Contents
Winstar WEH001602 OLED connection to Pi
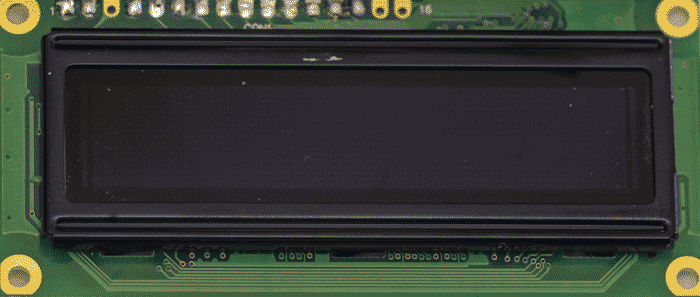
I bought this blue Winstar WEH001602 OLED display, hoping to pimp my Keithley 2304A PSU but since it happen to be not directly compatible, it went to use as Raspberry Pi display on next project.
Display can be bought from Adafruit directly as well. This model is using slightly modified Hitachi HD44780 compatible interface protocol, with parallel 8/4-bit bus and RS/RW/E control signals. OLED specified for operation voltage from 3.0V to 5.3V, so +3.3V available at Pi’s GPIOs will fit nice without any need of level conversion.
LCD connection to test Raspberry Pi Model B 2 is straightforward, with next table map:
| Raspberry Pi pin | Raspberry Pi function | LCD function | LCD pin |
|---|---|---|---|
| 26 | GPIO 7 | Data/command | RS, 4 |
| 15 | GPIO 22 | LCD Read/Write | R/W , 5 |
| 24 | GPIO 8 | Chip Enable | E , 6 |
| 22 | GPIO 25 | Data bit 4 | LCD_D4, 11 |
| 18 | GPIO 24 | Data bit 5 | LCD_D5, 12 |
| 16 | GPIO 23 | Data bit 6 | LCD_D6, 13 |
| 12 | GPIO 18 | Data bit 7 | LCD_D7, 14 |
| 6 | Ground | Ground | VSS , 1 |
| 1 | +3.3V power | Power | VDD , 2 |
Table 1: OLED 16×2 connection to Raspberry Pi Model B
As usual, python will be used to talk with display. To make it more practical, let’s show some intro messages and then IP address of eth0 interface of Raspberry Pi. Since I’m using my Pi’s headless with SSH login over LAN, it’s often an issue to connect if networks/address change due to DHCP. Before I had to connect HDMI monitor and login locally to check what is new IP address. Now with OLED display this step can be avoided.
You can download full python app here.
Let’s go over few key functions and code lines:
import RPi.GPIO as GPIO
import time
from subprocess import *
RPi.GPIO python binding will be used to talk with GPIO interface from python. time library used to take care of delays for signal generation. subprocess used to exec shell command to fetch IP address for our use.
#LCD pinout map to GPIO
OLED_D4 = 25
OLED_D5 = 24
OLED_D6 = 23
OLED_RW = 22
OLED_D7 = 18
OLED_E  = 8
OLED_RS = 7
This section defines our mapping of LCD signals to the actual GPIO connected, according to Table 1. Some more definitions followed according to OLED’s datasheet.
def lcd_init():
  # Configure the GPIO to drive the LCD display correctly
  GPIO.setmode(GPIO.BCM)             # Use BCM GPIO numbers

  # setup all output pins for driving LCD display
  GPIO.setup(OLED_D4, GPIO.OUT)     # DB4
  GPIO.setup(OLED_D5, GPIO.OUT)     # DB5
  GPIO.setup(OLED_D6, GPIO.OUT)     # DB6
  GPIO.setup(OLED_D7, GPIO.OUT)     # DB7
  GPIO.setup(OLED_E, GPIO.OUT)      # E
  GPIO.setup(OLED_RW, GPIO.OUT)     # E
  GPIO.setup(OLED_RS, GPIO.OUT)     # RS

  GPIO.output(OLED_RW, False)       # Write only mode

  # Initialise display into 4 bit mode, using recommended delays
  lcd_byte(0x33,LCD_CMD, DEL_INITNEXT, DEL_INITMID)
  lcd_byte(0x32,LCD_CMD, DEL_INITNEXT)

  # Now perform remainder of display init in 4 bit mode - IMPORTANT!
  # These steps MUST be exactly as follows, as OLEDs in particular are rather fussy
  lcd_byte(0x28,LCD_CMD, DEL_INITNEXT)    # two lines and correct font
  lcd_byte(0x08,LCD_CMD, DEL_INITNEXT)    # display OFF, cursor/blink off
  lcd_byte(0x01,LCD_CMD, DEL_POSTCLEAR)   # clear display, waiting for longer delay
  lcd_byte(0x06,LCD_CMD, DEL_INITNEXT)    # entry mode set

  # Extra steps required for OLED initialisation (no effect on LCD)
  lcd_byte(0x17,LCD_CMD, DEL_INITNEXT)    # character mode, power on

  # Now turn on the display, ready for use - IMPORTANT!
  lcd_byte(0x0C,LCD_CMD, DEL_INITNEXT)    # display on, cursor/blink off
This function take care of OLED initialization and sets everything up for us.
Low level lcd_byte() does actual GPIO pin toggling according to parallel 4-bit interfacing protocol, and higher level lcd_string() used to output strings to display. One can reference example output of strings in main() function.
IP address fetching in python and printing on OLED
Python app exec shell command to get IP address of eth0 network adapter. This is done by Popen method.
cmd = "ip addr show eth0 | grep inet | awk '{print $2}' | cut -d/ -f1"
def run_cmd(cmd):
    p = Popen(cmd, shell=True, stdout=PIPE)
    output = p.communicate()[0]
    return output
How we got IP address and can parse it a bit to chop off ipv6 address and output result on OLED:
def show_ip():
    ipaddr = run_cmd(cmd)
    lcd_byte(LCD_LINE_1, LCD_CMD)
    ipv4 = ipaddr.split('\n')
    lcd_string("IP:%s" % ipv4[0])
    print ipv4[0]
Now final touch, to have this little python application run every time Pi boots or restarts. To do so I configured system to wait for network connection at boot using raspi-config and added shell script to execute on boot using /etc/rc.local file:
root@rpi3:/home/pi# cat /etc/rc.local
#!/bin/sh -e
# rc.local
# Print the IP address
_IP=$(hostname -I) || true
if [ "$_IP" ]; then
  printf "My IP address is %s\n" "$_IP"
fi

/oledip.sh

exit 0
Here is shell script itself:
root@rpi3:/home/pi# cat /oledip.sh
#!/bin/sh
cd /repo/oled_ip
python ./oled_pi.py
Don’t forget to make this shell script executable via chmod +x /oledip.sh.
Animated photo of display output as a result:
This library and overall idea works very well with minor modify to other HD44780-compatible character displays. Other parallel I/O displays can be interfaced easily too, but may need writing proper low-level function.
Make sure display of the choice have +3.3V logic levels. Interfacing +5V directly at Raspberry Pi GPIO will cause damage, as there is no protection other than ESD-diodes in Broadcom SOC itself. If you need to interface 5V logic use level shift circuits or level buffers.
Ampire LO-13232A-02 ST7588T based LCD usage
This negative graphic dot-matrix LCD is based on Sitronix ST7588T controller (Datasheet). Controller have 132 segment outputs / 81 common outputs and internal LCD bias and voltage boost converter. It’s COG type LCD, so use and interfacing is simple. Display rated to run at +3.3V power and have white LED backlight (4 LEDs, two per side). LCD resolution is 132×32 pixel, and datasheet is available
I’ll be using wiringPi library to talk with GPIO and SPI on Raspberry Pi.
LCD connection follows next table:
| Raspberry Pi pin | Raspberry Pi function | LCD function | LCD pin |
|---|---|---|---|
| GPIO 4 | Chip select | CS | |
| GPIO 24 | LCD reset | RESET | |
| GPIO 25 | data or command | A0/RS | |
| GPIO 11 | Clock input | SCL | |
| GPIO 10 | Data input | SDA |
It’s possible to use different pinout if something already connected to pins mentioned in table, but make sure pins are configured properly. Some information about pin modes and use presented here on WiringPi page
Modified: May 28, 2016, 10:49 a.m.