Keithley Model 2001 and Model 2002 bench/system digital multimeters have internal memory to store measurement data and configuration settings(“profiles”). Since both models share same digital board with similar firmware, this article relate to both models.
Possible memory options:
STD – Standard, have regular SRAM which stores measurement data and 1 setting profile. Buffer size is 250 full readings or 850 compact. Buffer is volatile, will be reset on power off.
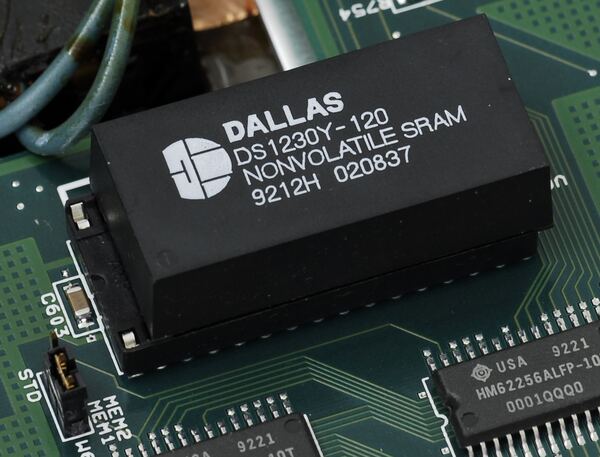
MEM1 – NVRAM option 1, using DALLAS DS1230Y, stores up to 5 setting profiles. Buffer size is 1400 full readings or 7000 compact. Buffer is non-volatile.
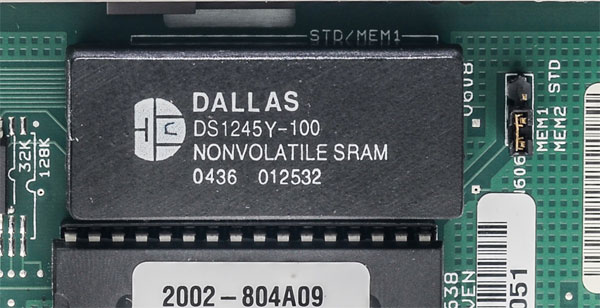
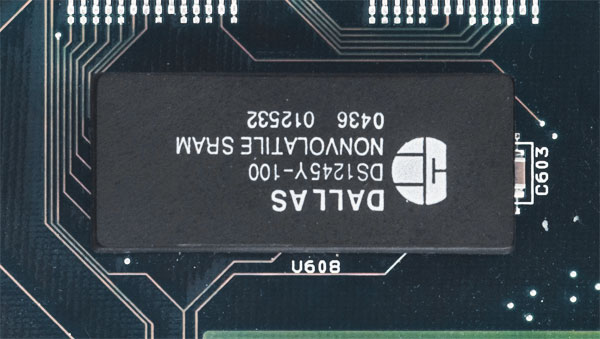
MEM2 – NVRAM option 2, using DALLAS DS1245Y, stores up to 10 setting profiles. Buffer size is 6000 full readings or 30000 compact. Buffer is non-volatile.
Memory option installation
Installation of options is performed by both hardware and firmware.
Hardware installation is pretty simple, firmware detects type of SRAM memory chip and strap setting with resistors (on Rev.G boards) or a jumper (on Rev.H,J,K boards).
Memory chip is located in a DIP socket on digital board (bottom side of unit) and is supposed to be replaced only by Keithley service centers, but actually if user does not care about loosing warranty/calibration void stickers then chip can be easily replaced on-site.
Keithley Model 2001
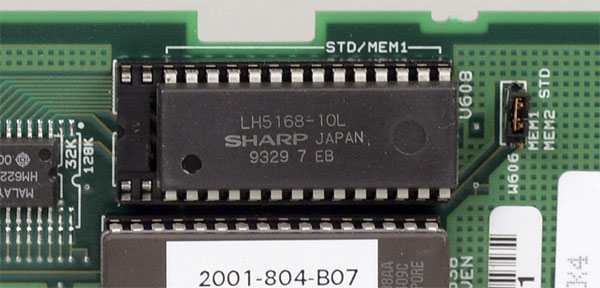
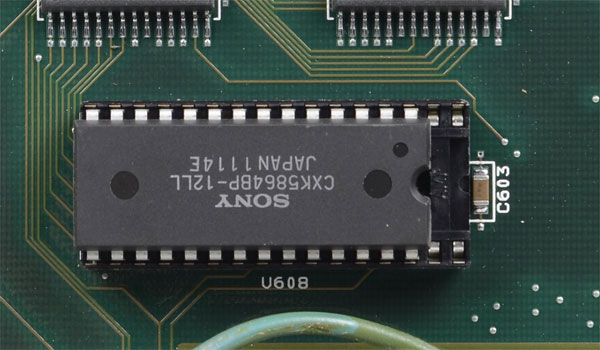
STD option have 8k x 8 CMOS SRAM in DIP28 (Sharp LH5168-10L or Sony CXK5864BP-12LL in our units)
MEM1 option have 32k x 8 non-volatile CMOS SRAM in EDIP28 (Dallas DS1230Y)
MEM2 option requires 128k x 8 non-volatile CMOS SRAM in EDIP32 (Dallas DS1245Y)
Properly installed hardware options are shown in detailed sections below:
STD – Configuration and hardware setup
- Install SRAM into socket with correct orientation
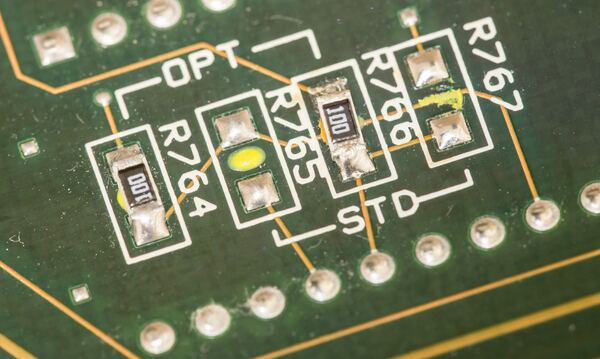
- On digital boards revision H,J,K populate W606 with jumper on pins 1-2 (STD)
- On digital boards revision G populate 10R resistors on positions R765,R767. Leave R764,R766 positions empty. These resistors located on bottom side of digital board.
Rev K with STD option:
Rev G with STD option:
MEM1 – Configuration and hardware setup
- On digital boards revision H,J,K populate W606 with jumper on pins 2-3 (MEM1/MEM2)
- On digital boards revision G populate 10R resistors on positions R764,R766. Have R765,R767 positions empty. These resistors located on bottom side of digital board.
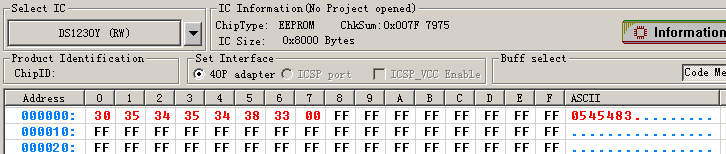
- Write your meter serial number in ASCII into Dallas NVRAM at offset 0×00
This step will let meter firmware recognize correct memory option installation, and will enable storage and settings saving to NVRAM.
- Install Dallas DS1230Y or DS1230AB into socket with correct orientation
Rev K with MEM1 option:
Rev G with MEM1 option resistors strap:
After installation meter will display MEM1 on start screen.
MEM2 – Configuration and hardware setup
MEM2 option is installed same way as MEM1, only difference is that bigger EDIP32 NVRAM is used with extra address pins.
- On digital boards revision H,J,K populate W606 with jumper on pins 2-3 (MEM1/MEM2)
- On digital boards revision G populate 10R resistors on positions R764,R766. Have R765,R767 positions empty. These resistors located on bottom side of digital board.
- Write your meter serial number in ASCII into Dallas NVRAM at offset 0×00
This step will let meter firmware recognize correct memory option installation, and will enable storage and settings saving to NVRAM.
- Install Dallas DS1245Y into socket with correct orientation
Rev K with MEM2 option:
Rev G with MEM2 option:
Same Rev G with MEM2 option resistors strap:
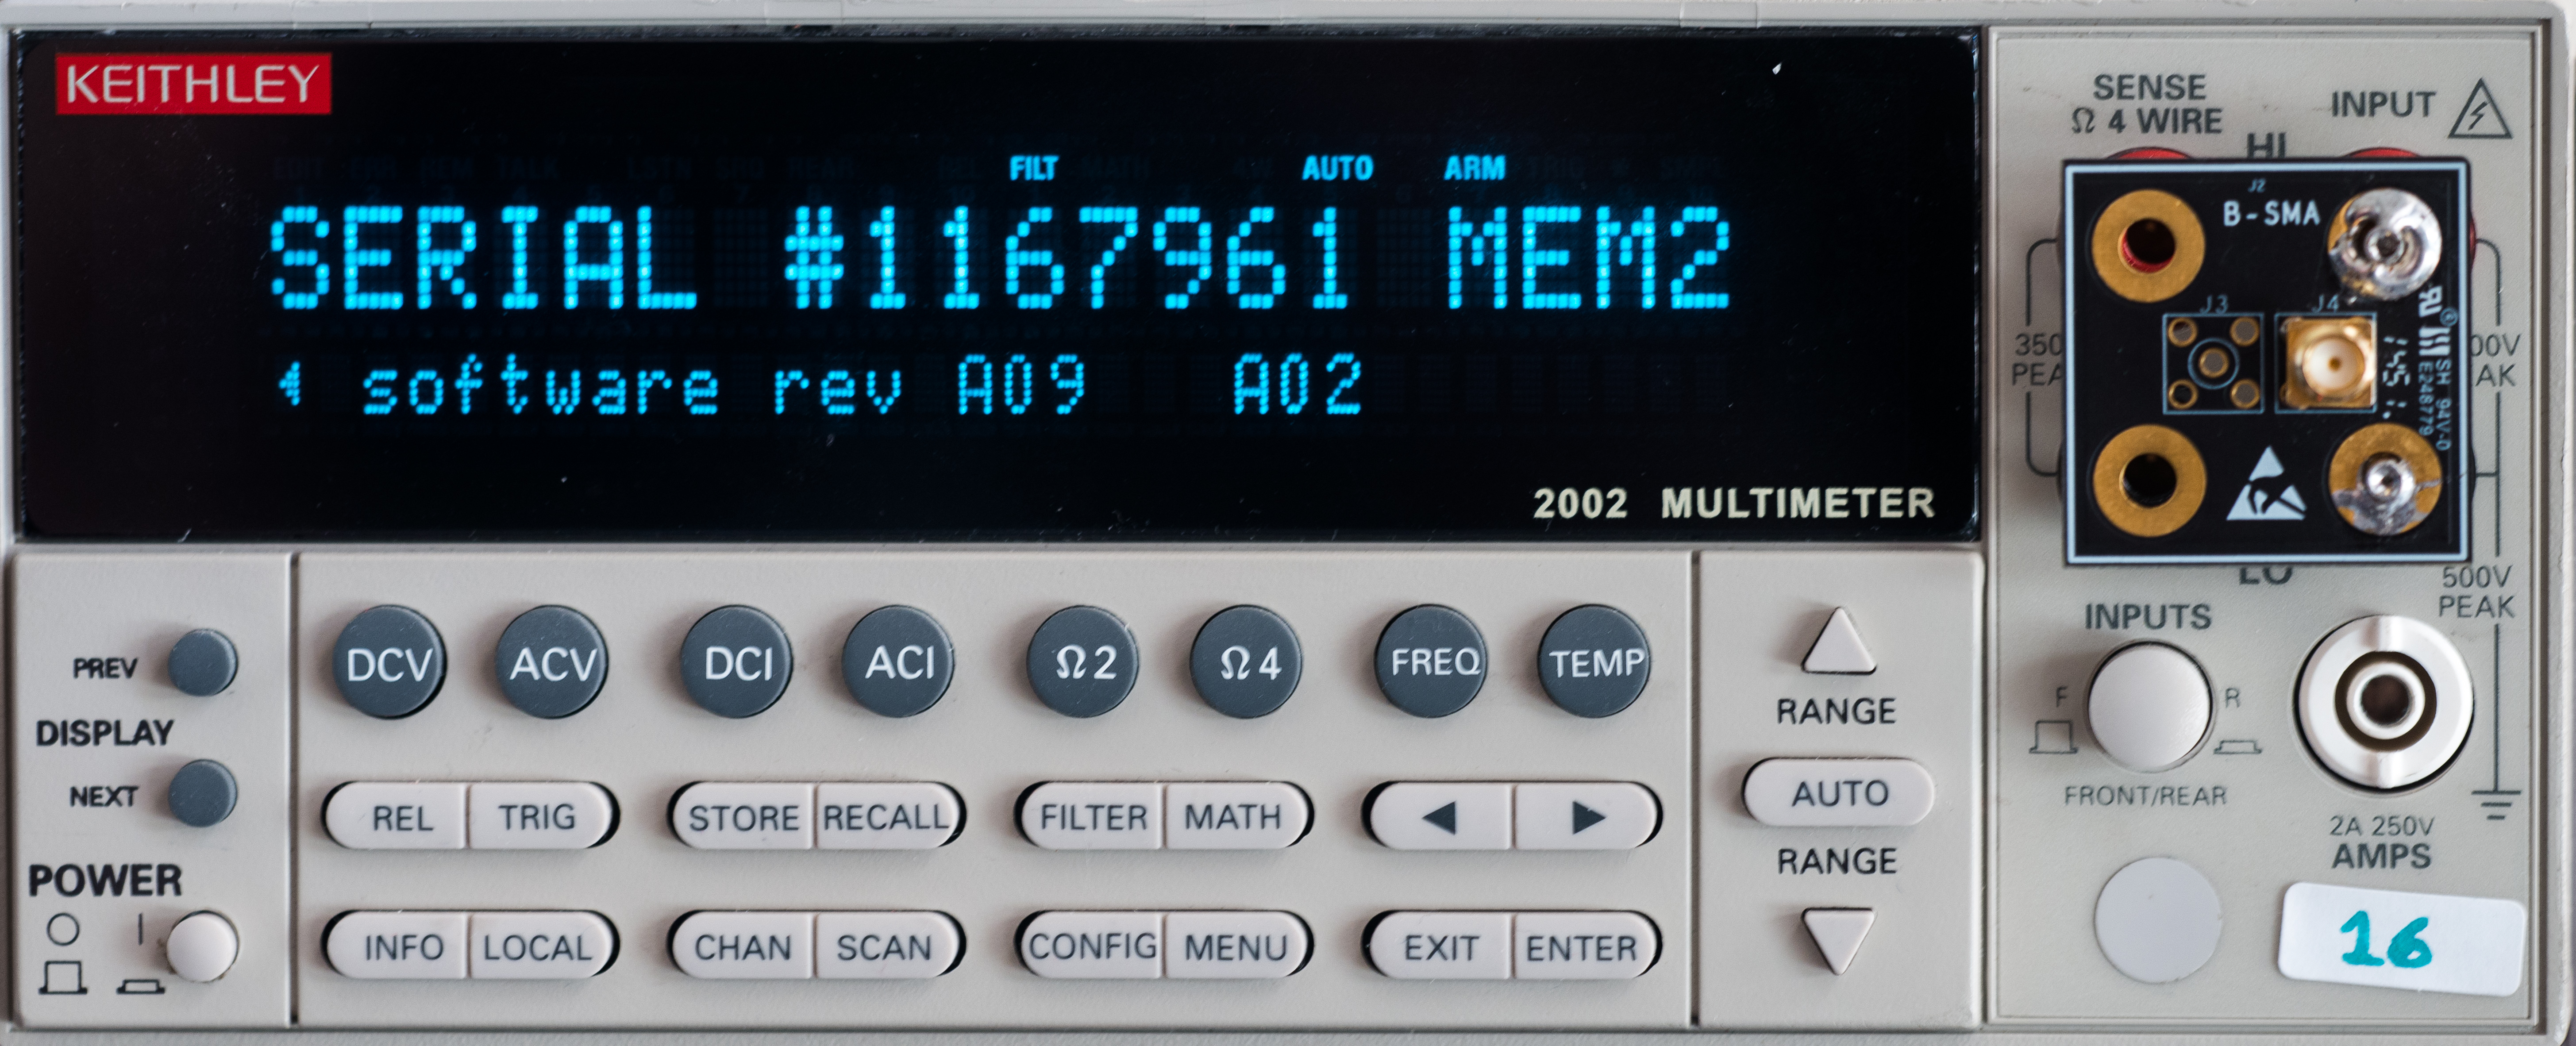
After installation meter will display MEM2 on start screen.
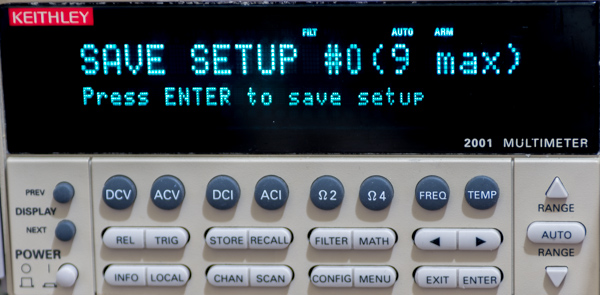
Here save setup options with MEM2:
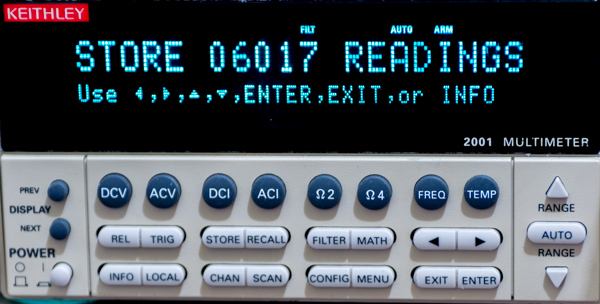
And data storage non-volatile buffer
Firmware settings is using serial ID which must be stored at beginning of NVRAM.
This is key item to enable proper memory option configuration. If NVRAM contents is empty or serial number does not match actual serial number stored in calibration EEPROM (I2C chip Uxxx on digital board) then meter will show MEM1/MEM2 option still enabled, but will be unable to save any meter settings, and measured data will be lost from NVRAM on power cycle.
There are two ways to initialize NVRAM to meter’s serial number.
Easy way is to enter secret menu , navigate to GENERAL/SECRET/INIT-BB-RAM and perform initialization.
This will copy S/N from calibration EEPROM into Dallas RAM.
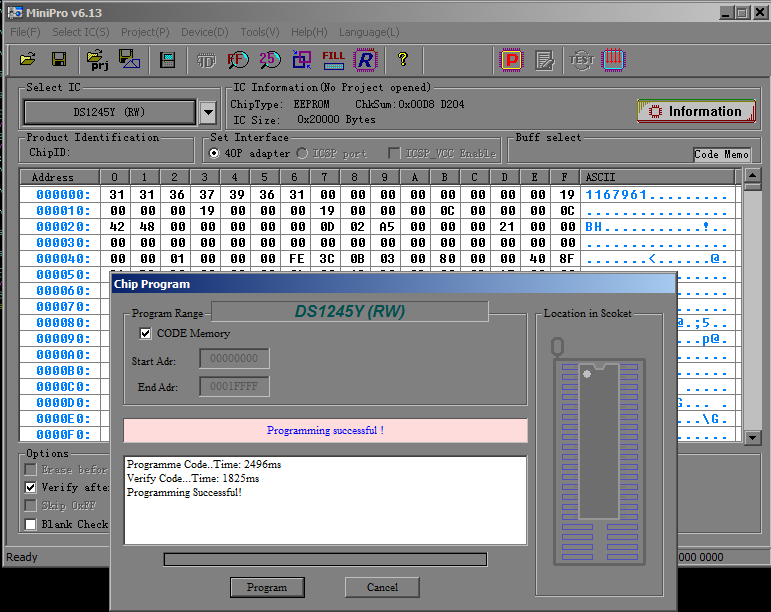
More difficult way is to use standalone programmer:
In this article MiniPro TL866 was used successfully.
Keithley Model 2002
Model 2002 features use realtime clock support used by non-volatile RTC chip. It’s being implemented by Phantom clock chip in same package as Dallas NVRAM.
Installation procedure is identical to Model 2001, with only difference in used memory chip devices, as listed below:
STD option – Dallas DS1243Y (8k x 8 non-volatile CMOS SRAM with Phantom clock in EDIP28)
MEM1 option – Dallas DS1244Y (32k x 8 non-volatile CMOS SRAM with Phantom clock in EDIP28)
MEM2 option – Dallas DS1248Y (128k x 8 non-volatile CMOS SRAM with Phantom clock in EDIP32)
Dallas NVRAMs without Phantom clock function still can be used in Model 2002, but you will get warning message “Clock is not installed” during startup, and clock related functions will be disabled. Memory storage and data readings still can function as expected, but without real timestamps.
There are two ways to initialize NVRAM to meter’s serial number.
Similar to 2001, it’s possible to do that by secret menu , navigate to GENERAL/SECRET/INIT-OPTS/BB-RAM and perform initialization.
This will copy S/N from calibration EEPROM into Dallas RAM. But sometimes if NVRAM already have some data, that would not work and you need use more difficult way, by to using standalone programmer which supports Dallas PhantomClock NVRAM.
In our case it was the only way, as fresh installed DS1248Y was not able to initialize correctly using INIT-OPTS/BB-RAM secret option.
So cheap TL866 programmer was used to program DS1248Y. It’s software recently got update to v6.13, which finally added support for DS1245, DS1249, DS1250 NVRAM chips. Since access for PhantomClock versions is same, NVRAM now can be reprogrammed as DS1245:

Used binary dump – MEM2 NVRAM binary for our Keithley 2002.
This was just readout of native DS1243Y, it’s important to have serial number match serial number in calibration EEPROM from digital board.
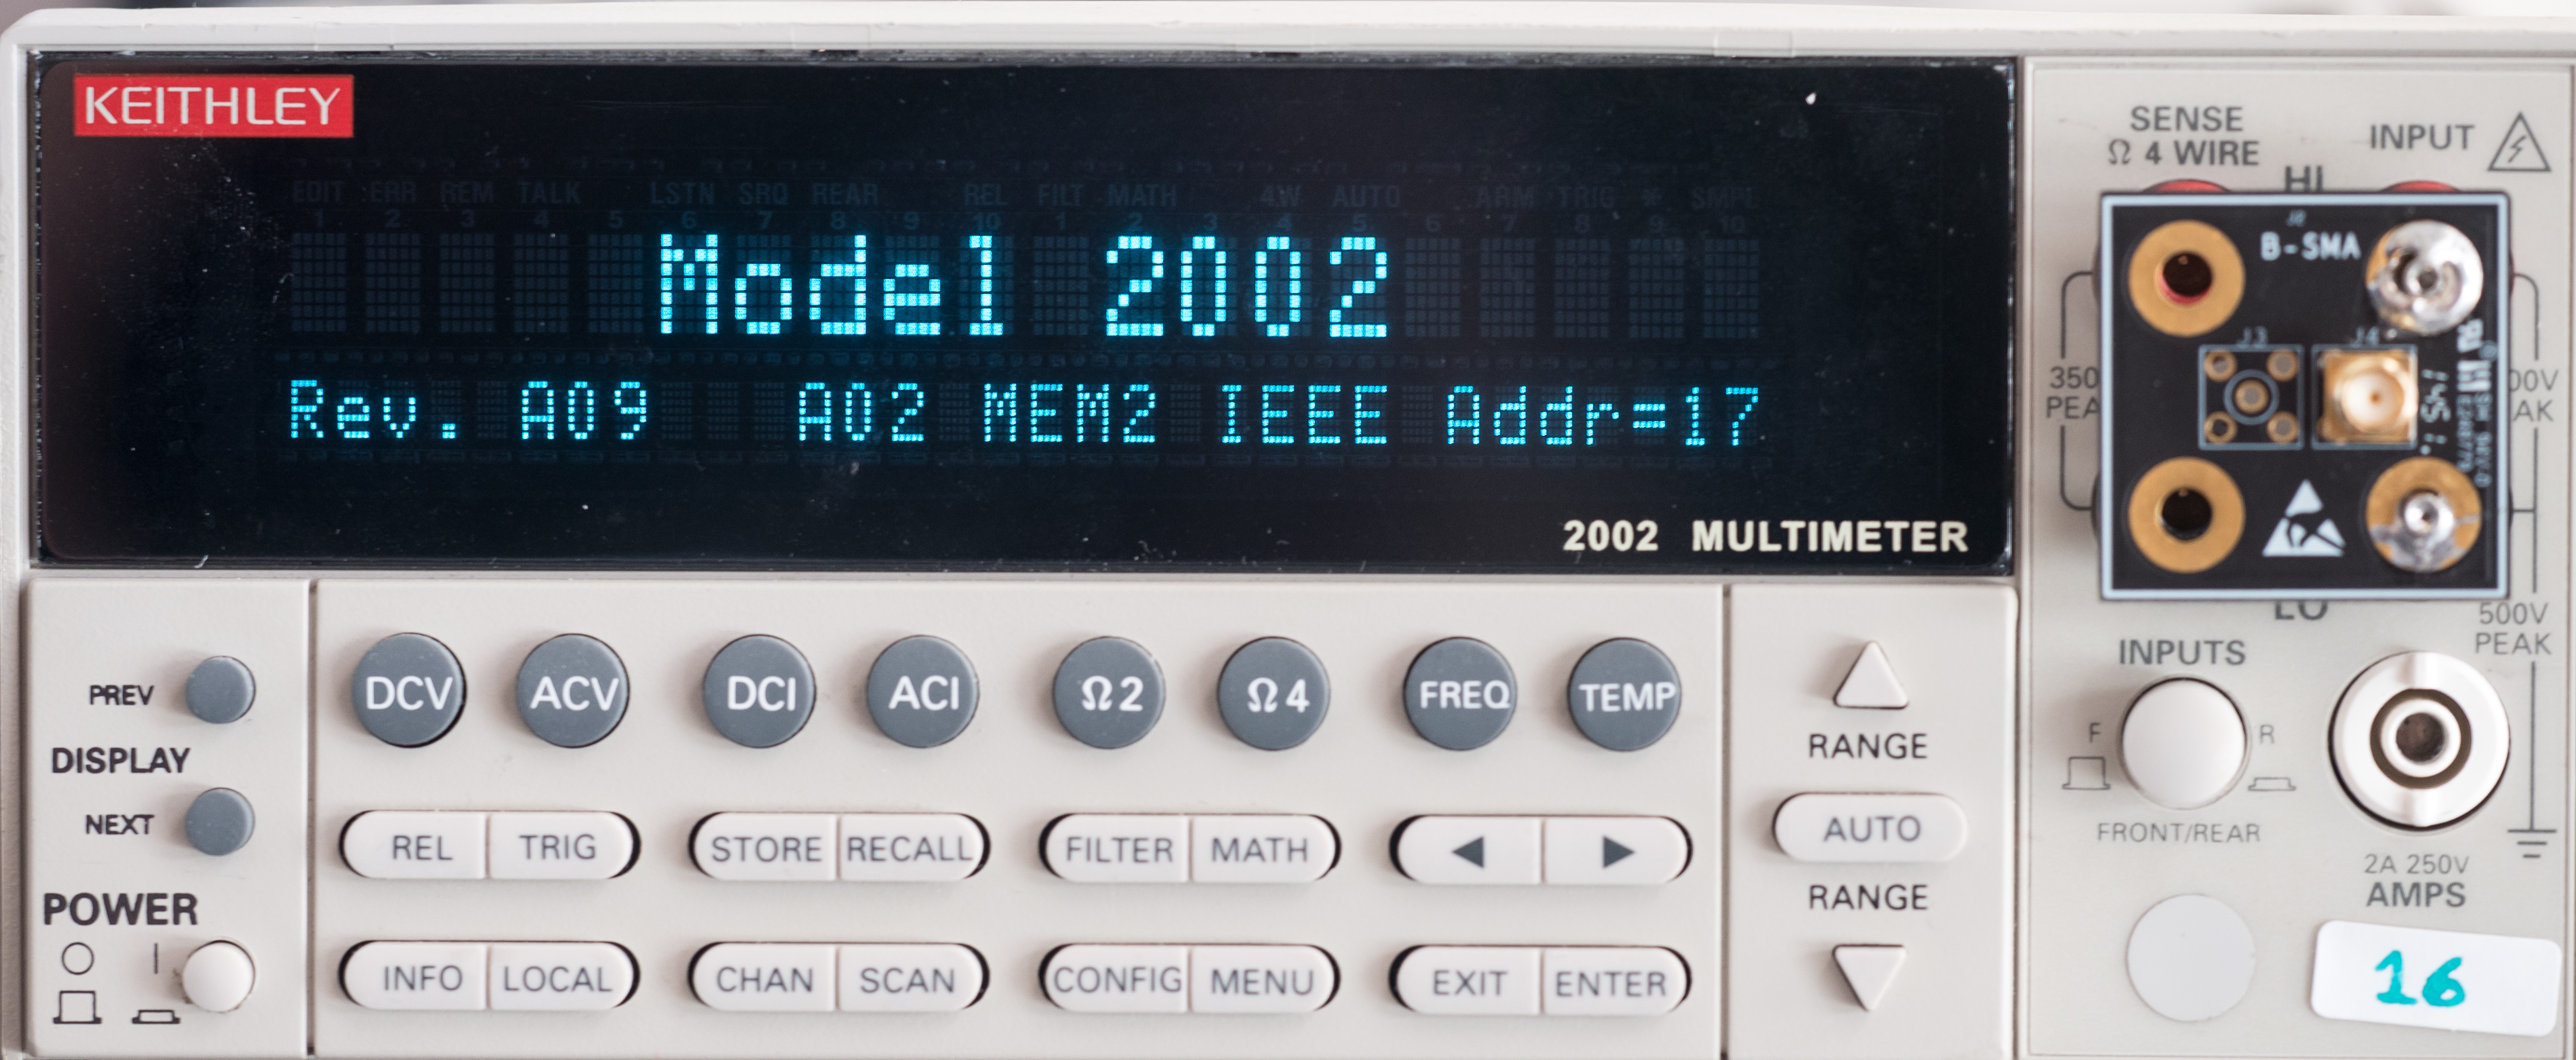
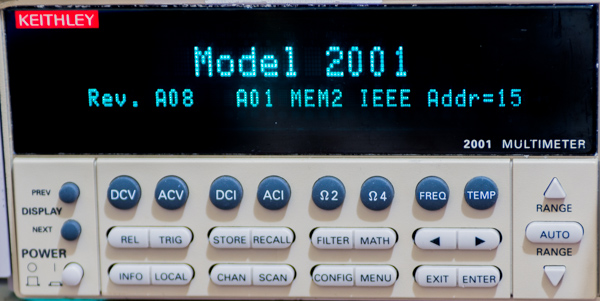
Booting up, MEM2 option correctly detected, no warning messages.
Try save/restore settings:
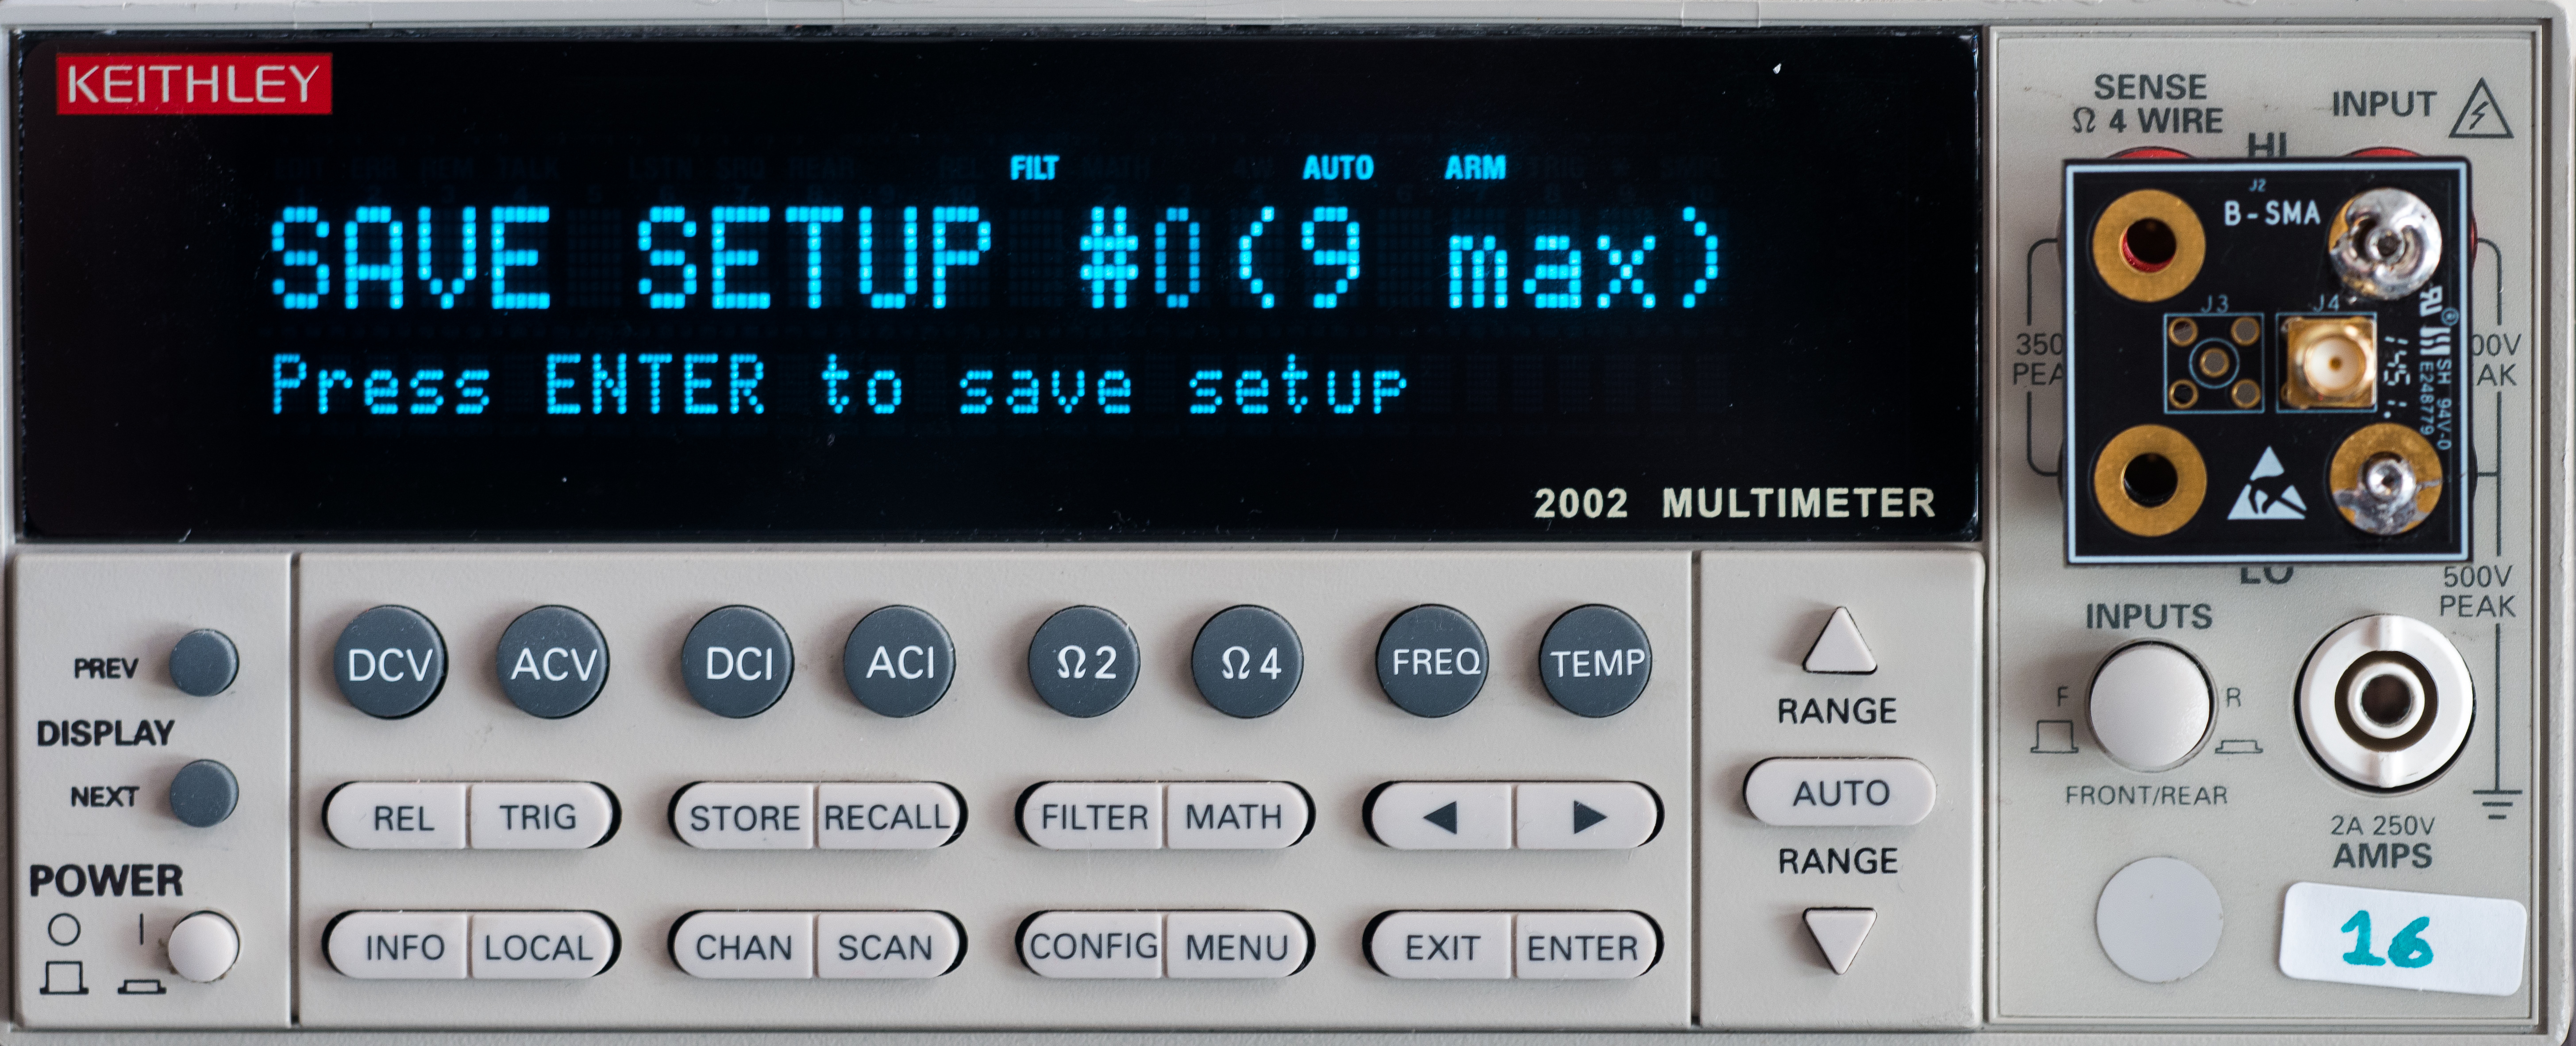
10 settings allowed, as expected with MEM2 option.
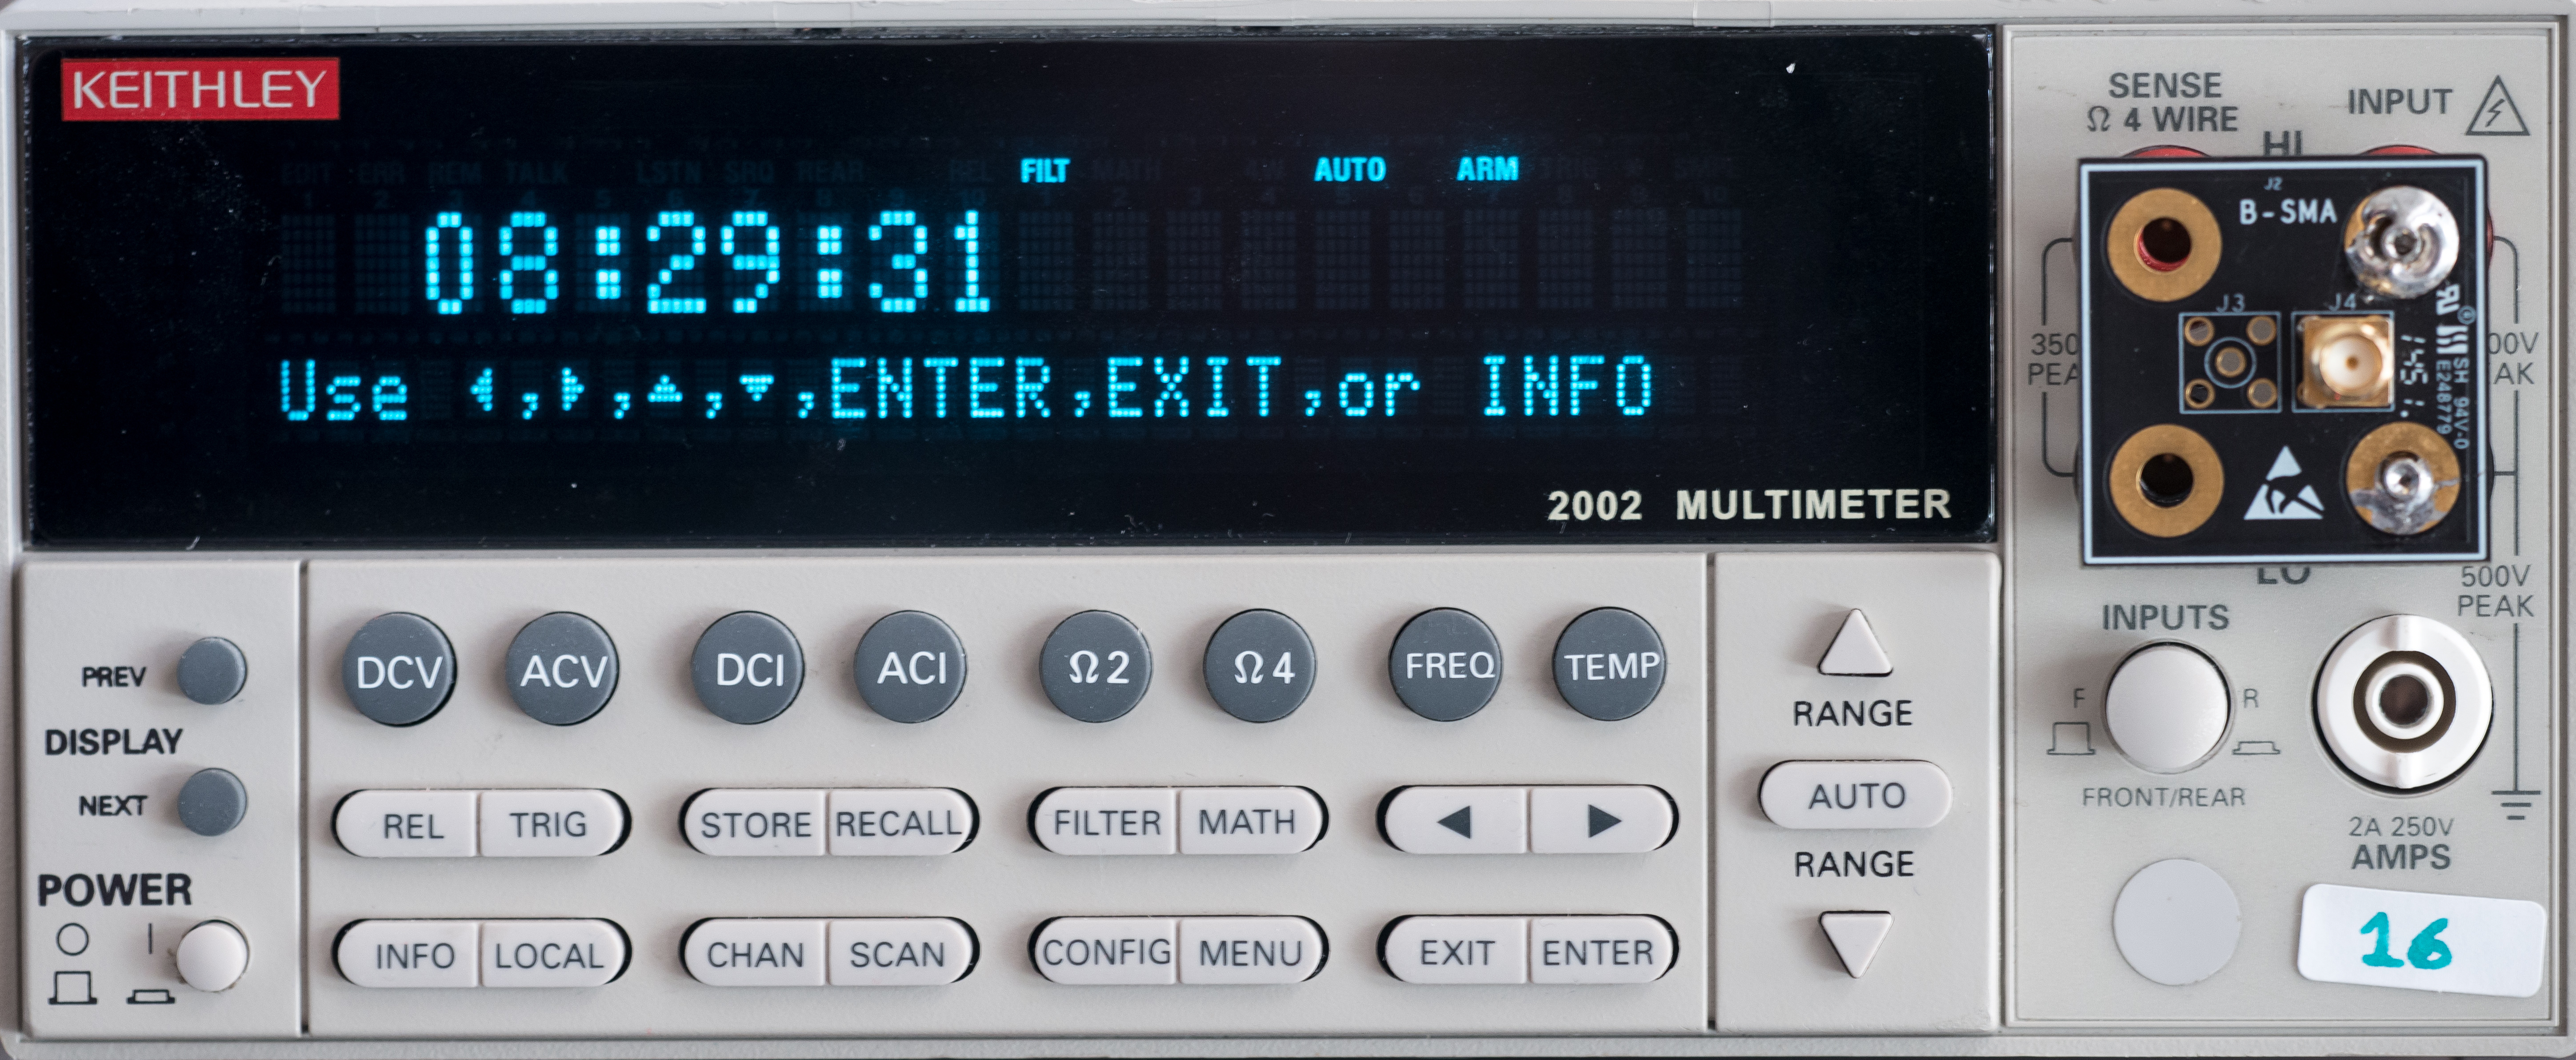

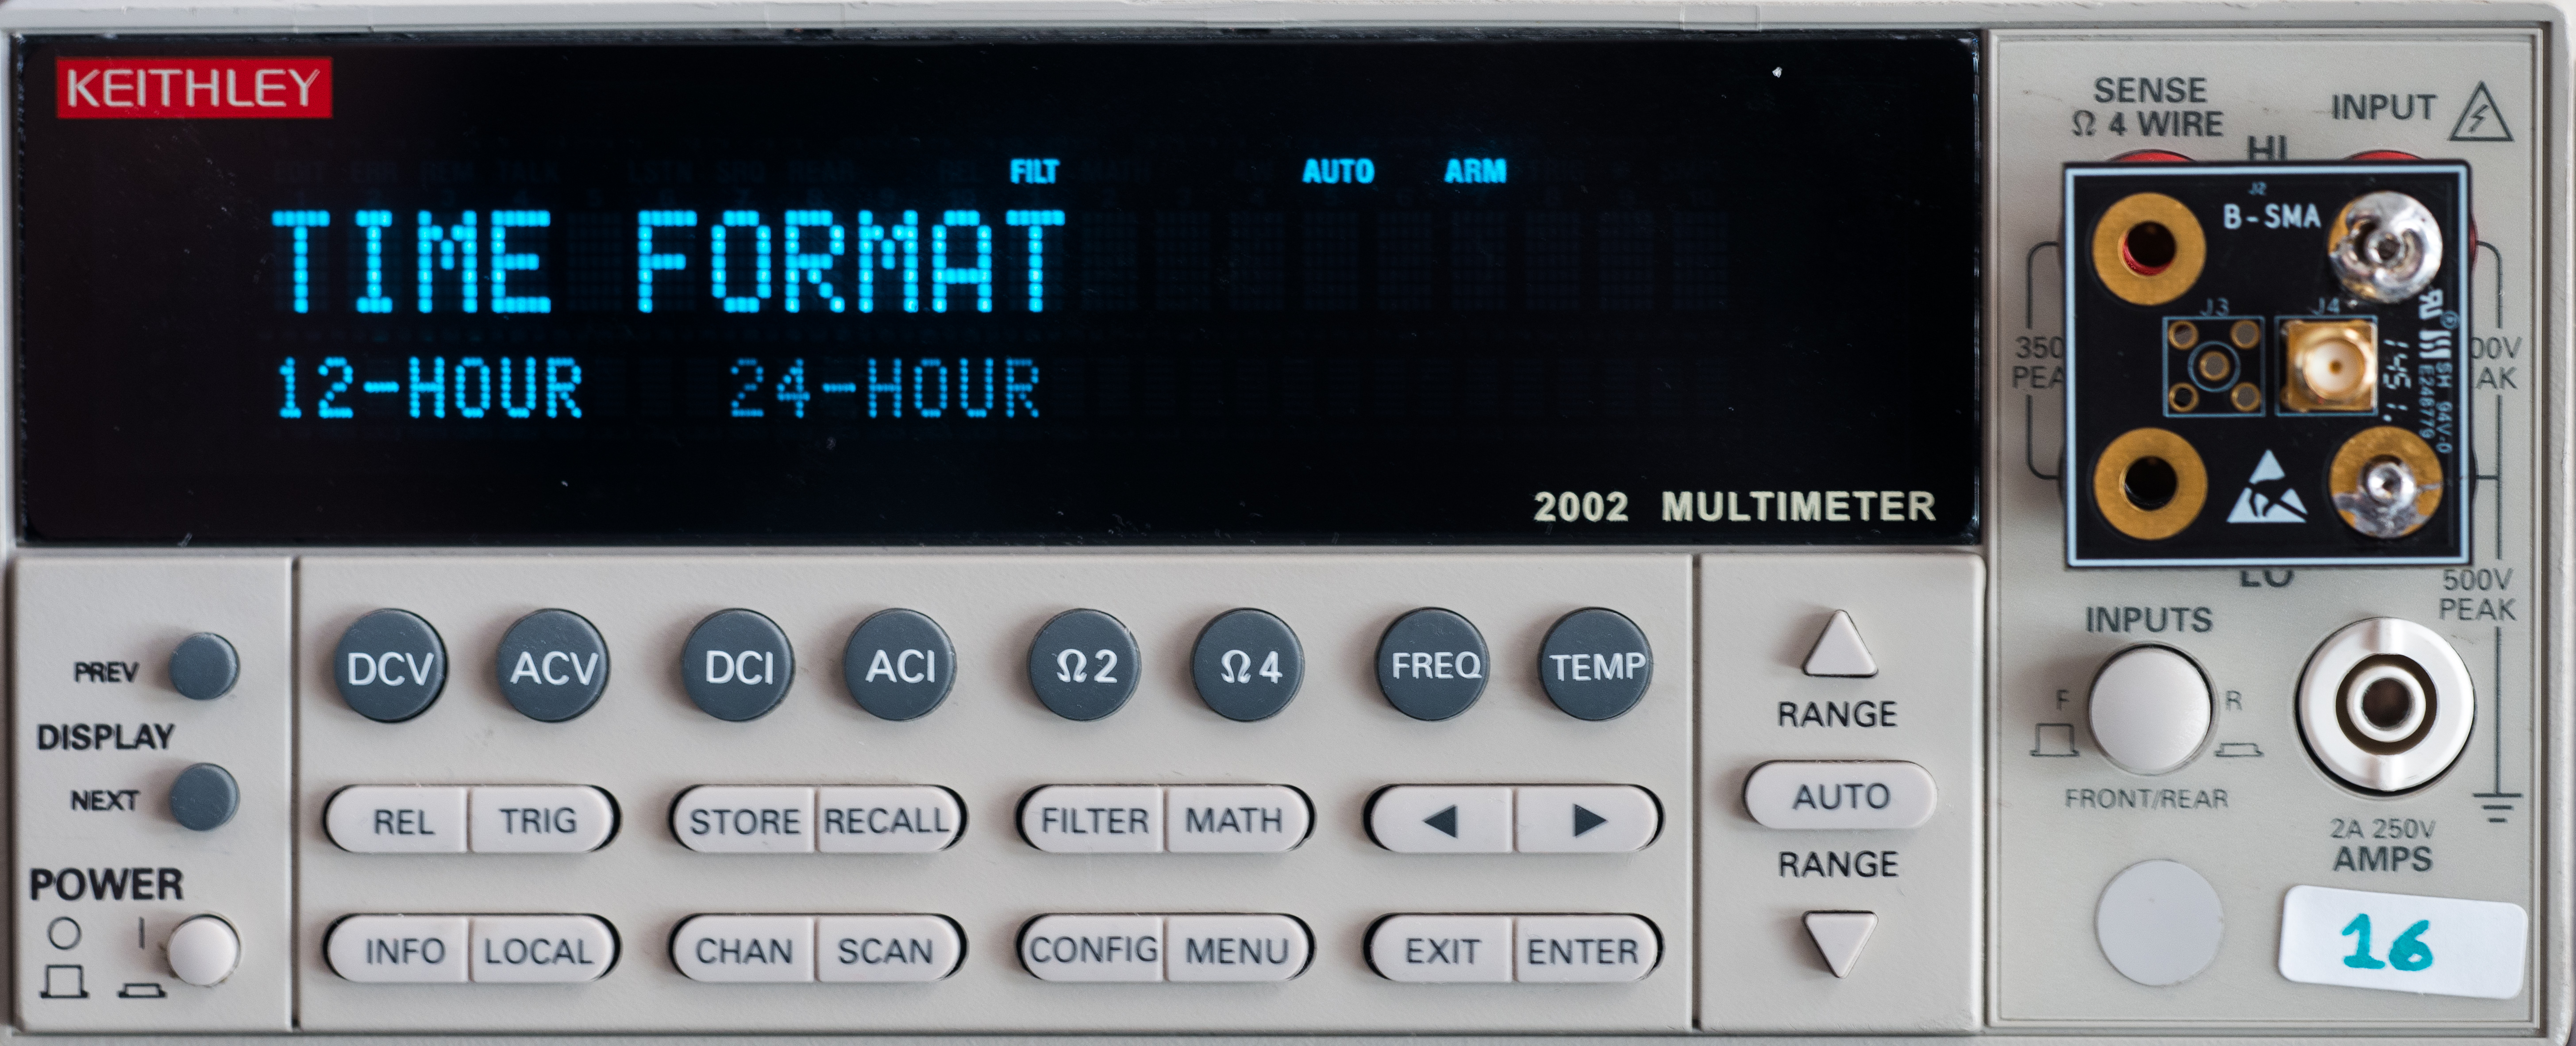
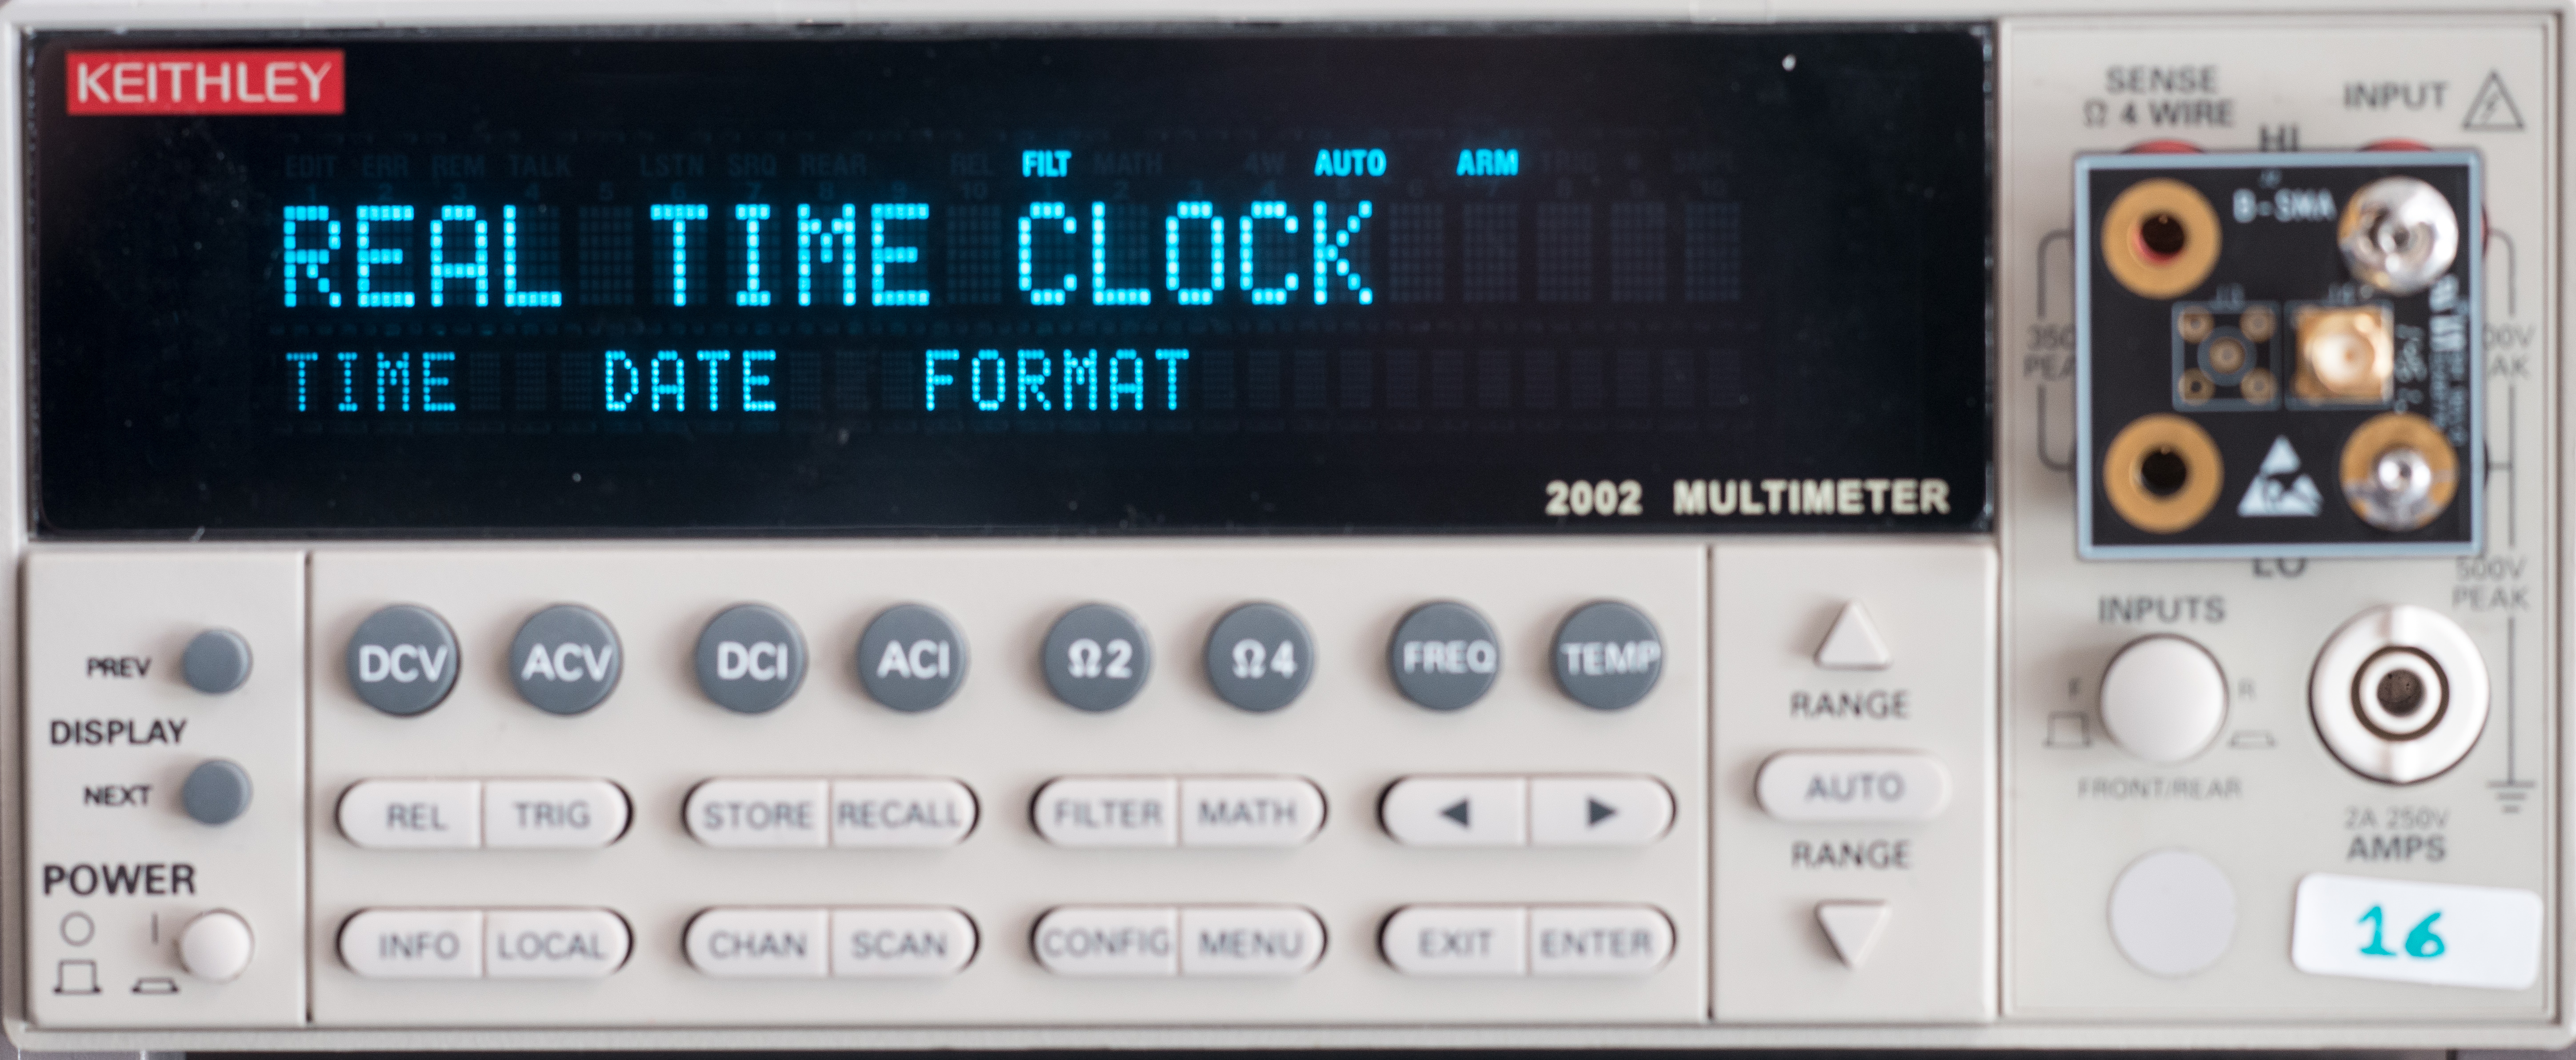
Realtime clock settings are unlocked and can be adjusted.
This is it, upgrade is complete.
Projects like this are born from passion and a desire to share how things work. Education is the foundation of a healthy society - especially important in today's volatile world. xDevs began as a personal project notepad in Kherson, Ukraine back in 2008 and has grown with support of passionate readers just like you. There are no (and never will be) any ads, sponsors or shareholders behind xDevs.com, just a commitment to inspire and help learning. If you are in a position to help others like us, please consider supporting xDevs.com’s home-country Ukraine in its defense of freedom to speak, freedom to live in peace and freedom to choose their way. You can use official site to support Ukraine – United24 or Help99. Every cent counts.
Modified: March 14, 2016, 3:41 a.m.