Contents
Initial examination
This article is somewhat different from usual test equipment stuff, and covering attempt of repair for dead Nikon D3 DSLR camera body. It was described by seller as “shutter,sensor are ok, but camera does not power on. It was dropped, and comes without anything, not even battery.”

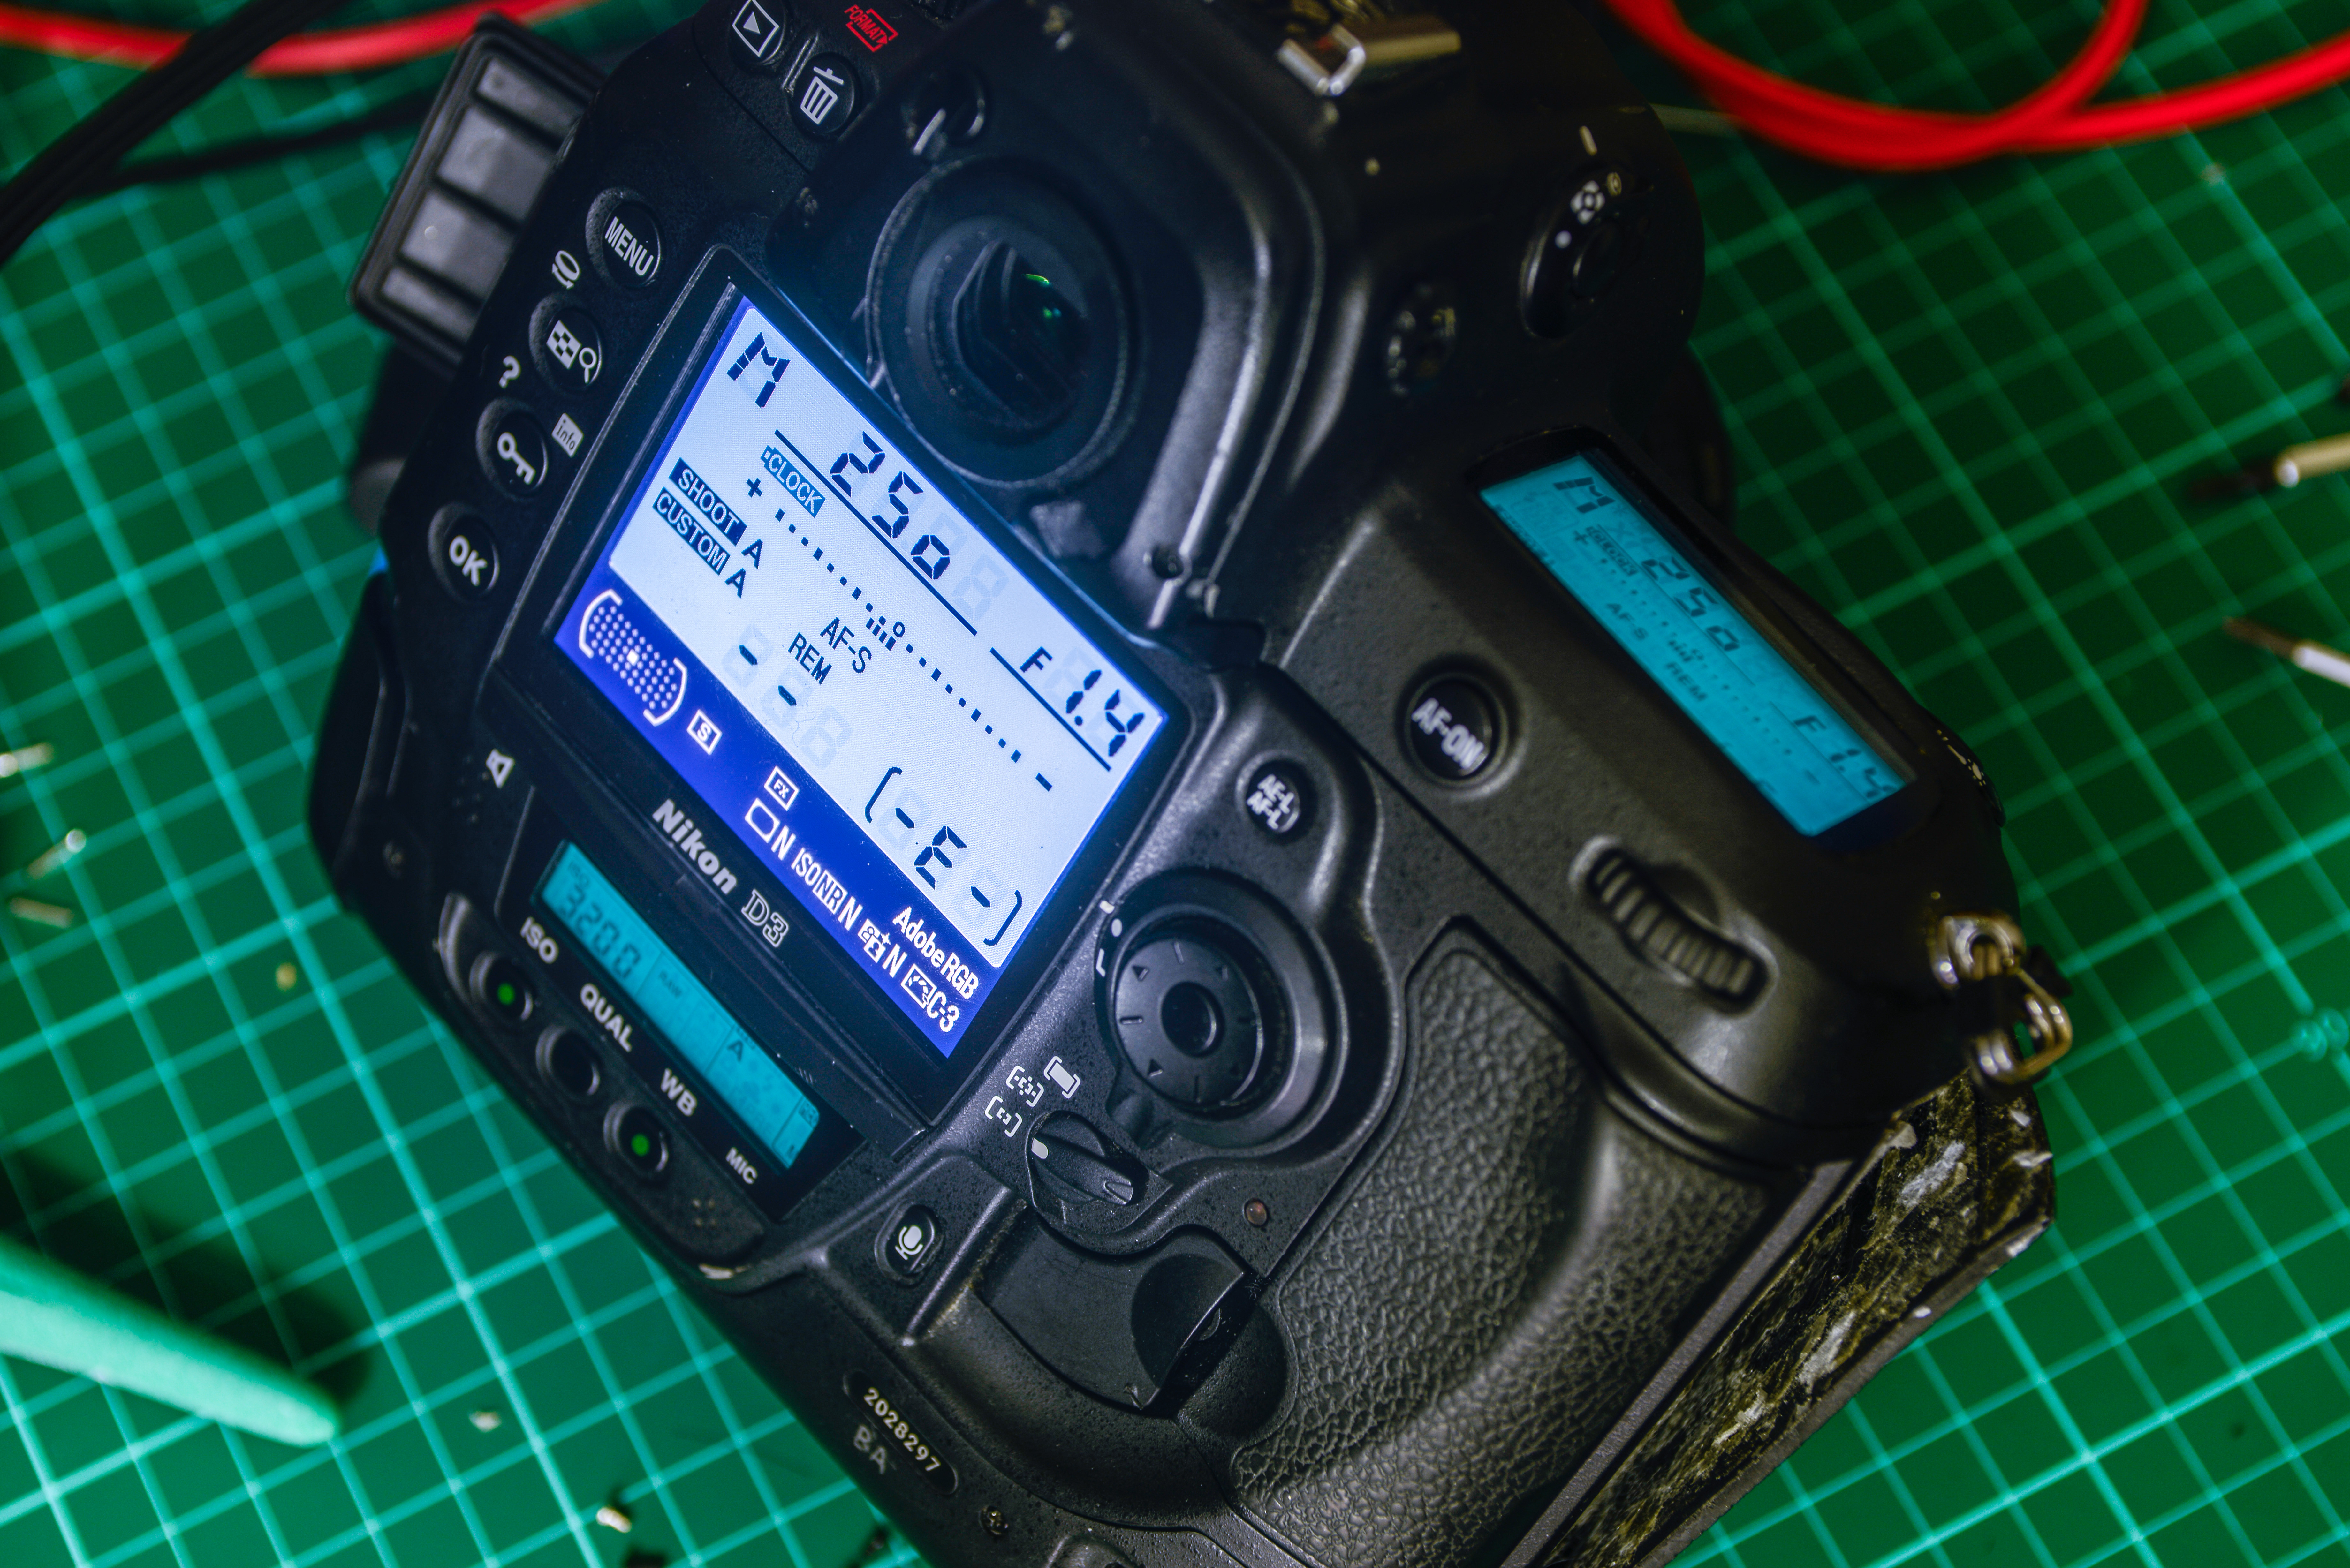
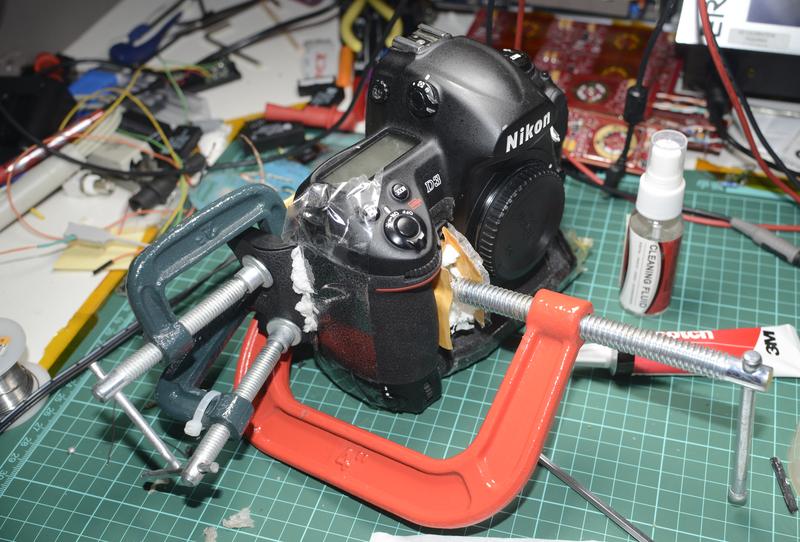
Battery cover is pretty much destroyed and looks like previous owner tried to glue it to body (!?). I had no battery, so I will be using 5A AC-DC brick, which I modified for DC 13V to power camera and initial testing. It would be wise to test and get camera working before spending money on accessories and batteries. Overall body condition would be C- grade, but no really serious damages, as least externally. All buttons, glass, LCDs seem to be OK, and given that it’s top-tier single-digit pro grade DSLR, it is build and designed to survive harsh use.

As expected, when power was applied nothing happed, no magic smoke, nothing on any screens, no reaction to controls.
Before we start, worth to look thru Service manual for D3, 20MB PDF
Repair worklog
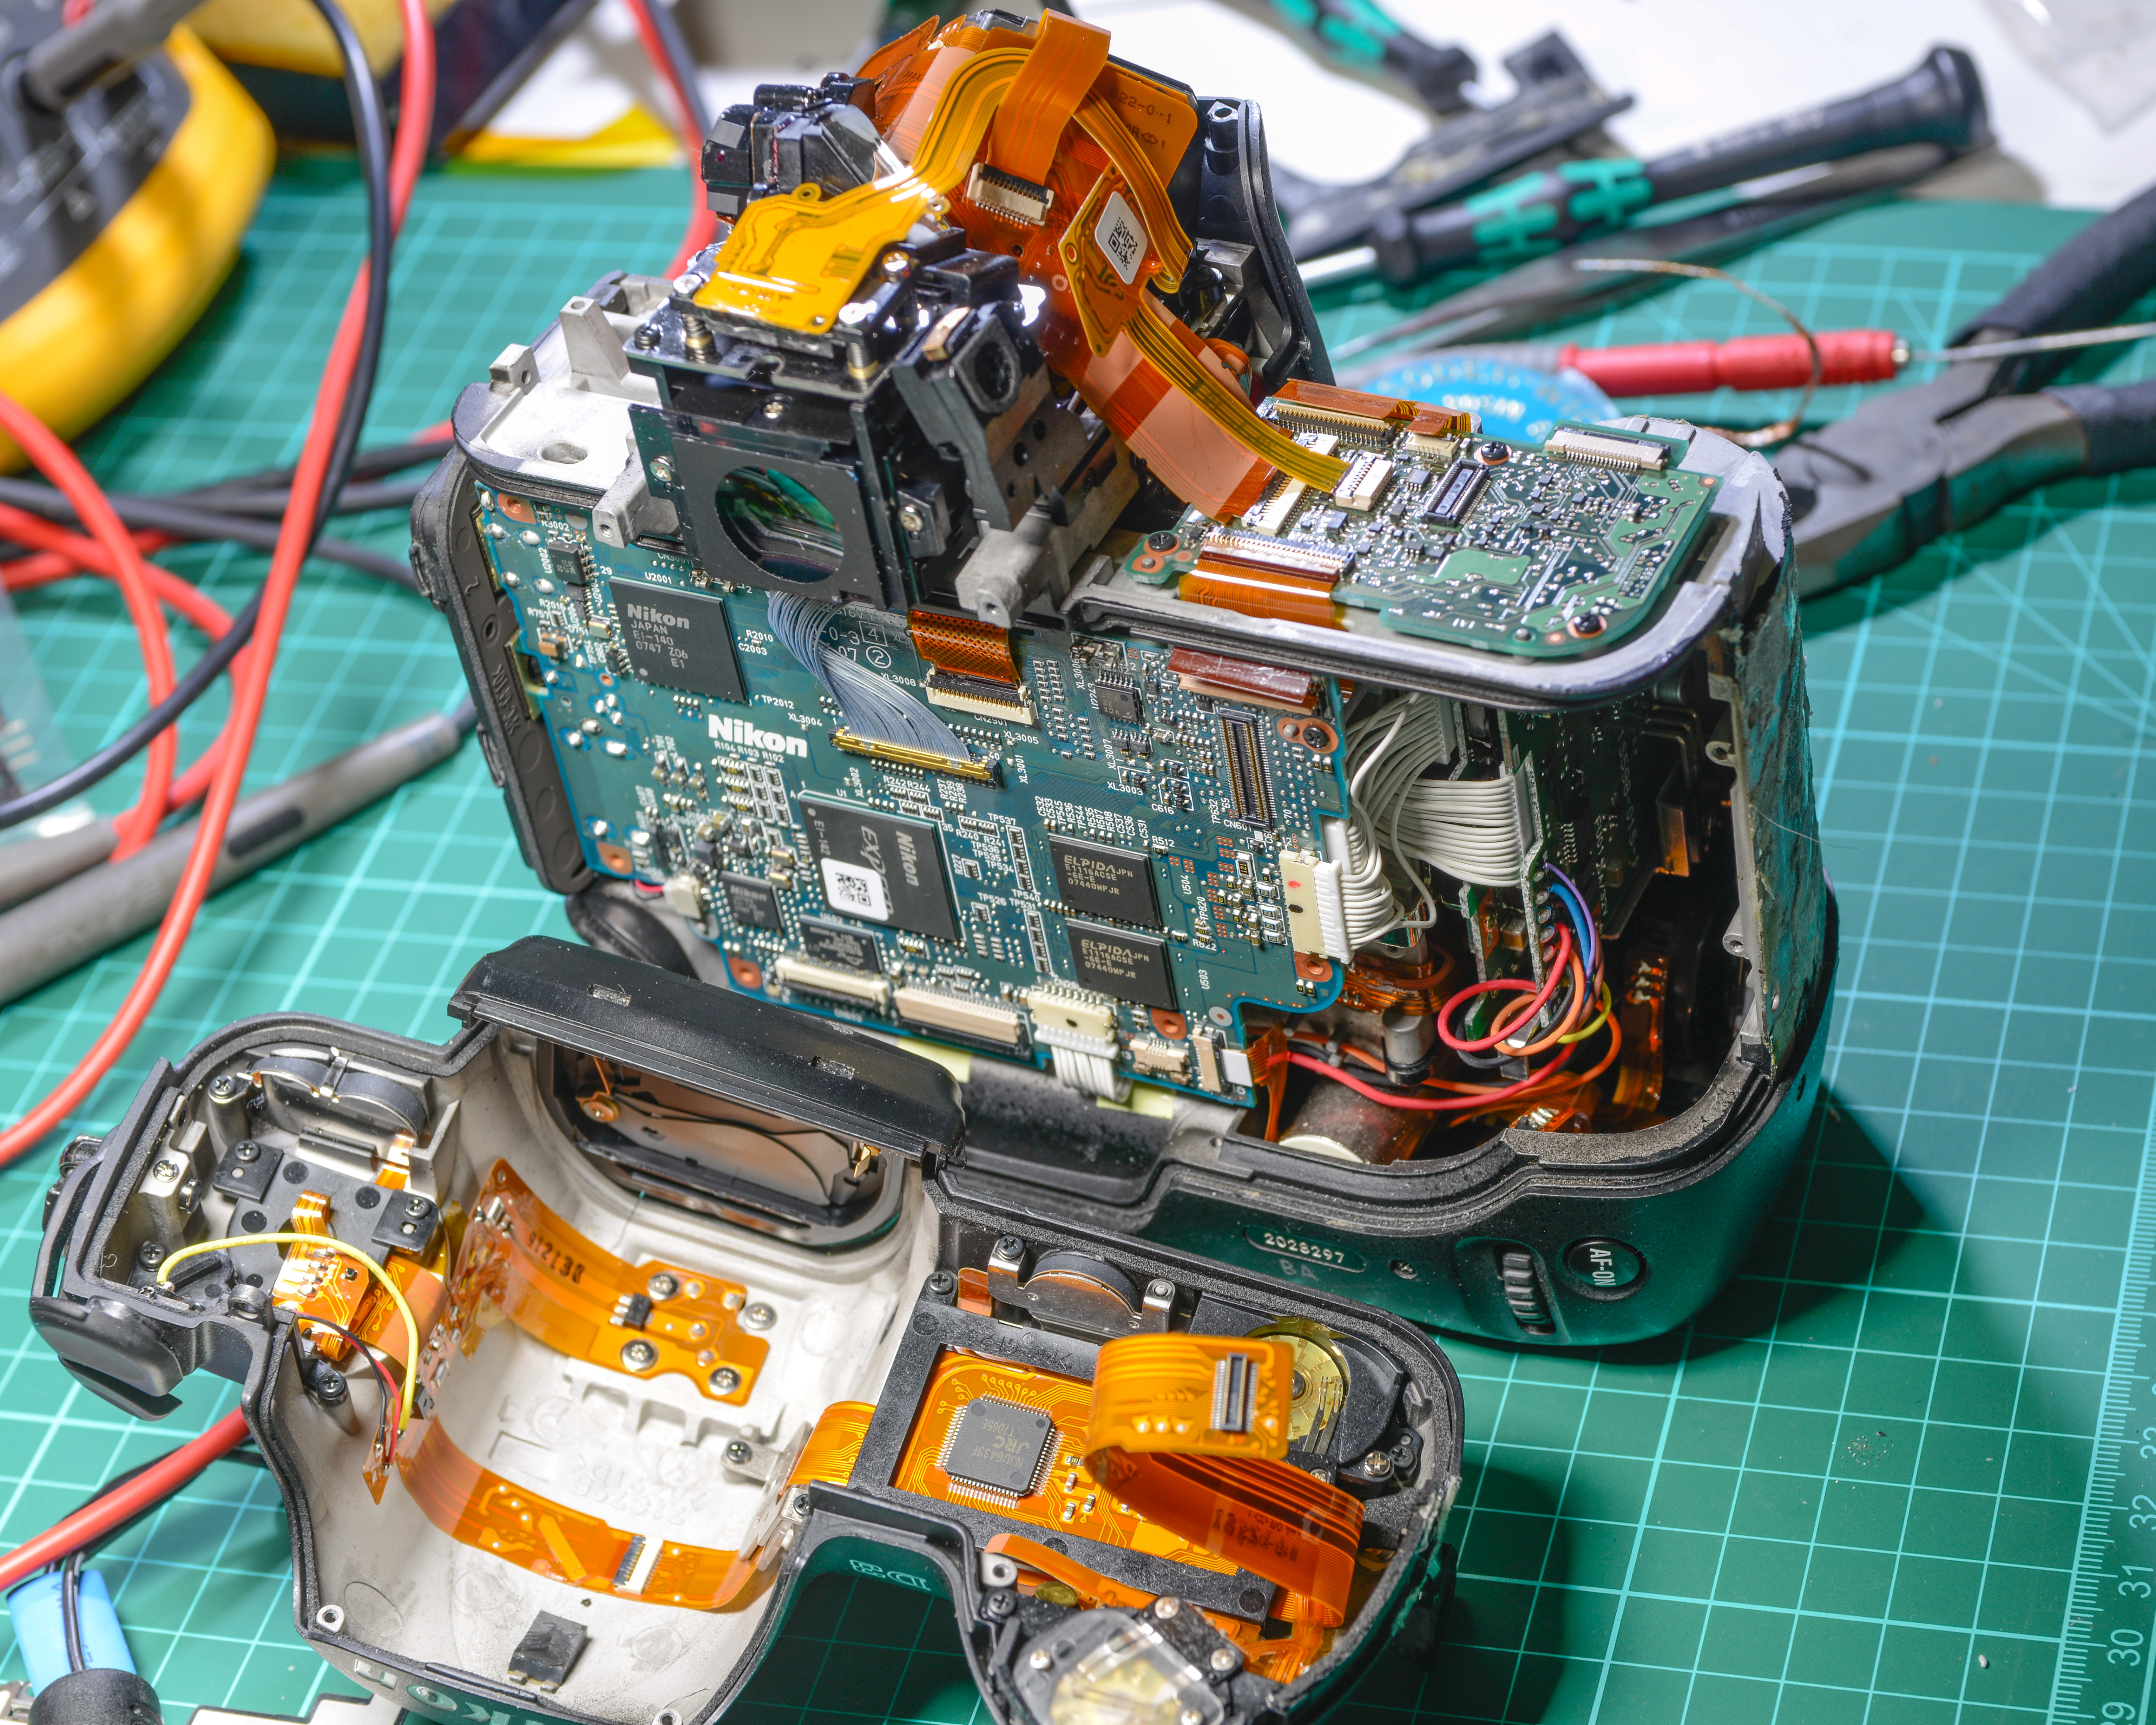
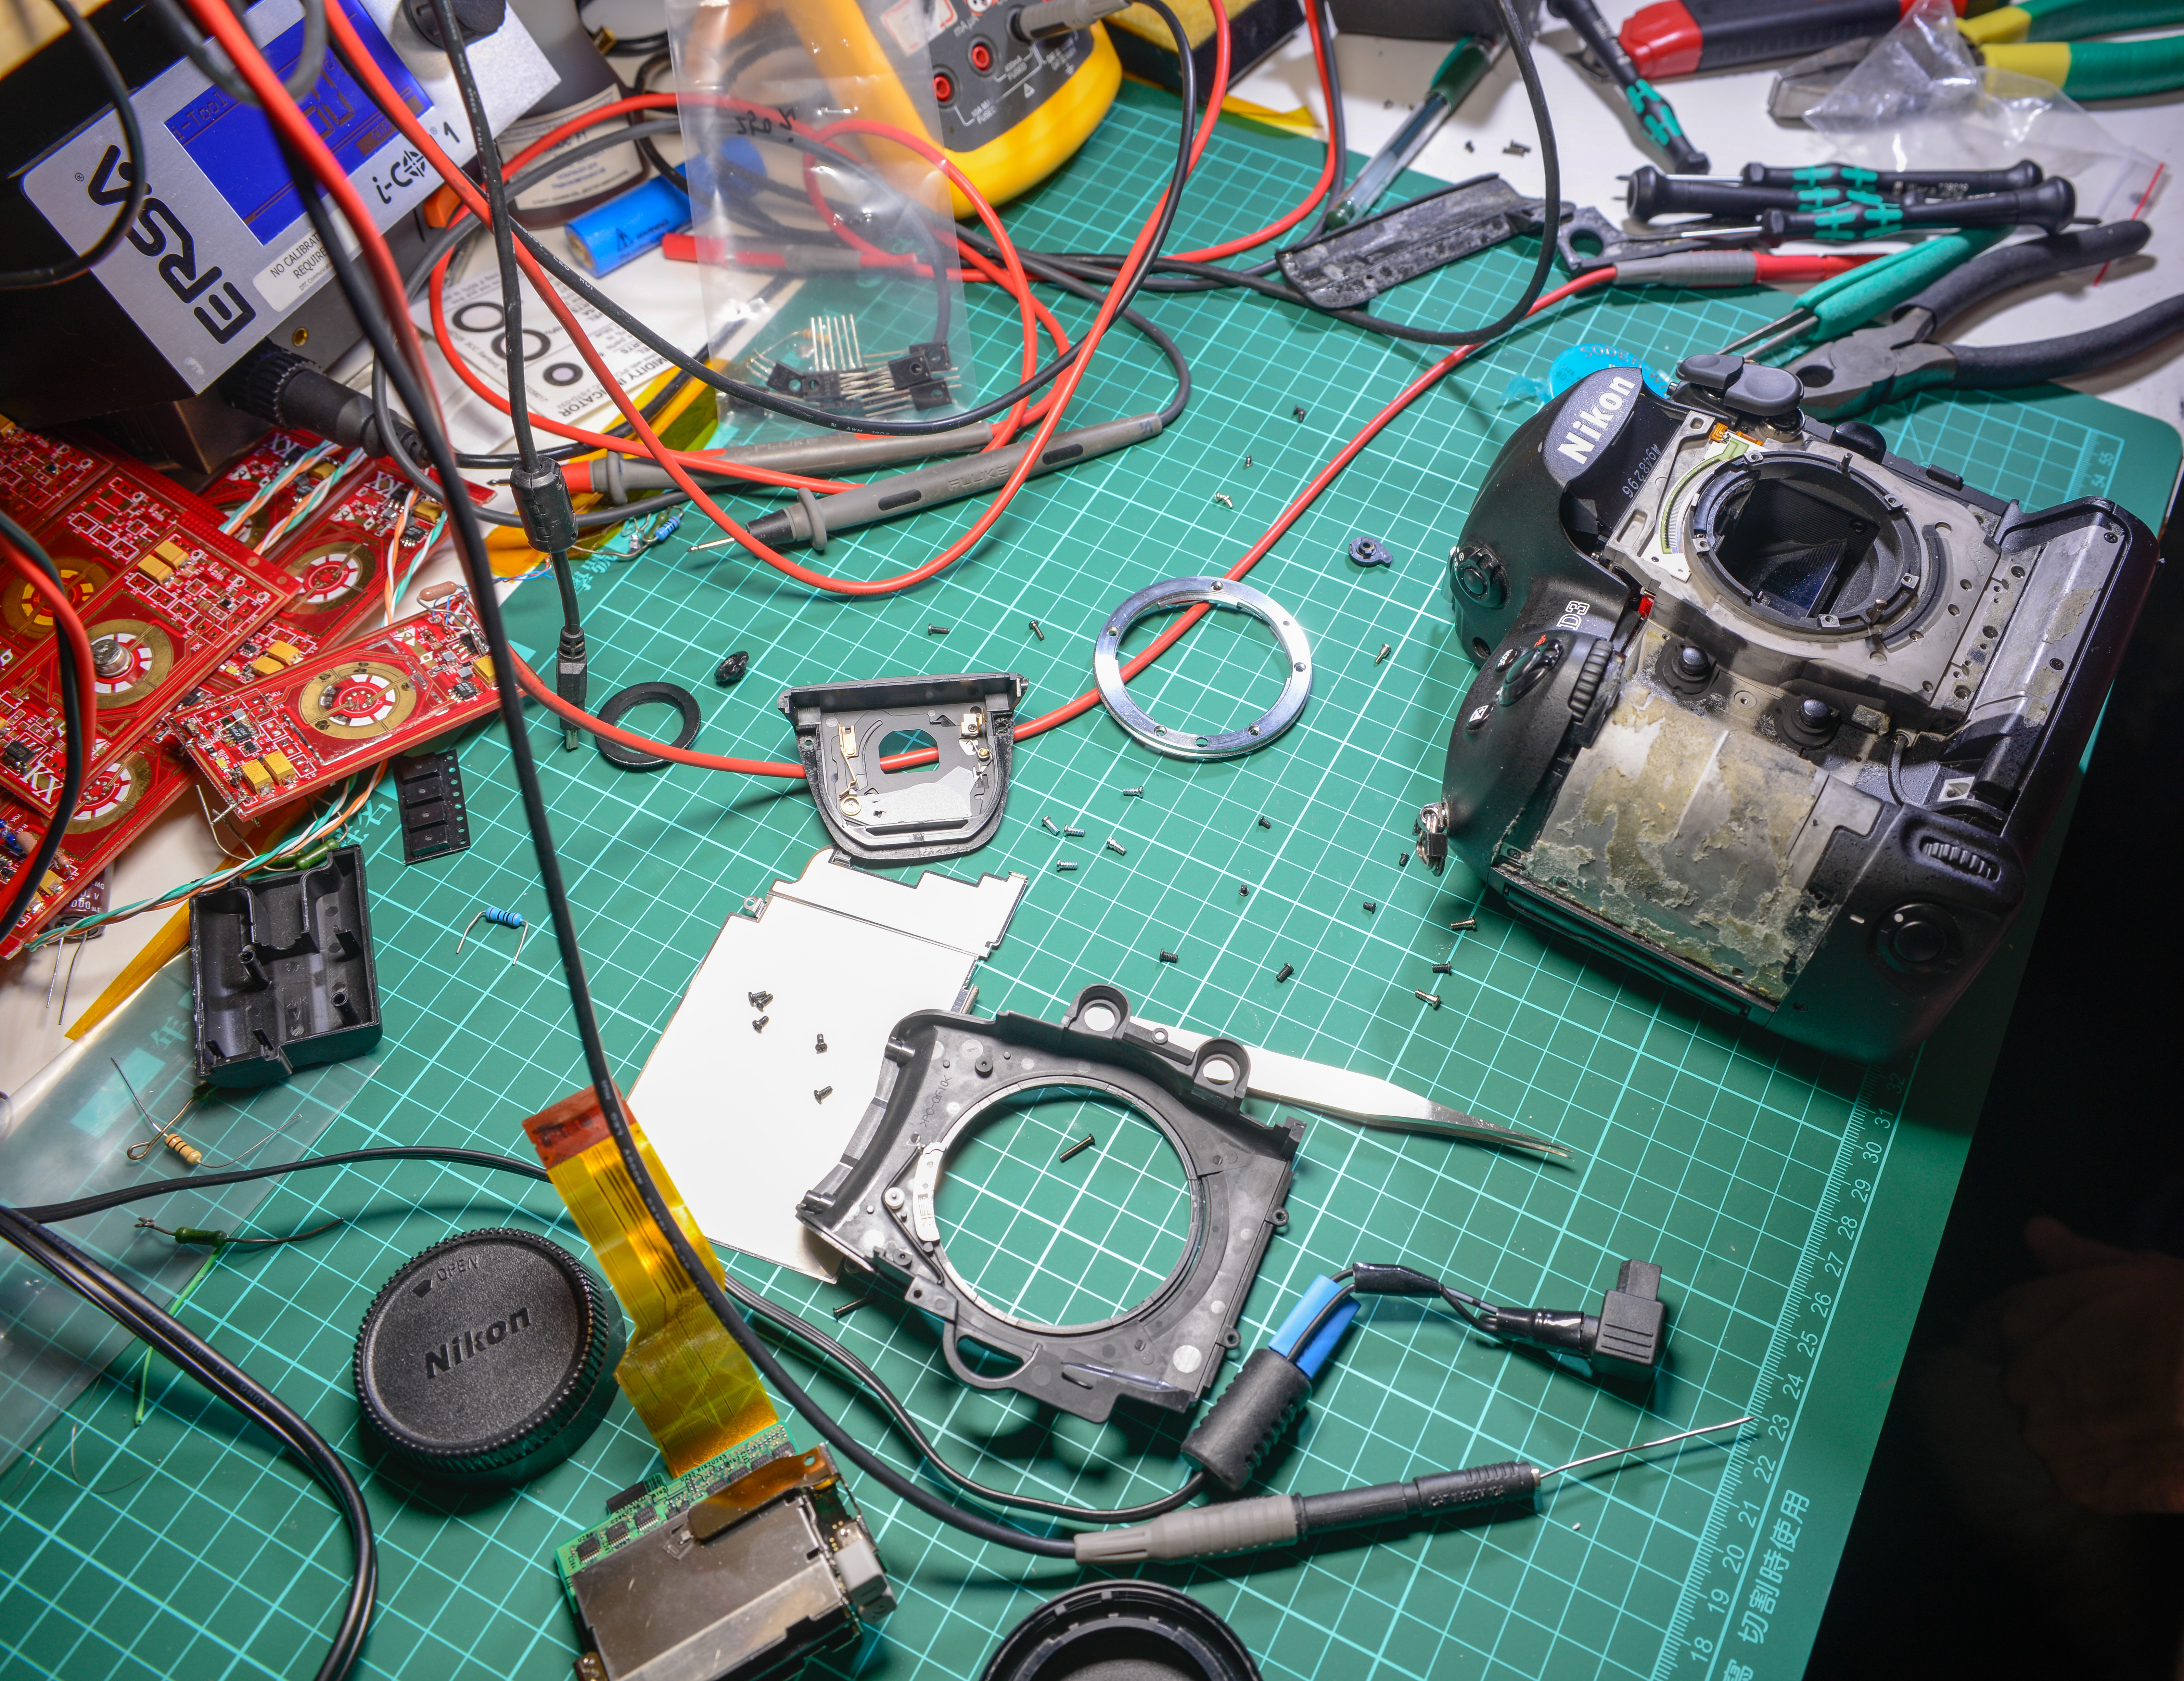
Not much we can do without taking camera apart, so let’s get inside and try find issue as we go.
First would be to unscrew four screws holding back cover with LCD and controls.
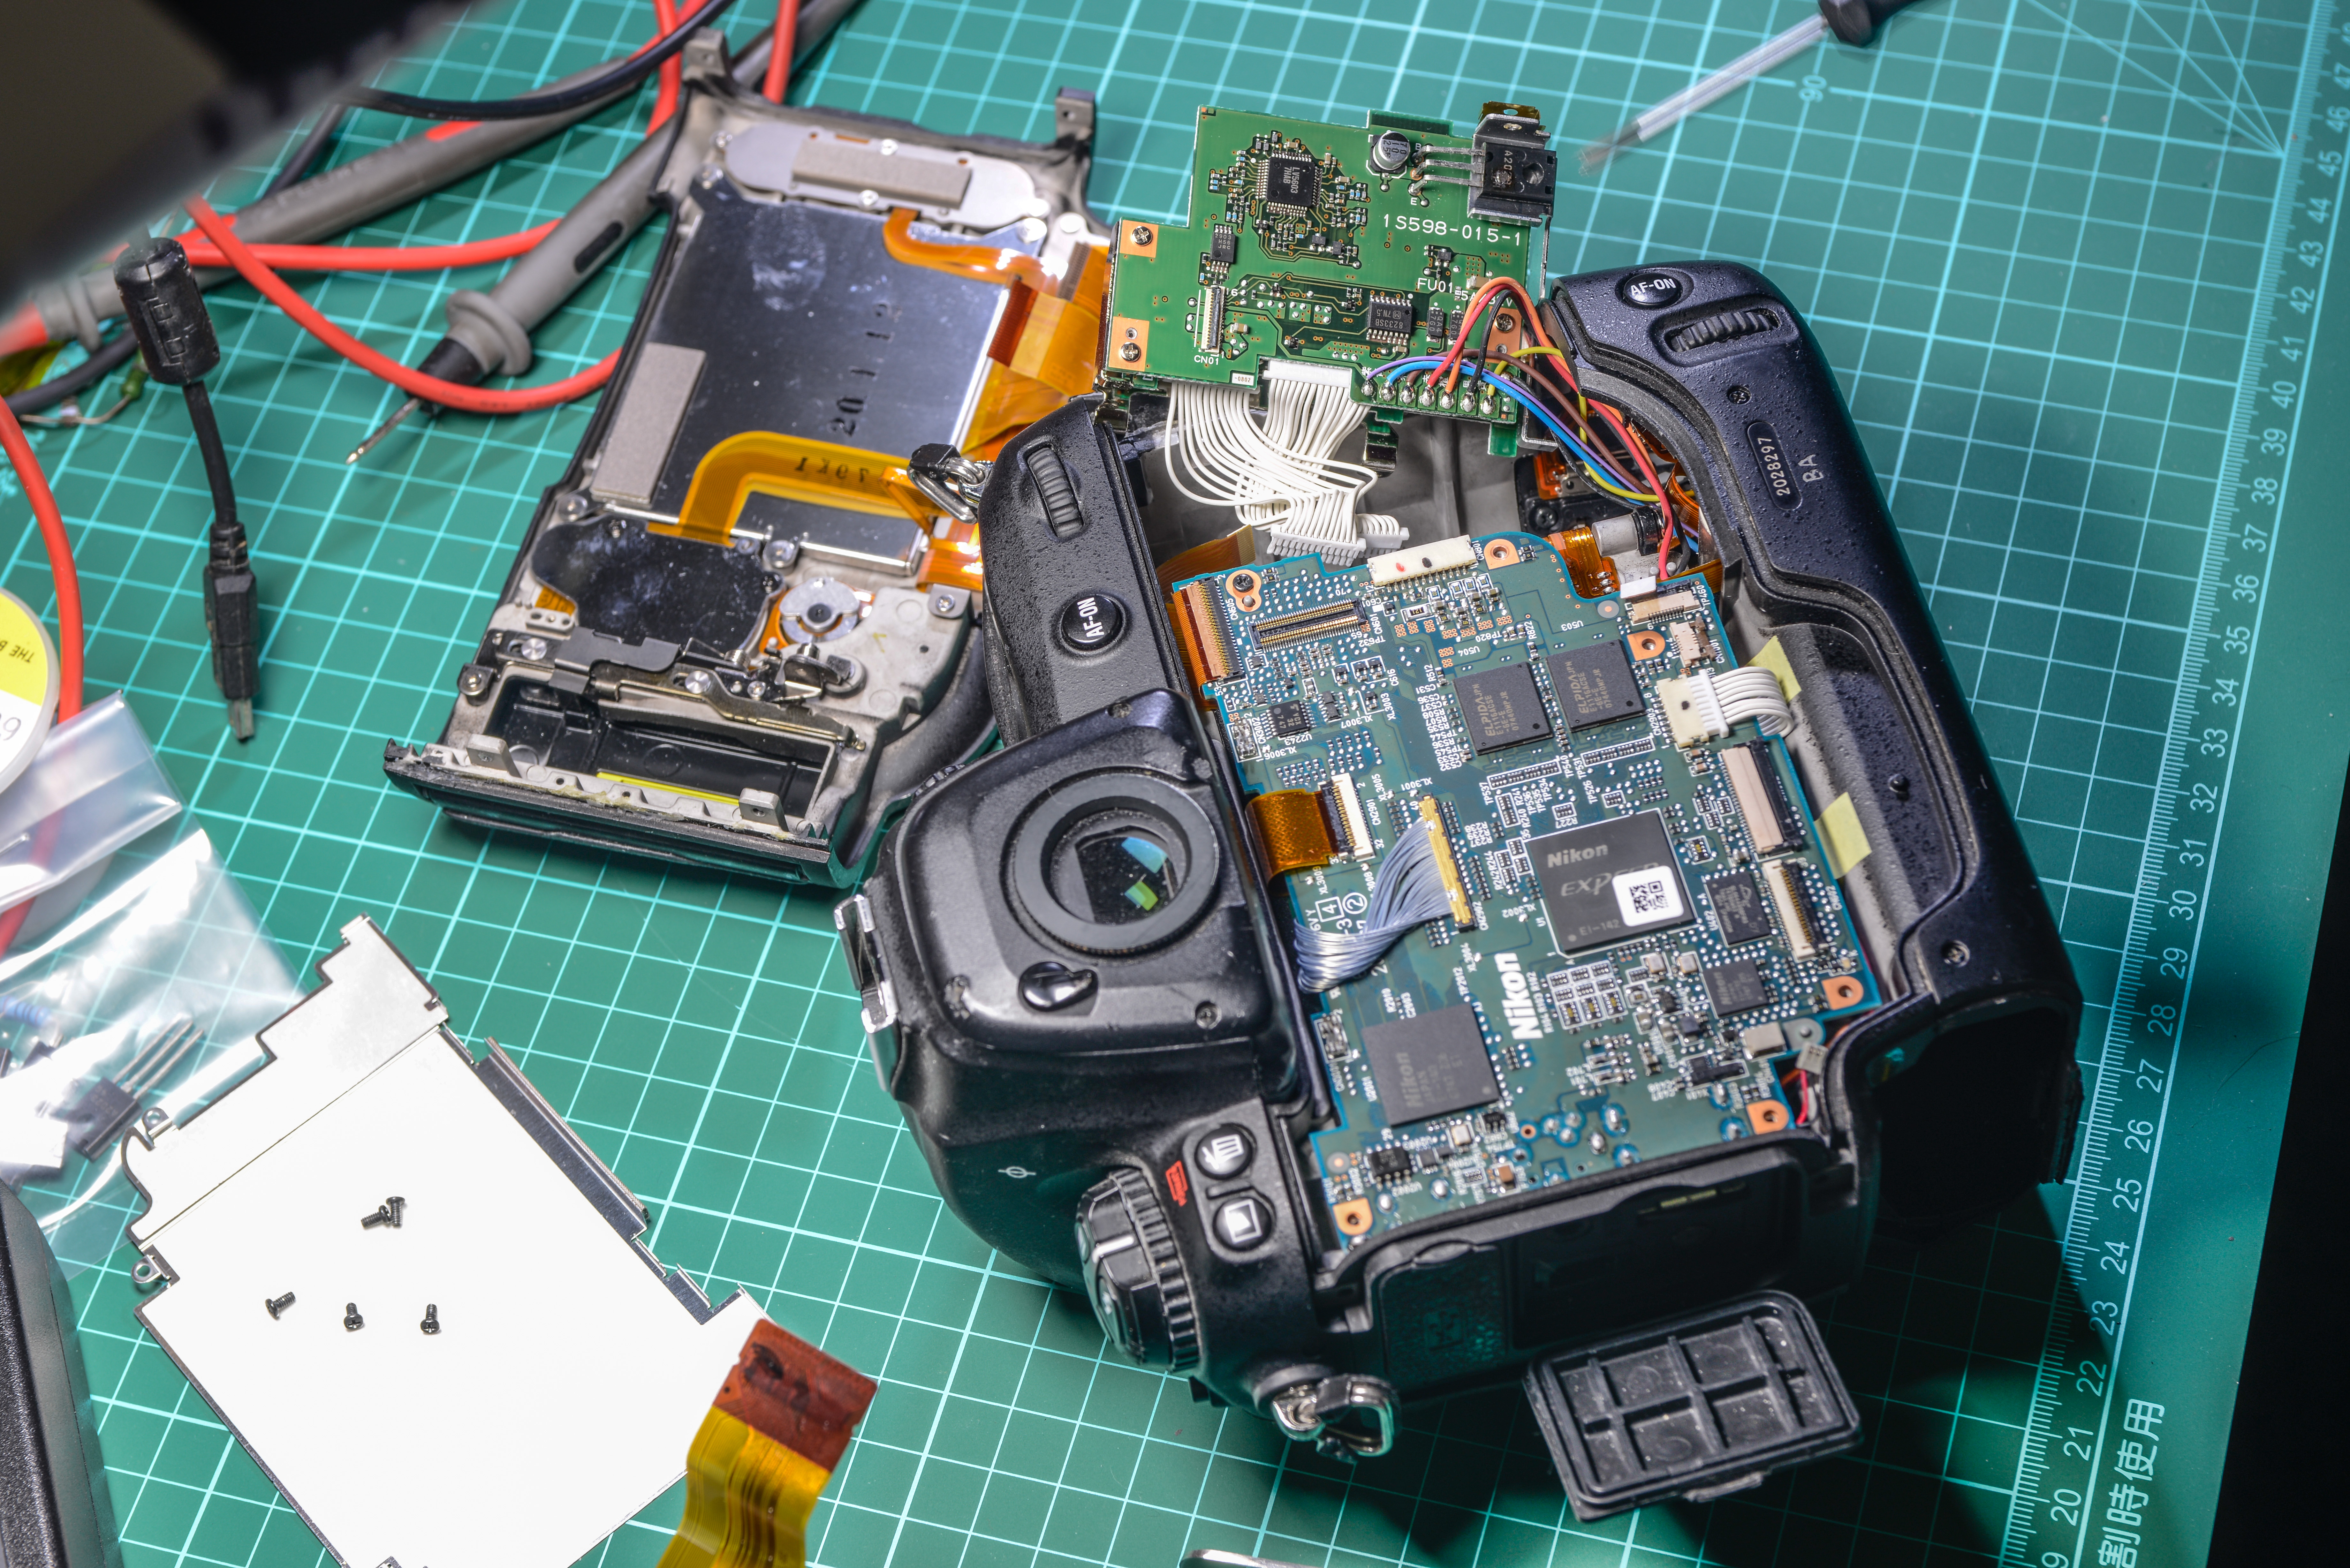
Everything clean and nice inside, no blown parts on main board. Looks like there were no attempts to repair it by previous owner, which is always nice.
Since nothing works at all, and camera unable to power on, first suspect – power supply/converter.
According to service manual – it’s on two board assembly right next to CF slots assembly.
Lucky enough, we don’t need to take apart camera to gazillion pieces to get access to DC-DC board.
Aha.. That’s where magic smoke escaped… Look at that component in top right side, with a good burnt blob on it!
It’s A2023 marked TO225 packaged transistor. Based on marking on PCB – it have emitter, collector and base, so we know it’s a BJT.
Remembering similar style marking inside of my HP 4263B LCR, it’s 2SA2023 PNP, rated 5A 80V.
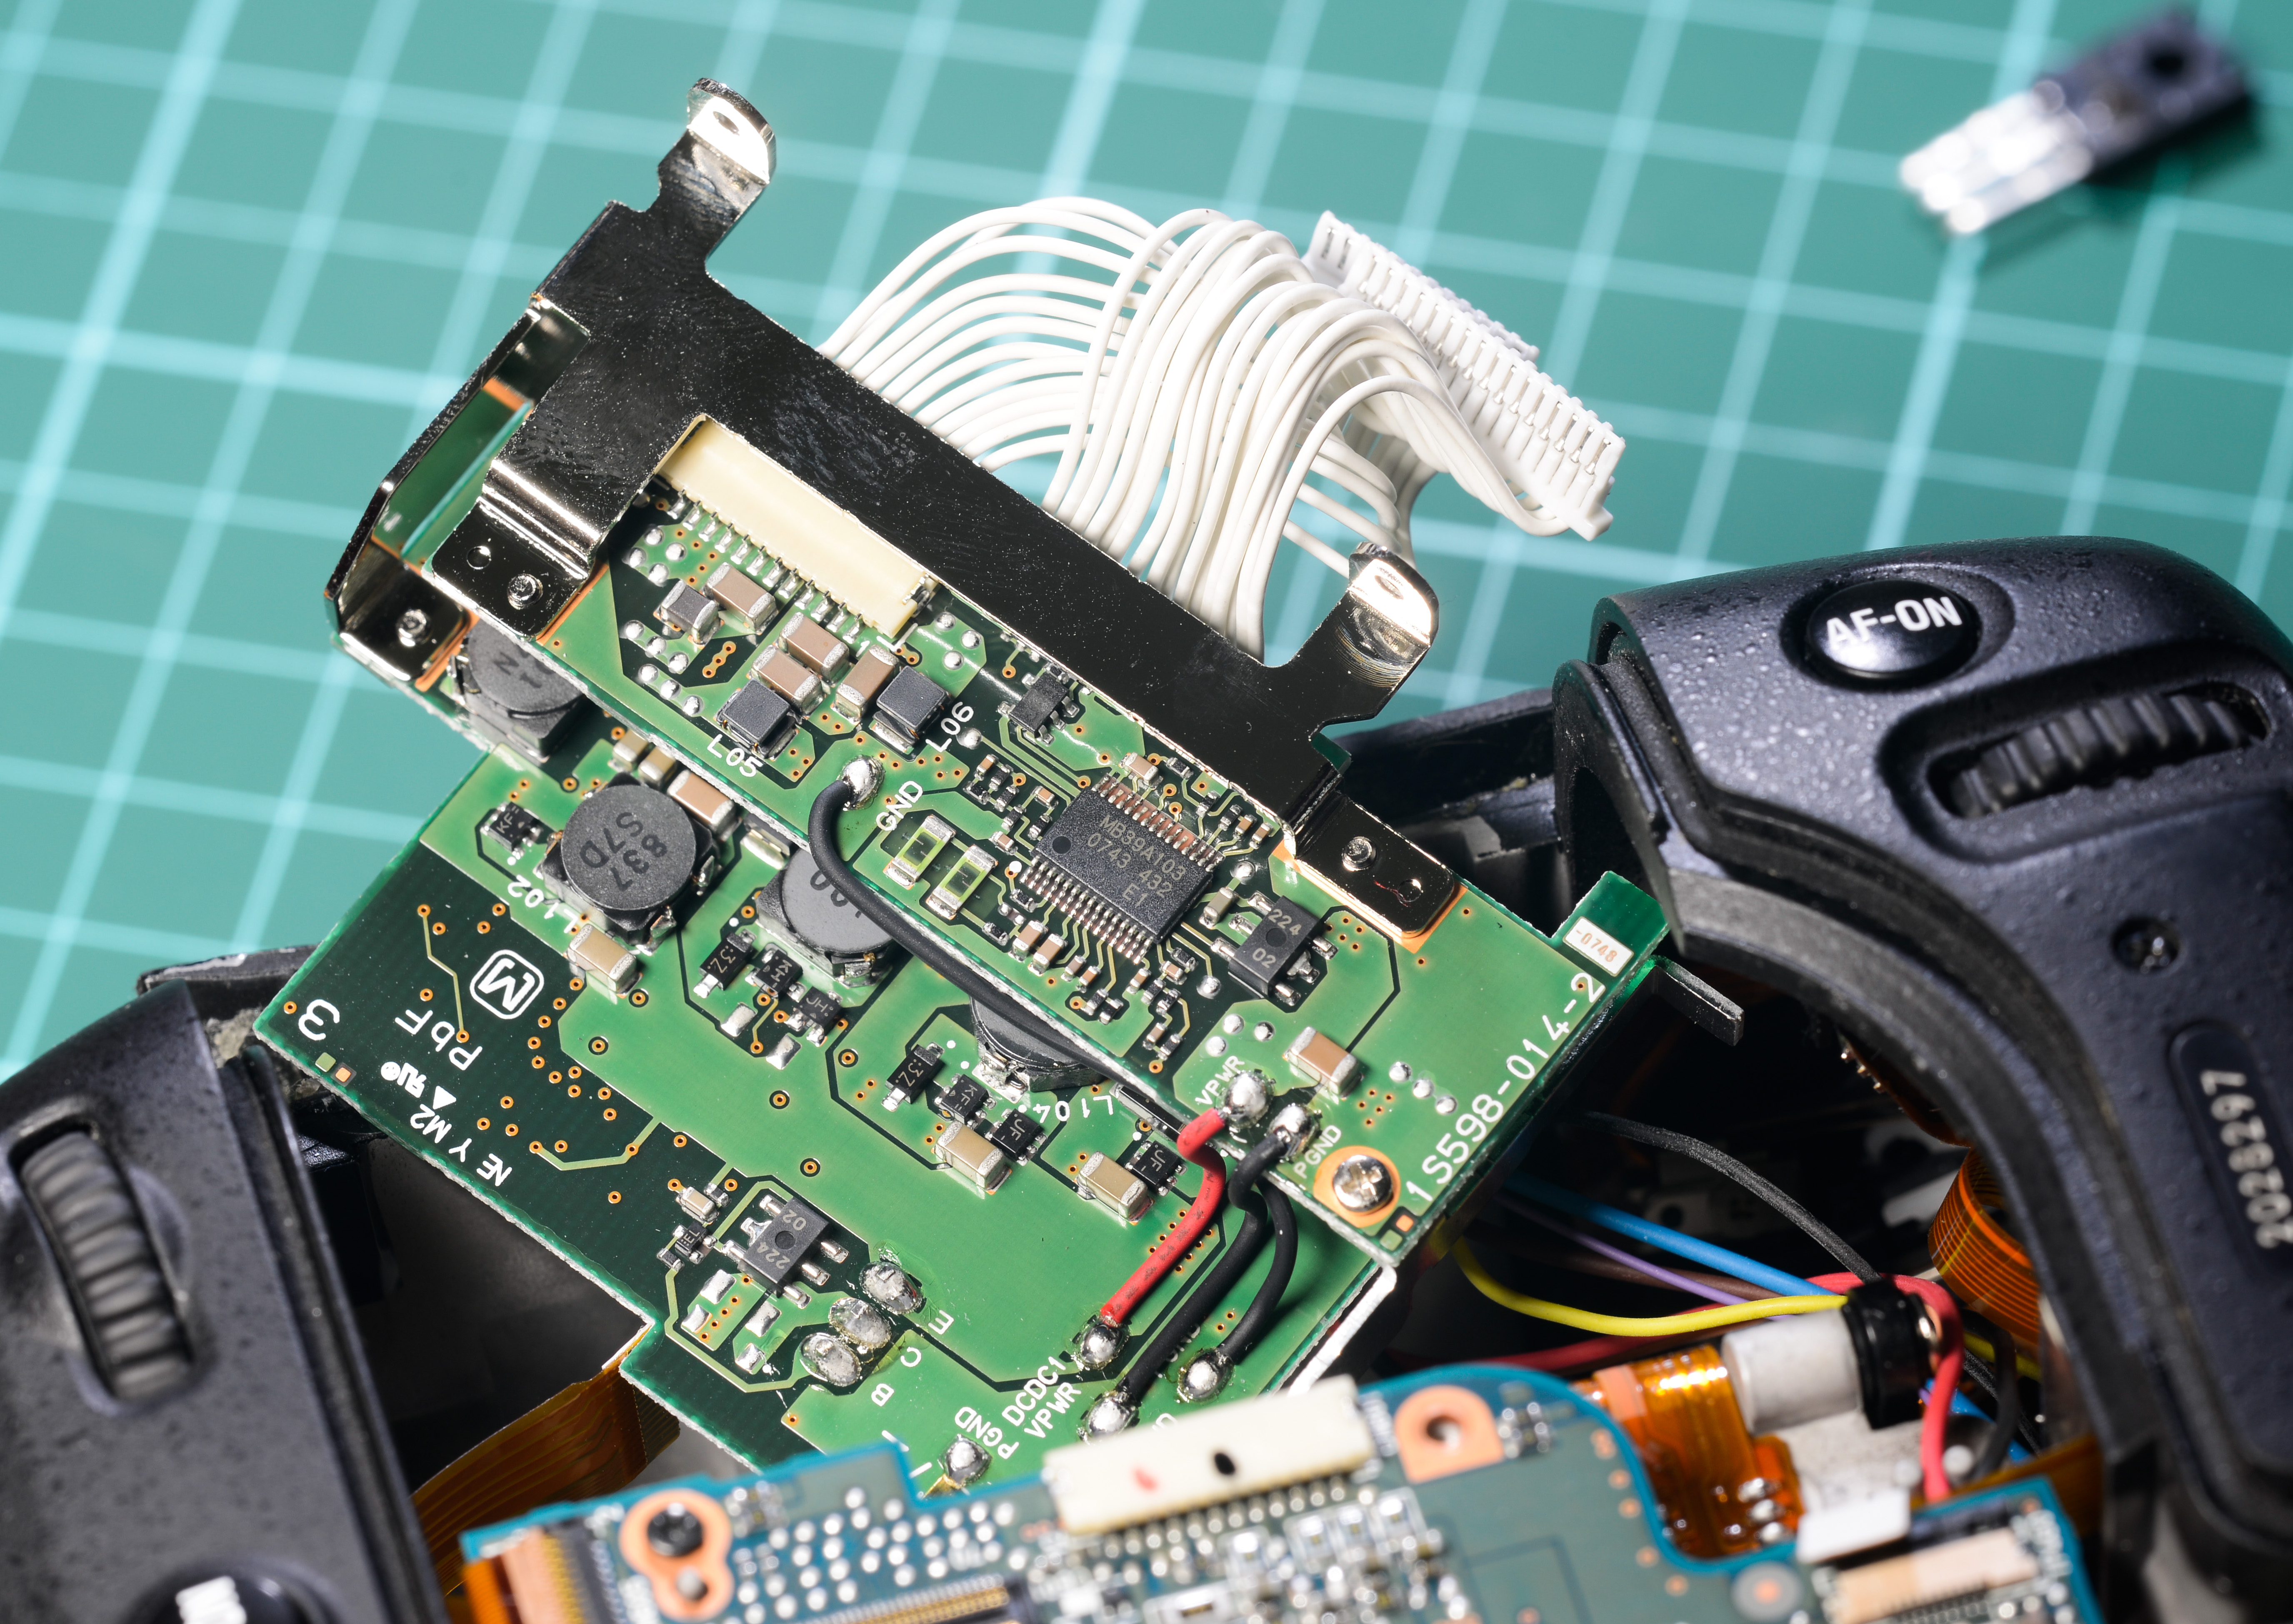
Went local electronics flea market and was lucky enough to get exact same P/N PNP’s.
Now there are two things could happen on such step. First – PNP just died from some power surge or battery short for example.
It could be just a dead PNP, so replacing it will get life back to camera.
Or things could be much worse, and actually some other part got shorted and caused power supply to die. In such gear like consumer cameras, which are almost completely build around custom ASICs, custom controllers and absolutely no schematics or service information available such scenario means that’s best use from it would be a really expensive pencil holder.
I cut pins of old transistor first, and remove remnants with solder iron one by one later, just to make job easier.
Let’s cross our fingers and try to replace PNP.
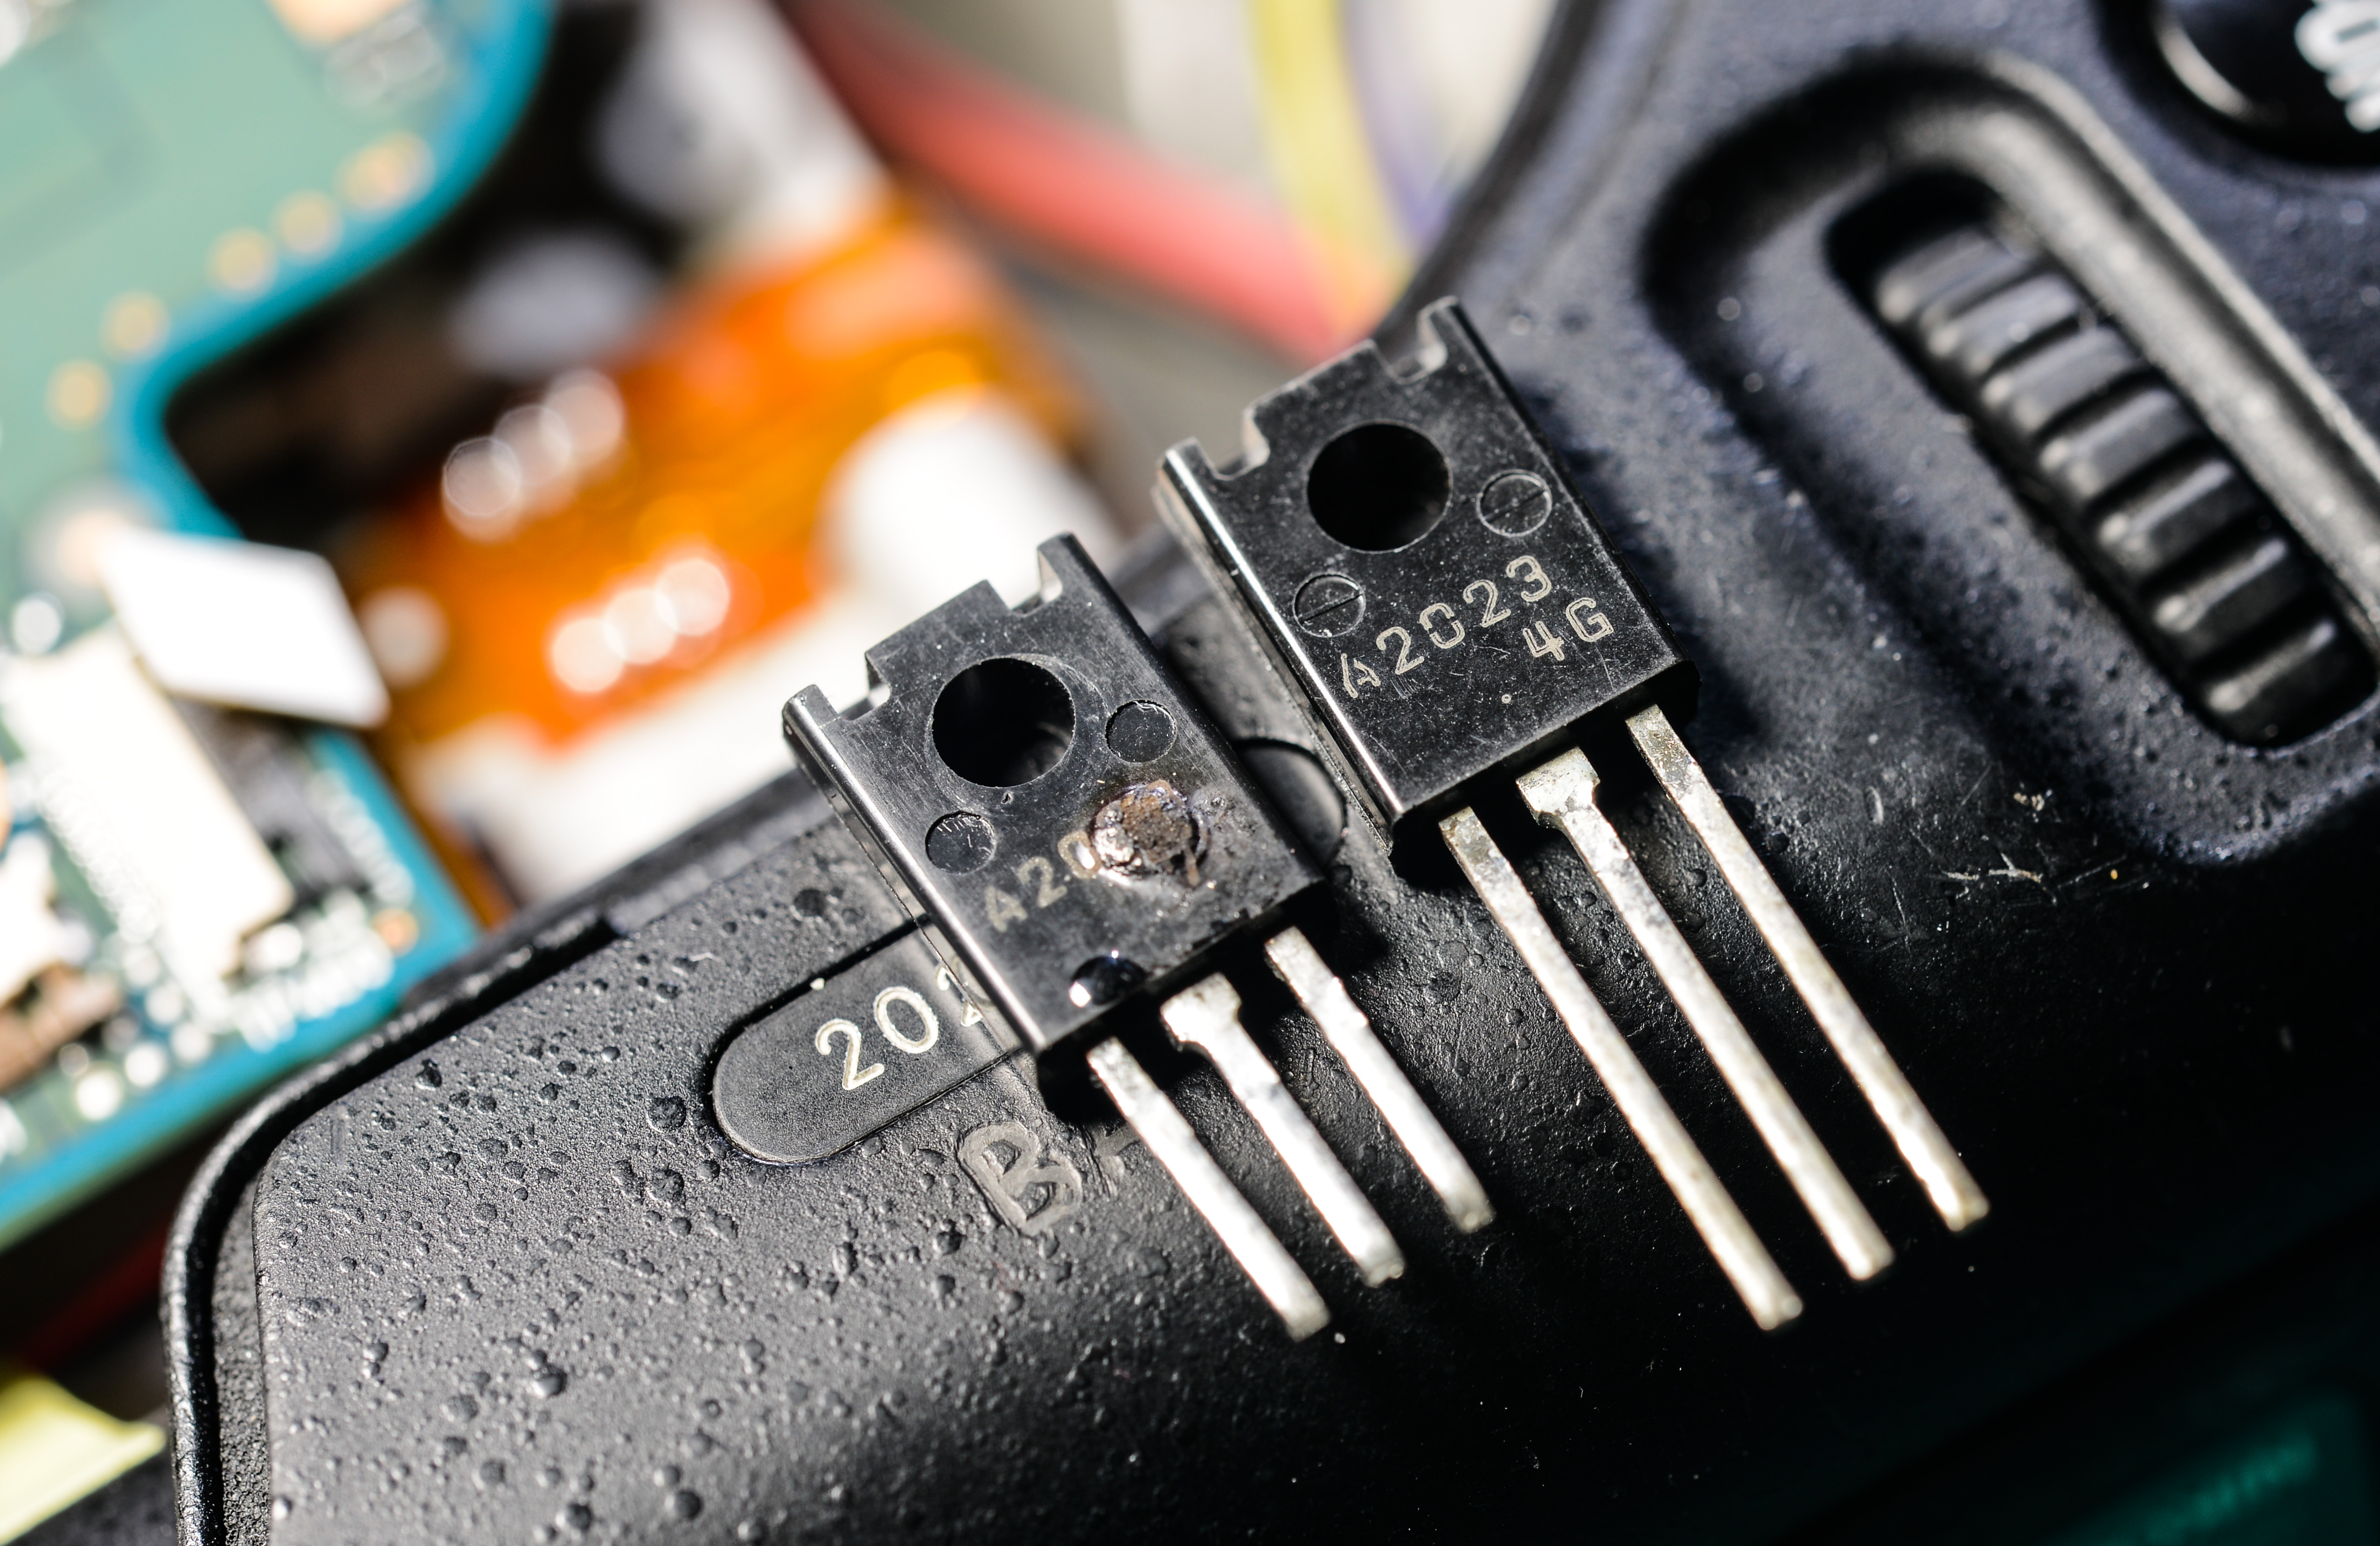
Original part on left side, new transistor on right side.
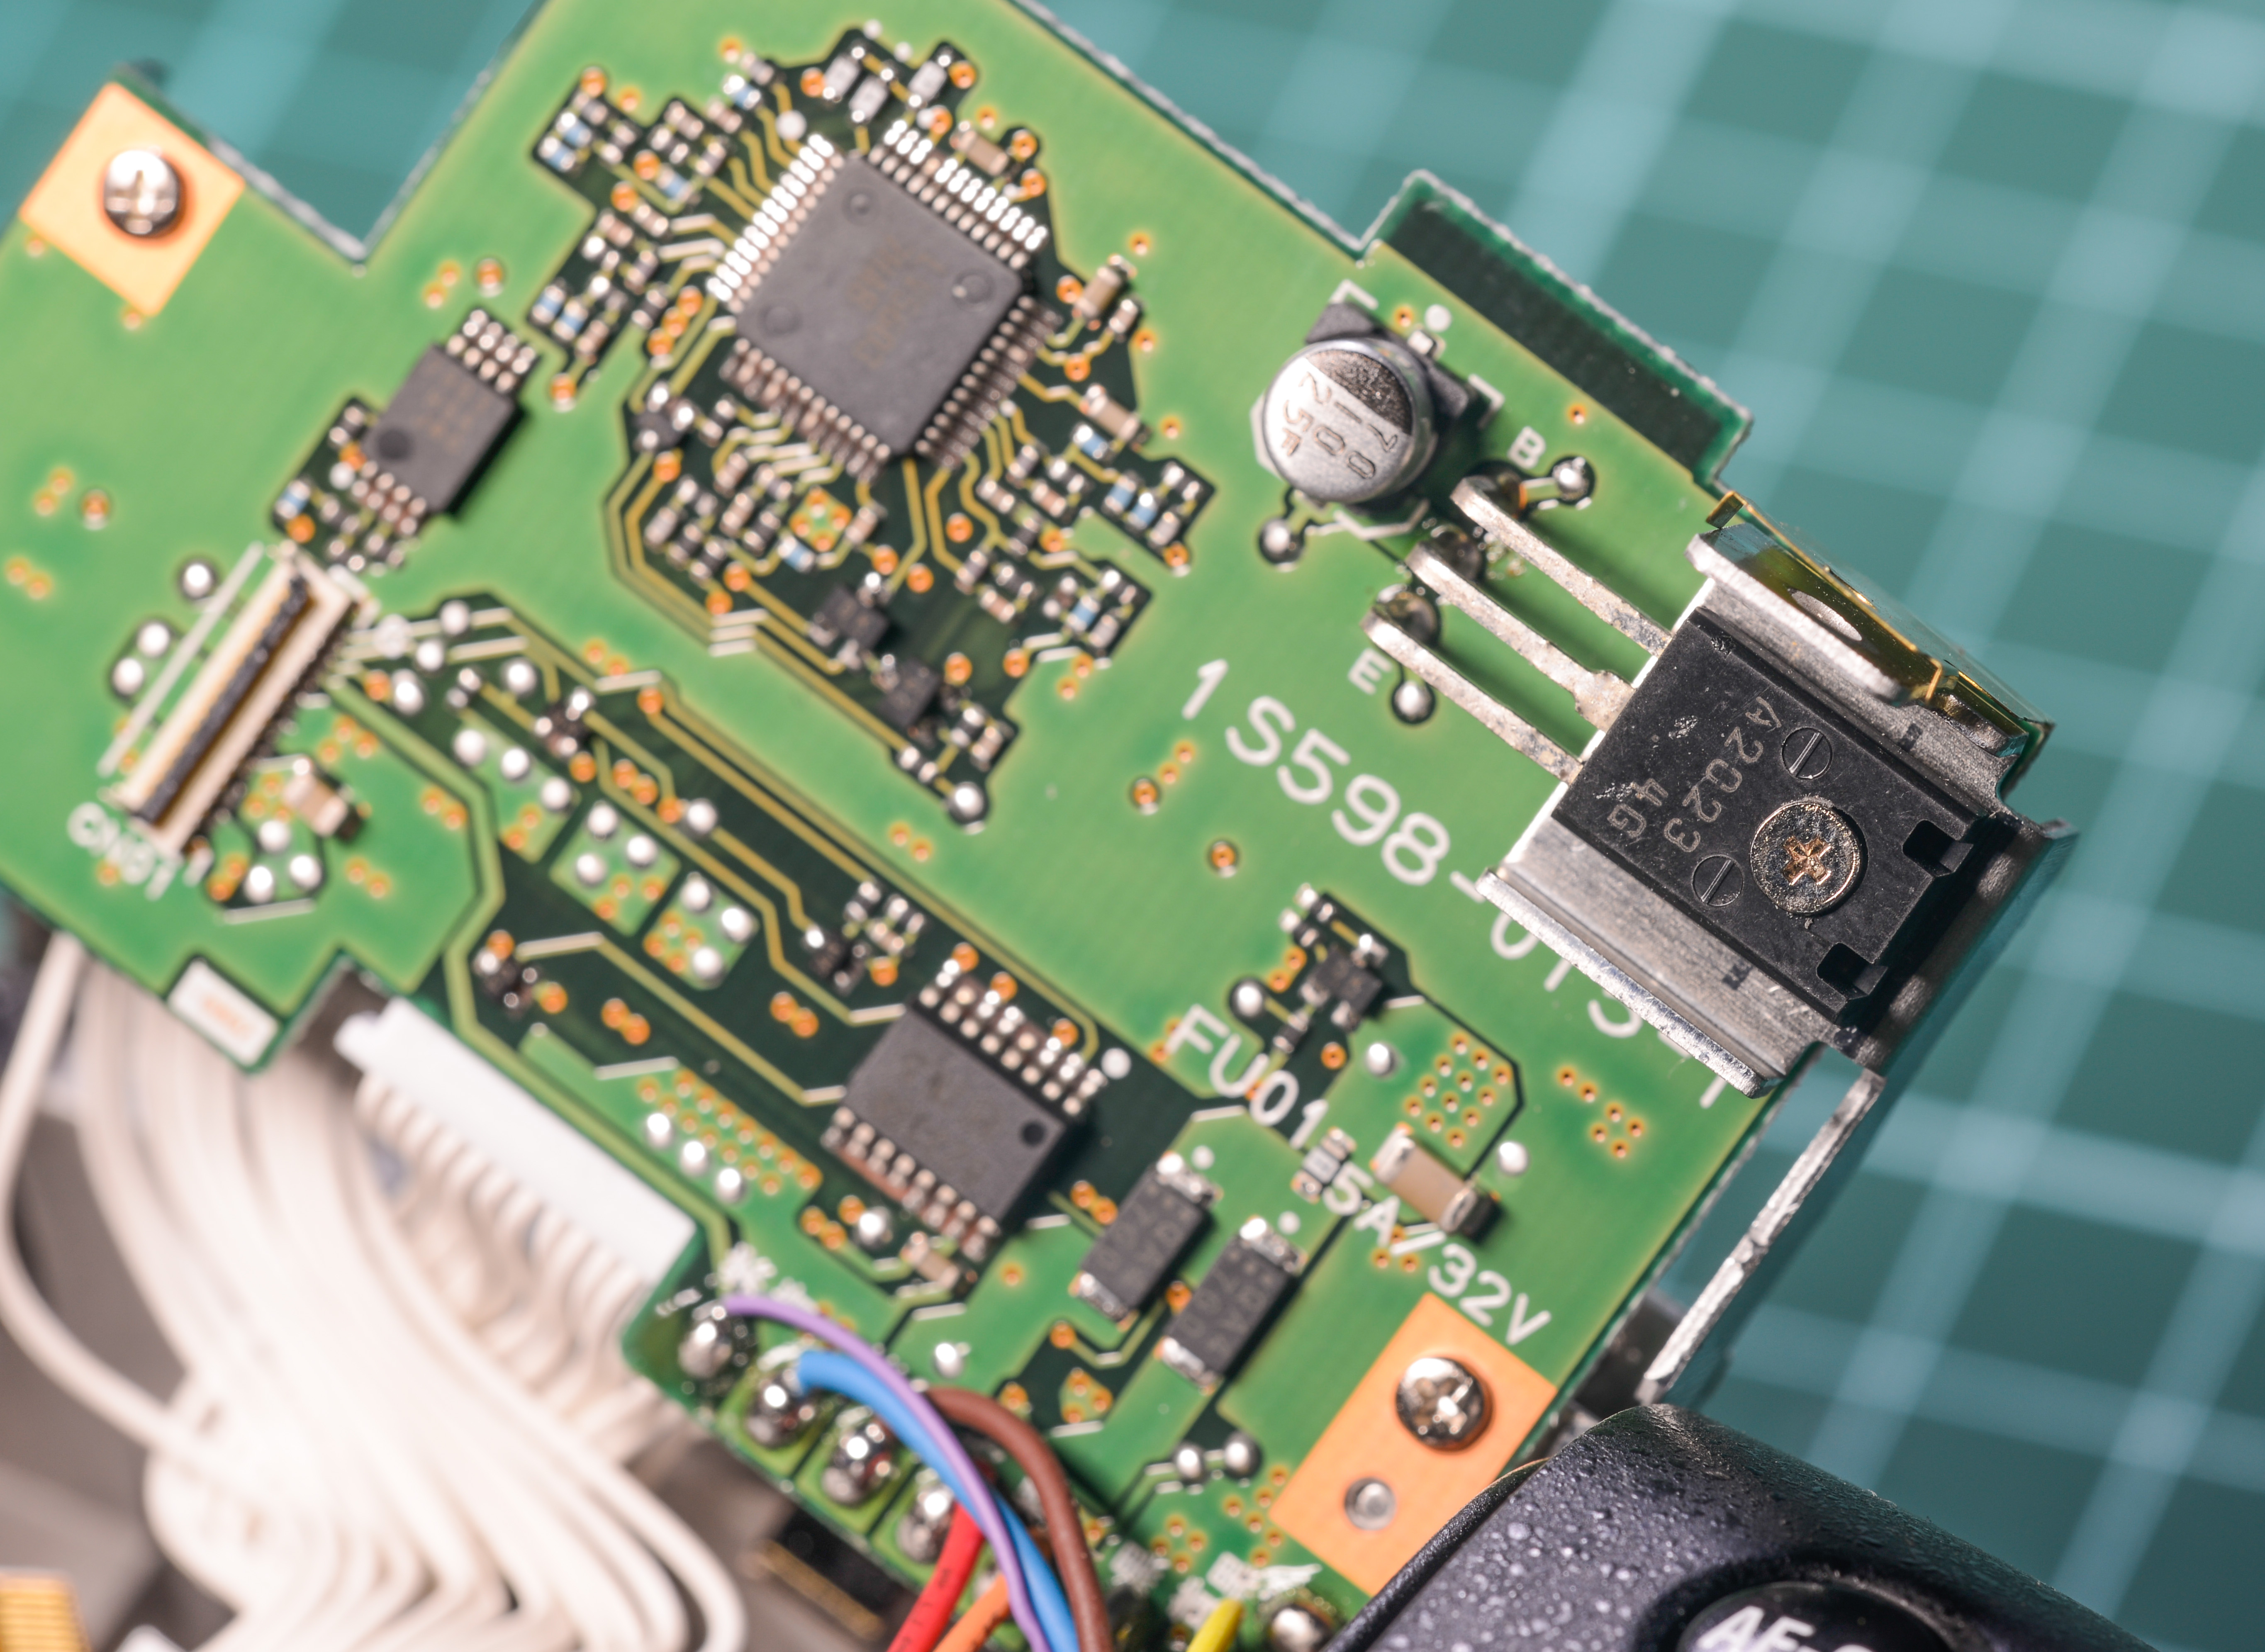
5 seconds with my trusty ERSA iCON, and DC-DC assembly is like new again… Connect back cover with controls & LCD , check to make sure no shorts or any dangerous parts around, connect DC +13V to DCin jack, and..
Diagnostics and further repair
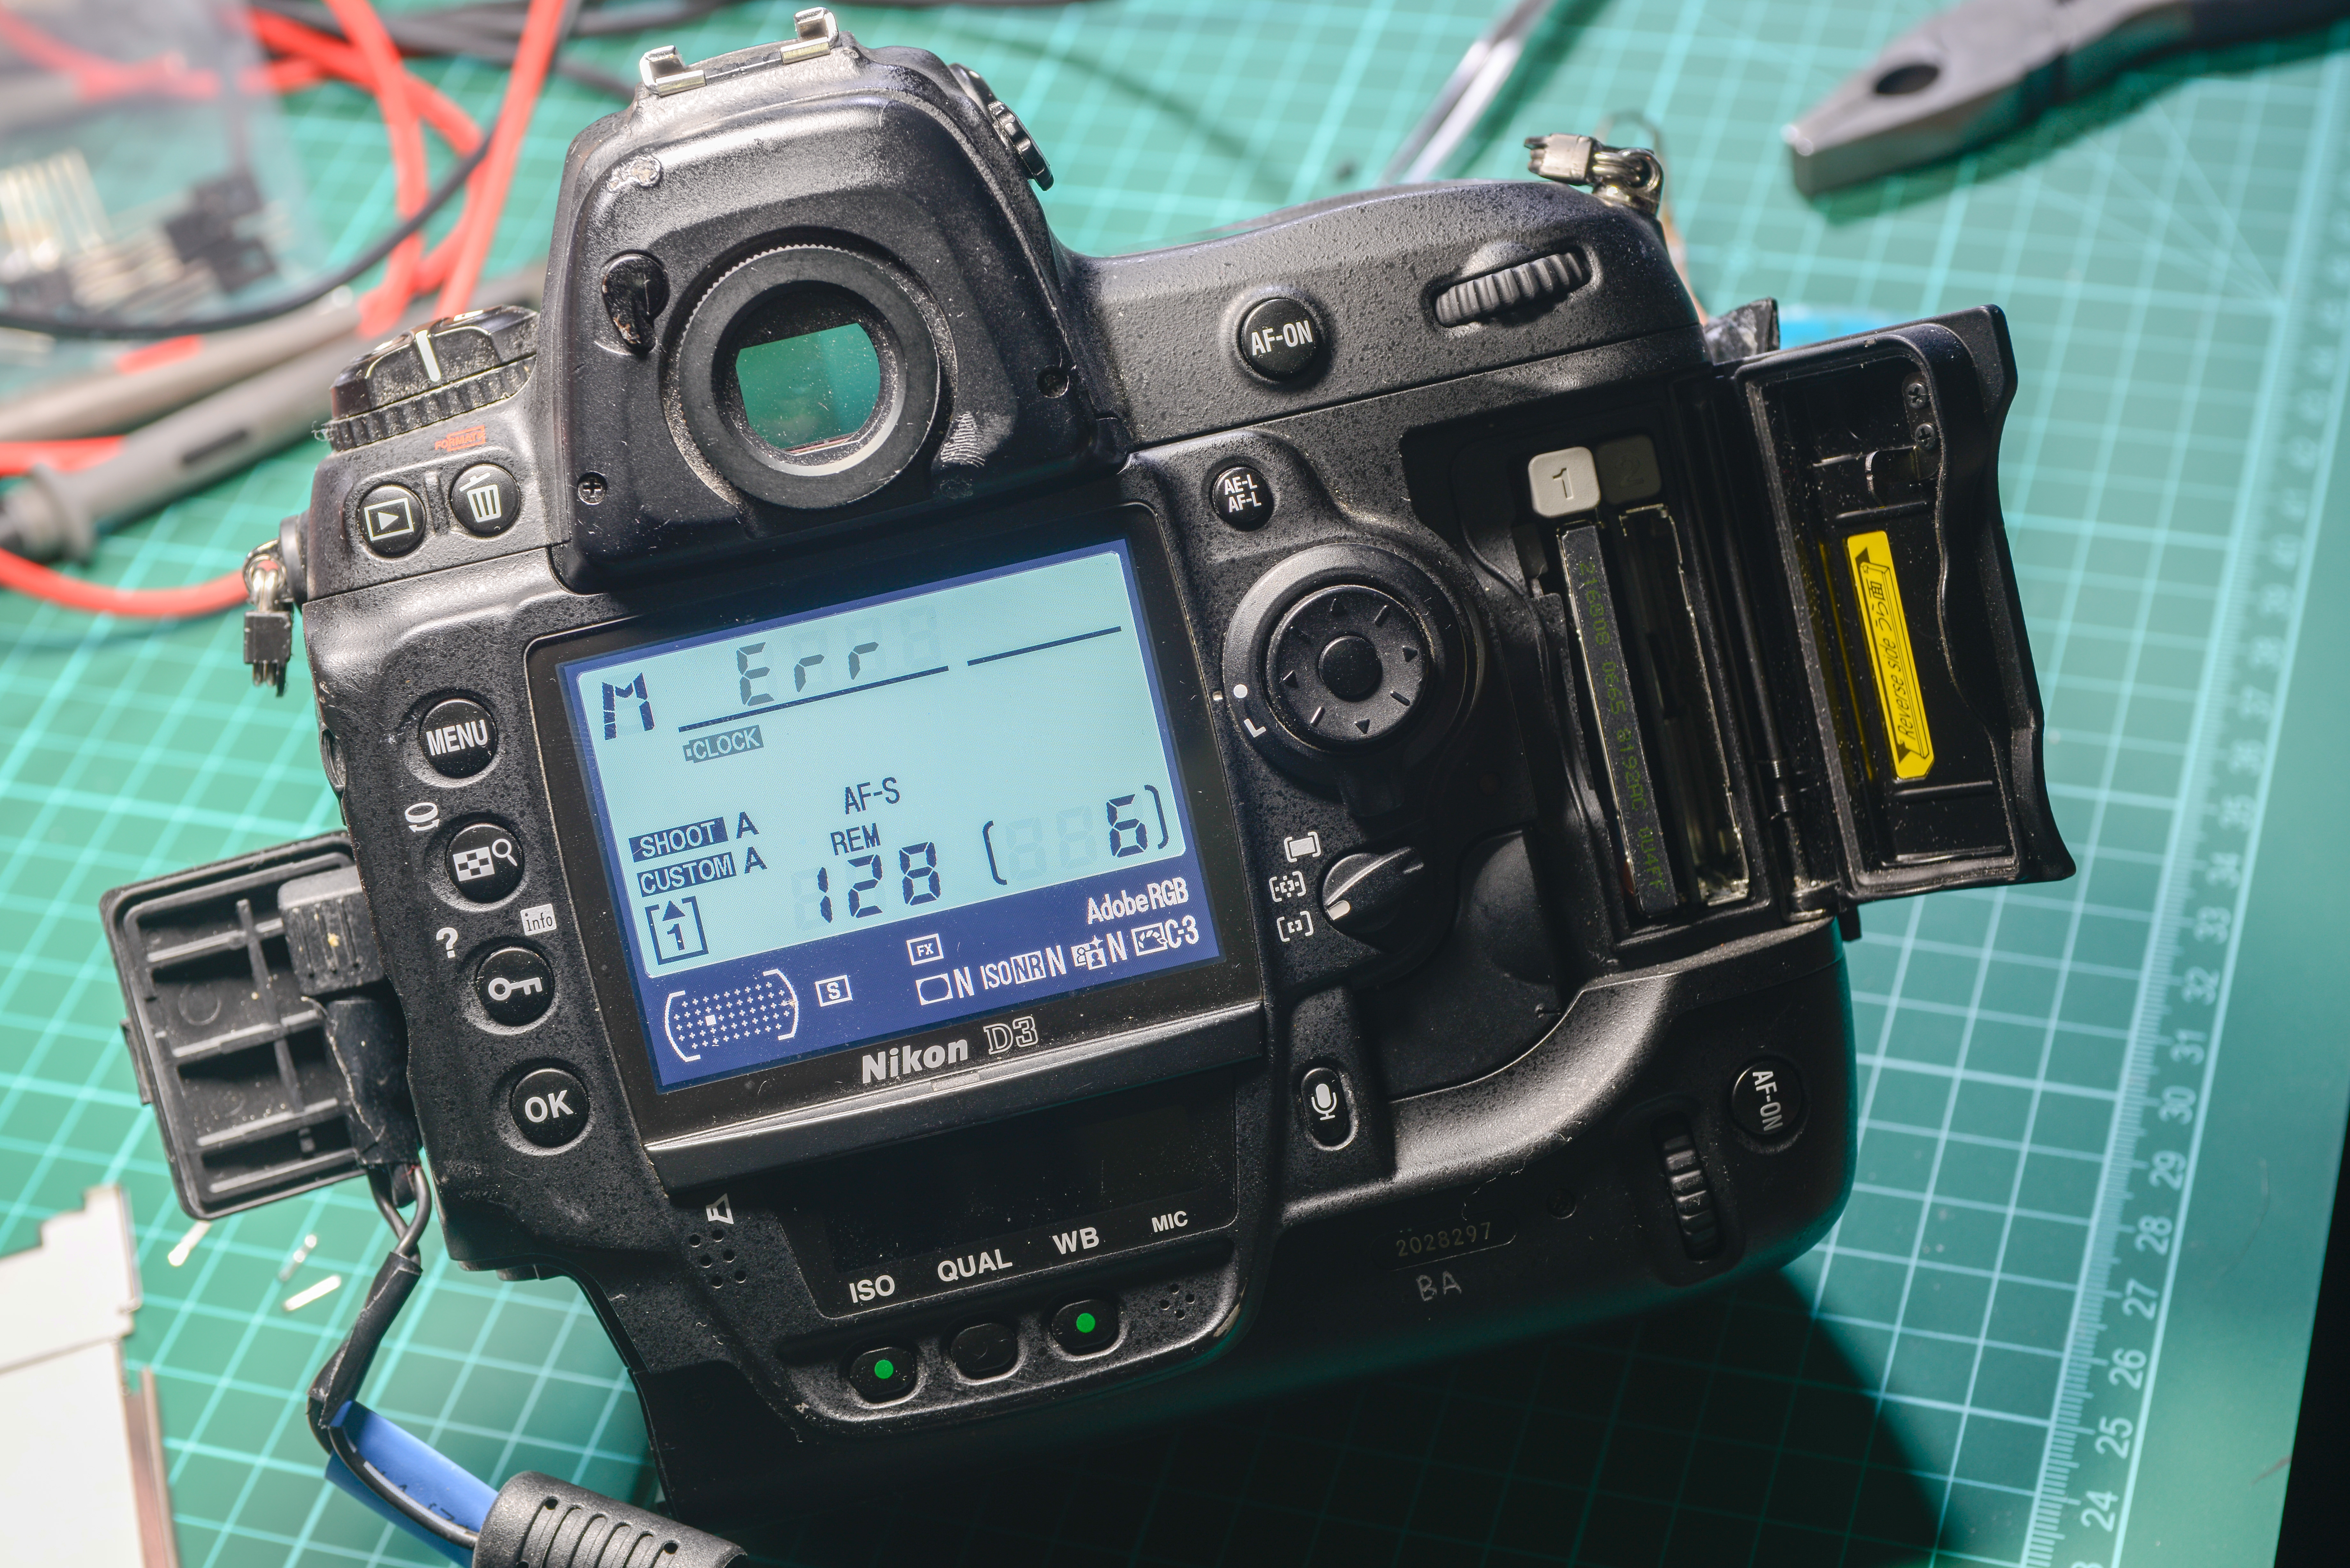
Ta-daaa…. Great, no smoke, no noise, it was a lucky day which brings some hope to this project :)
Auxilary LCDs aren’t working at this moment, probably some FPC cable got bad connection or no contact (remembering that camera was dropped).
Liveview works, tells us that CMOS sensor, aquisition, digital processing works properly.
Now tried to make couple shots, and got files without problems.
There is ERR message happening after every shot, which can be “reset” by turning off, turn on, and releasing shutter once. Seem like some mechanical issue with mirror assembly, as it’s not returning back to normal state after most of shots. Will take a look on that later, let’s check LCDs first..

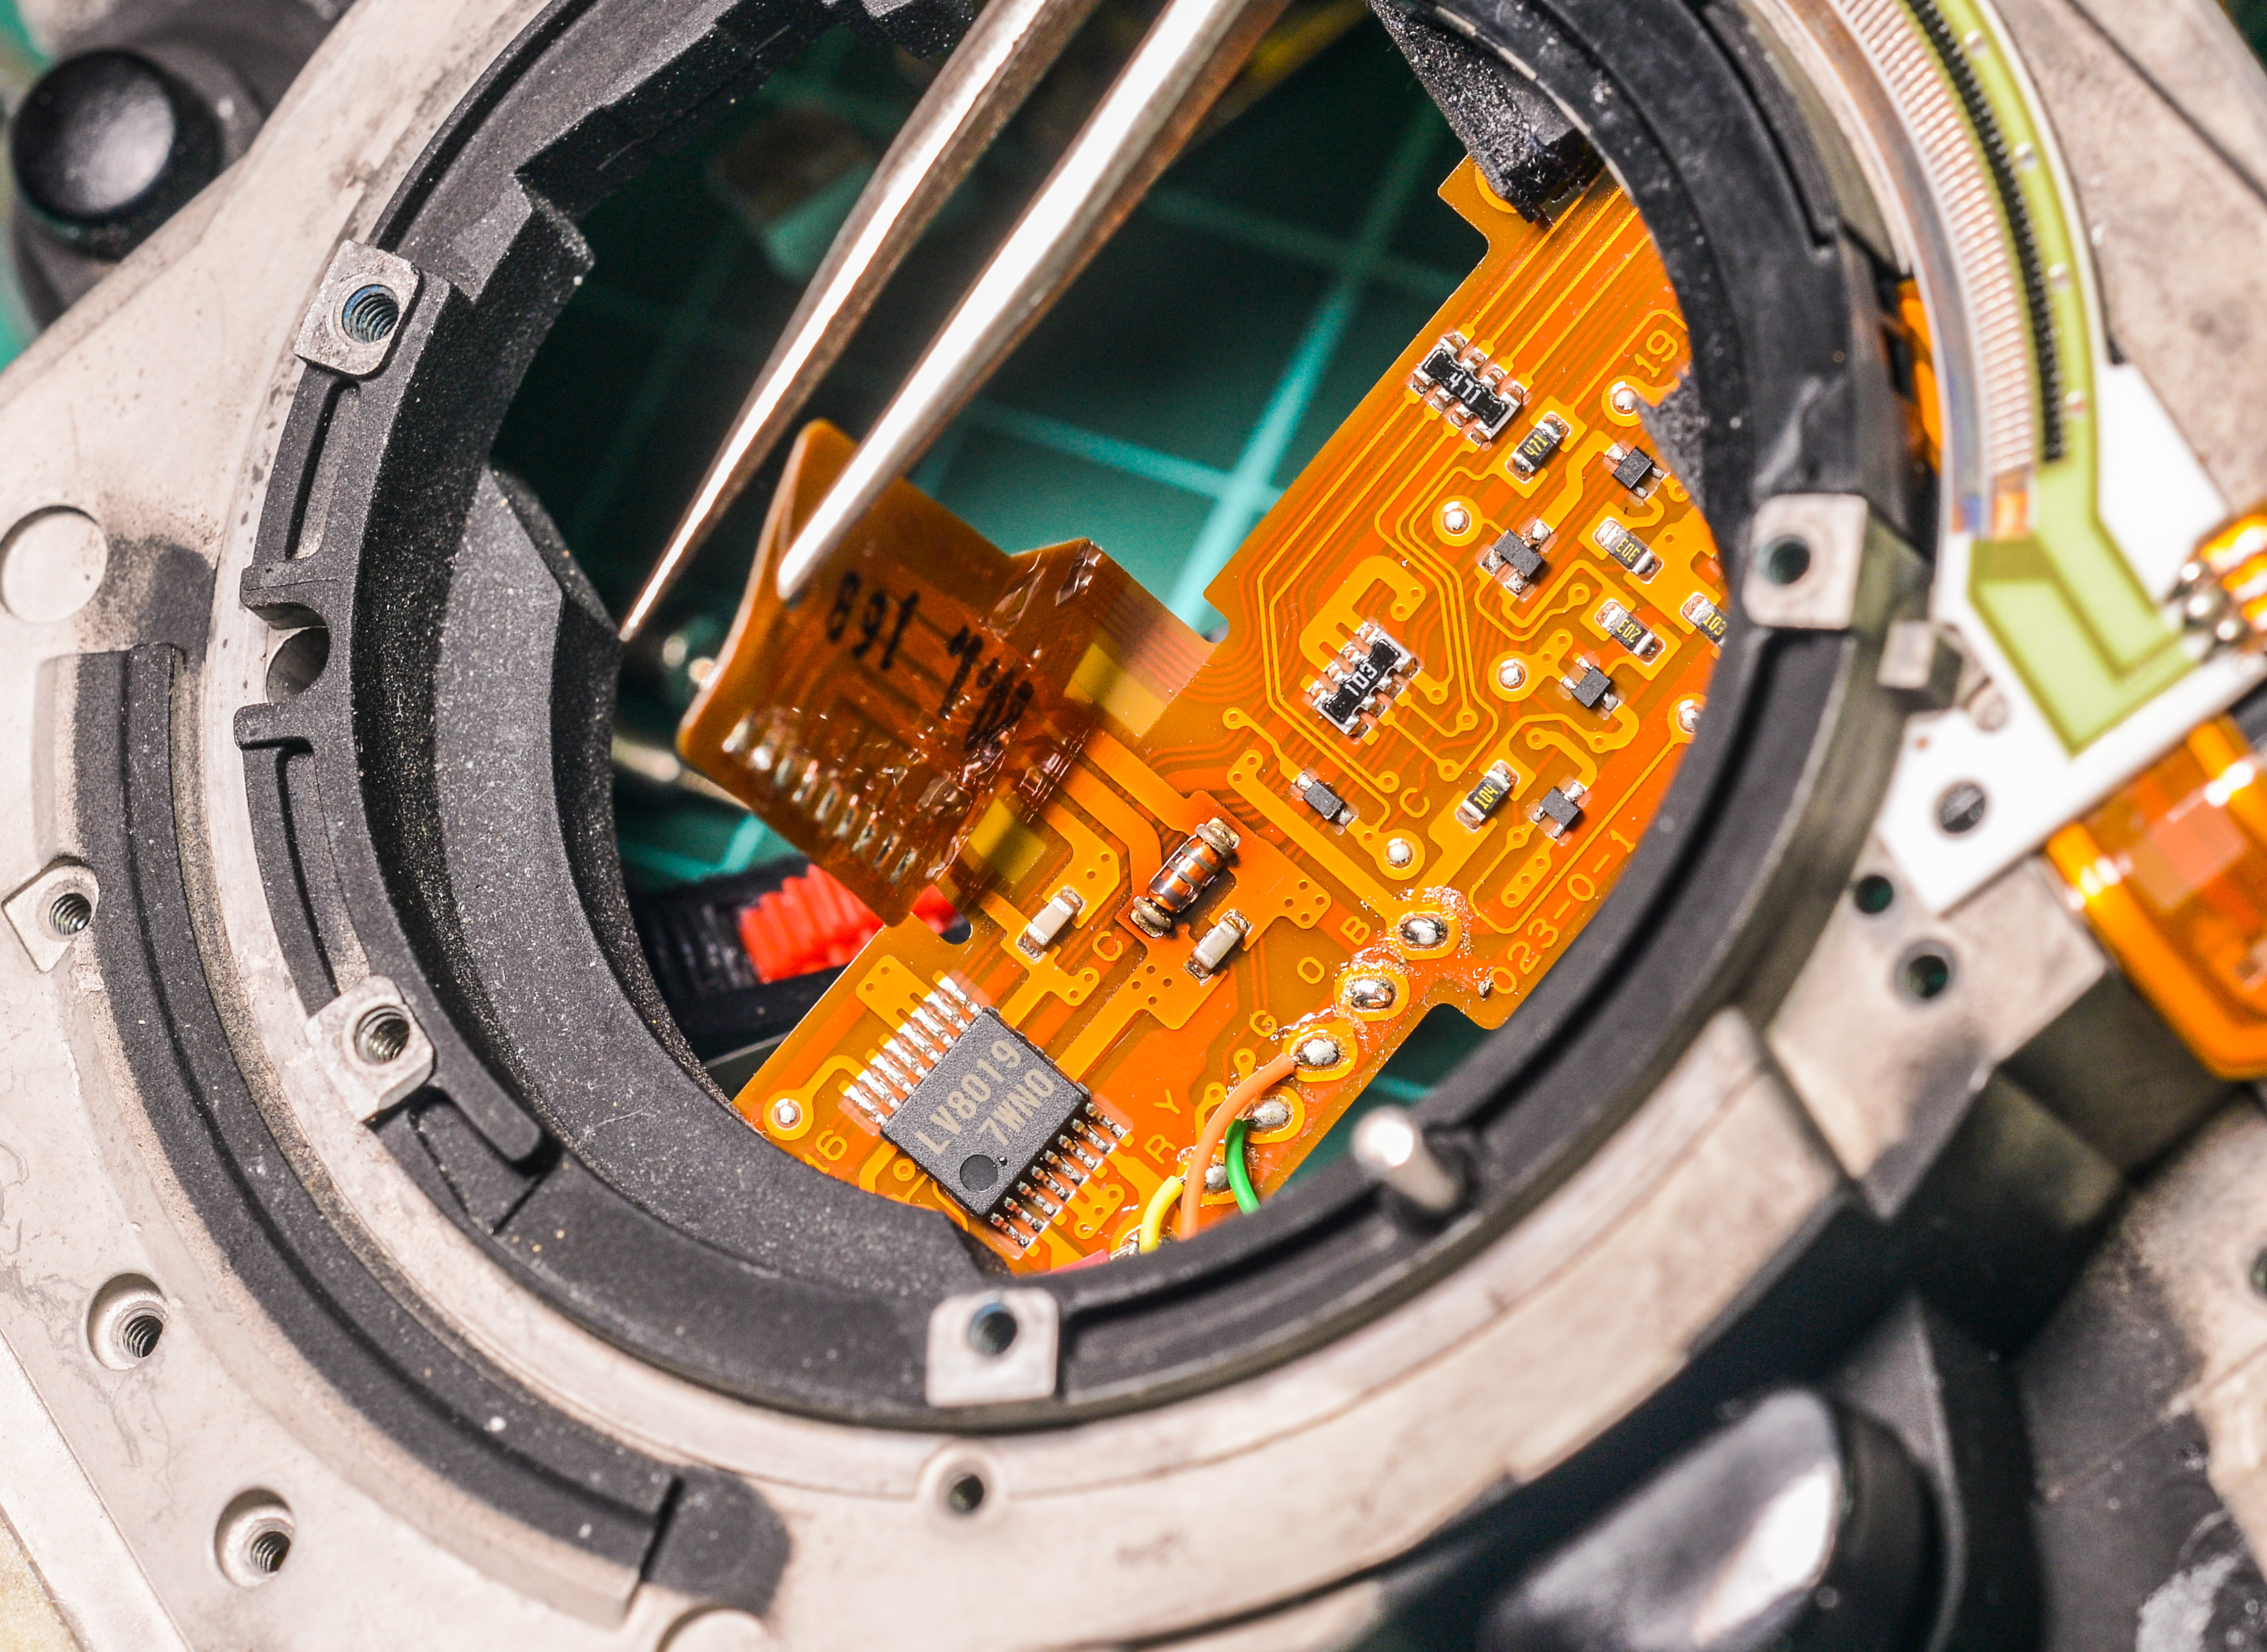
Remove top cover, as microcontroller board which handles LCDs is on top side…
There it is, small board on right top which have lots of FPC’s going to it.
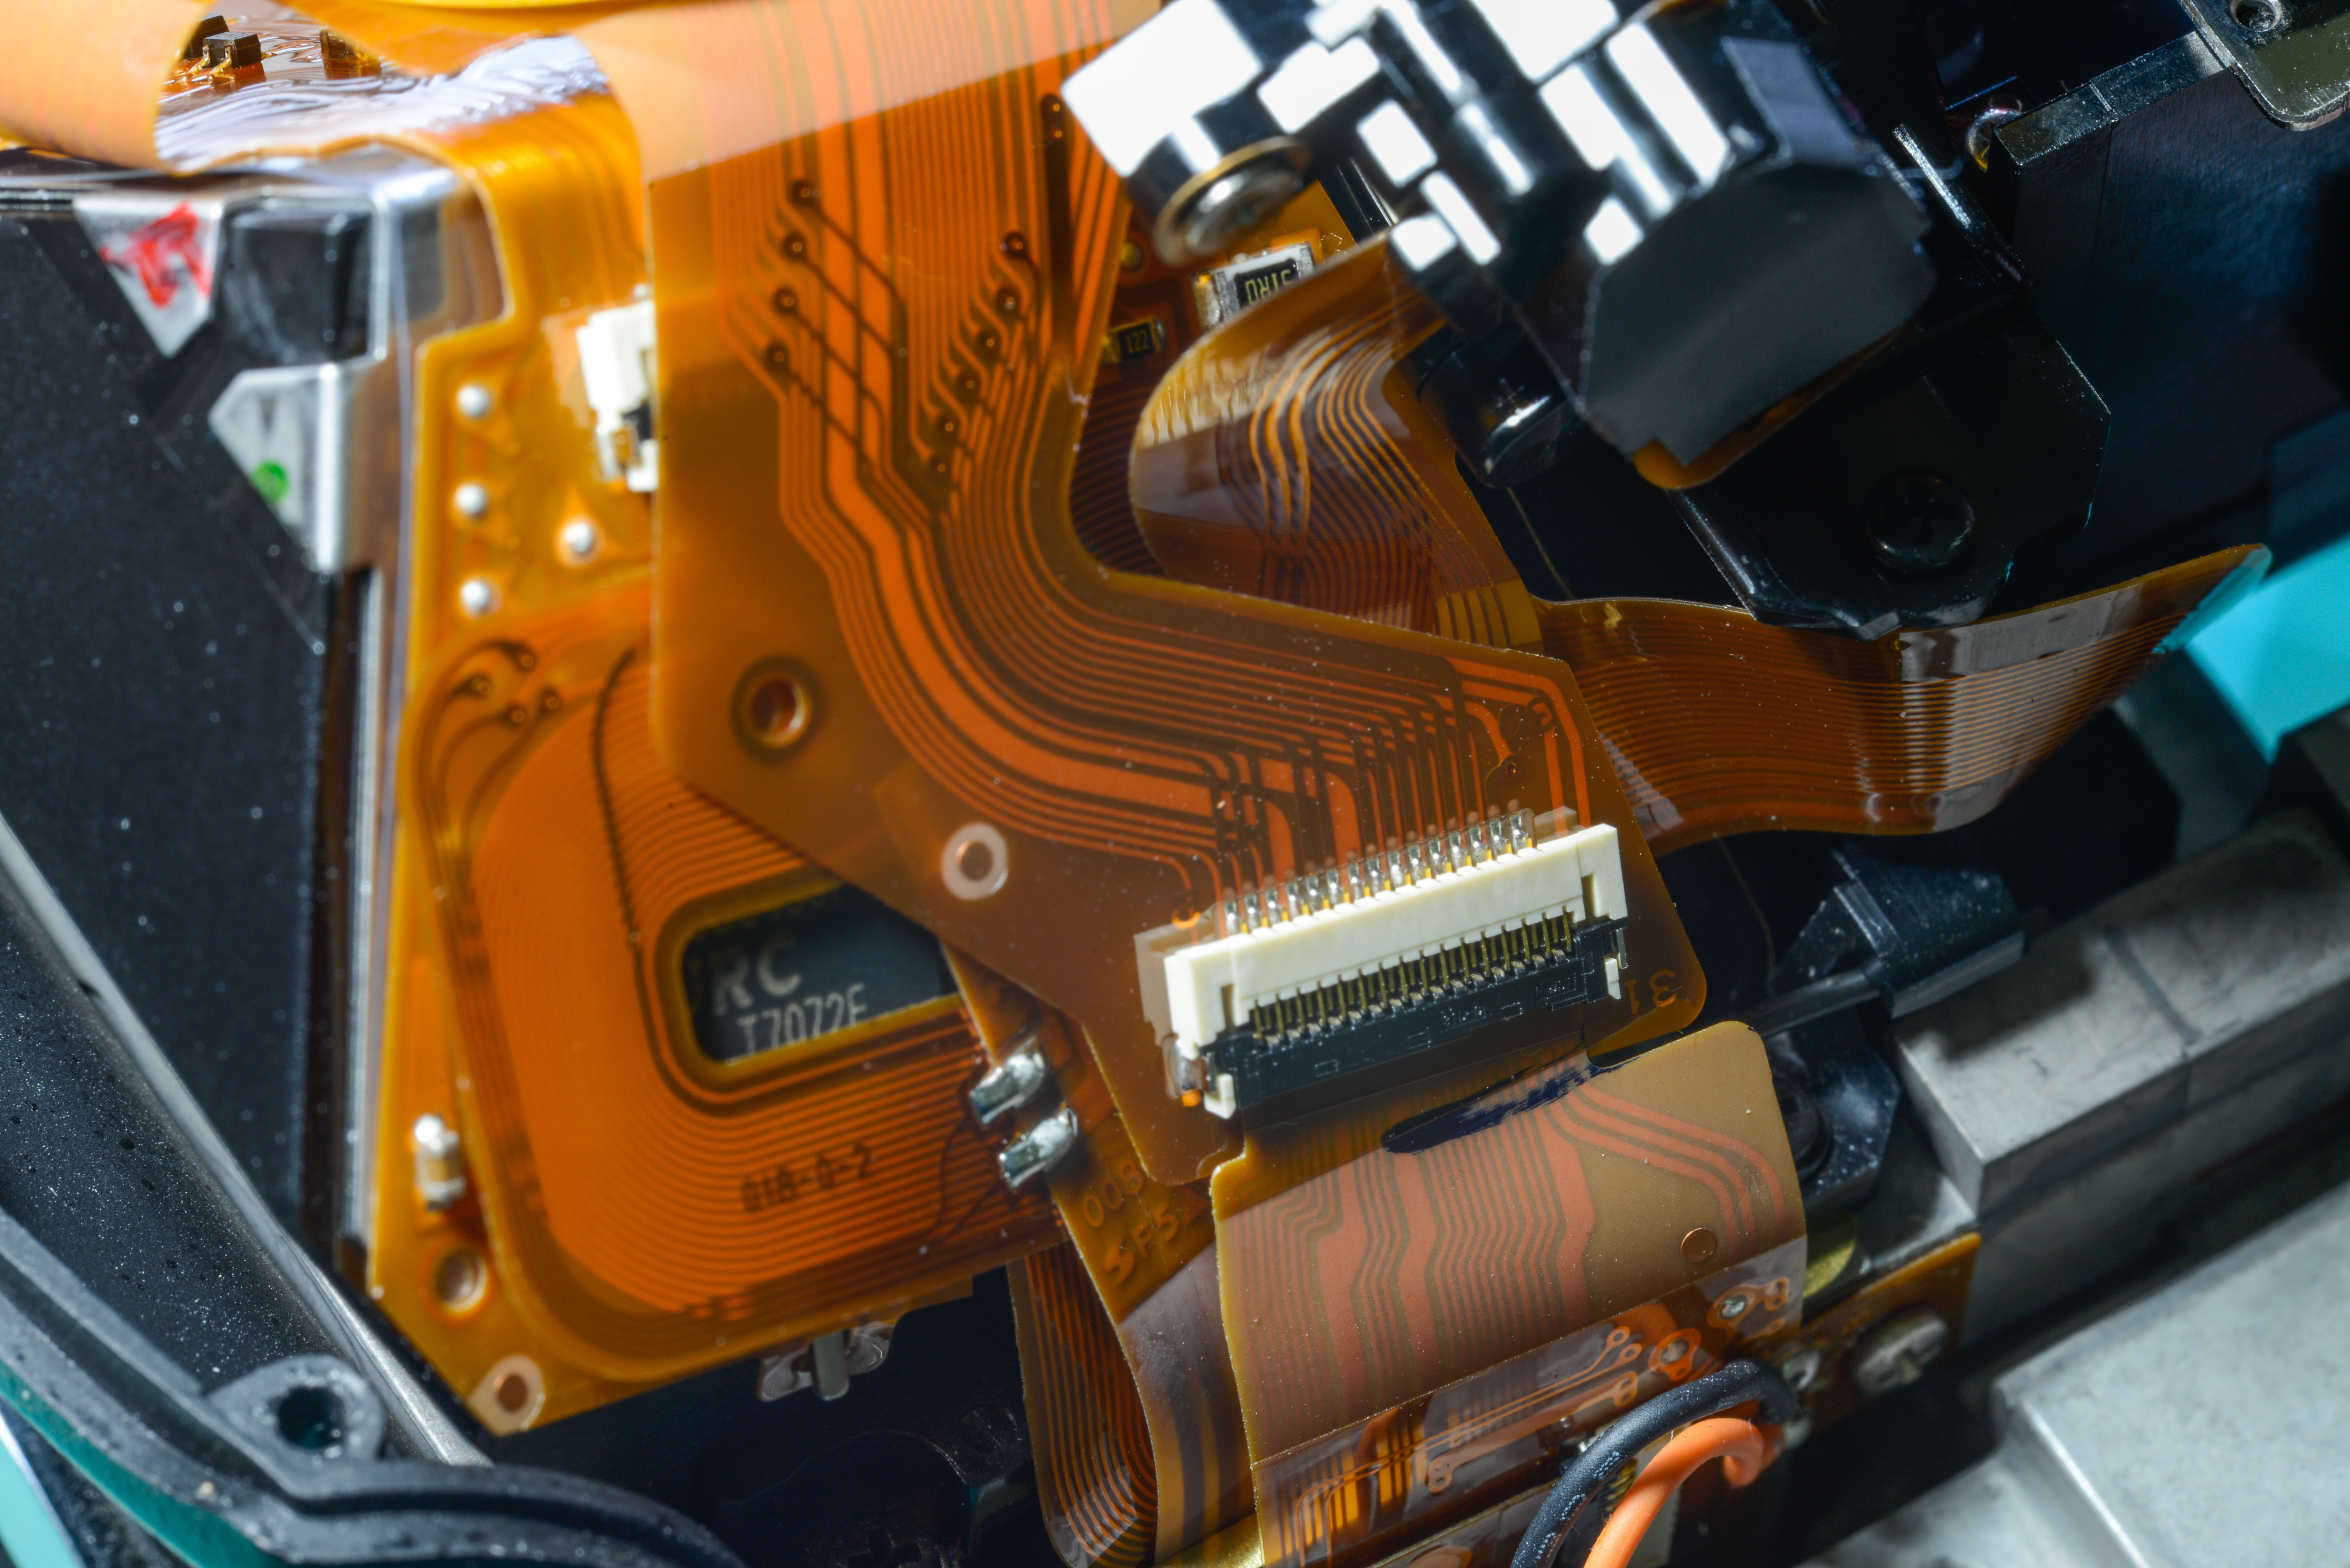
I mean, really lots… :)
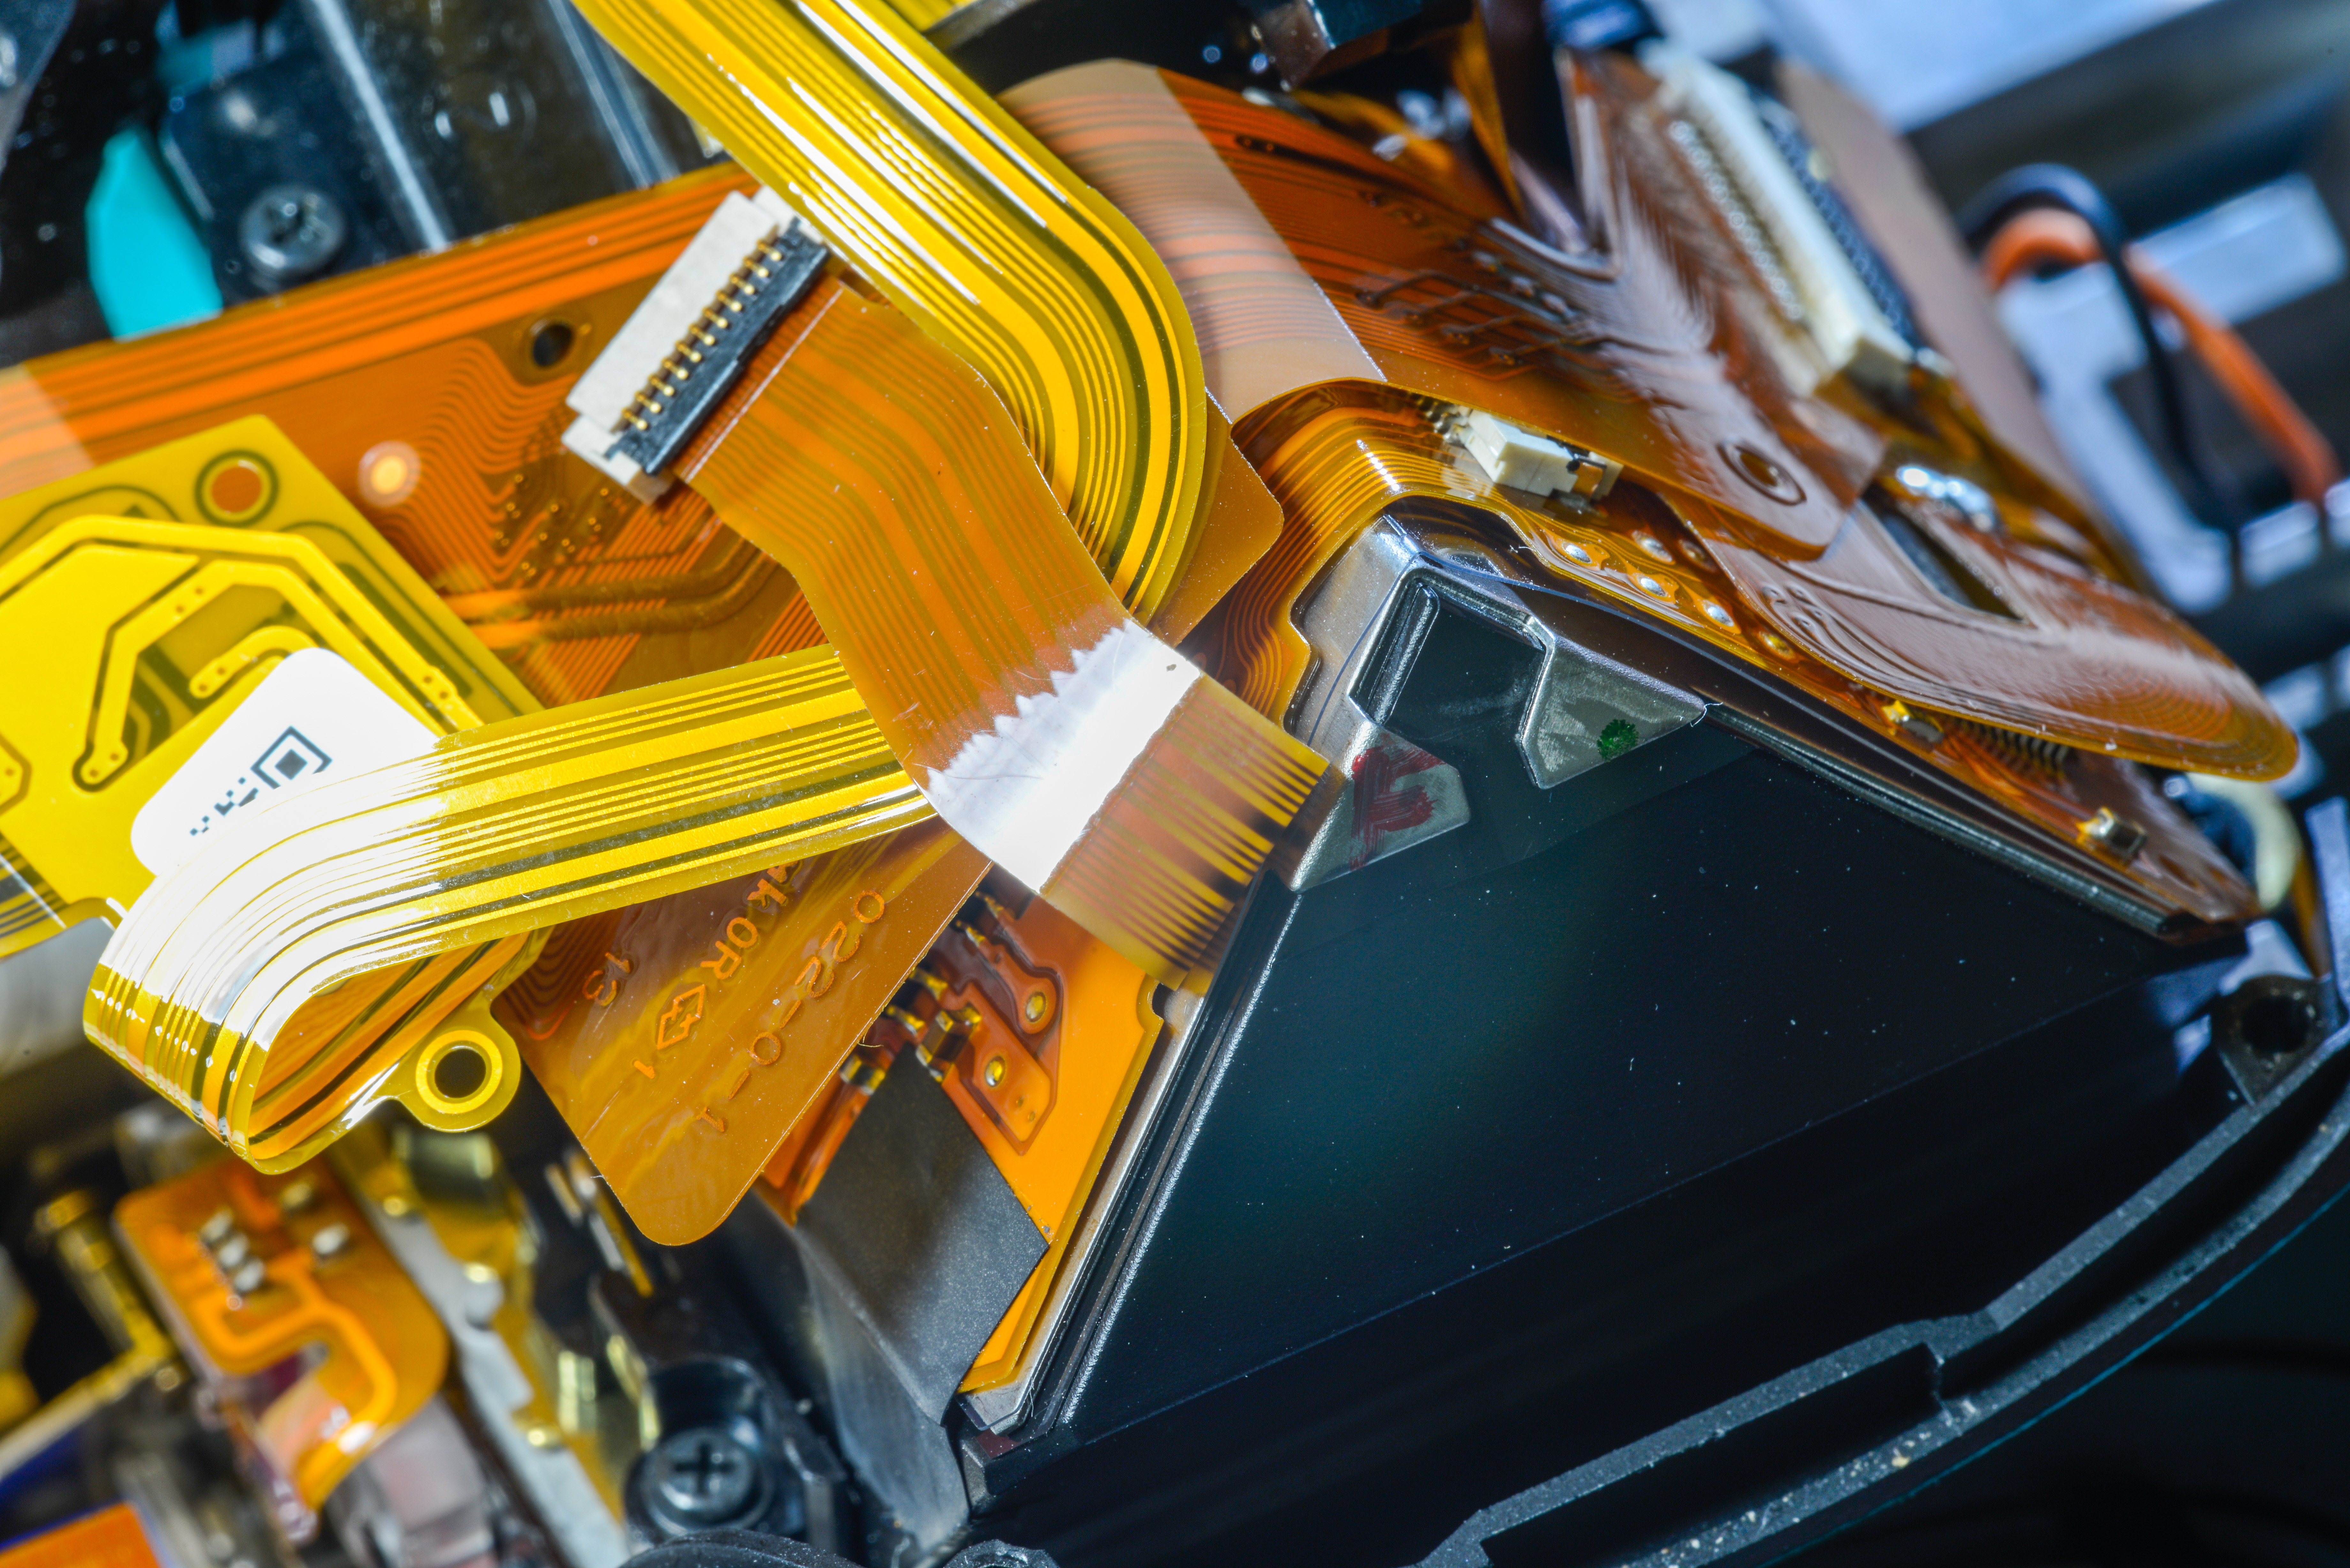
Nikon guys are not joking around with flat ribbon cables, have parts and connectors all over them.
Now let’s check microcontroller board:
Back:

Top:

No visible damages. I hope it’s connectors. Reconnected everything back and try again…
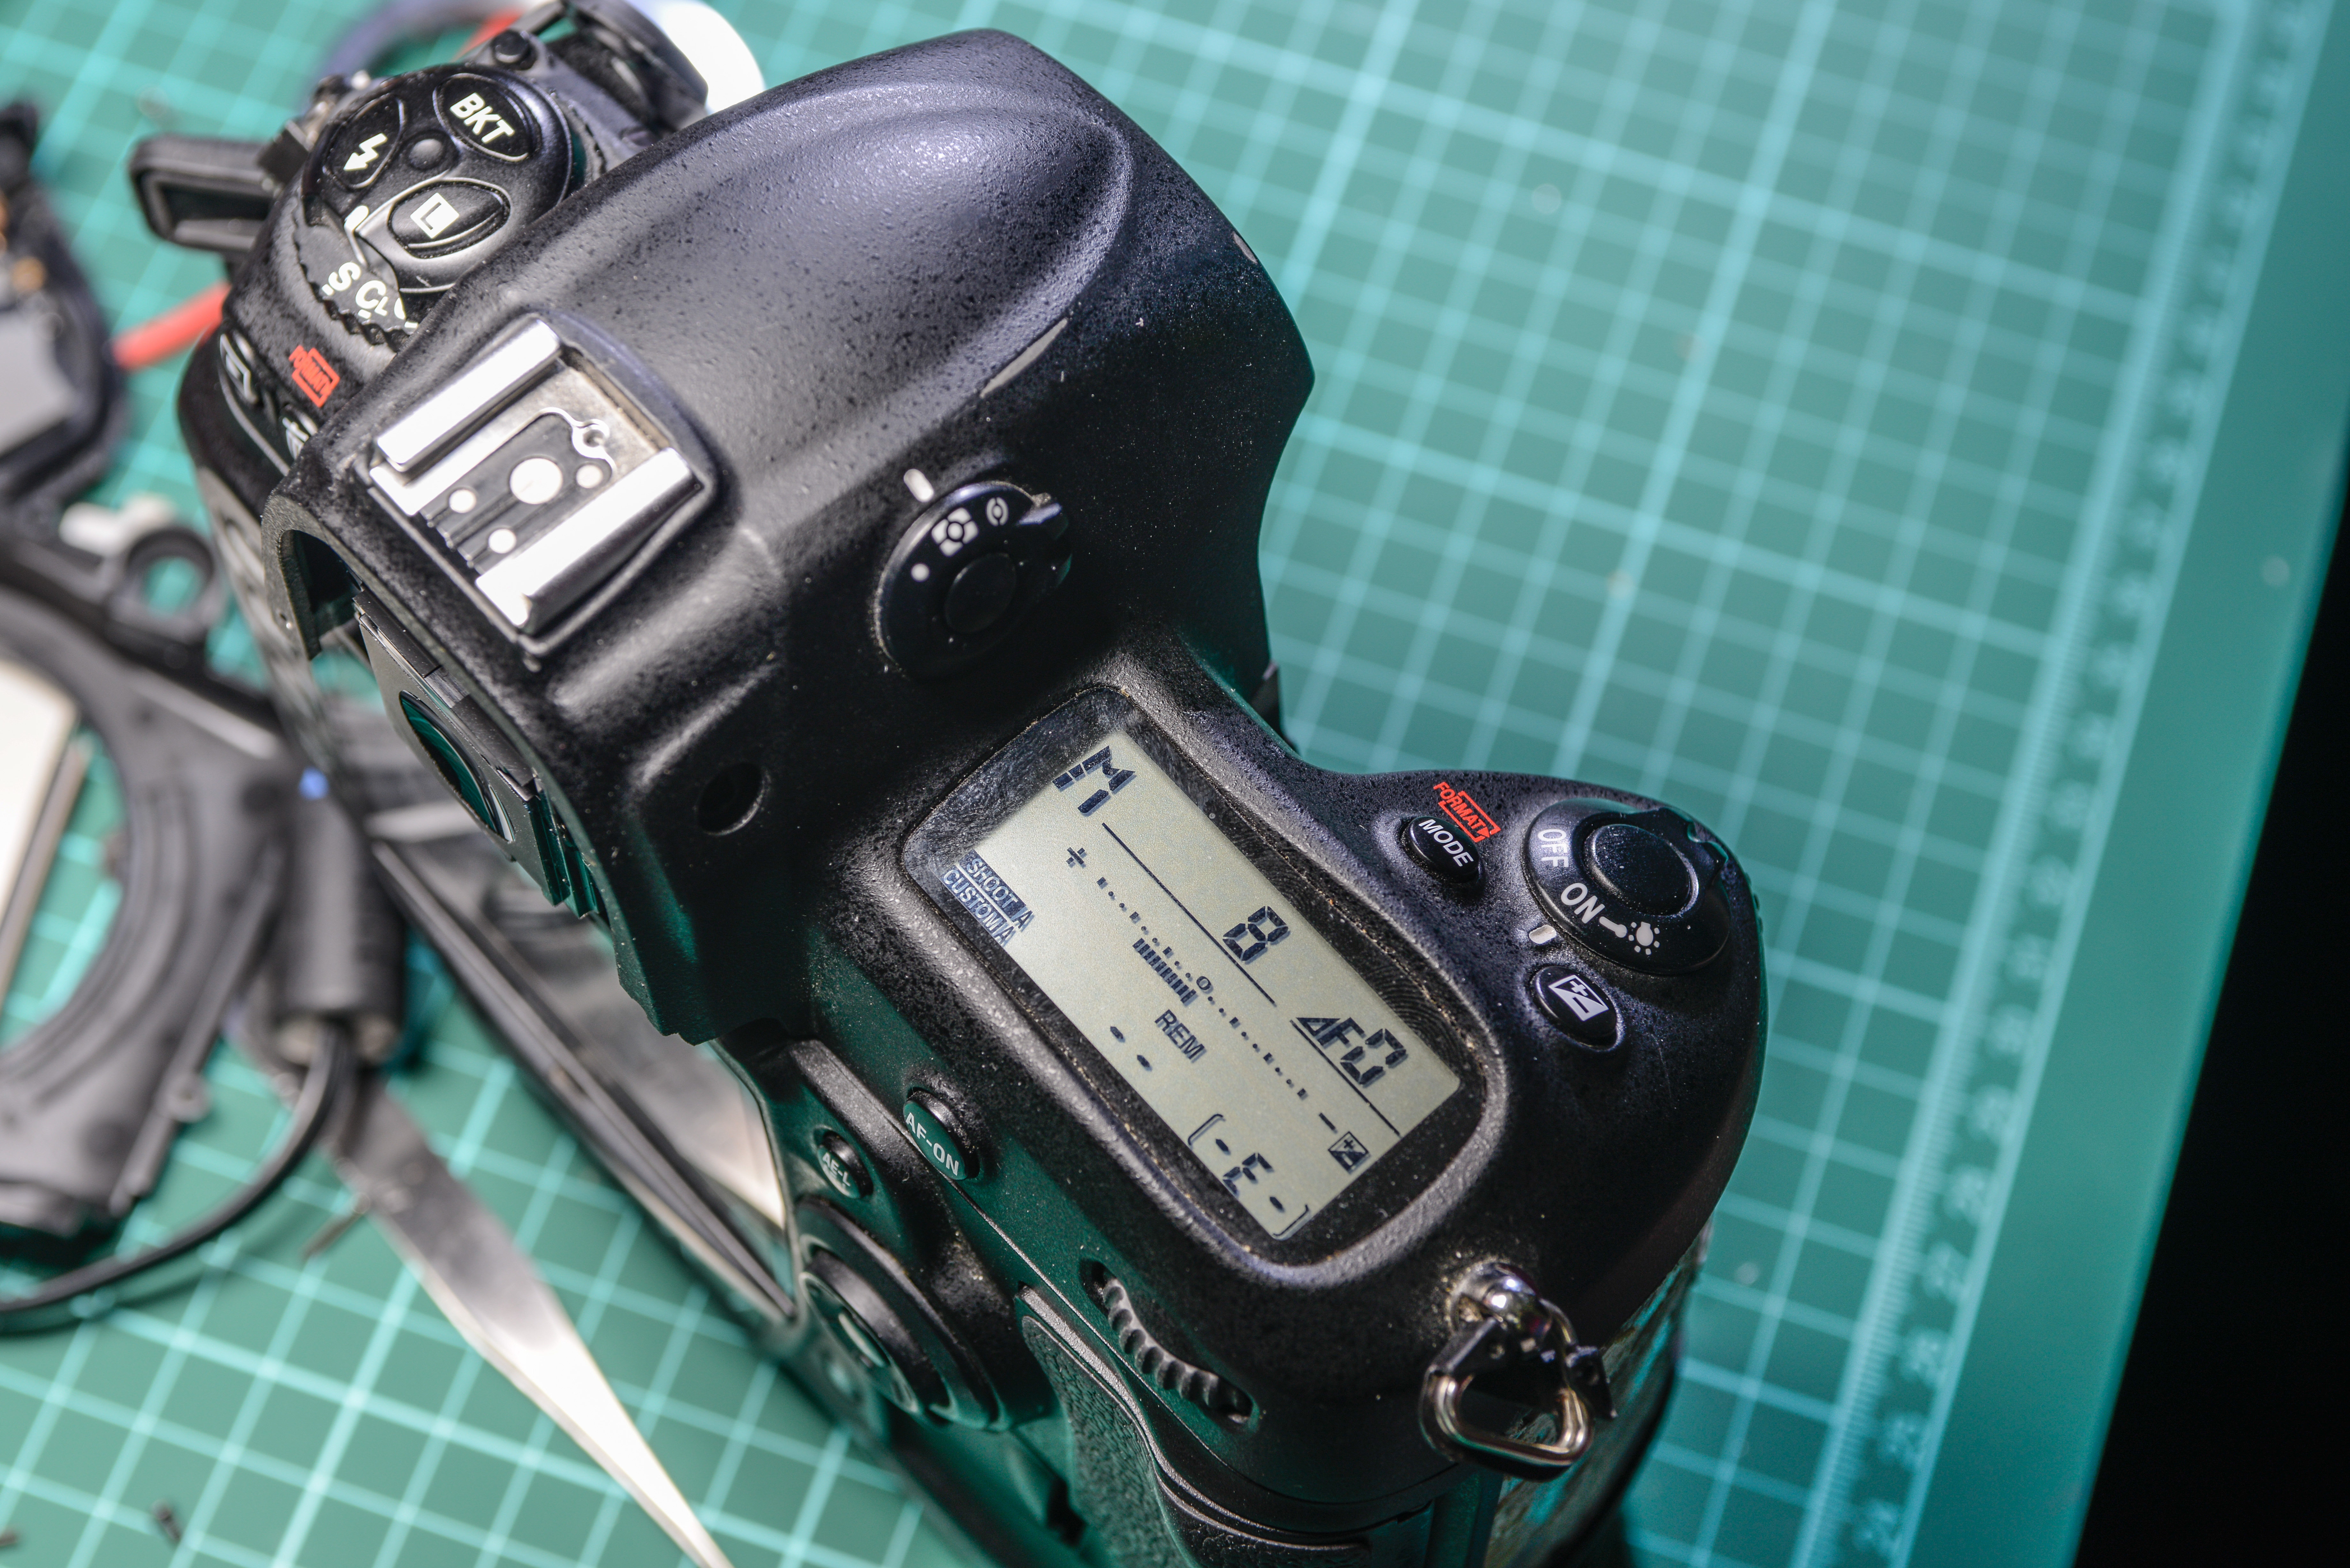
Great, now all LCDs working proplerly. So far we moving well with this repair, and there is a chance that camera might be useful again.
Quick shot to make sure electronics work as expected:

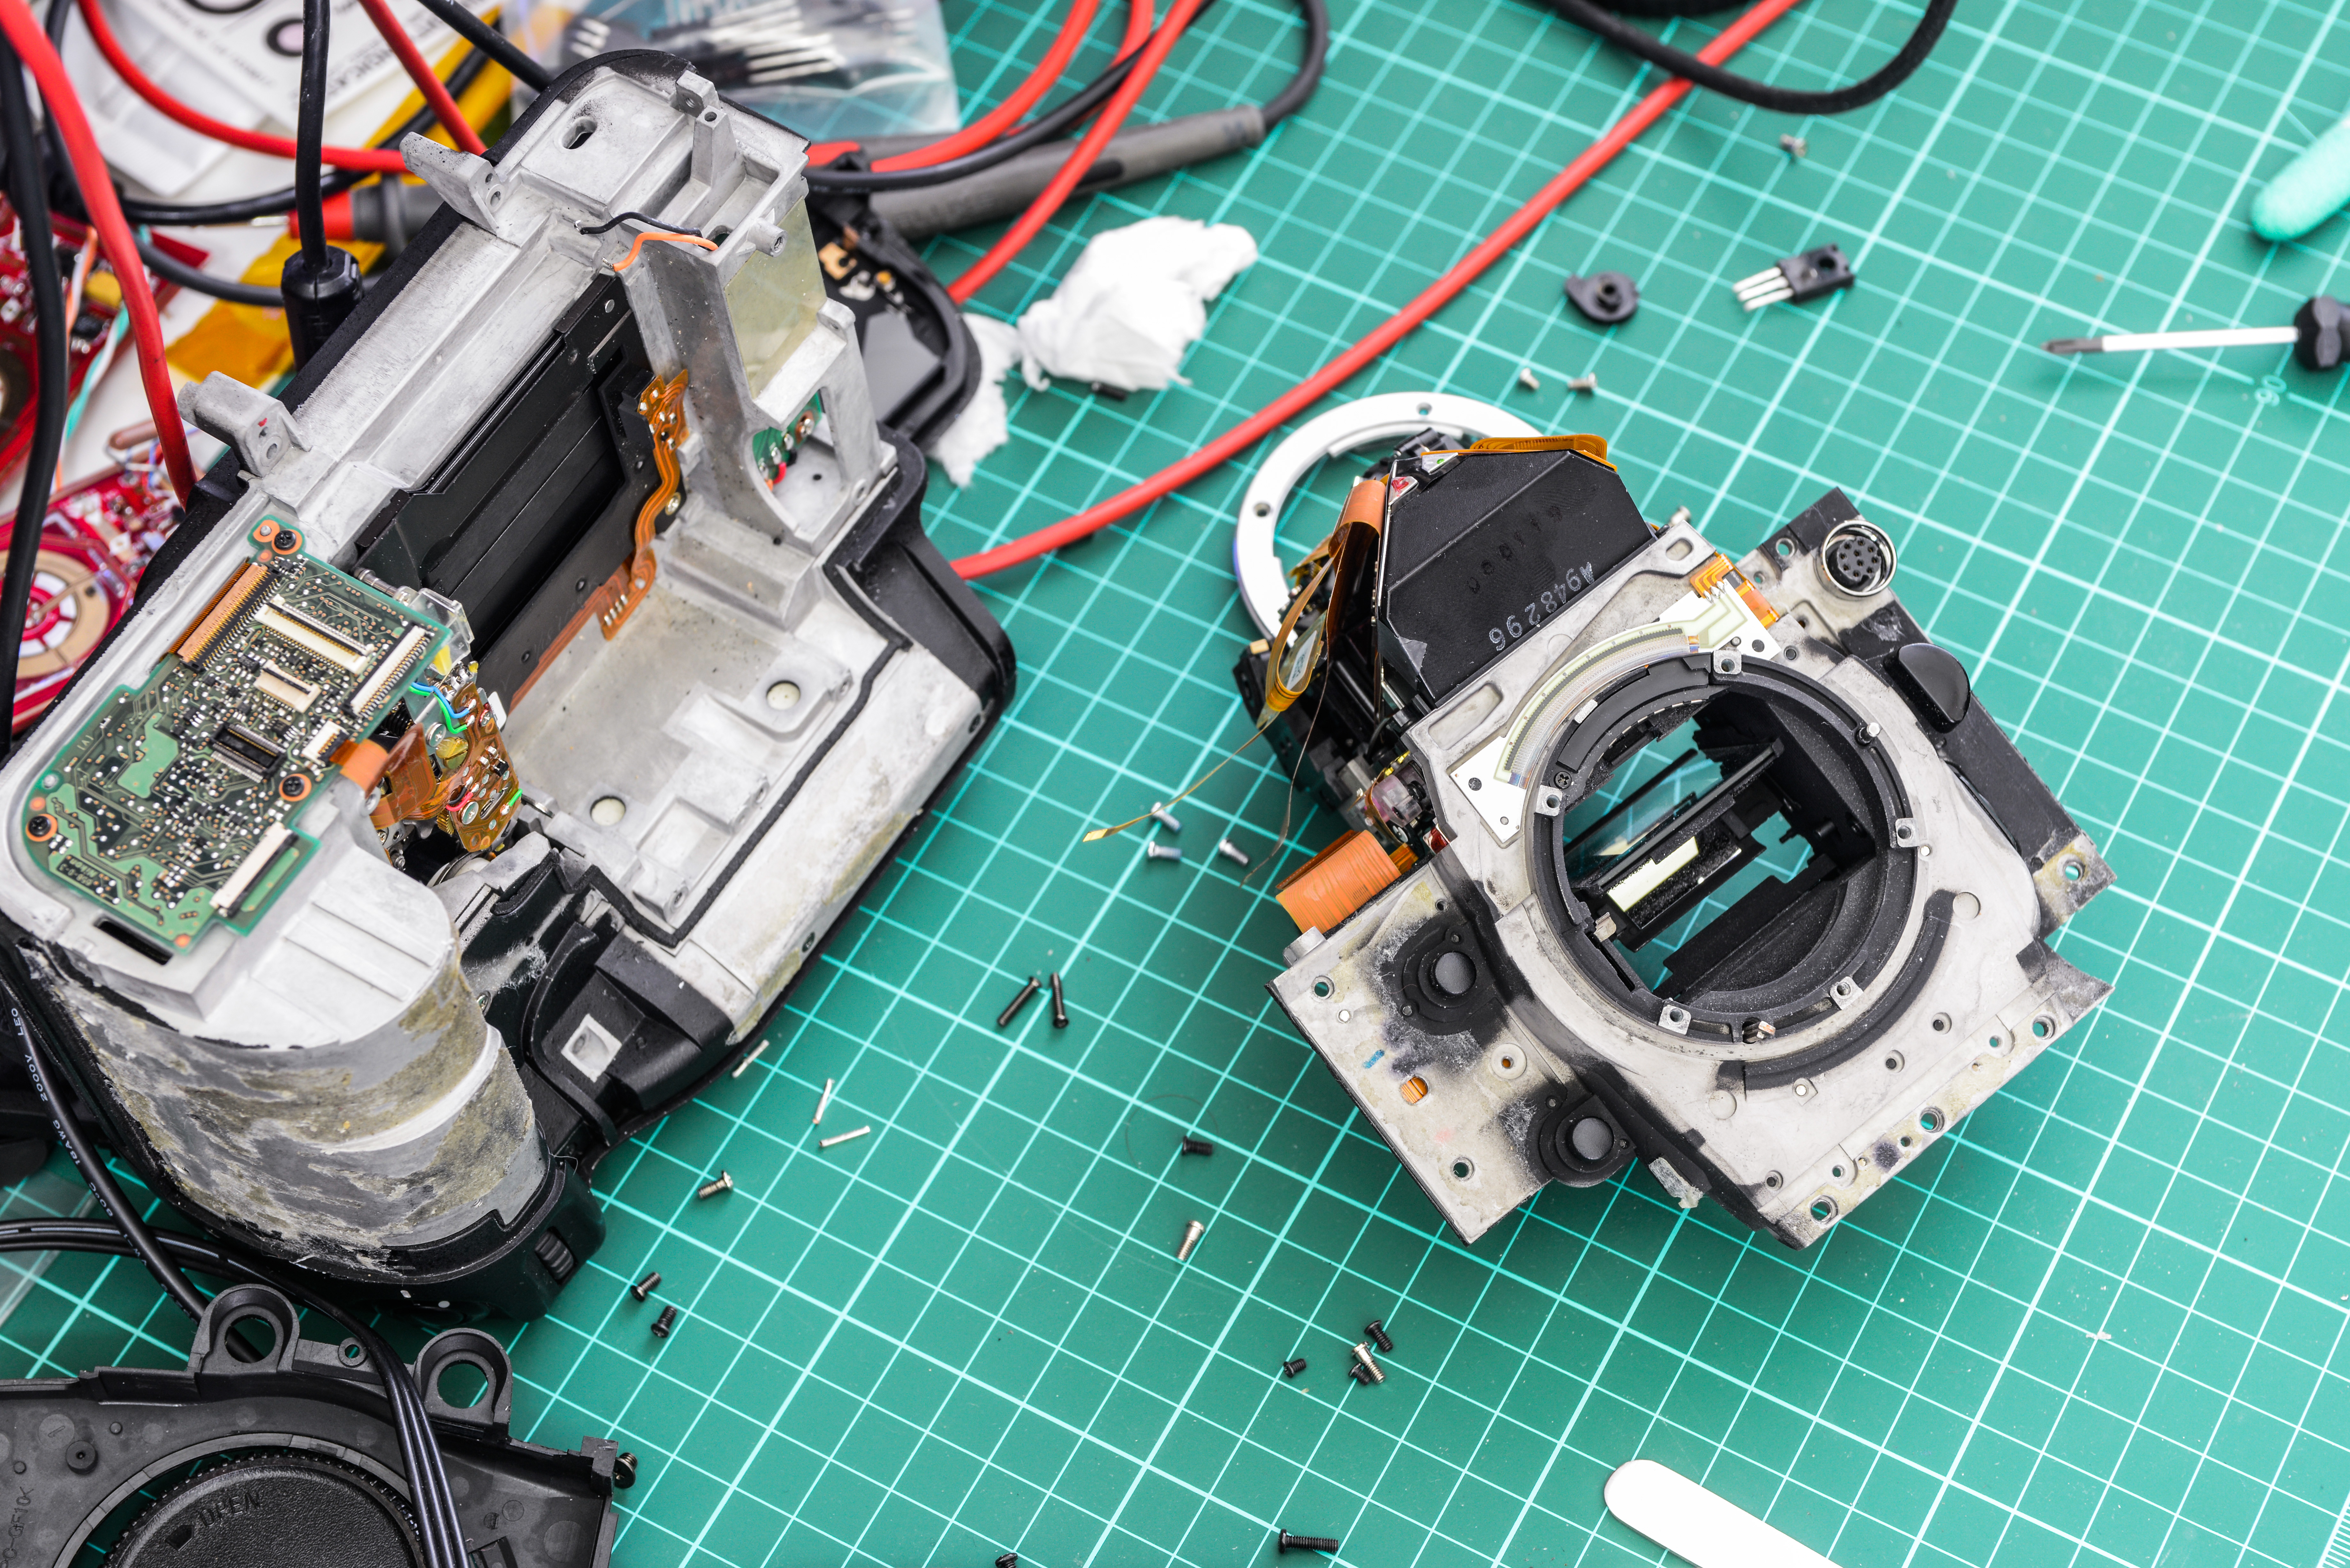
Now hard part – need to disassemble most of camera to get ahold of that mirror locking up issue, as it’s barely usable in such condition just yet.
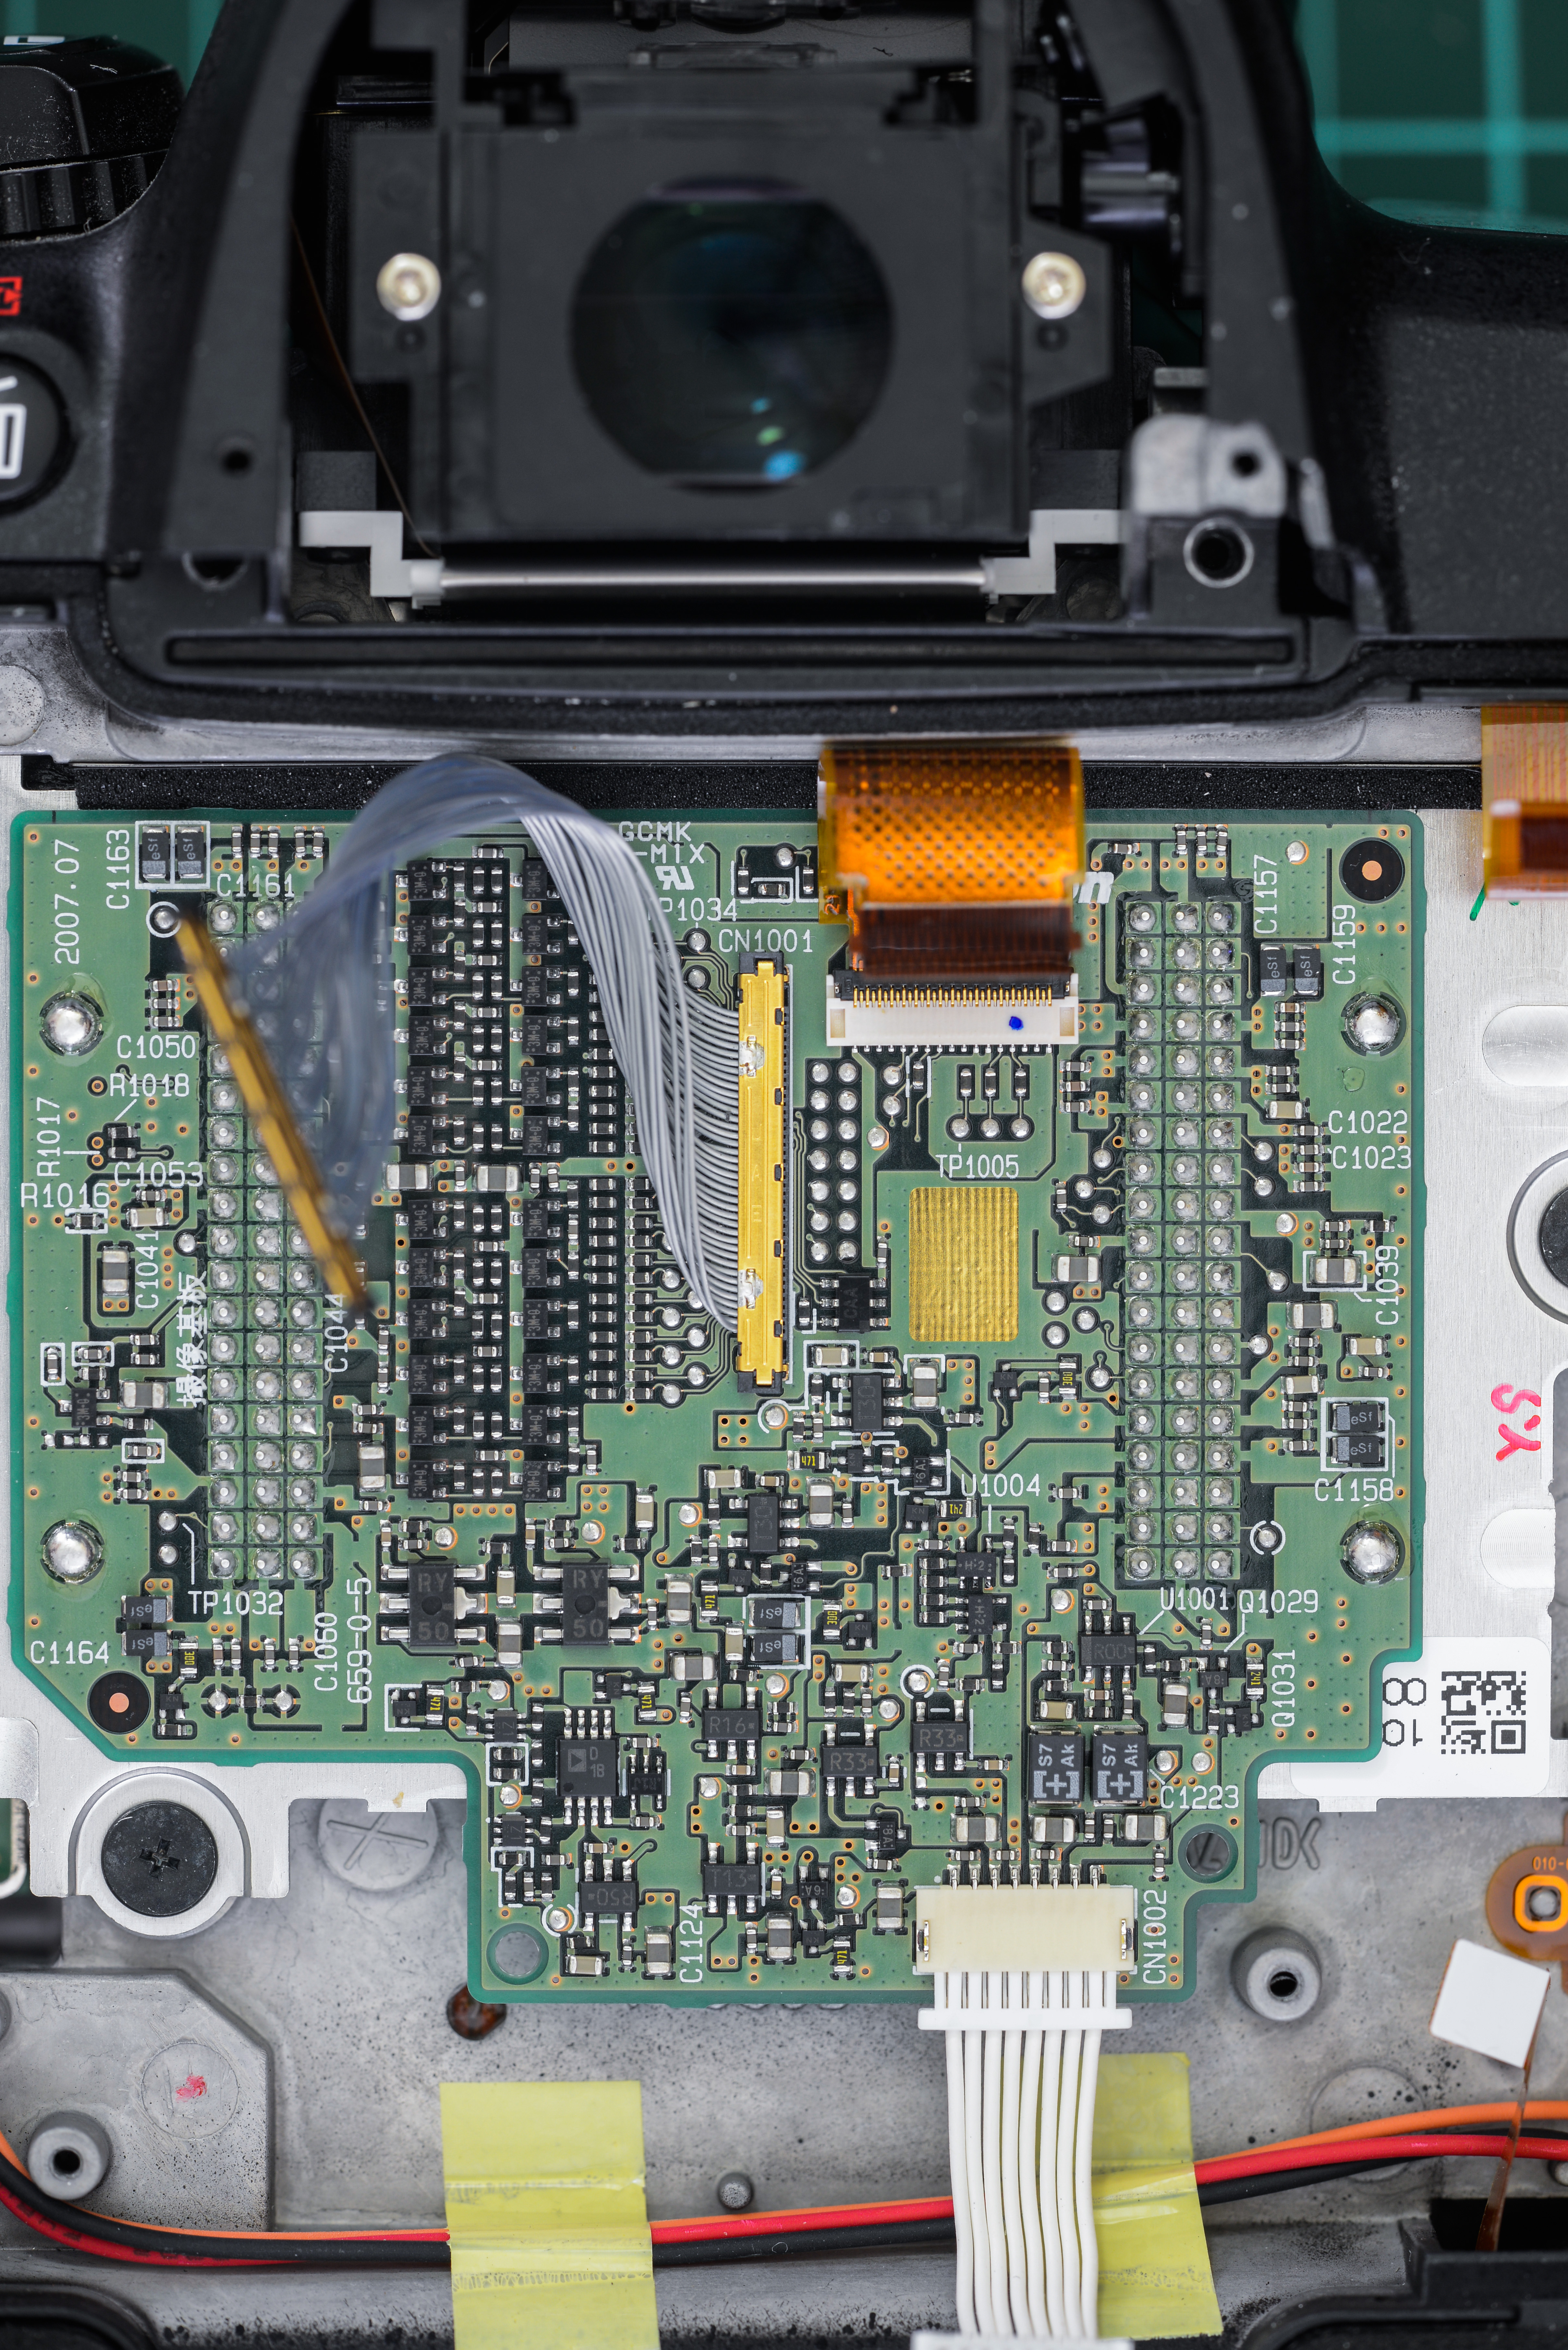
Board with sensor is located under aquisition/processing board.

DG board face:
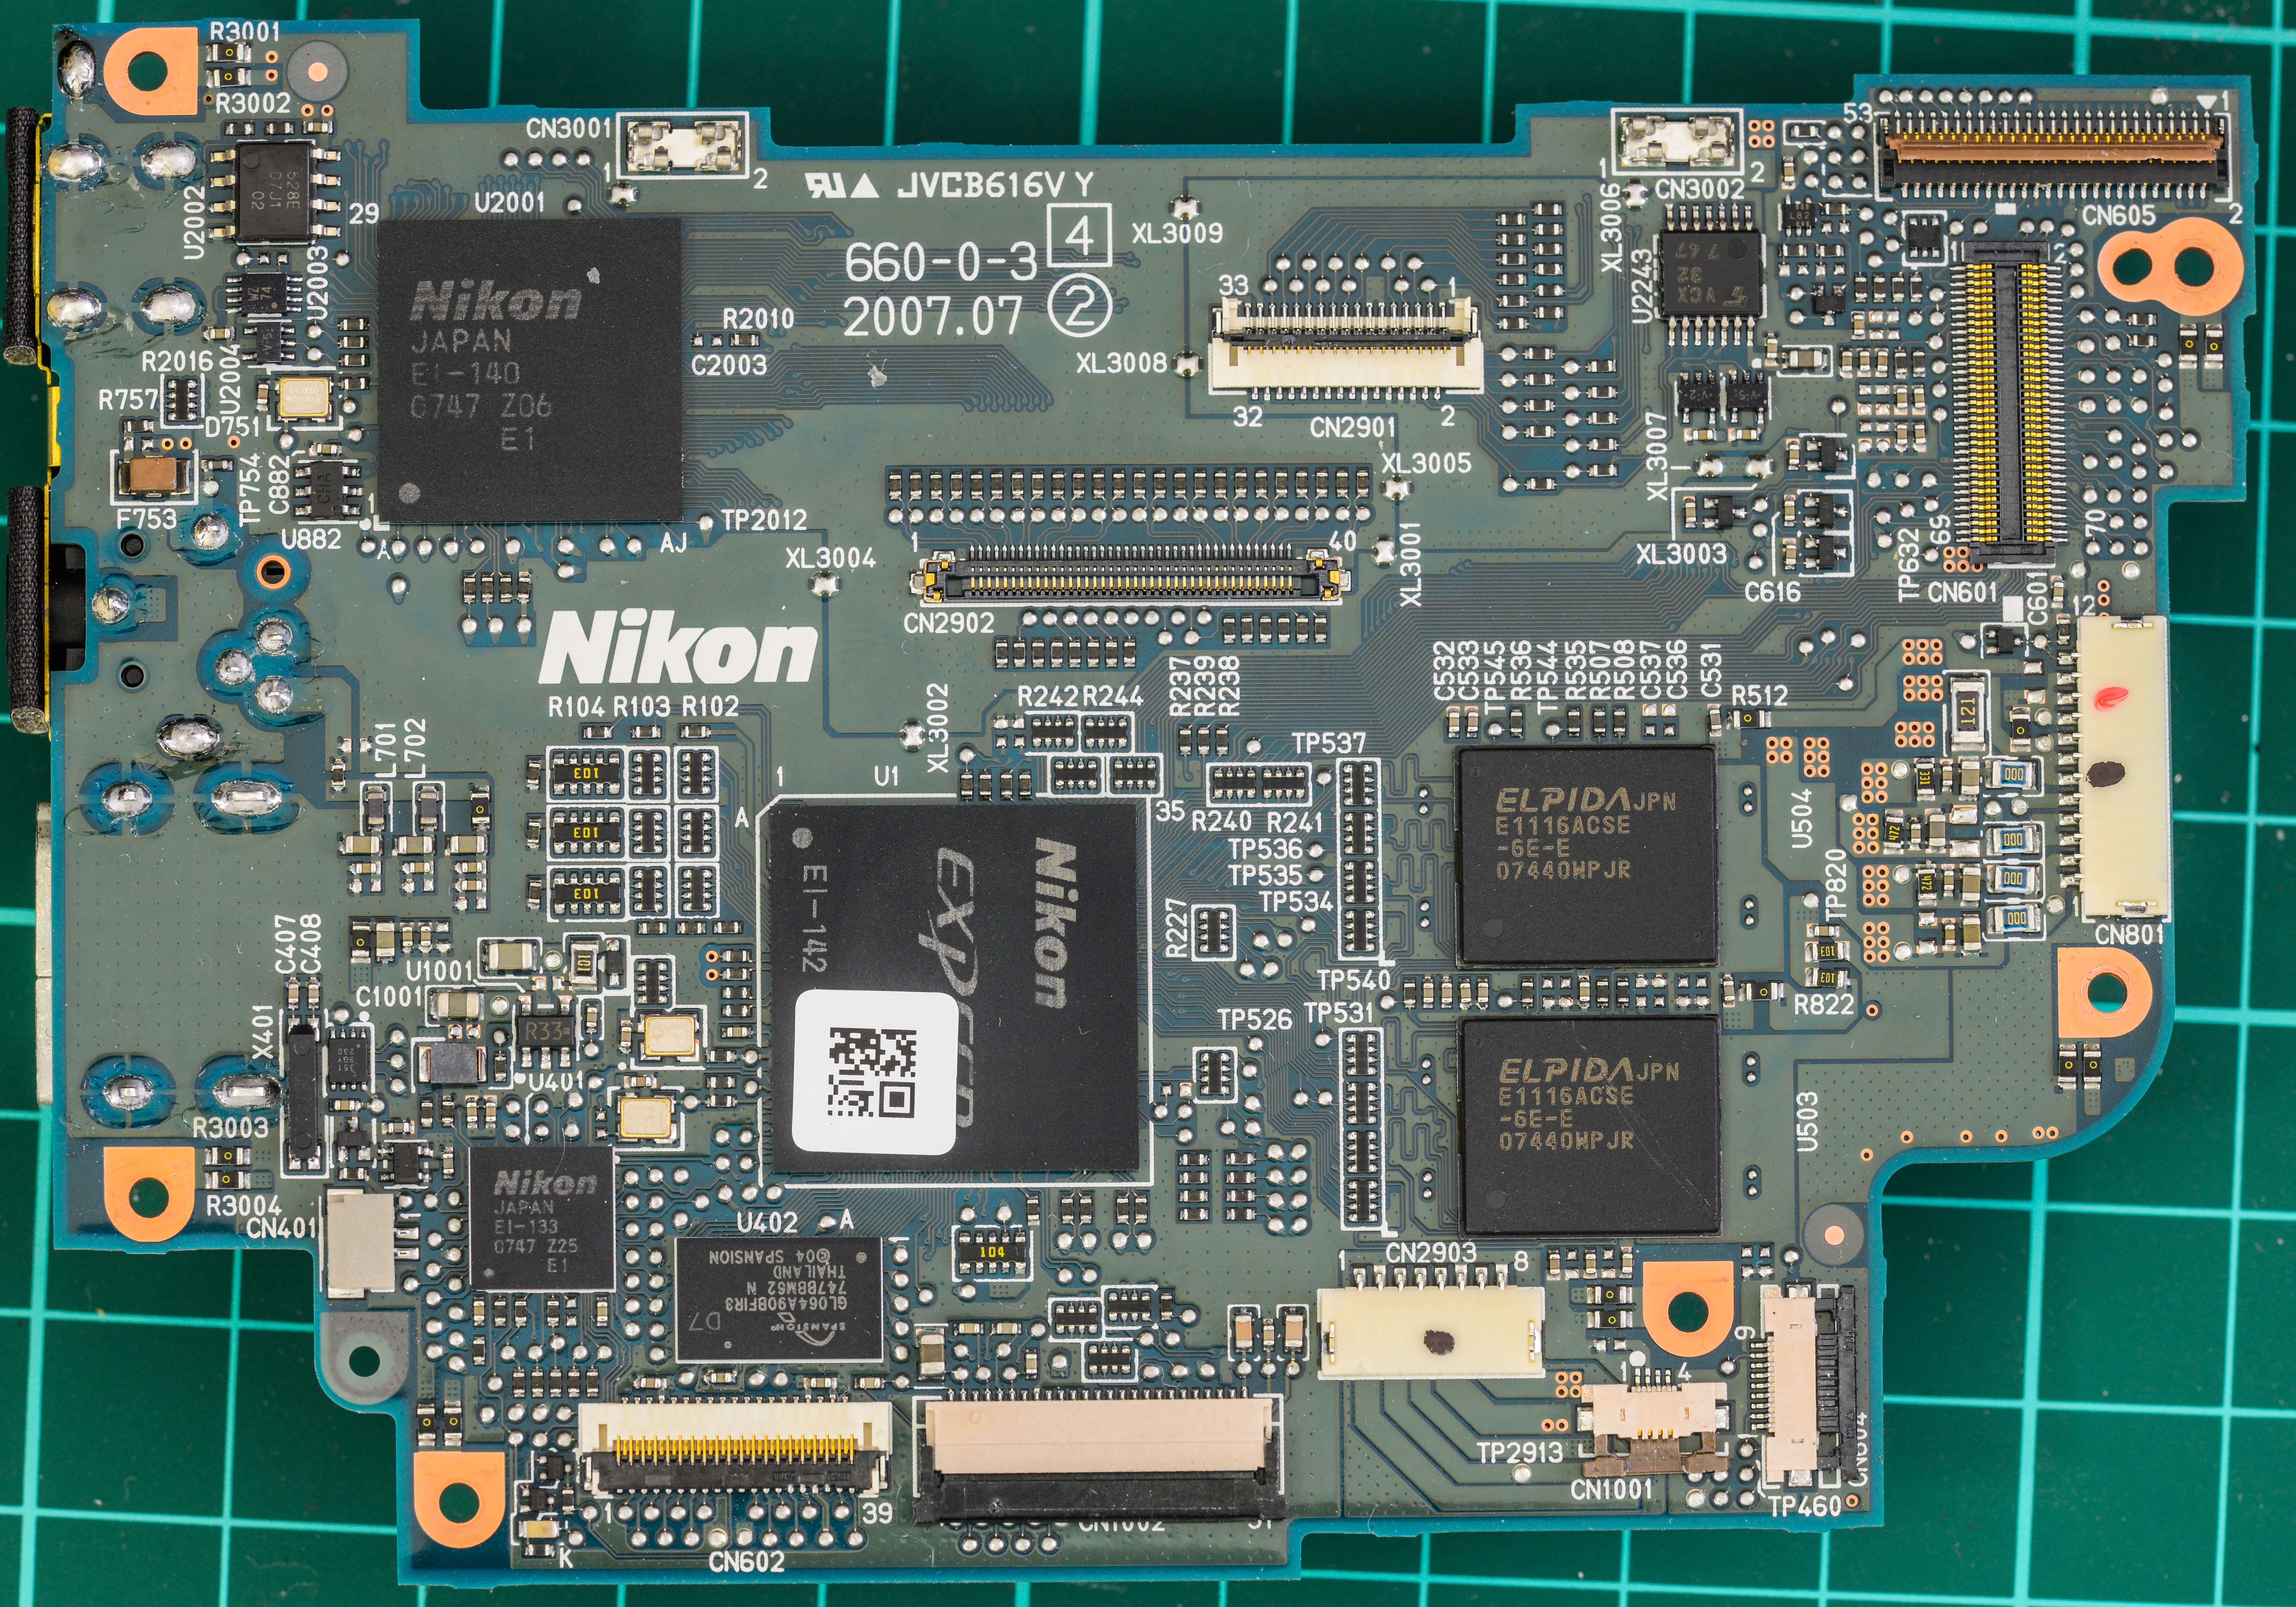
DG board back:
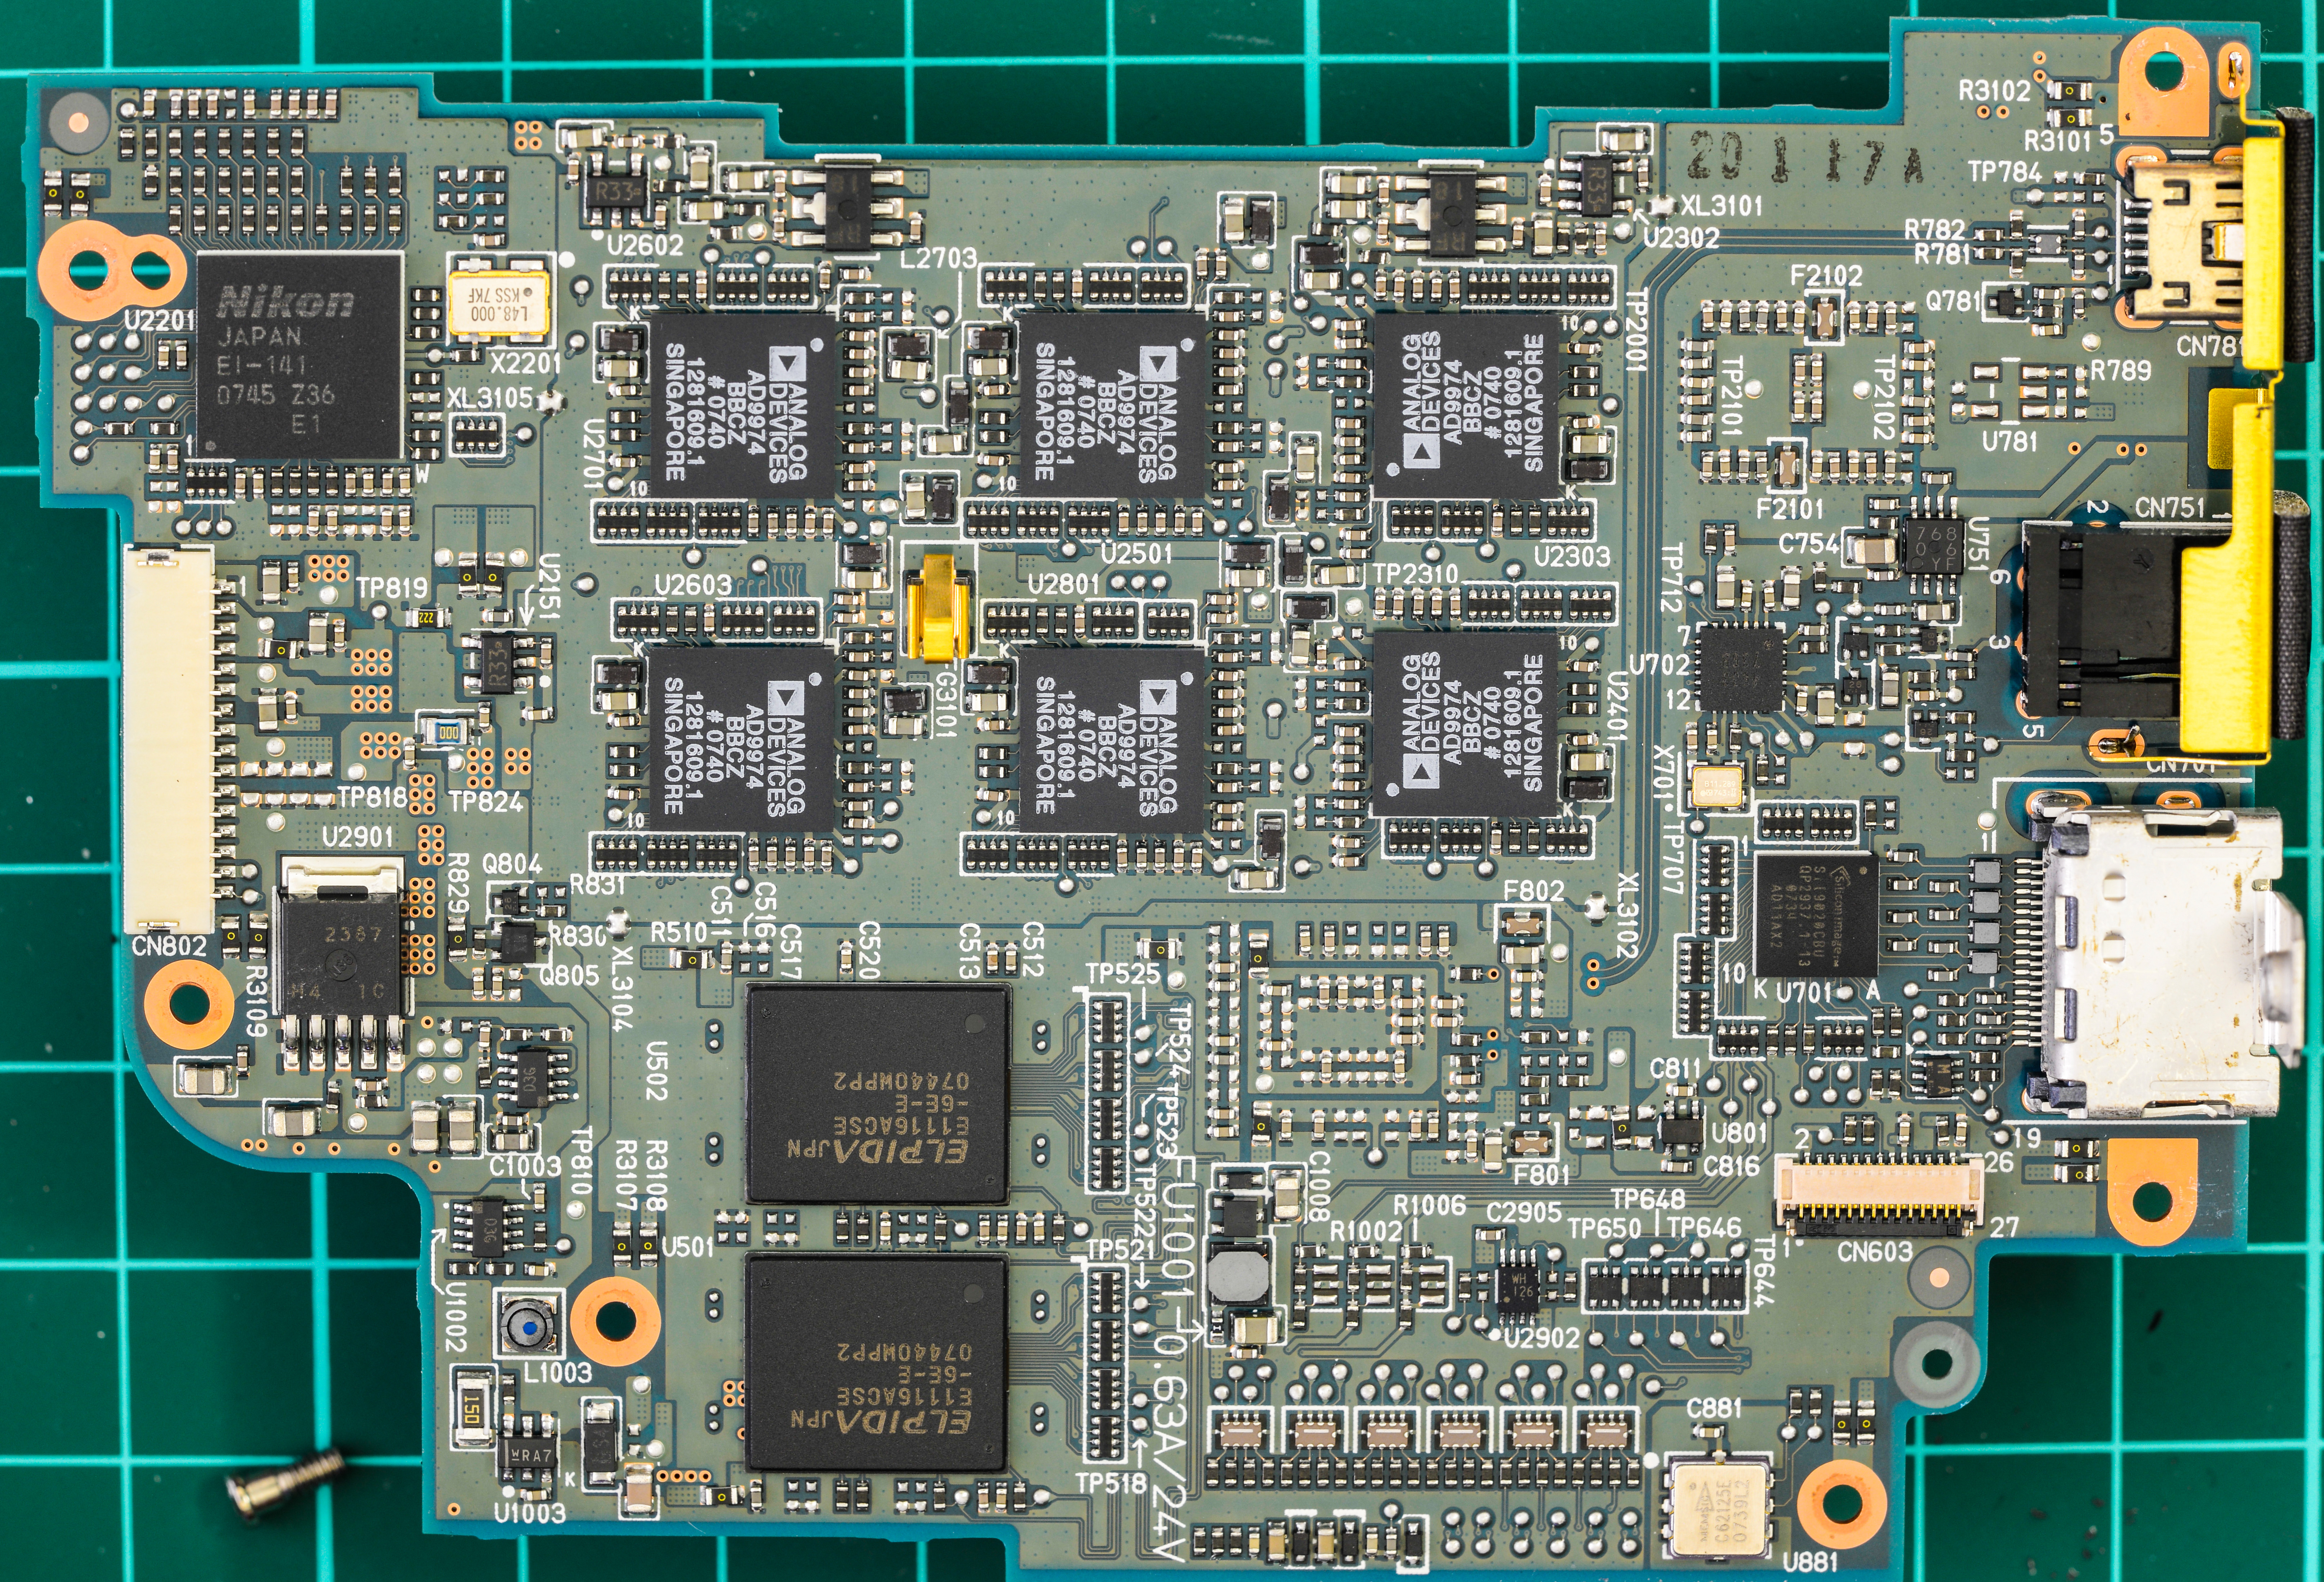
D3 using six ADI AD9974 signal processors, each of them able to capture 2 channels of 14-bit CCD data at 65 MSPS.
Probably they are capturing data from 12MP CMOS sensor via 12 channels to allow that crazy 9 frames per second camera speed. :)
And back of sensor board:
That’s it for today, time for sleep, it’s 2.08am already.
Not a bad start.
Day 2, mechanical repairs
Disassembled body more, found two frame damages.
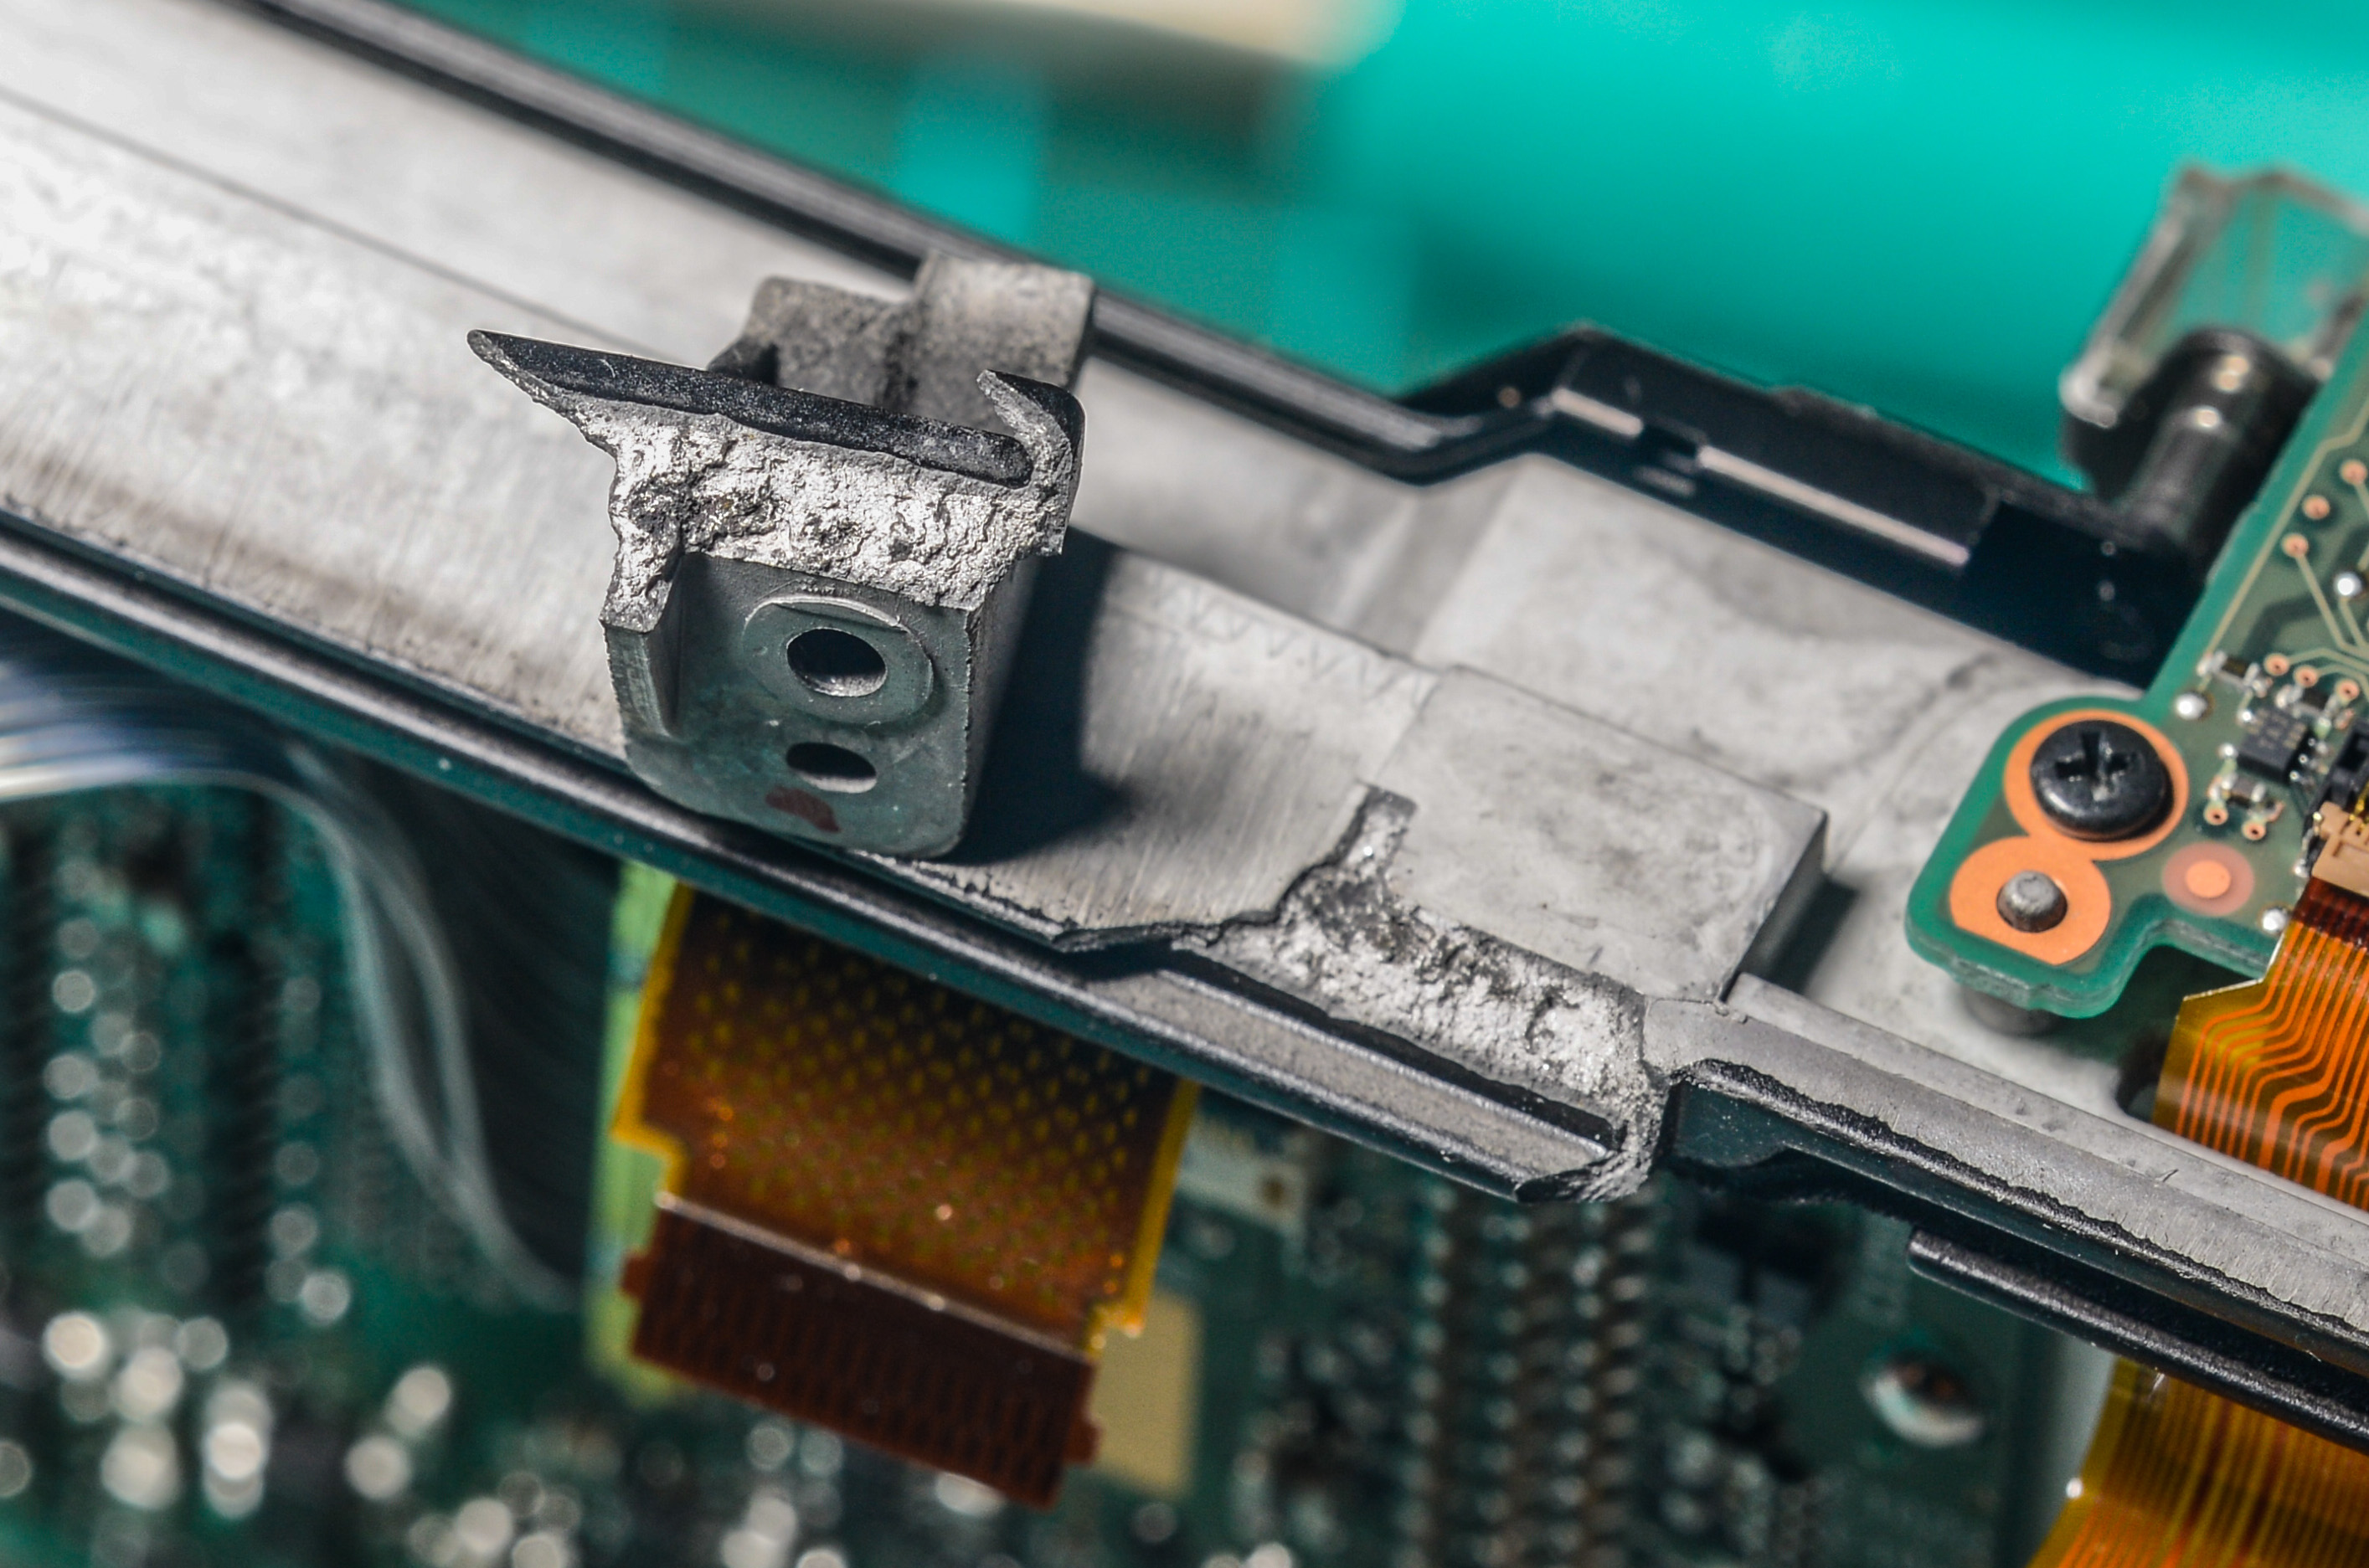
Ear which mounts eye piece thru main magnesium body to front block with lens mount together have one of it’s “ears” broken. It was holding there just on nothing and fell apart right away.
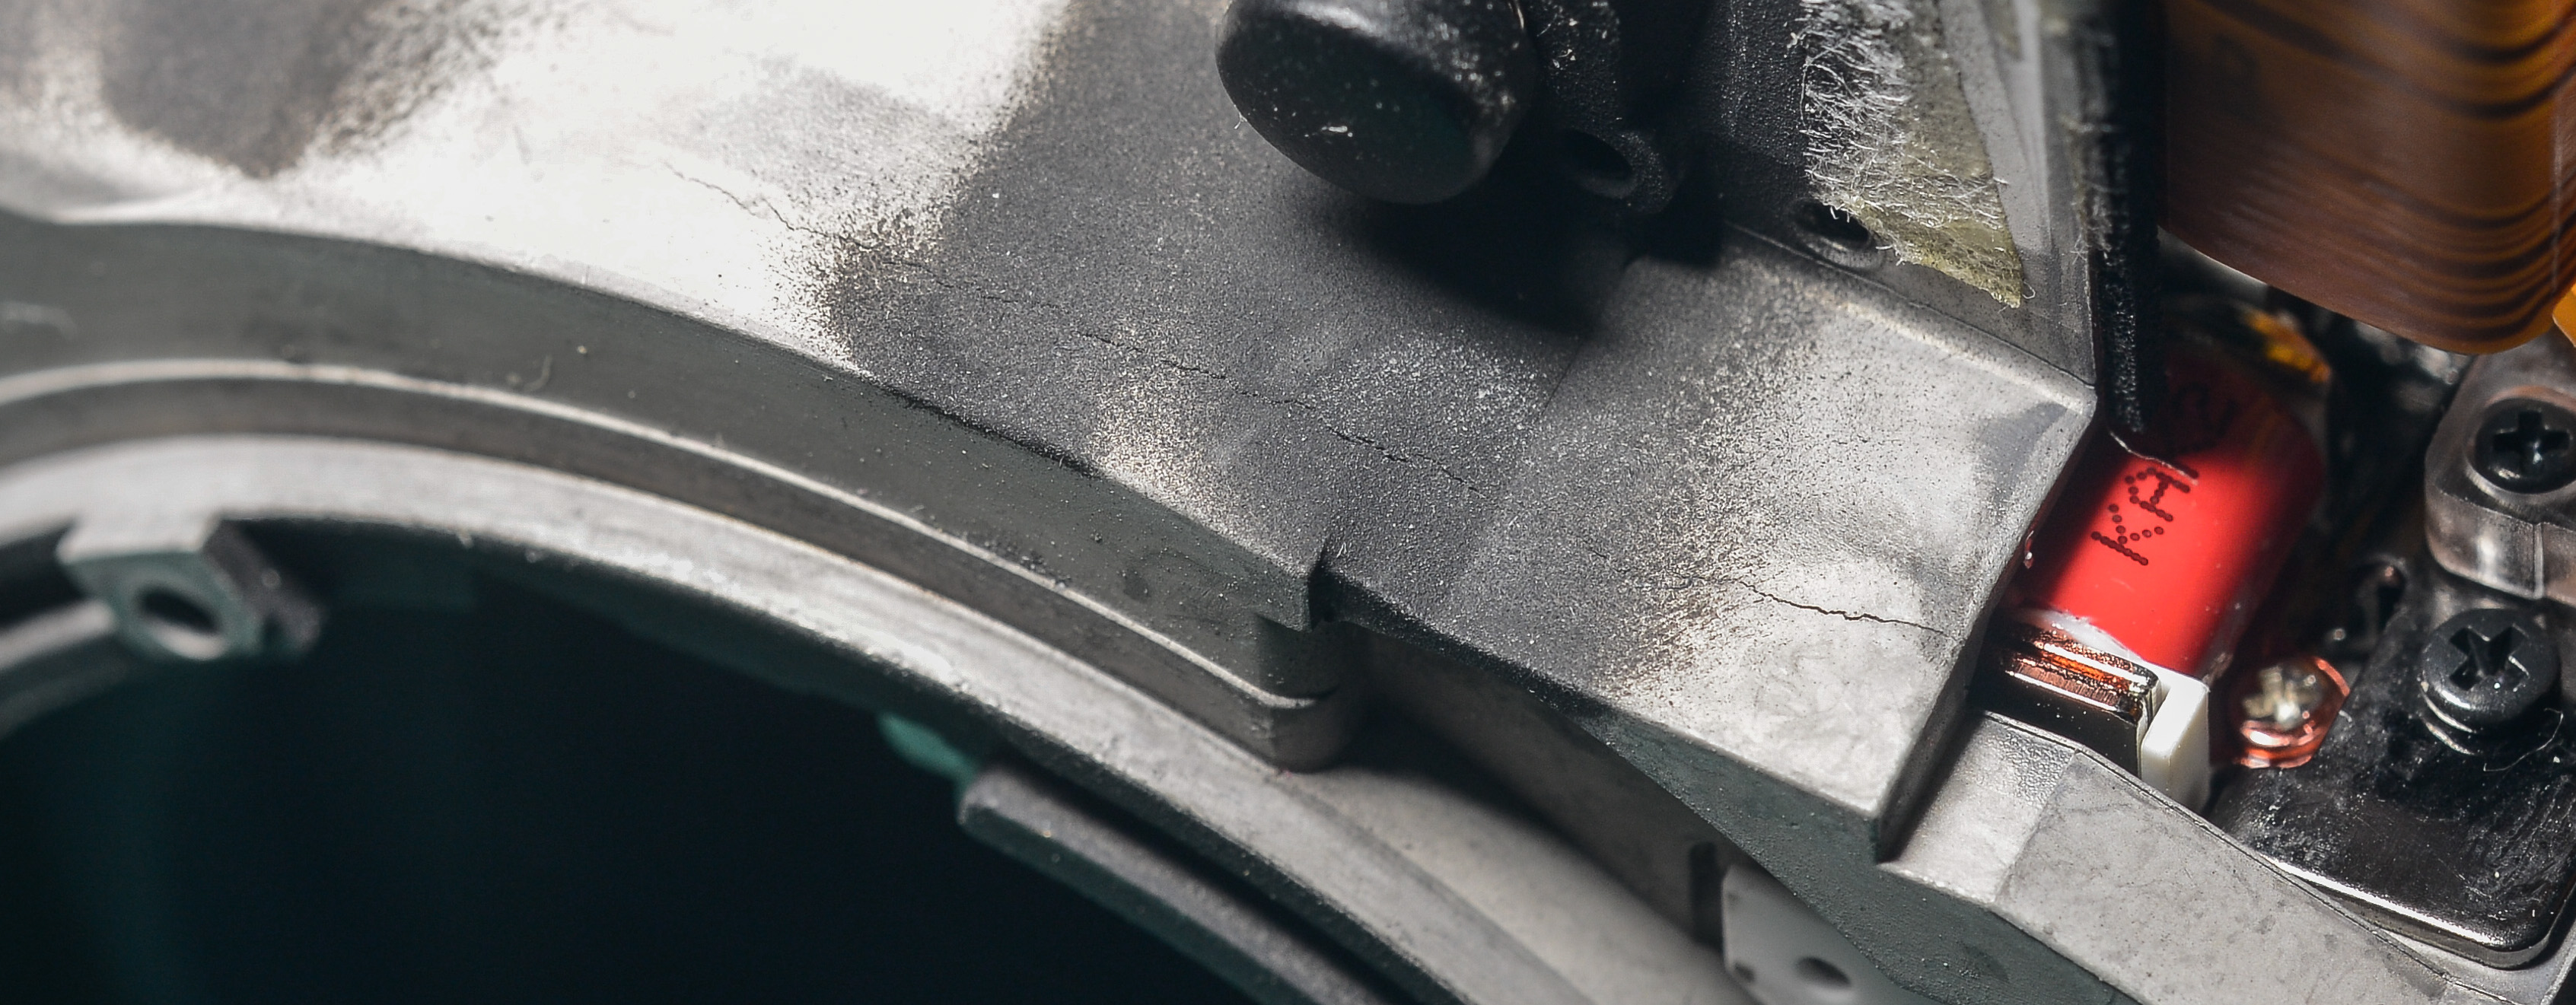
Second is a crack on lens mount block.
Magnesium is a light and nice metal for gadgets, but one of it’s drawbacks is fact that it’s fragile. Seems like this camera had pretty decent impact which caused these damages and likely some mechanical parts to get misaligned.
That could explain why it works fine sometimes, and locks up next time. Lot of tolerances in such precision gear like DSLR are in microns, not even millimeters…
Any ideas, except super gluing whole thing?
I think acquiring another dead D3 to get frame, or even worse getting new frame would cost way more than I would like to spend.
That’s it for today…
Looks like it’s not as easy as replacing one 1$ PNP transistor here :)
Day 3, shutter repair
Tested shutter today, it works good. It’s the front body issue with mirrors and stuff. I’ll have to record a video of full front body part disassembly, as I will never findout after where which screw or pedal goes :-DD
Bought copycat battery (actually two by mistake :palm:), noname charger on ebay. Hope I will have camera fixed by time that arrive.

Looks scary…
Also I found dodgy diode. It seem to be working, 0.74V Vf, but it was definitely heating up before. Not sure if it’s “normal”.
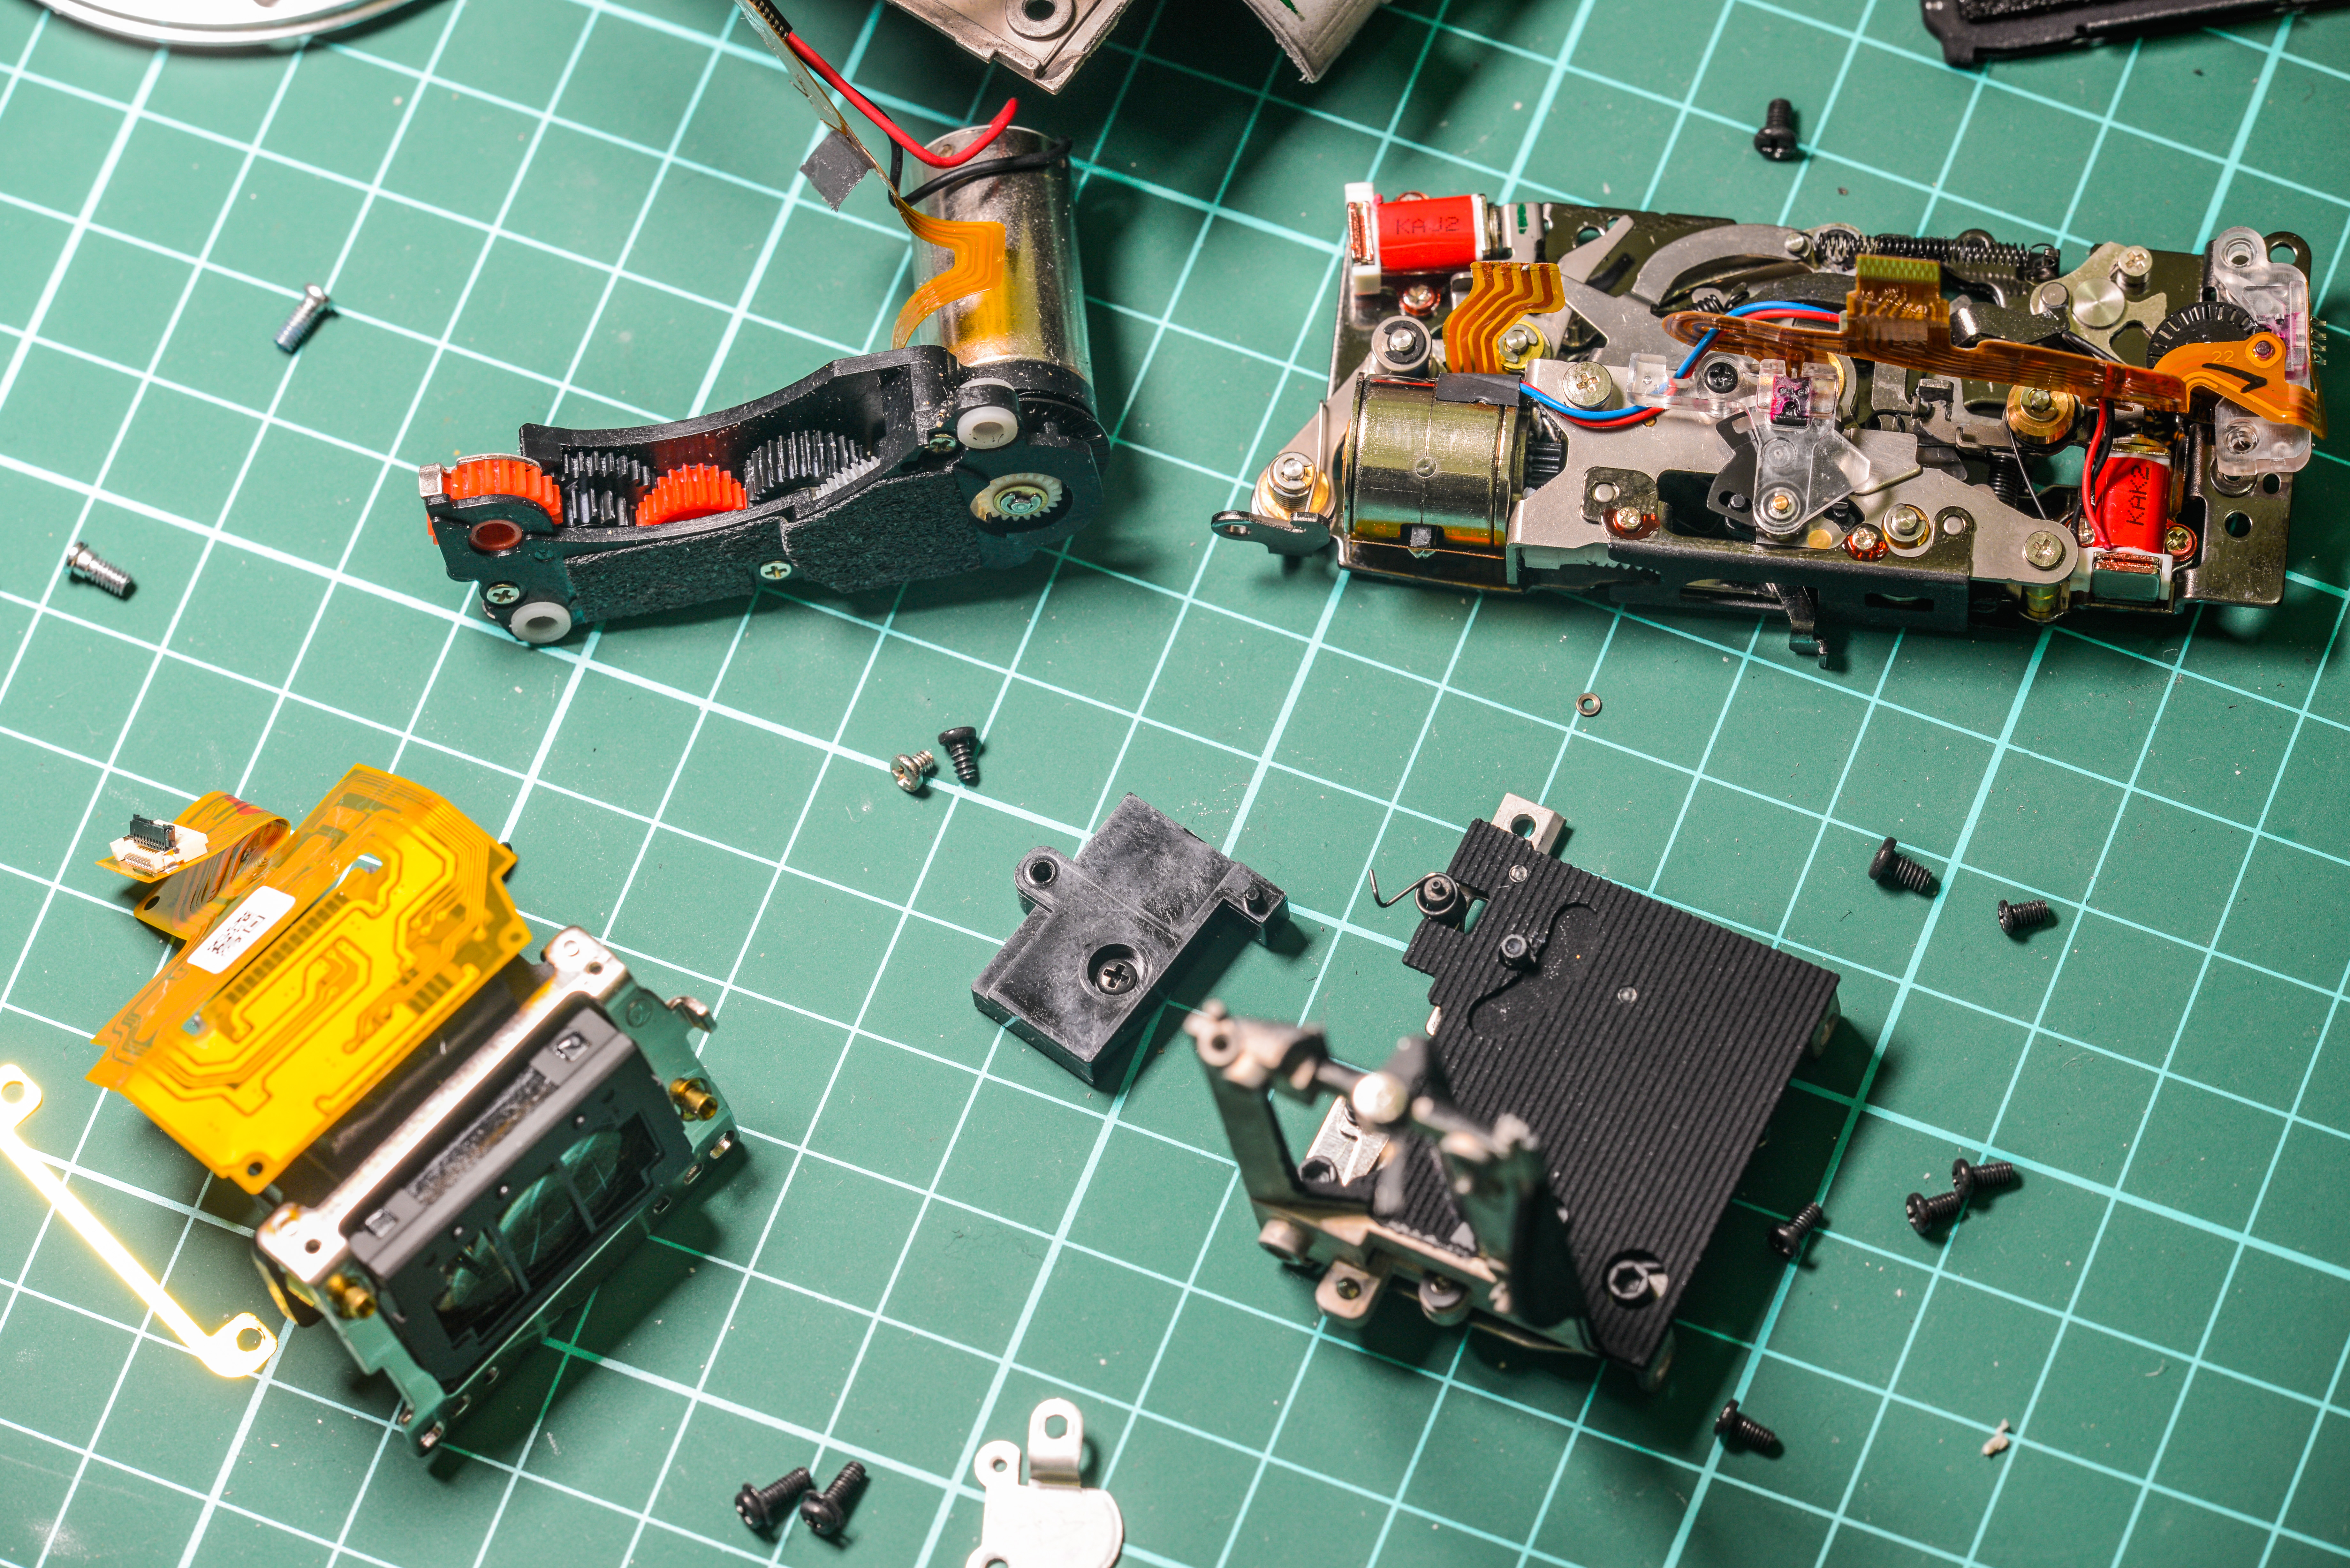
Problem is in that chunk of mechanics, aperture/mirror control unit.
One of levers for exposure metering unit was bent, fixed it.
Other problem was the mounting screw was not tighten up well, and whole unit was moving against body frame, which prevents mechanics to interact correctly.
After proper fixing blocks in place – mechanism started working flawlessly.
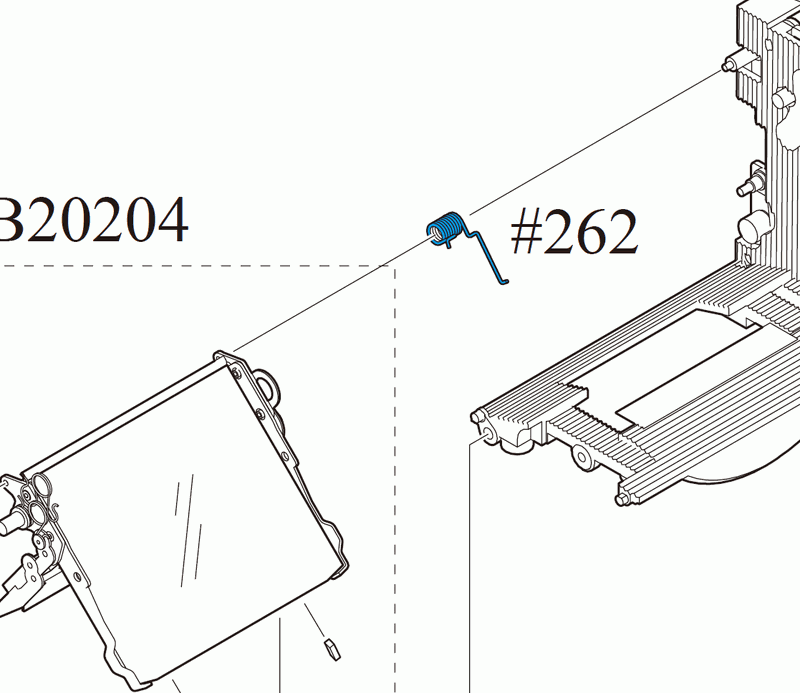
Looks like I figured out mirror issue, it was #262 spring which recovers mirror into view position, and small lever for light shielding for metering block.
Now hard part – assemble all that thingy’s together without breaking anything else. I bet I’ll have some extra “unnecessary parts” left over after this repair project.
Test front block with fixed mirror assembly:
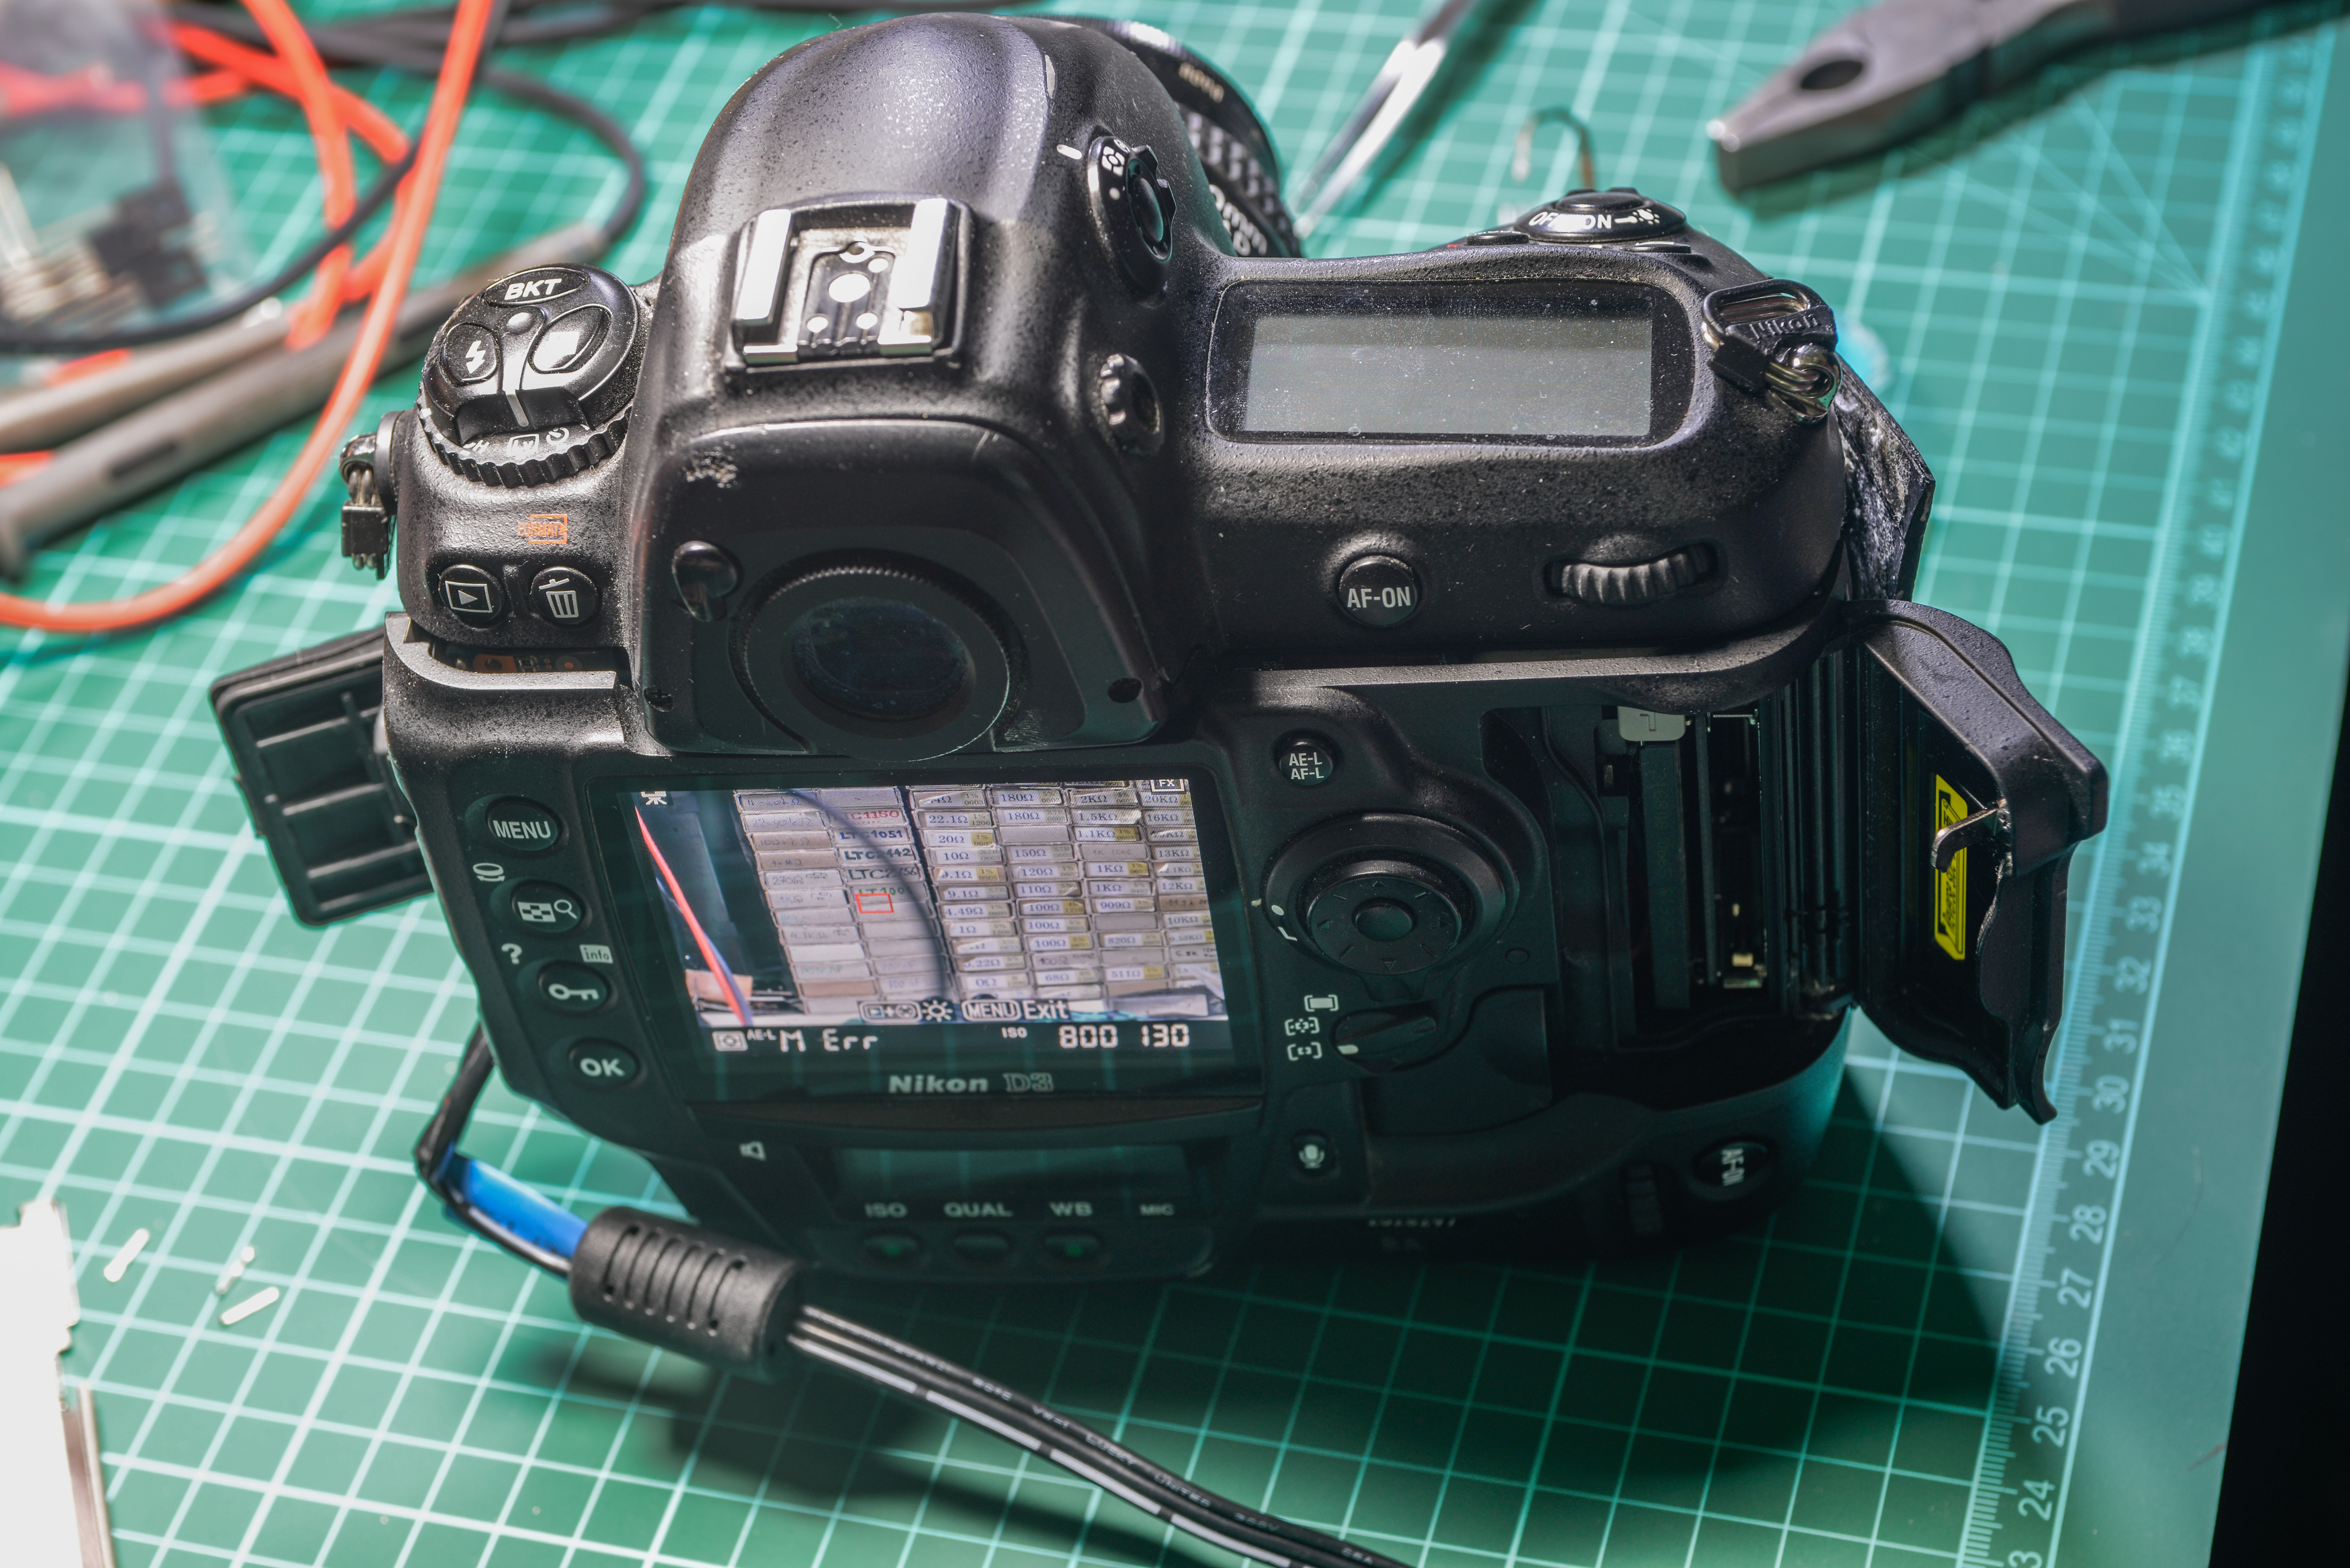
Test check with body assembly
Now it takes photos well, no errors or other critical issues.
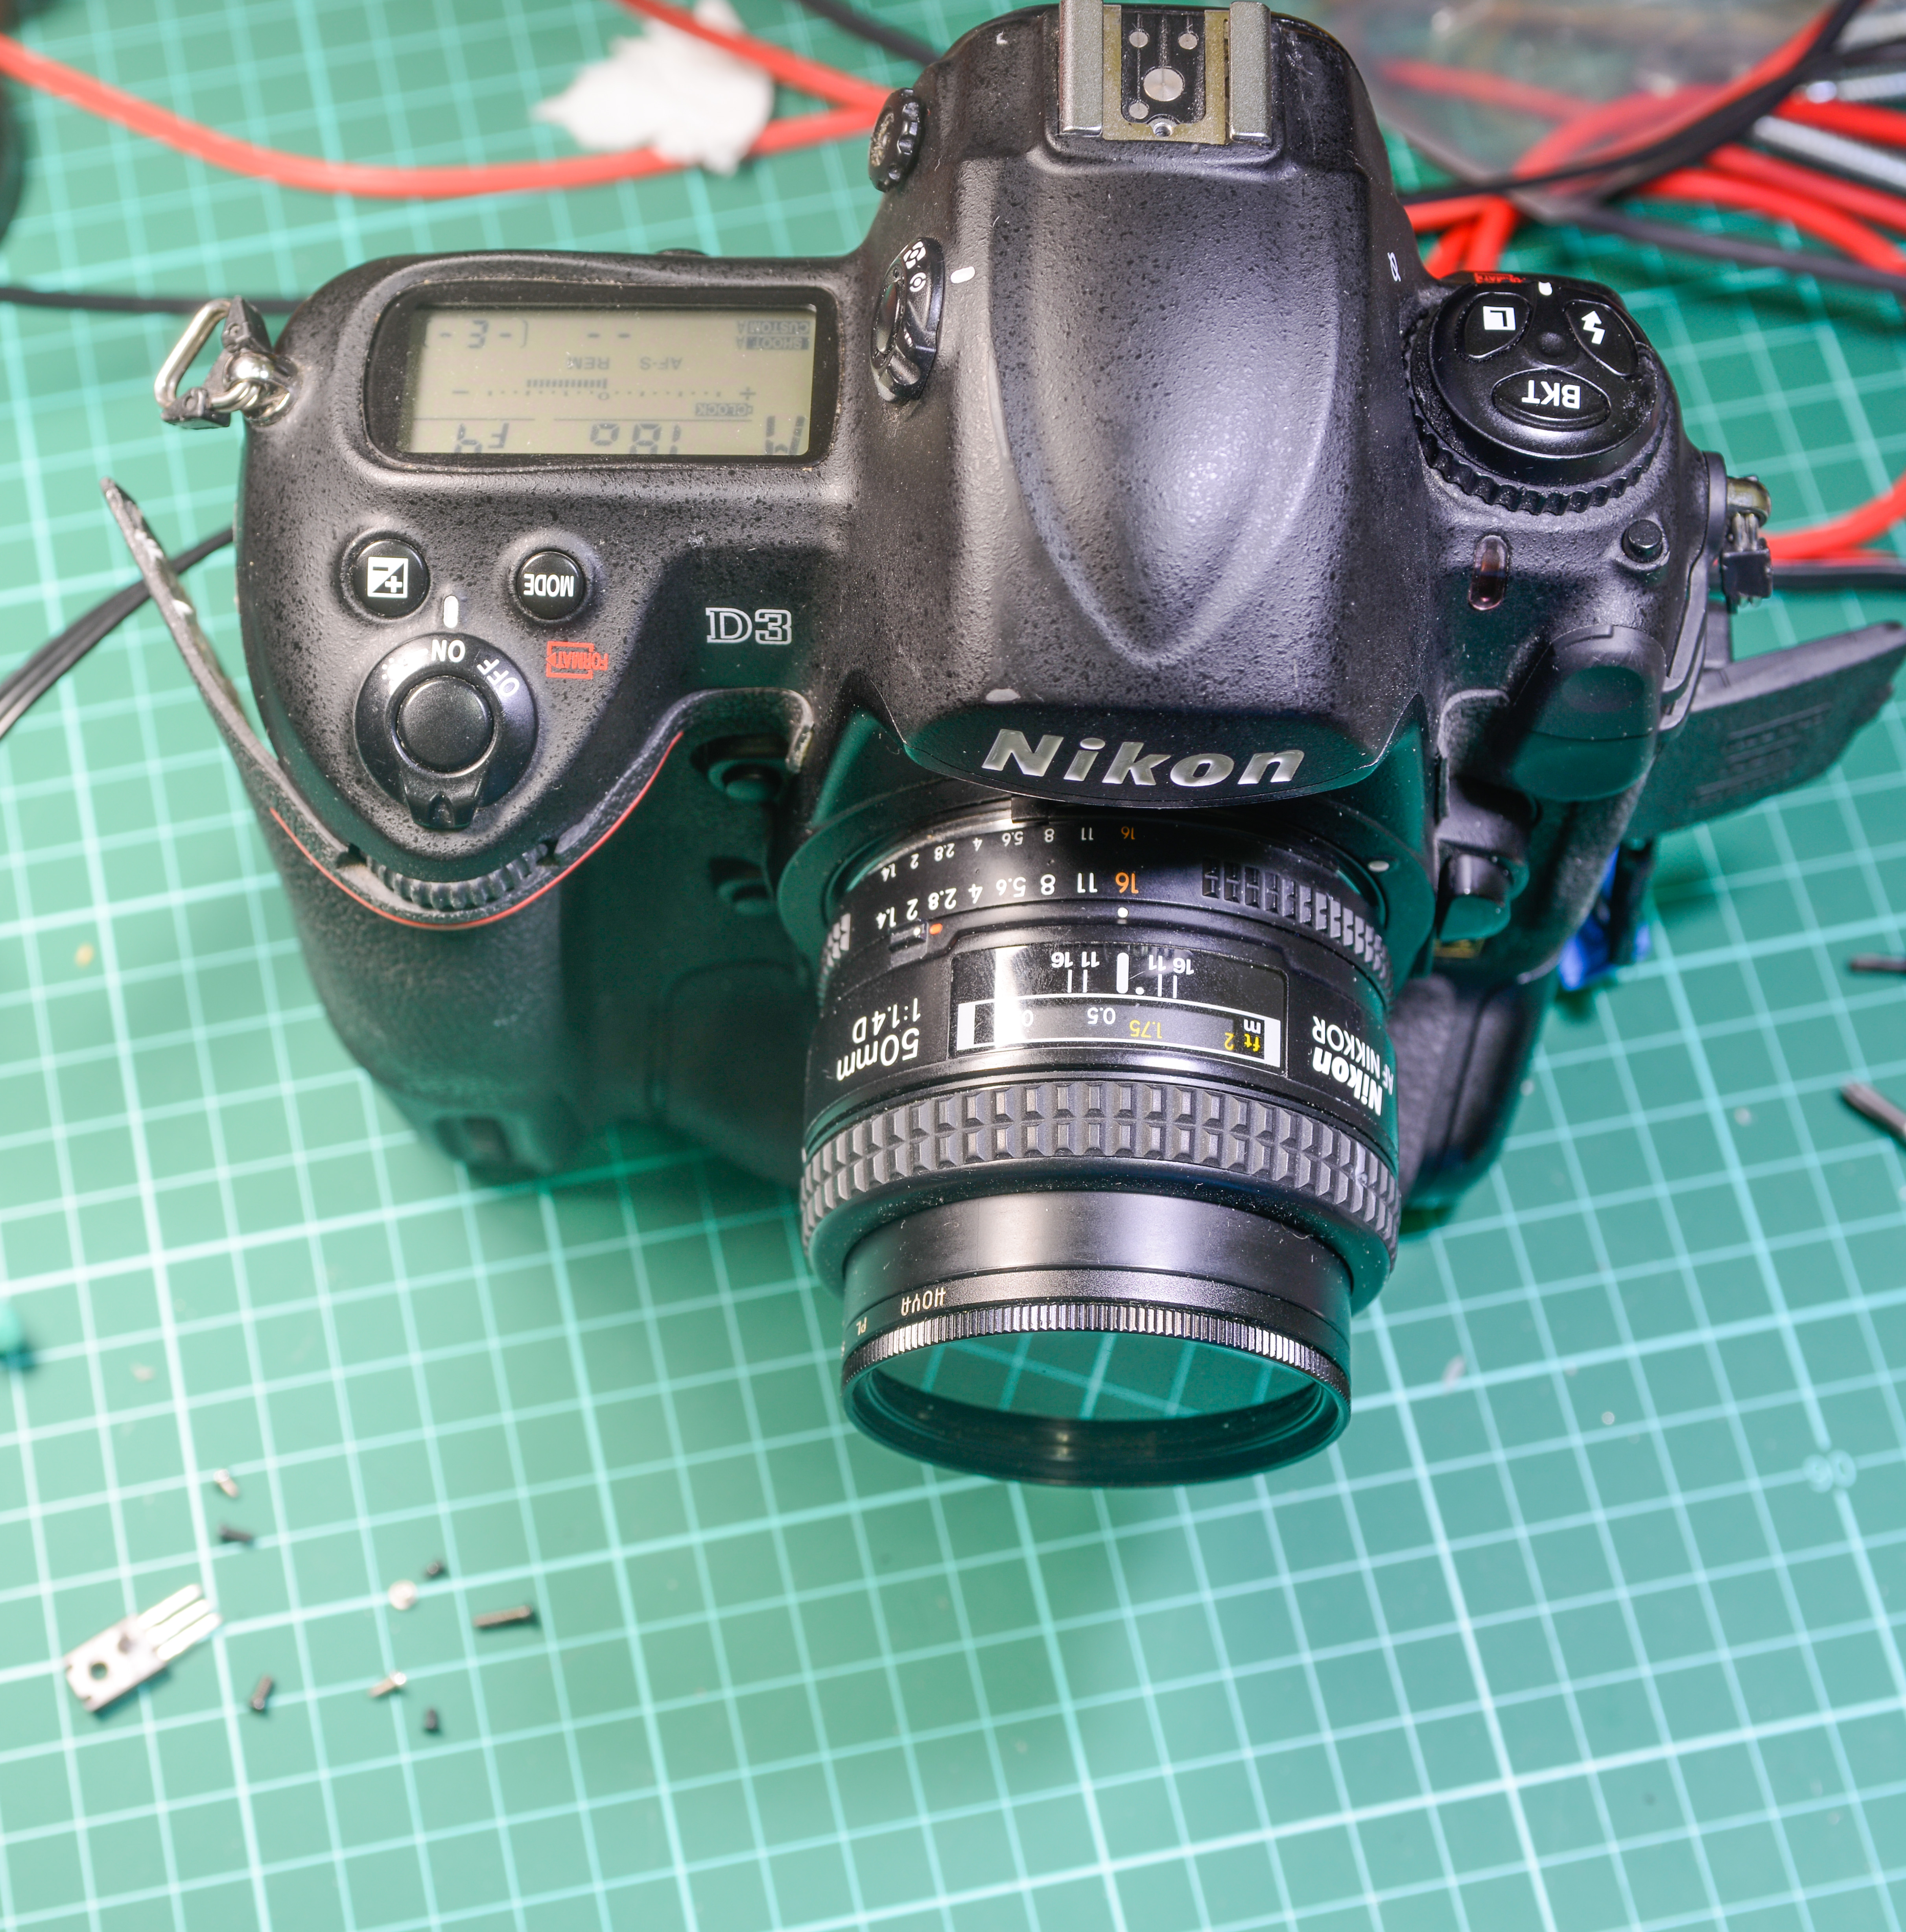
Test assembly for checks. D3 body + Nikkor 50/1.4D lens
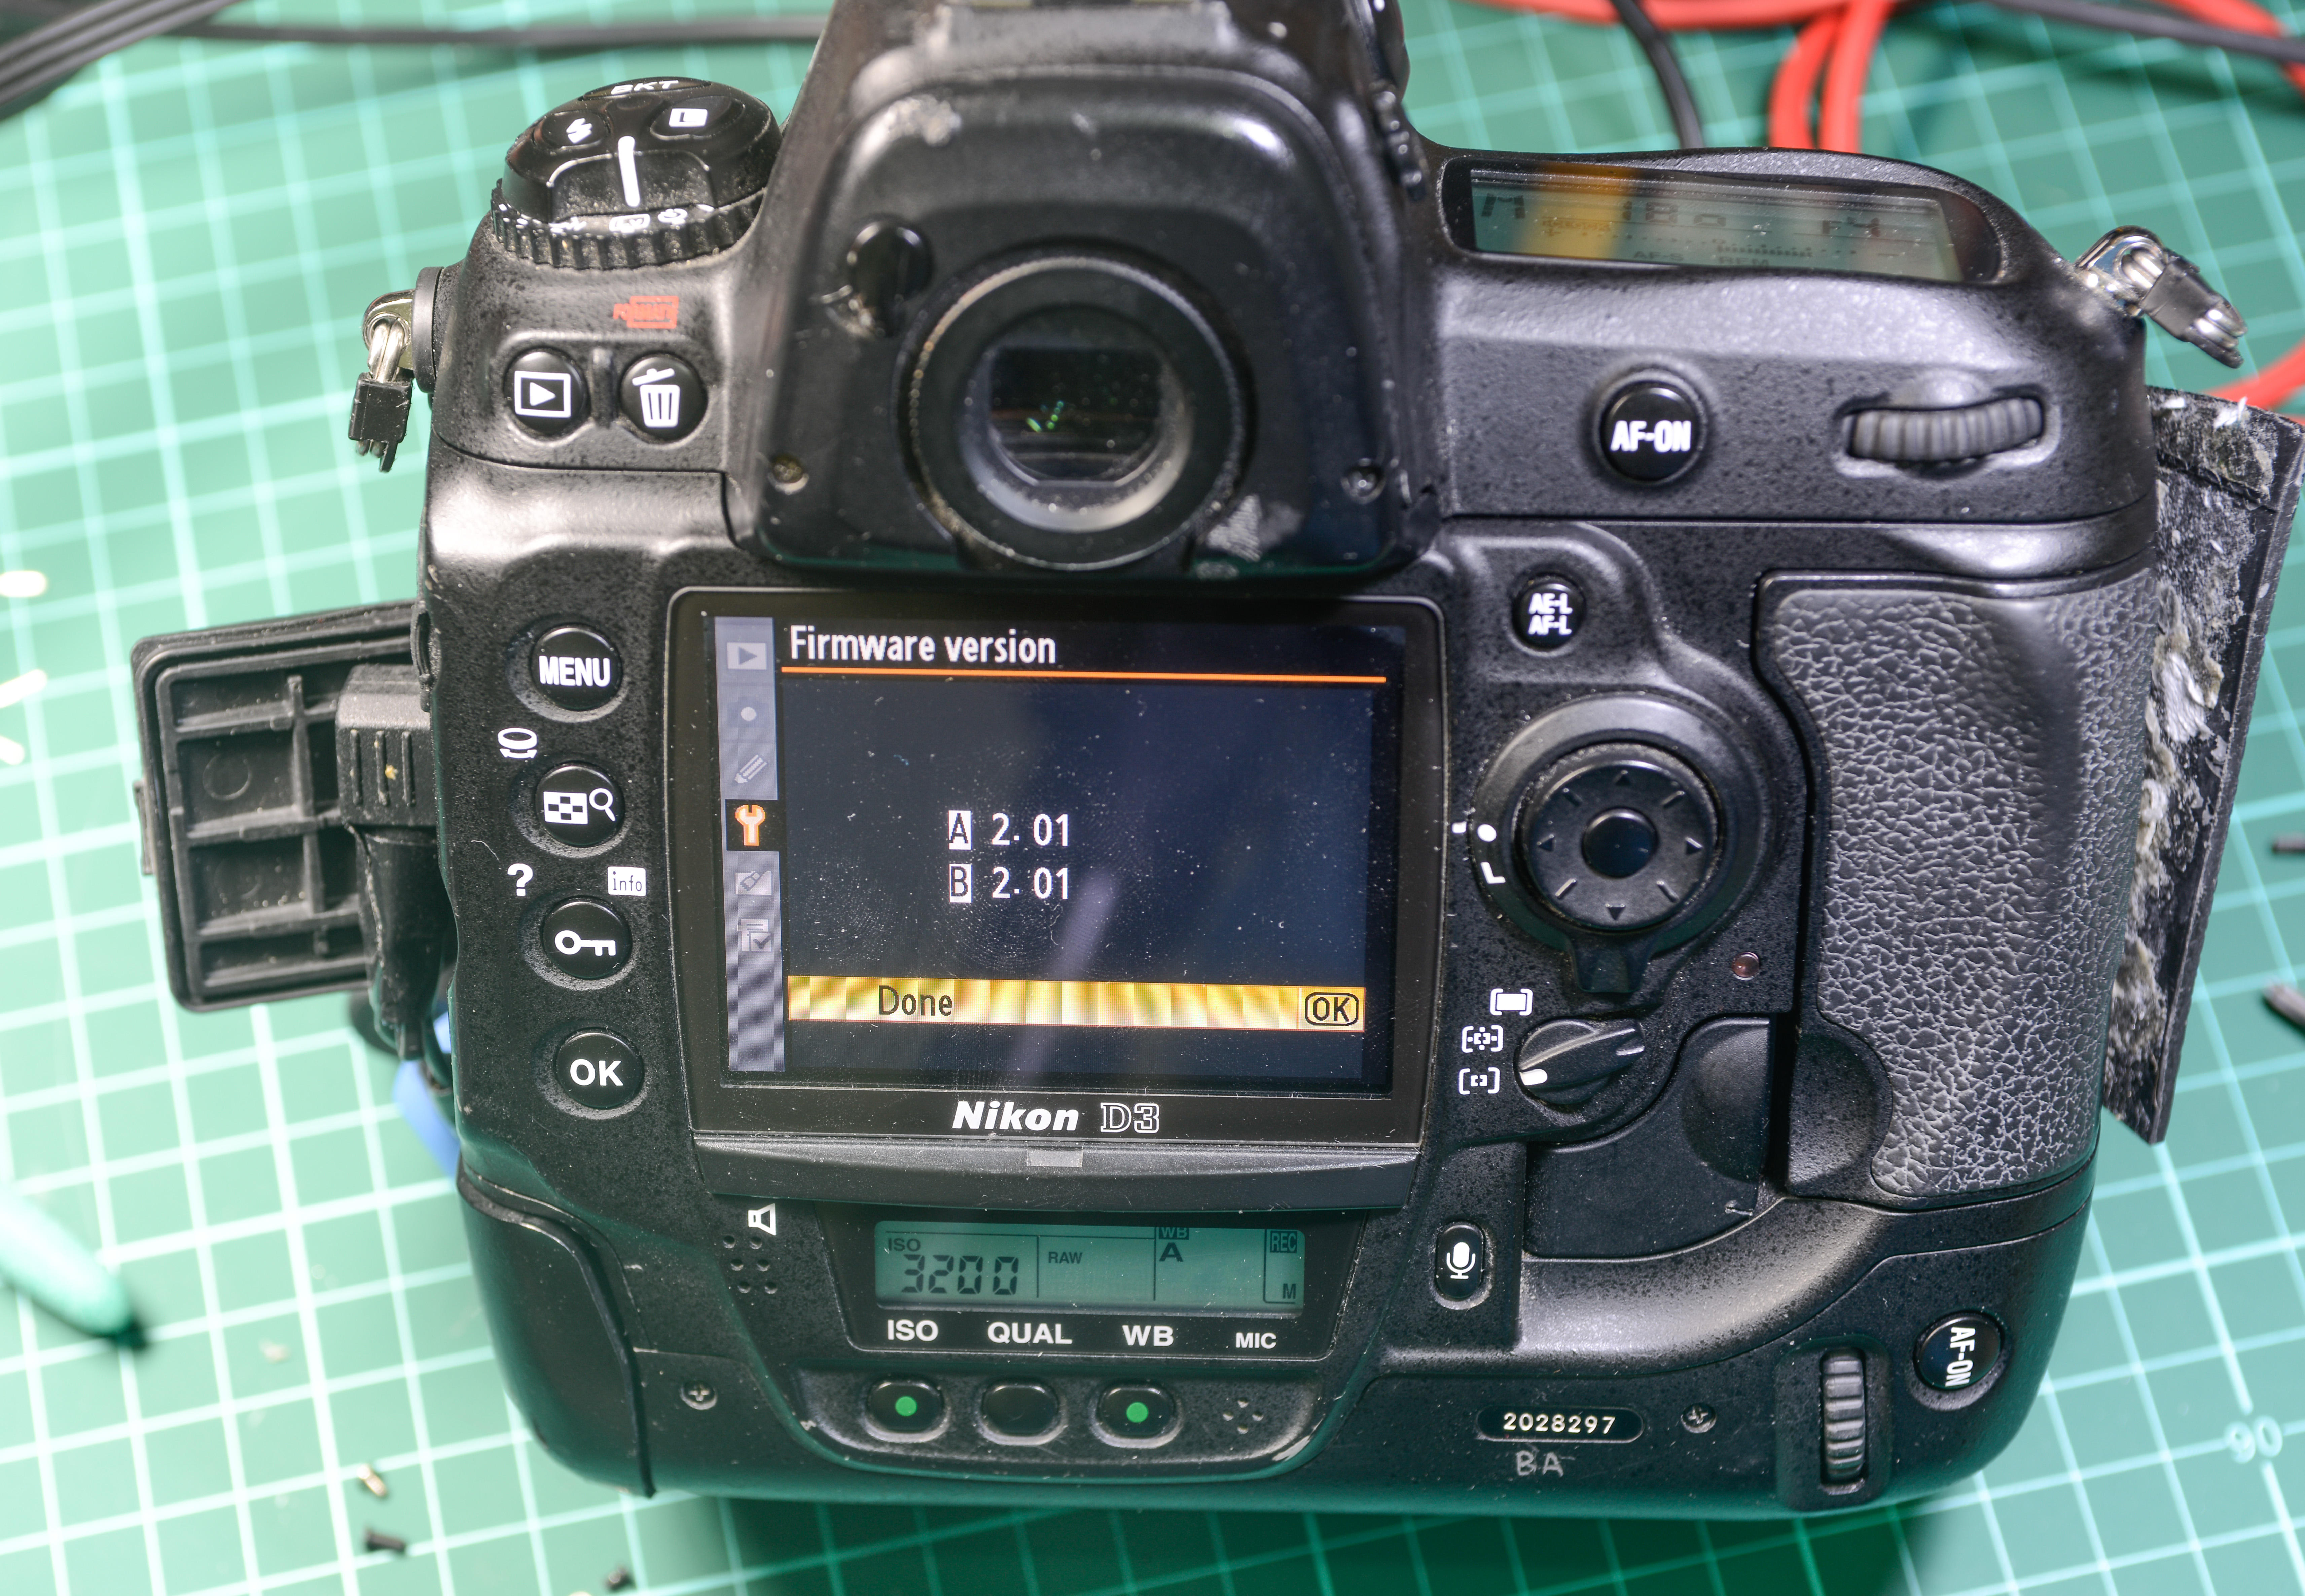
Firmware is 2.01.
All LCDs working fine, backlight working fine, no issues with that.

Updating firmware to 2.03
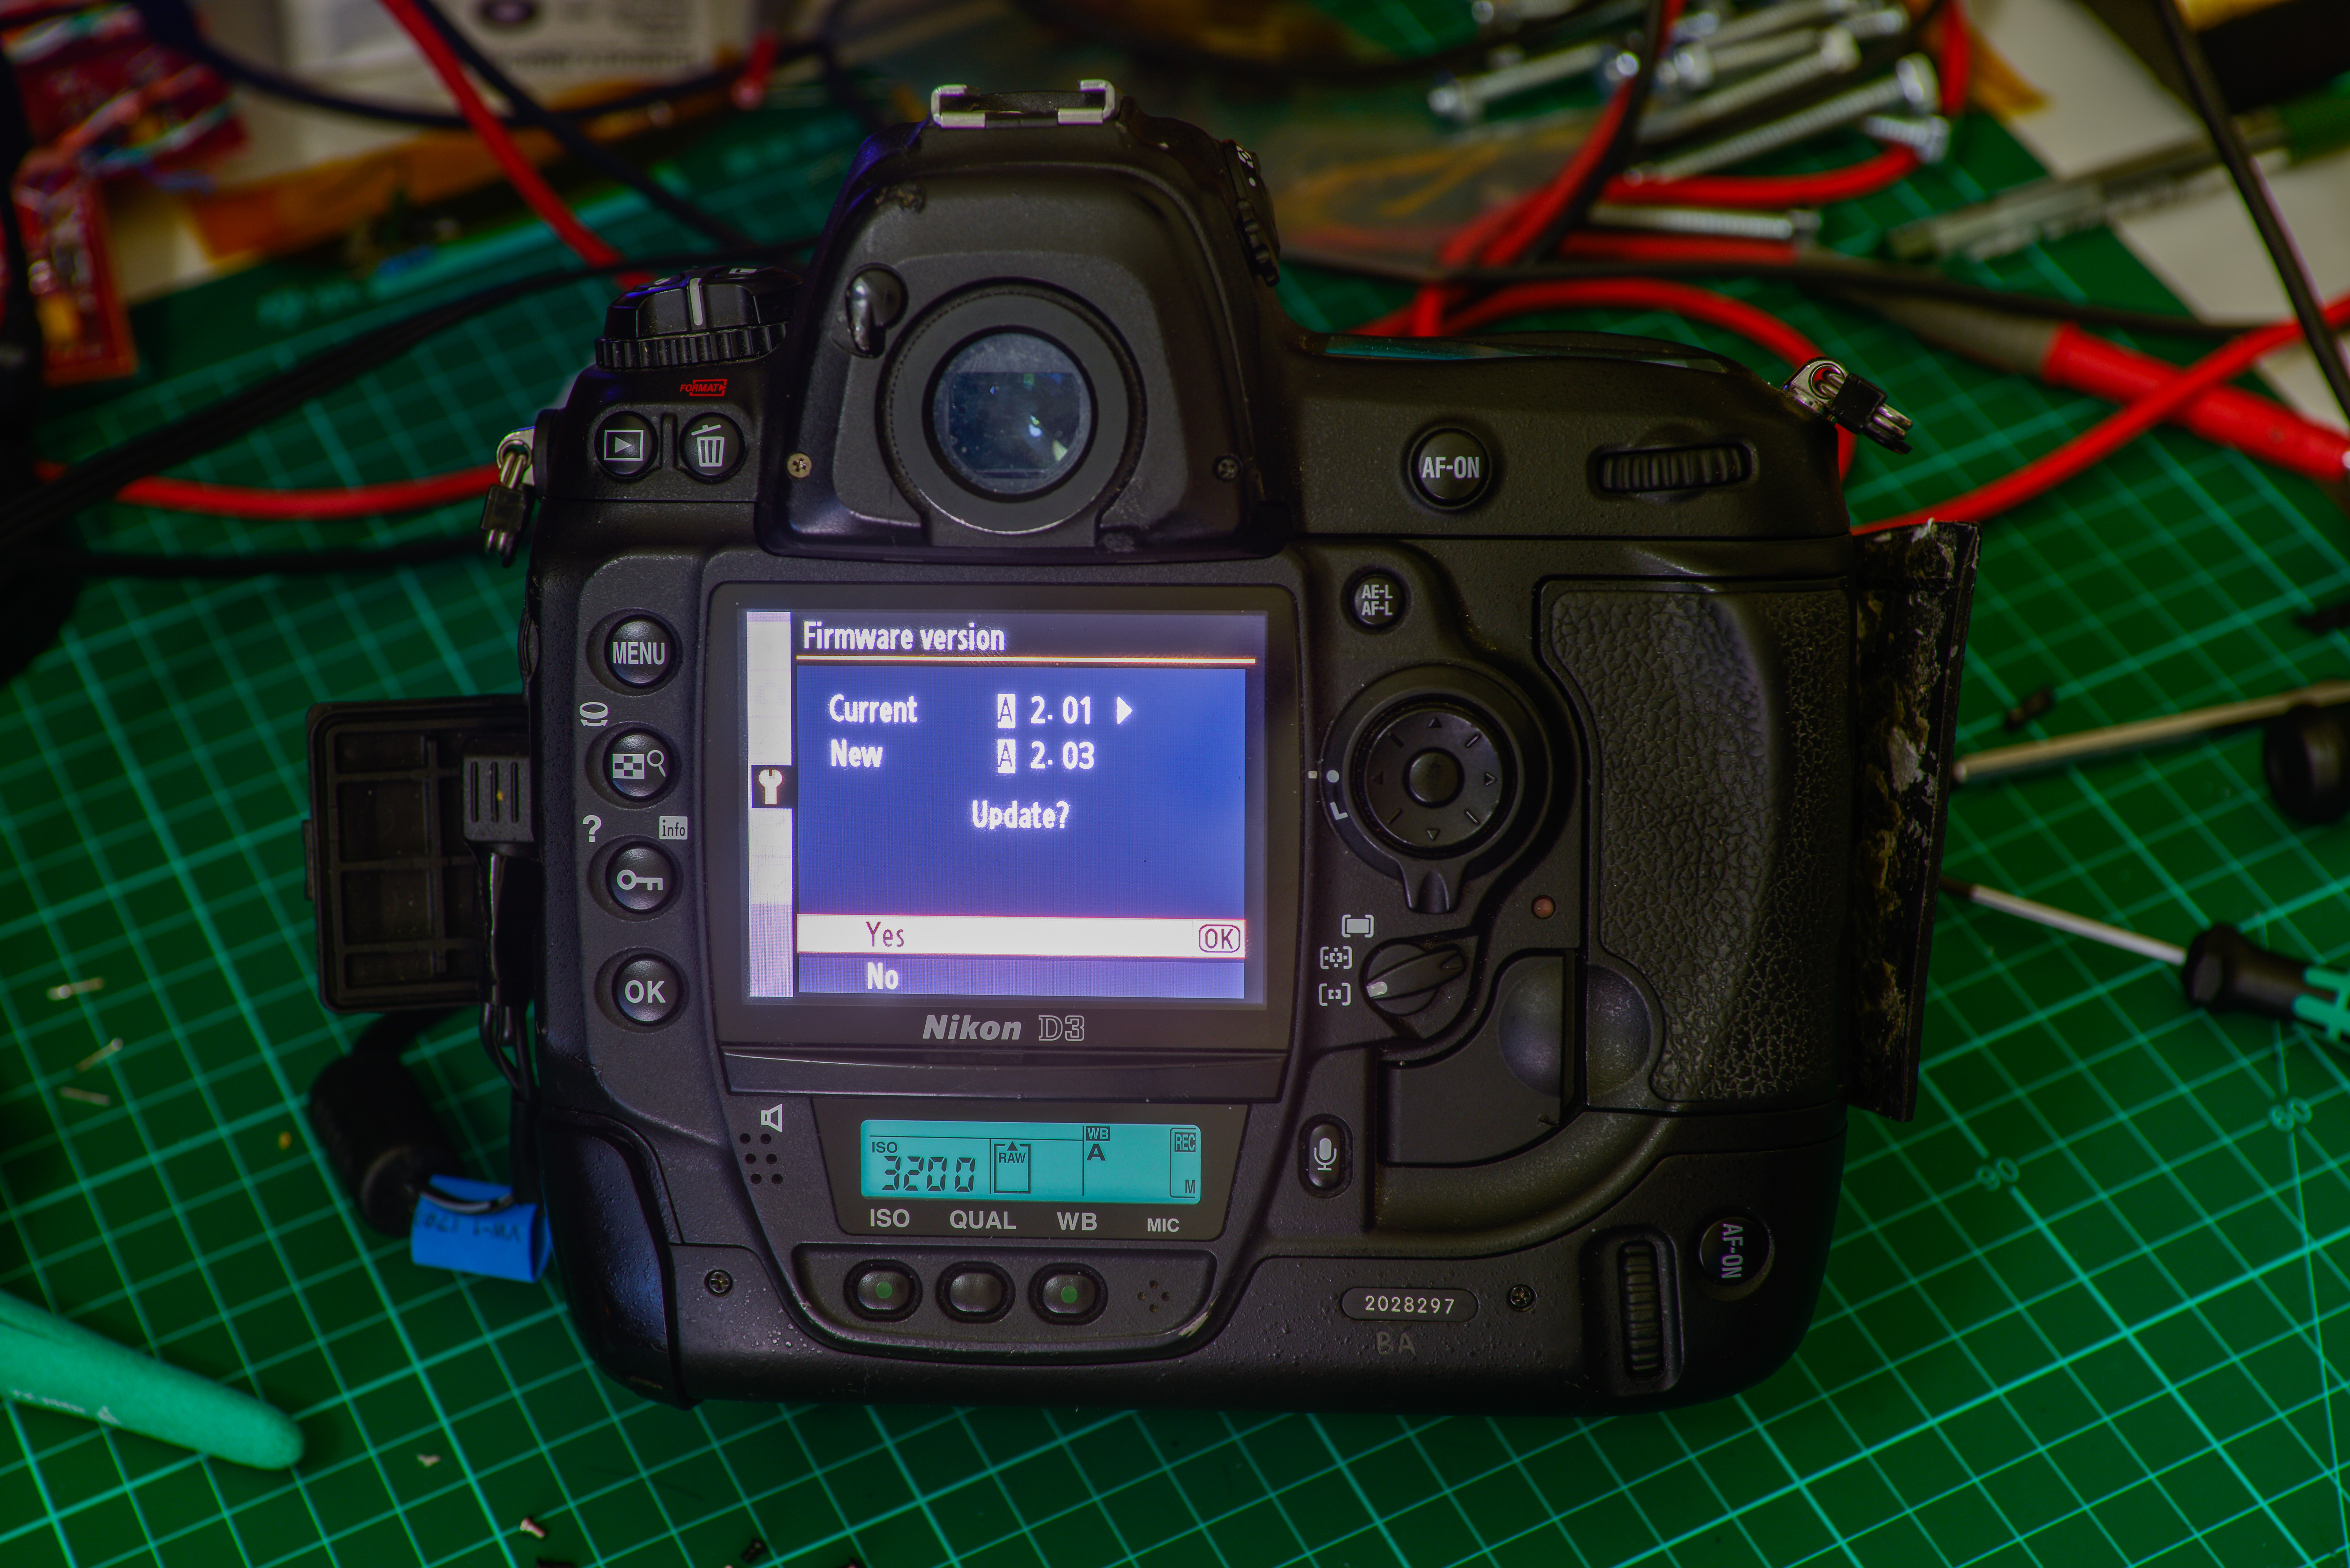
So far so good..
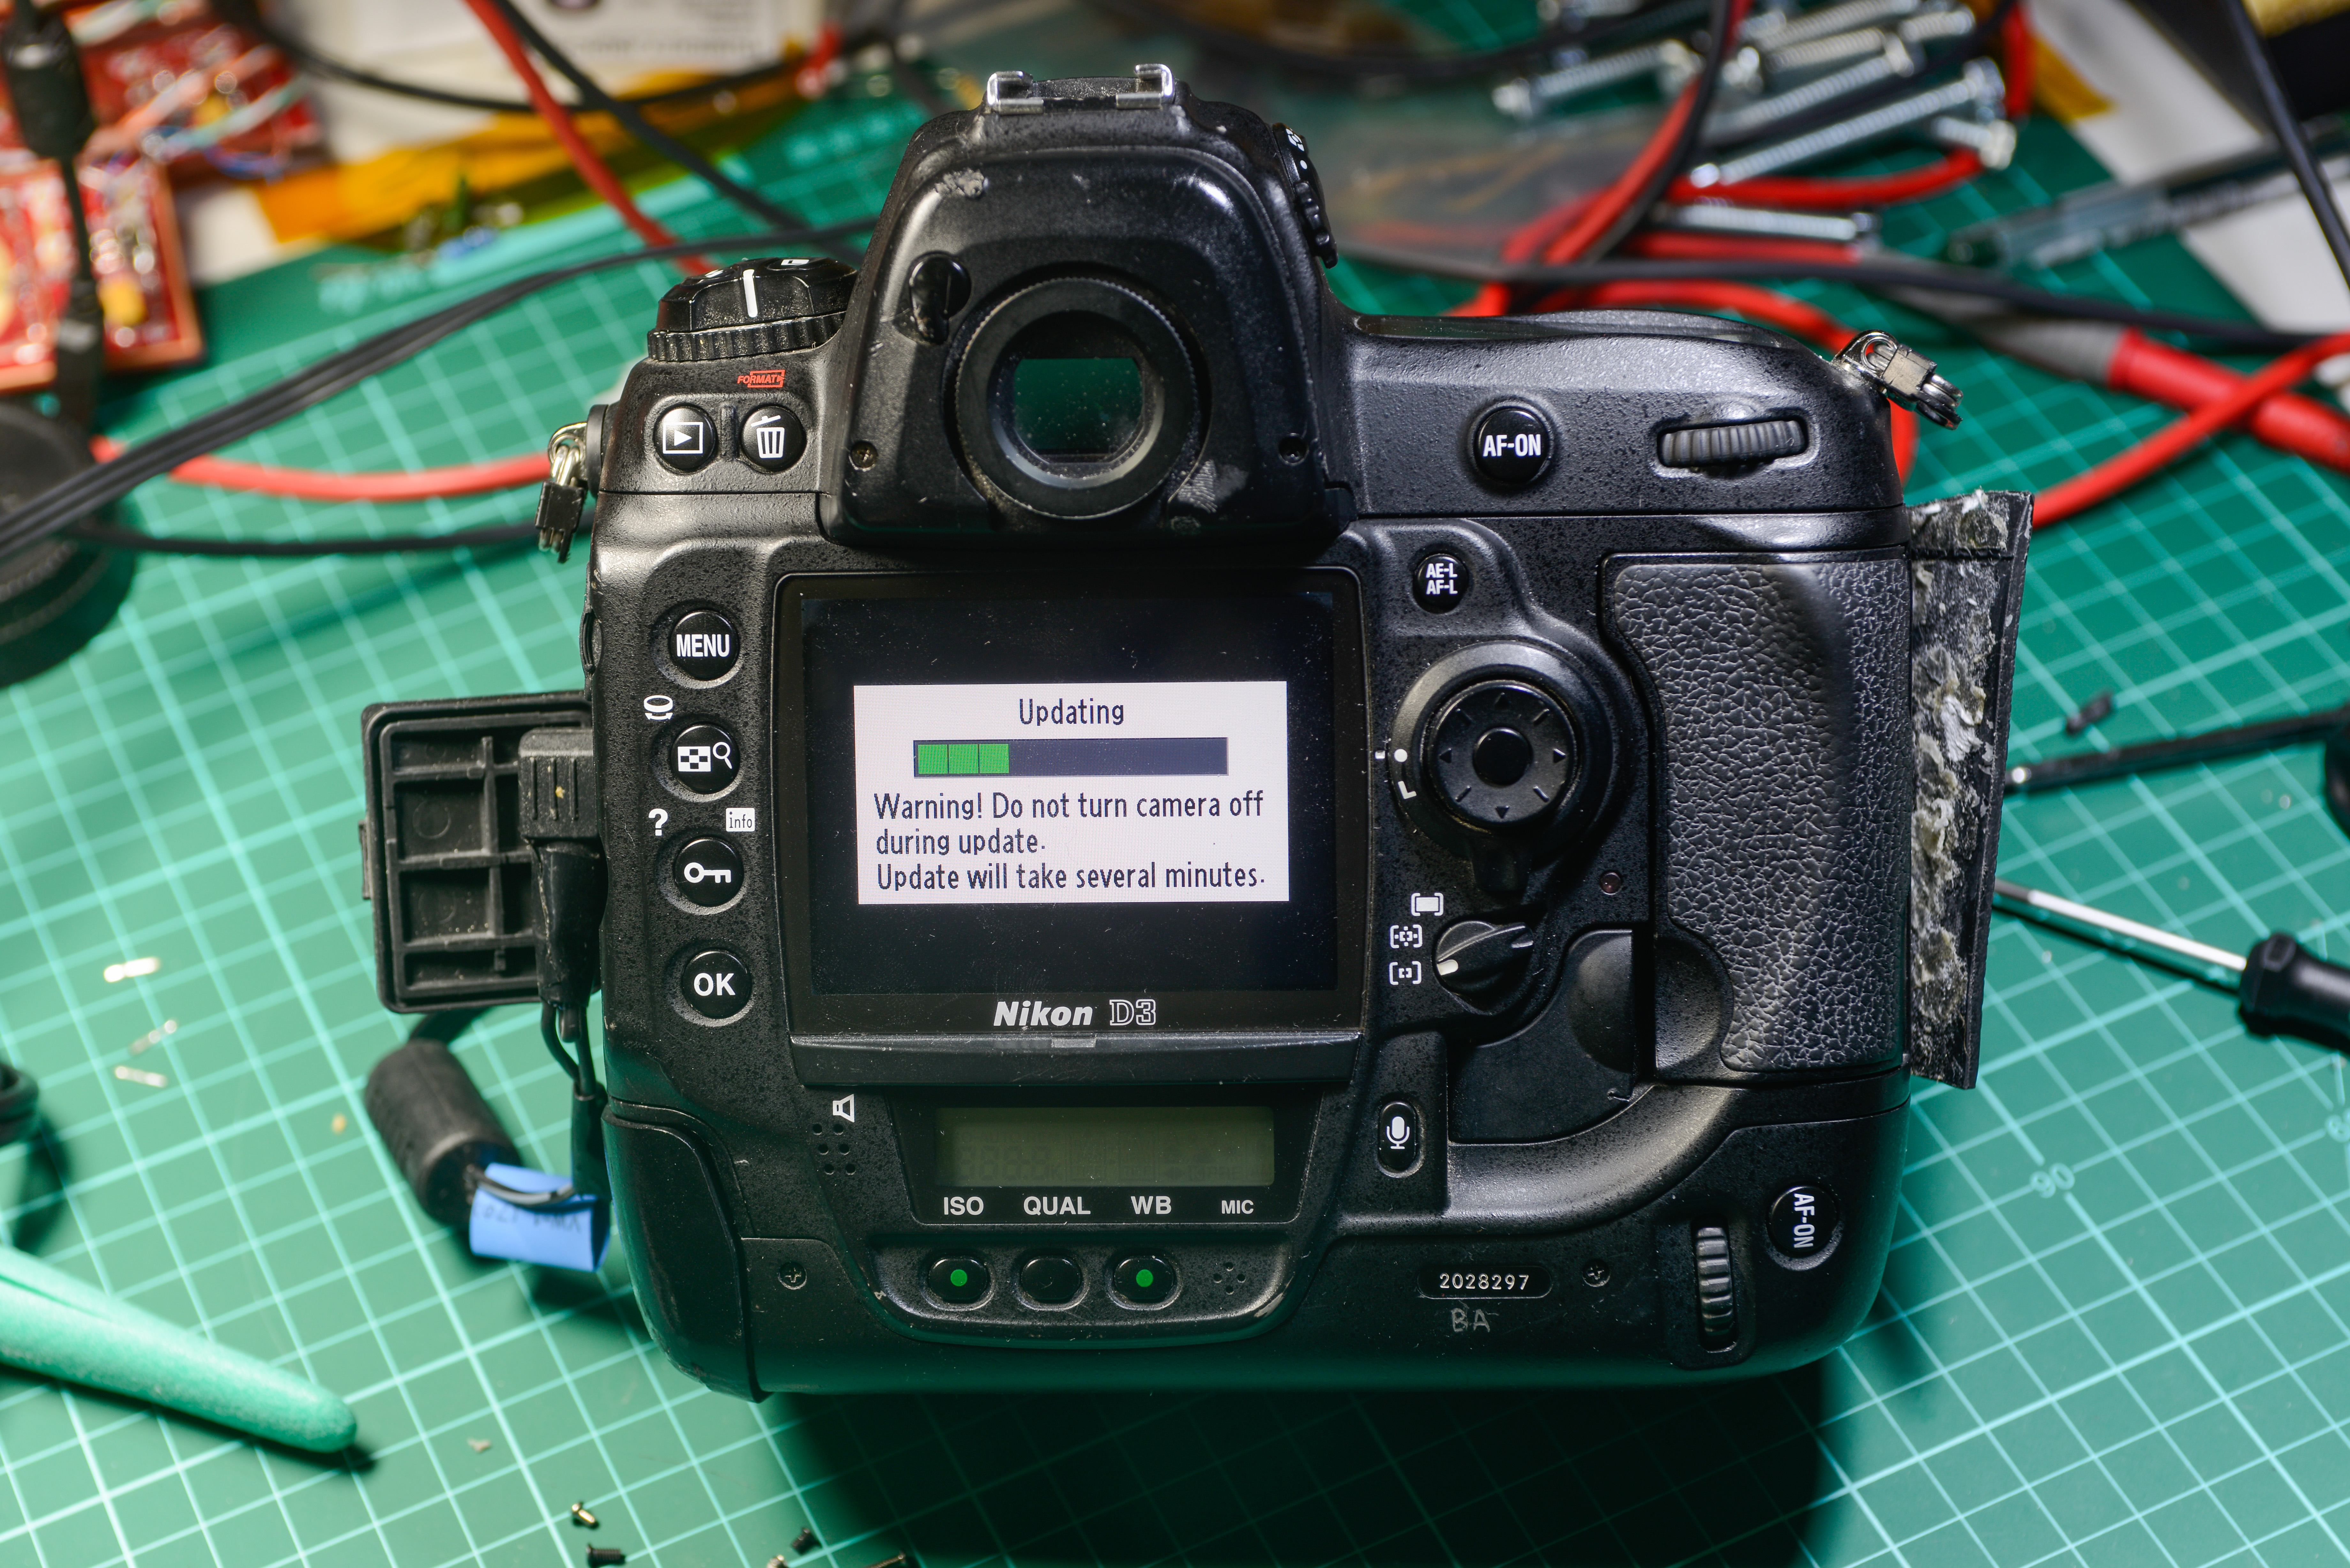
Firmware update went well, now it’s 2.03+2.03.
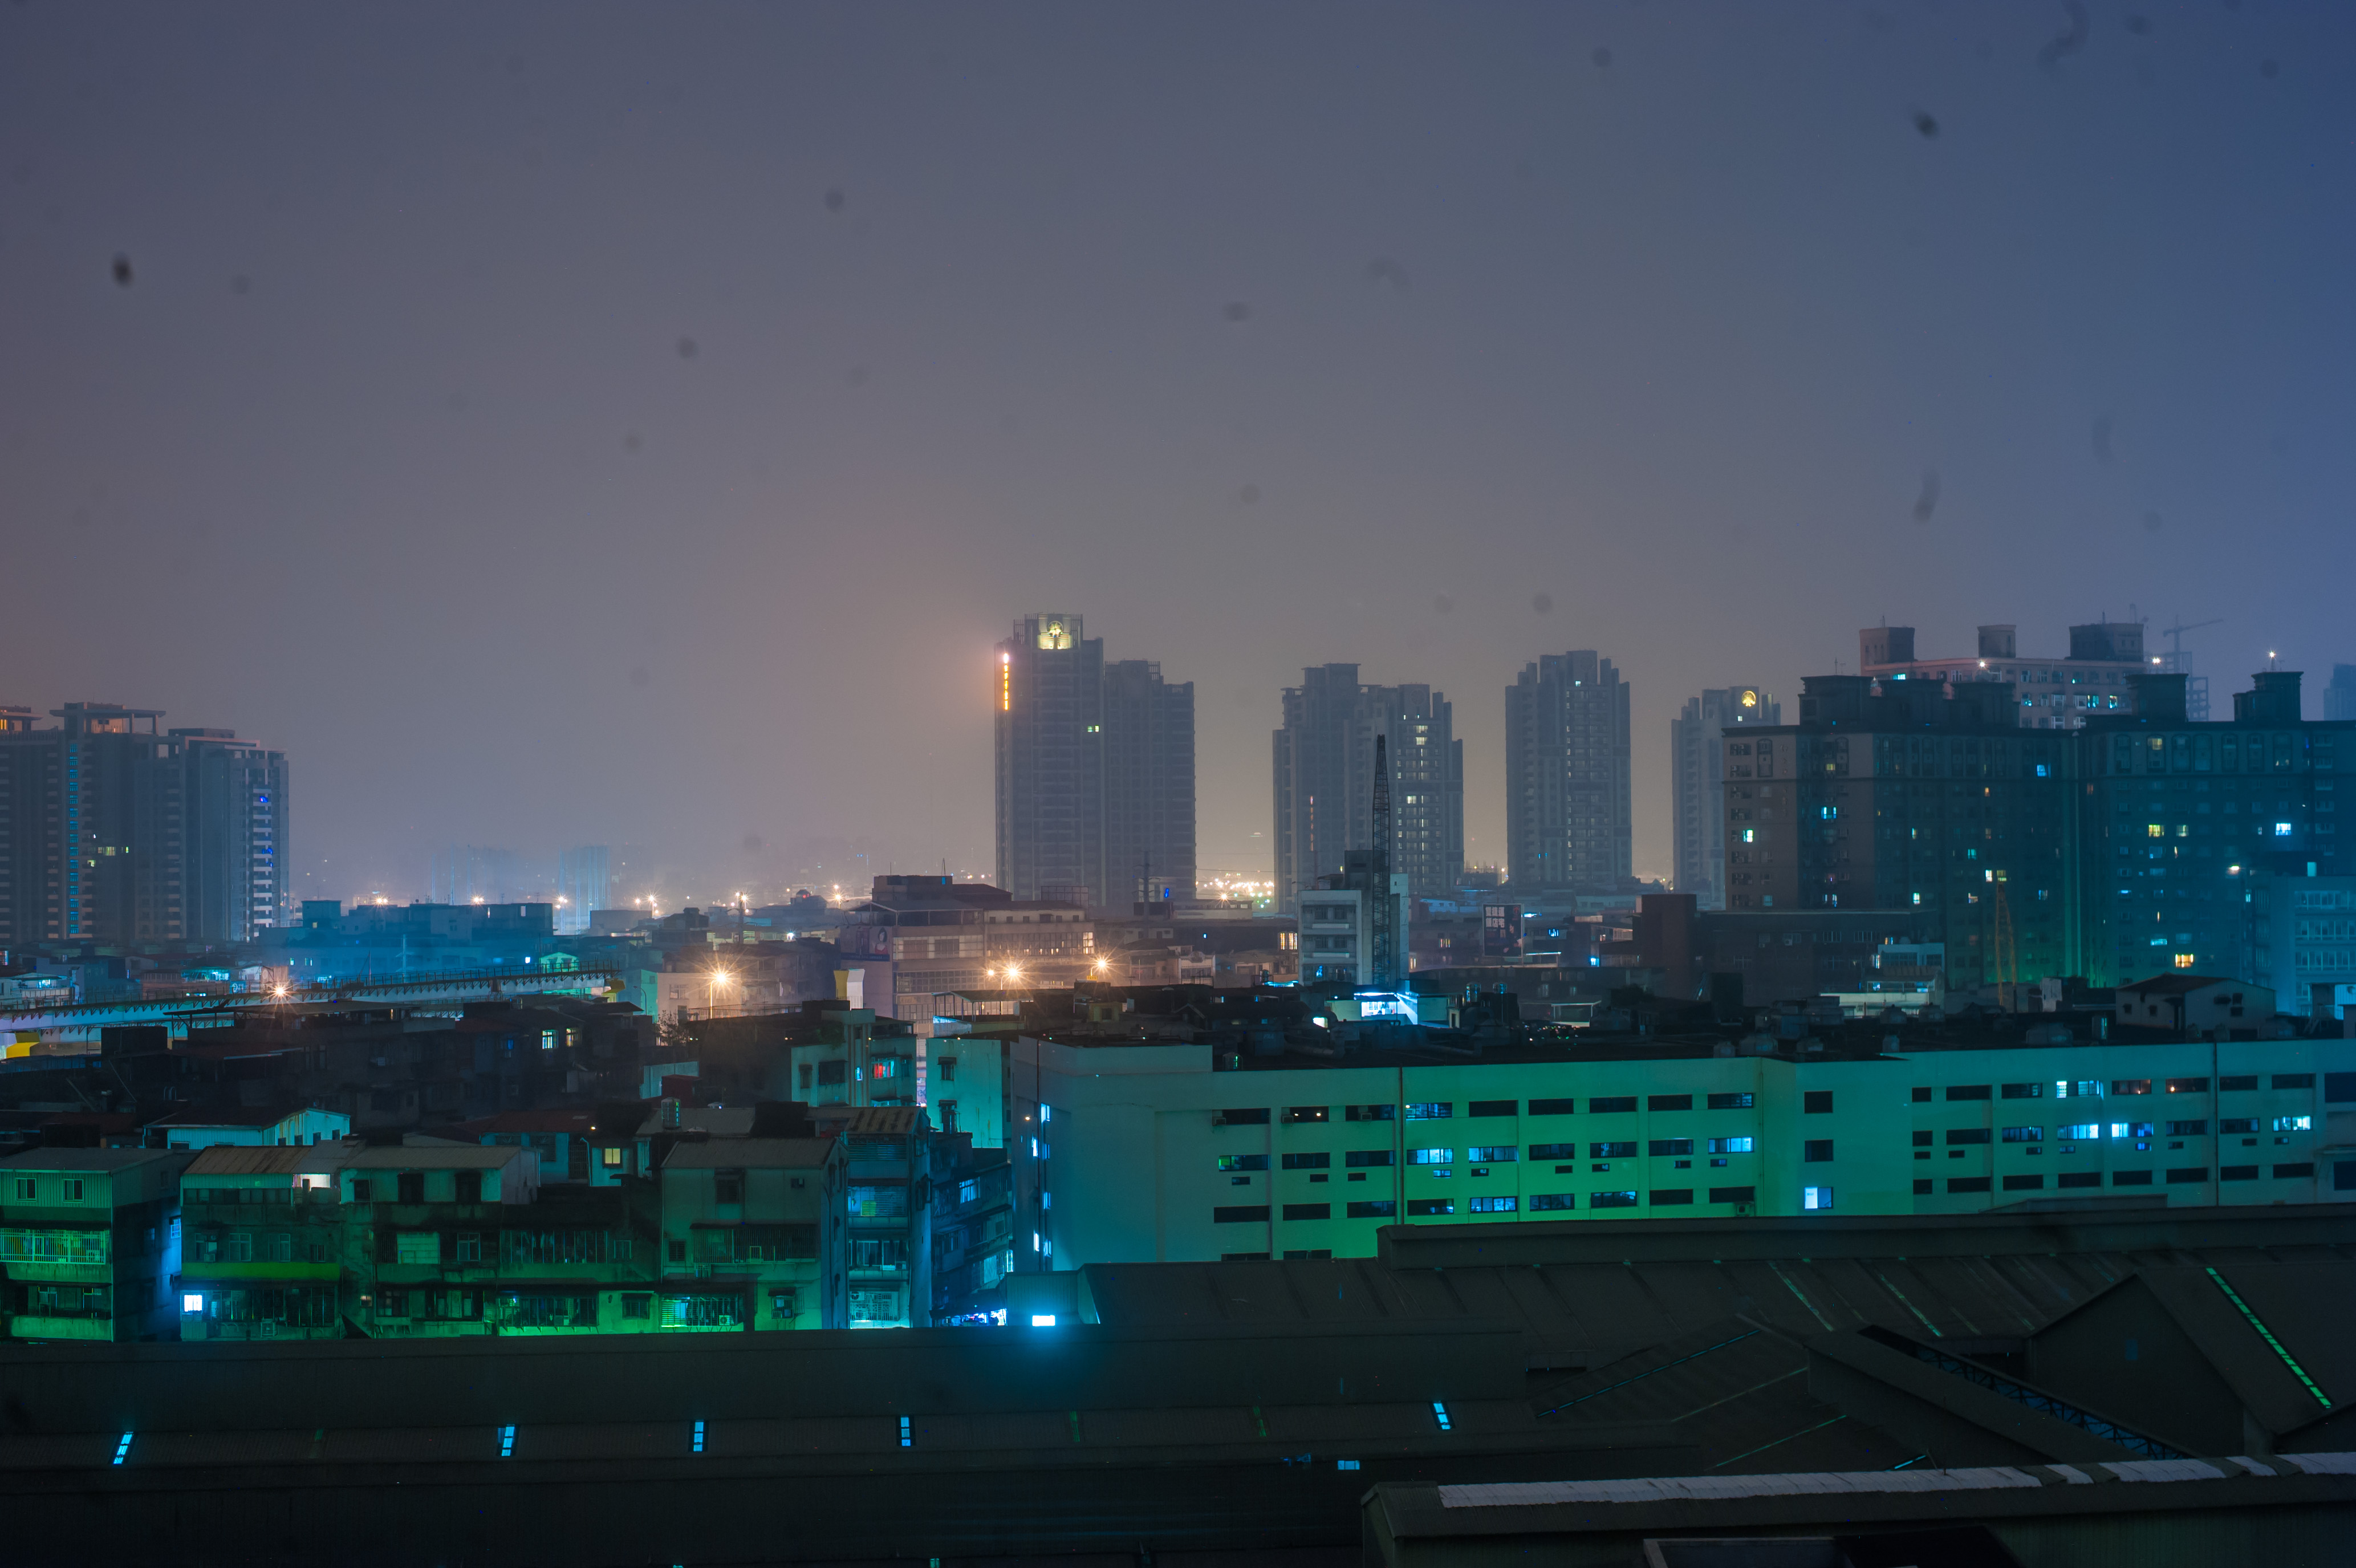
Actual image from D3. Black dots are dirt on sensor.
Actual image from D3. “Extra” parts :)

Finishing up
- Receive battery and test with battery power
- Autofocus need adjustment, with 50/1.4D it gets too close. Likely AF unit aligment or adjustment.
- Standard AF-ON button does not work (no reaction). AF-ON on portrait side works fine.
- Refurbish rubber pads
- Clean image sensor.
Well, it took good half hour for me to figure out how it all works. It was not in proper position, and was not pulling mirror correctly, so it could not return in up position after lock release.
- Standard AF-ON button does not work (no reaction). AF-ON on portrait side works fine.
Done, it was a9 menu setting, button was select to wrong mode. It works well.
- Clean image sensor.
Done, now nice and clean, enough to not see any dirt even with f/16 aperture.
- Autofocus need adjustment, with 50/1.4D it gets too close. Likely AF unit aligment or adjustment.
Done via adjusting AF finetune +3 and turning two AF module screws #295 4.5 turns counterclockwise.
It’s exactly the case when need to read service manual before doing assembly. I skipped that part, and just assembled everything for “seems correct” aproach :D.
But AF module with its optical block have two adjustment screws #295 with very fine thread, so it adjusts distance between AF module and image plane.
Now mine 50/1.4, Sigma 150/2.8 macro and Nikkor 28-70/2.8 are spot on for focus.
By time when I got all assembled, it was already 5.00am, so I put camera on tripod near my apartment window and let it shoot timelapse, 400 photos, interval 5 minutes between each.
That’s one of reasons why bought this camera first place, so I could leave it shooting timelapse for days, while still being able to take usual photos with my primary cam.
Still left minor fixes (soak rubber pads in acetone to get them proper size, glue them to camera body) and get copycat battery and charger from ebay, so I could use it without need of permanent 110V AC jack.
But that’s it for now, not going to dismantle camera again, unless reason for.
Time to glue back rubber covers and it’s ready to go..
Battery cover BL-4
Received today (13/05/2014) new battery cover (Nikon BL-4)

All rubber pads in place already, just left to get battery and charger and it’s officially closed :)
Non-genuine battery replacement
Well, received also pair of non-original batteries for D3.
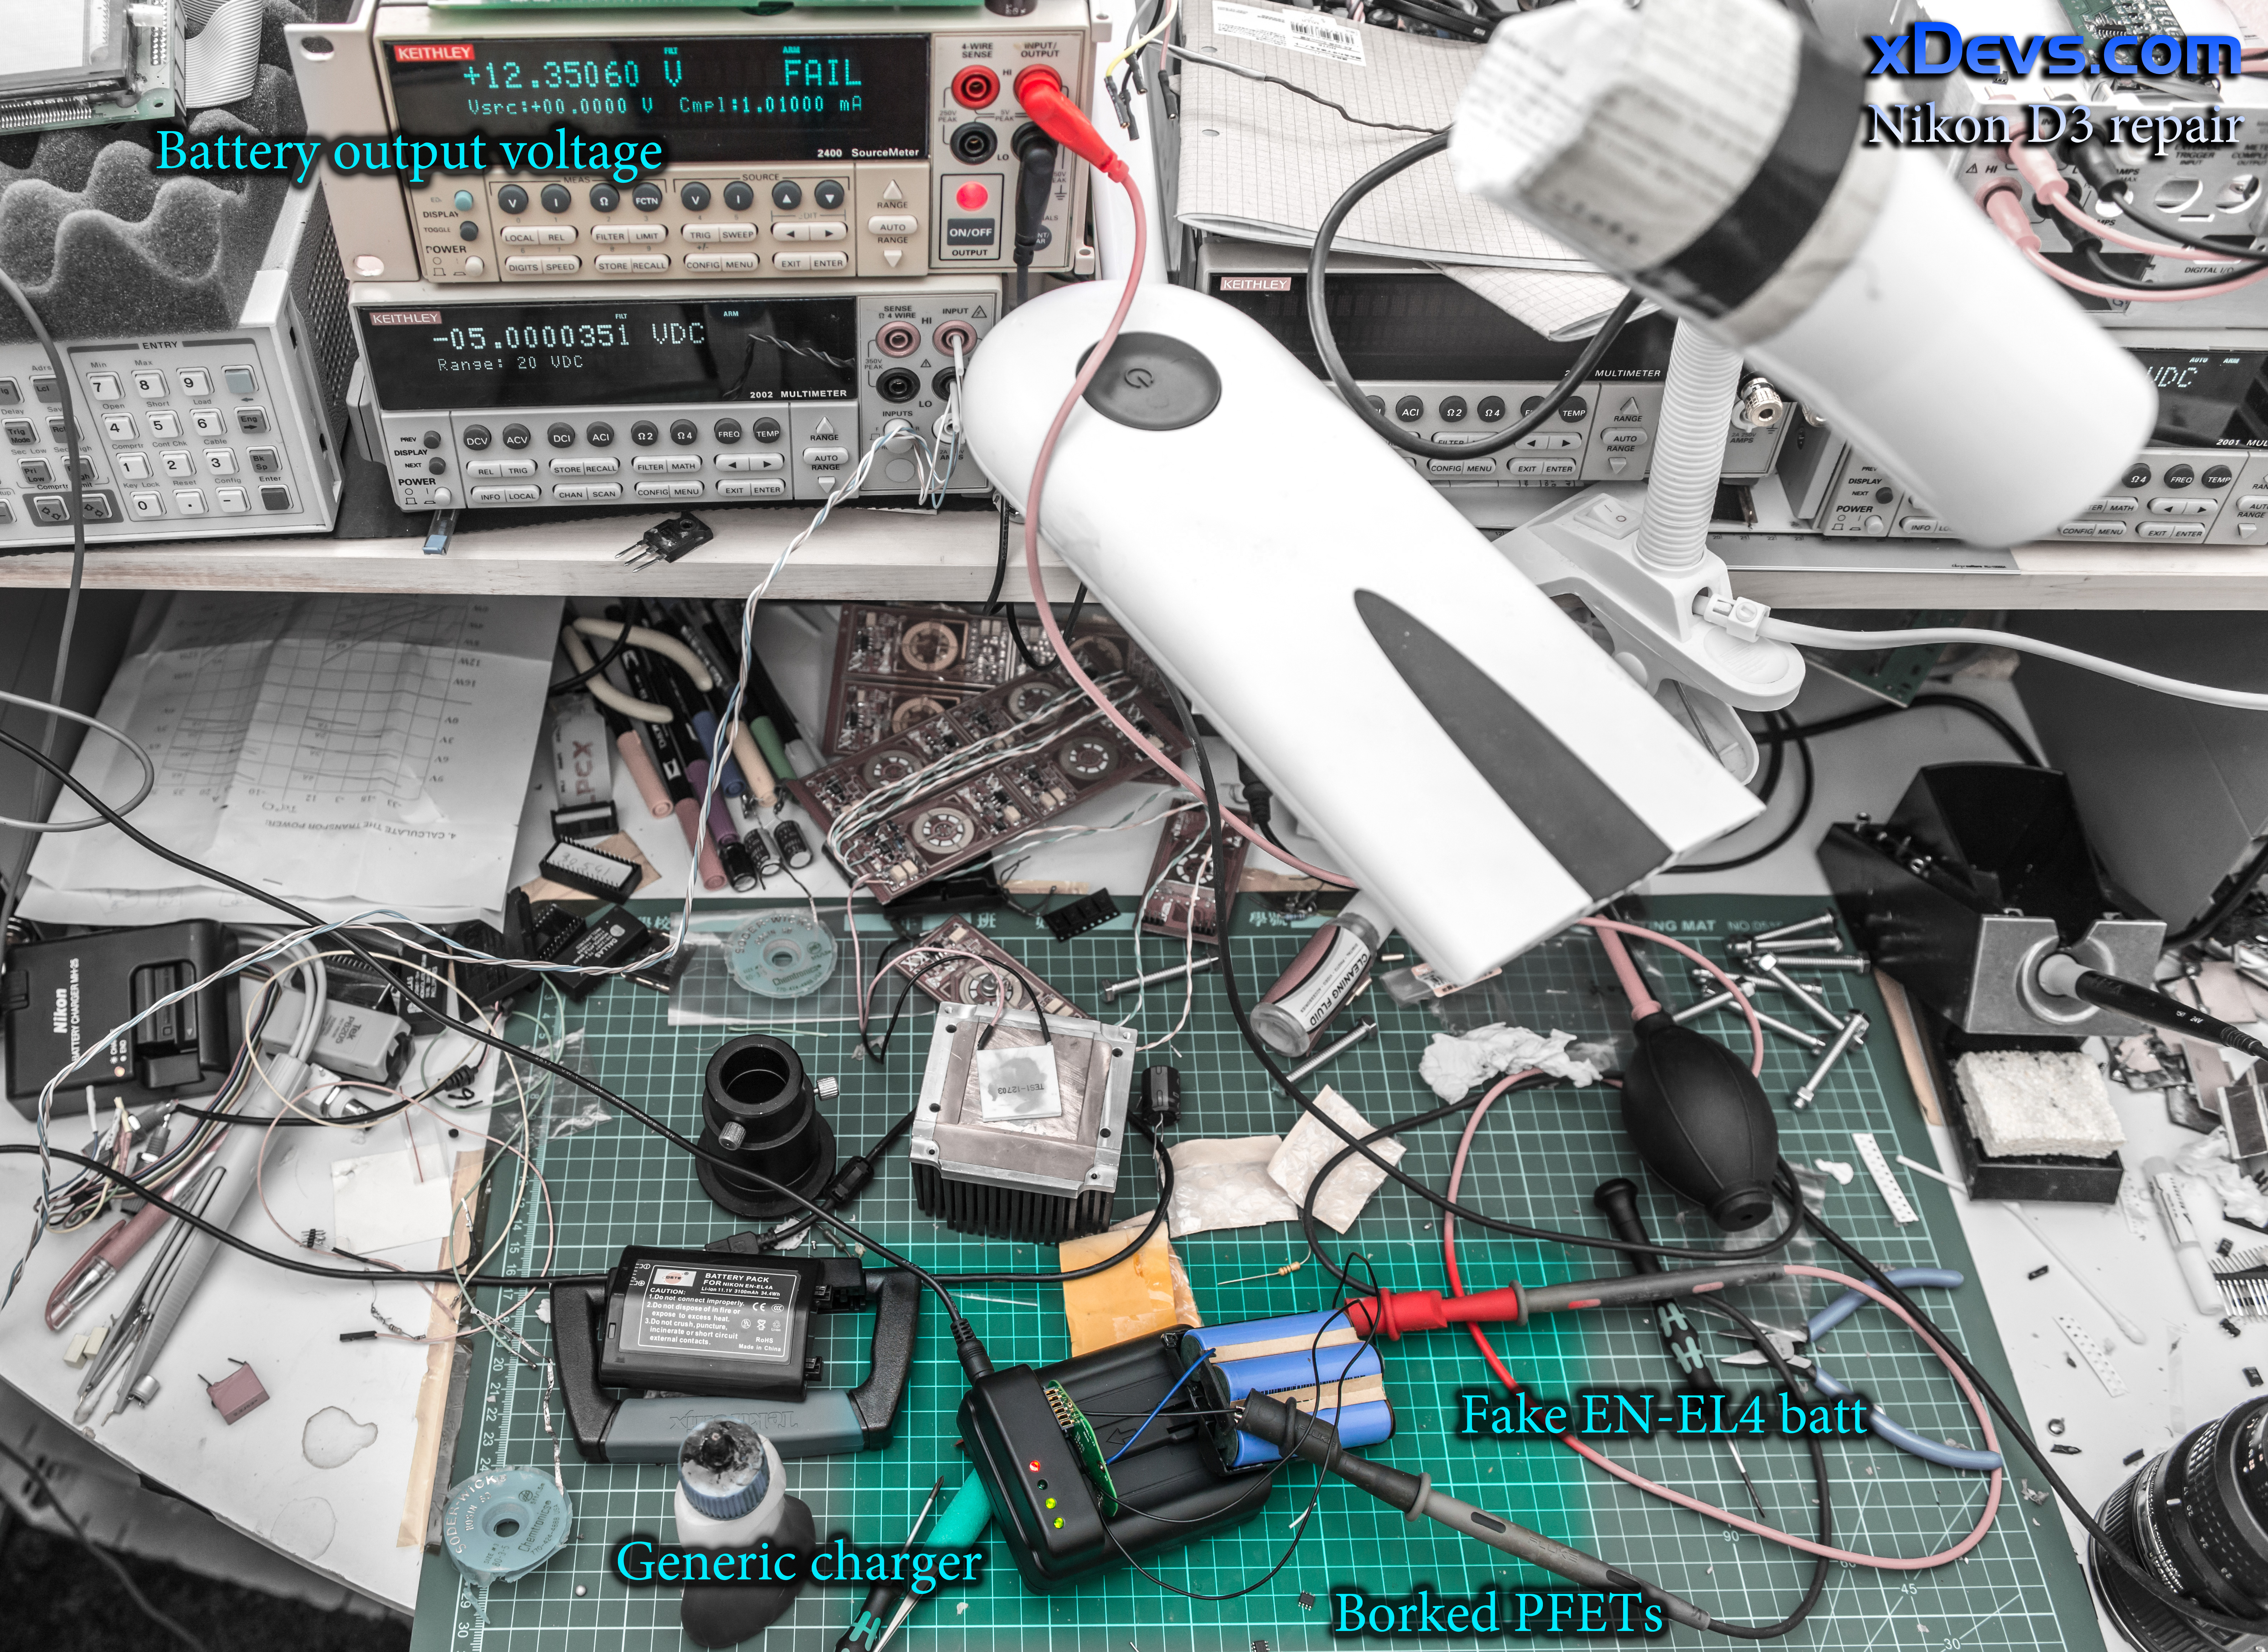
And of course, QC is as expected for $23USD battery (which is 6 times less than genuine batt). I mean second battery is DOA. Zero volts on power terminals. But since seller wants item back for refund, it’s not worth shipping cost, so i just take it apart to see if can fix it.

Cells have correct voltage around 4V, no blown visually parts. Two PFETs are okay, but controller turn off one of them cutting power from output terminals.
Need to study a little how that works.
- TSSOP20 chip have marking 235 1414C and logo like “M”
- TSSOP10 chip have marking 8202 318PO
- PFETs are AO4407A
- SOT23-5 have marking C2KF and SOT23-3 just 2A
Second battery works fine in camera.
TSSOP20 is a Mitsumi MM1414 LiPo protection IC.
Schematics:
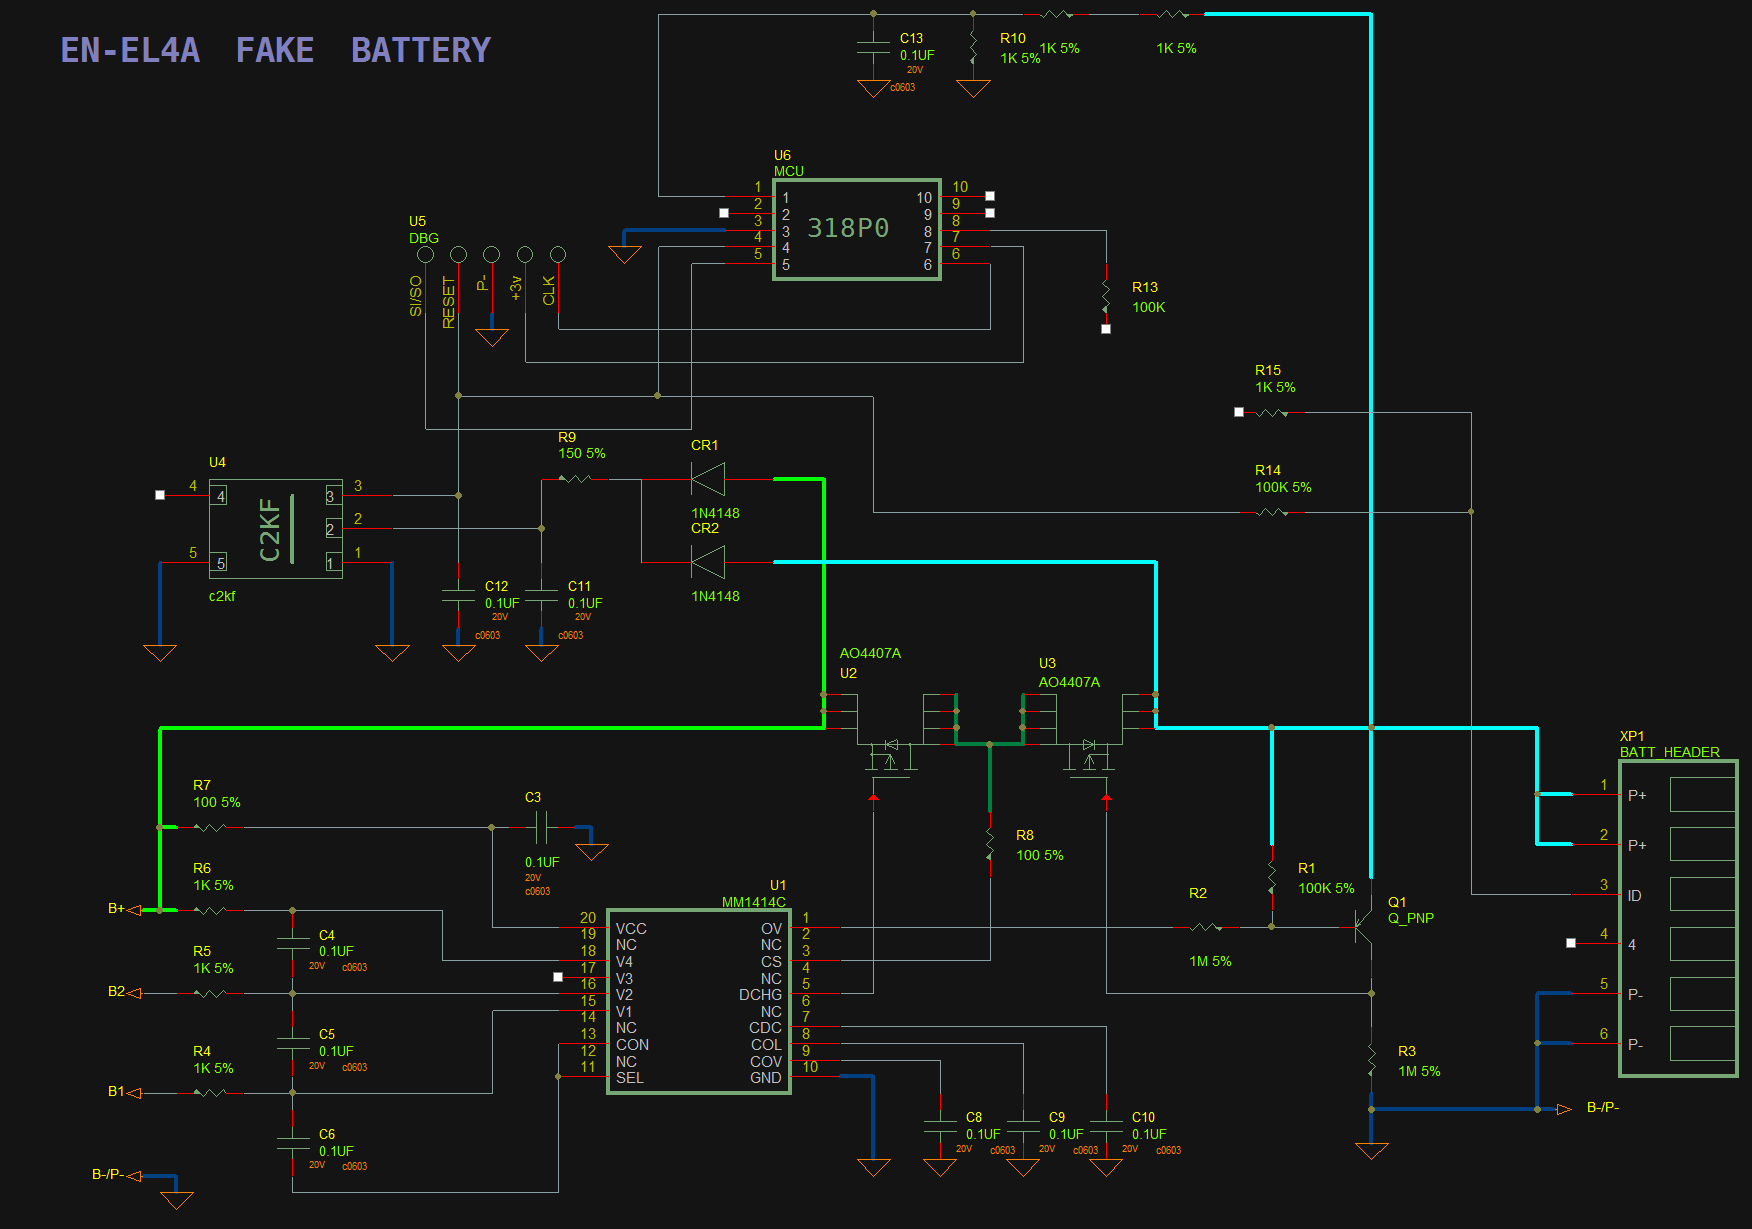
Anyone knows SOT23-5 SMD part with marking C2KF ?
It seems to be reset supervisor according to schematics, but could be LDO, too much caps around as for supervisor…
Photos:
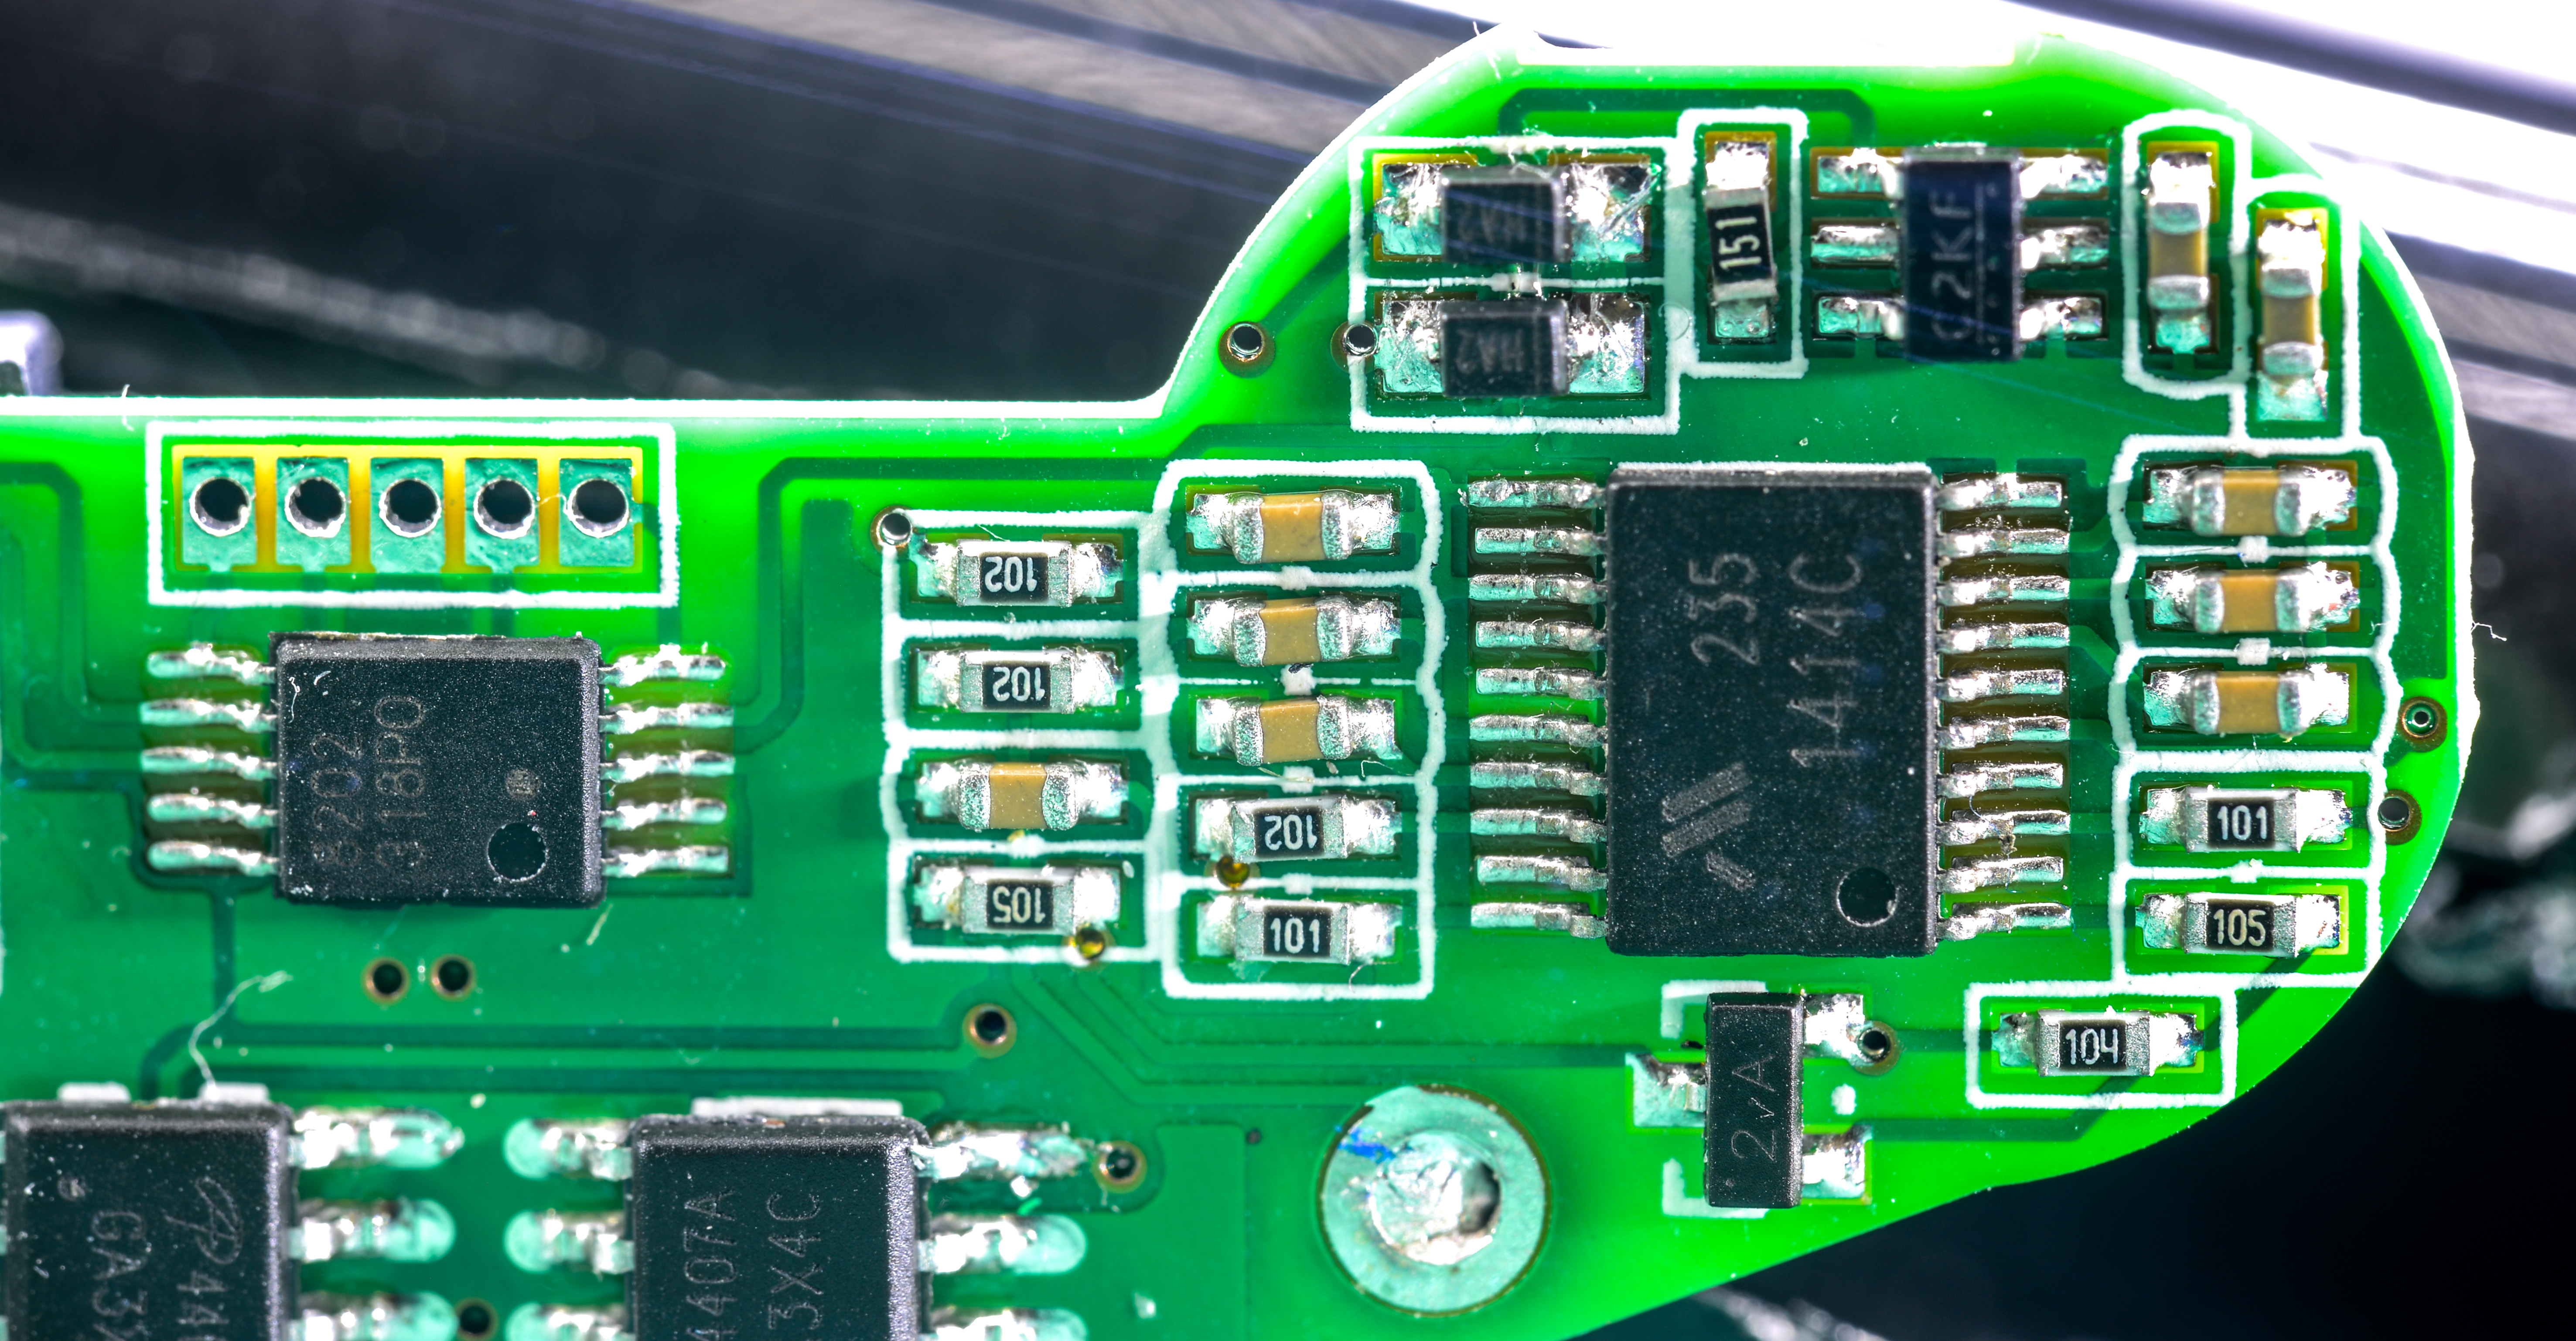

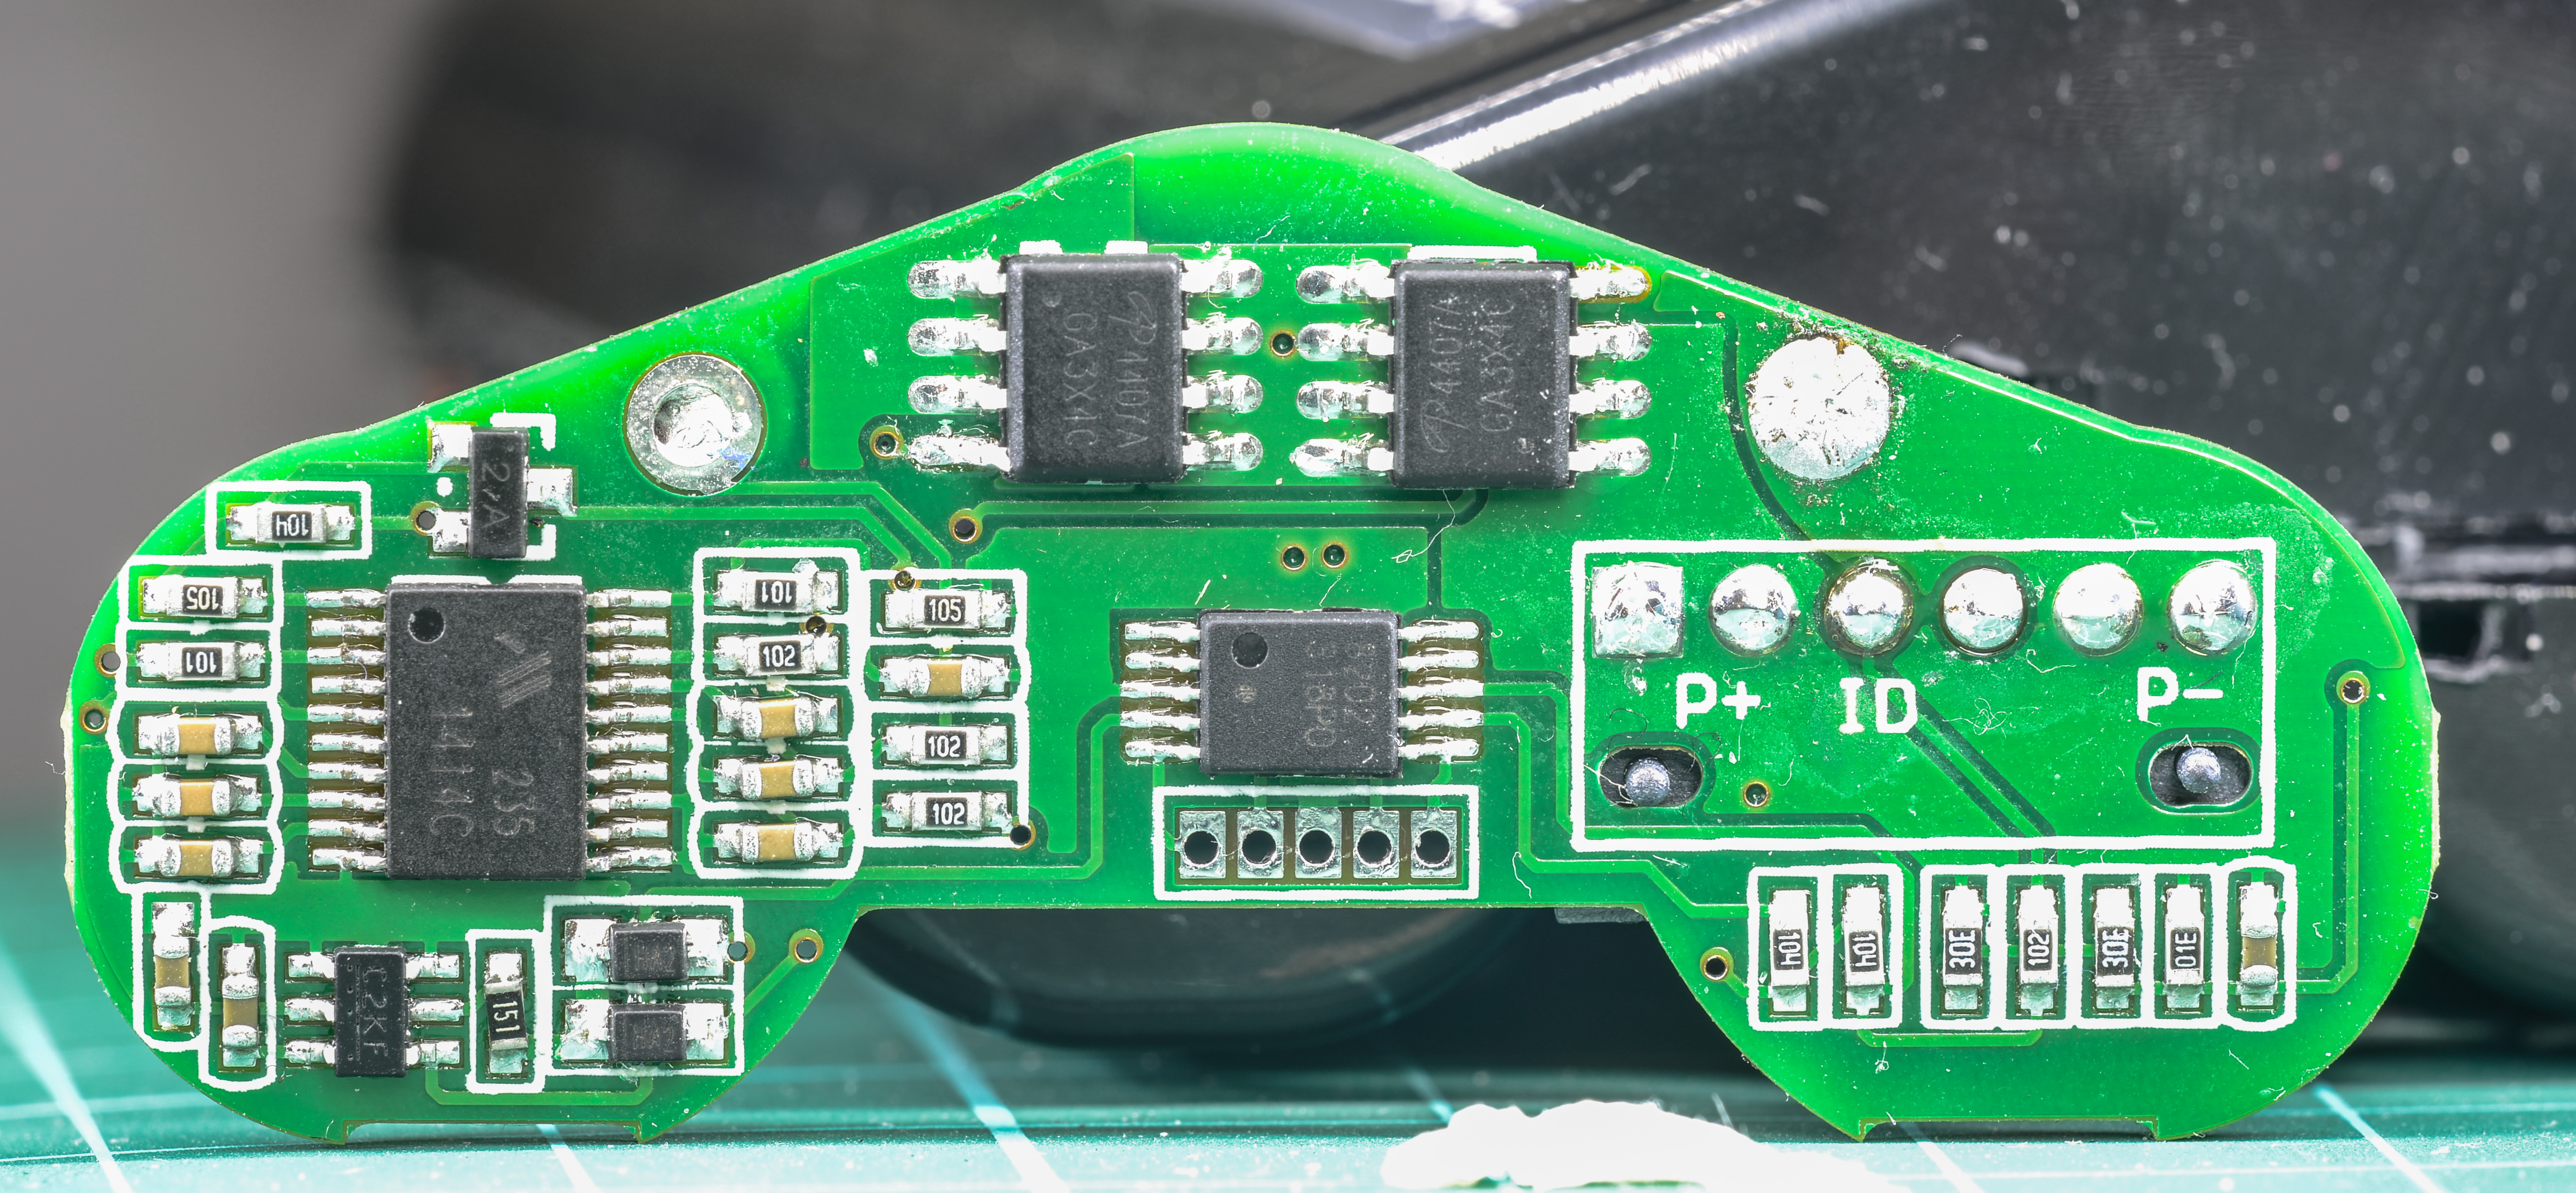
Happen that issue was with dodgy PFETs.
Now second battery accepts charge, seems alright after replacements of both P-channel MOSFETs.
After few month of use I noticed large self-discharge of battery. If camera left off for a week, battery will be completely empty. Eventually battery stopped working and disassembly revealed corrosion on the package.
Set of three new Type 18650 cells from Sanyo was purchased. After quick and careful soldering, which went easy and well, battery was measured at +12.4 VDC after full charge. Camera was happy to accept it and working OK. Will see how long will repaired battery hold.
Of course one might just go and buy original Nikon EN-EL4a for $175 USD, but it’s the case when process of repair might be more interesting and educational than getting stuff working ASAP.
Final test
Also finished another timelapse, 4 days non-stop, 17 min interval, this time running on fixed battery:
If you like this kind repair experience, feel free to leave comments, I have some lenses which need repair on hand, and could make few articles covering that.
P.S. only 6 extra screws which I don’t know where to put :D. Well expected, given that not as much care was used during repair.
Total time spend for this repair project is around 5 evenings.
Update from October 2016
After more than a year of use, this poor D3 still working nice and happy. Chinese crappy battery however died, so I had to replace cells in one with japanese Sanyo. After that no issues, and camera still used for time-lapse, making 1000-2000 shots a day on occasional event.
Projects like this are born from passion and a desire to share how things work. Education is the foundation of a healthy society - especially important in today's volatile world. xDevs began as a personal project notepad in Kherson, Ukraine back in 2008 and has grown with support of passionate readers just like you. There are no (and never will be) any ads, sponsors or shareholders behind xDevs.com, just a commitment to inspire and help learning. If you are in a position to help others like us, please consider supporting xDevs.com’s home-country Ukraine in its defense of freedom to speak, freedom to live in peace and freedom to choose their way. You can use official site to support Ukraine – United24 or Help99. Every cent counts.
Modified: Feb. 4, 2026, 1:19 a.m.