Intro
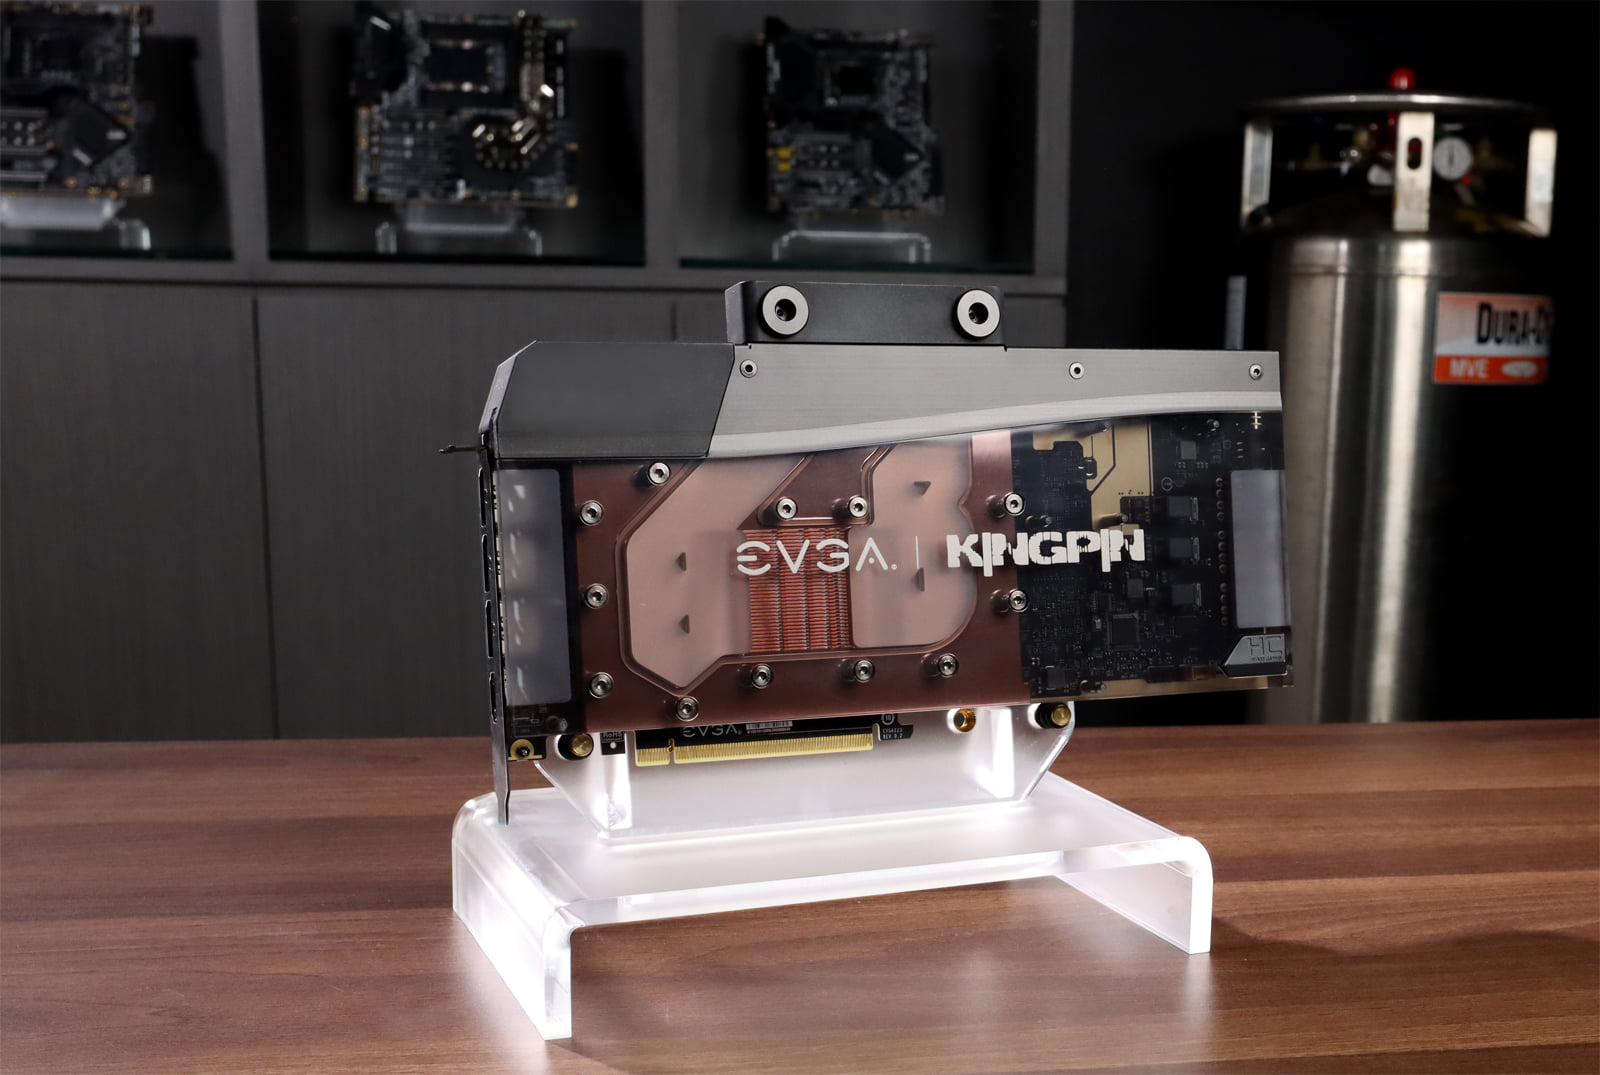
EVGA RTX 3090 Kingpin Edition graphics card is based around new generation of ray trace-enabled NVIDIA Ampere ASIC and fast Micron GDDR6X DRAM. This manual is mirror of kingpinoc.com page
- Out of the box ready for any type of overclocking. From everyday gaming and compute to liquid nitrogen cooled competition benchmarking.
- Unlimited onboard DC-DC regulator, using only the state of art components with digital control.
- Advanced controls and tuning knobs for overclockers and hardcore enthusiasts.
- Improved cooling solution technology with exclusive KPE theme.
- Clean Triple 8-pin power plug connectors located at the bottom right corner of the card help to minimize chassis cable clutter.
Korean website QuasarZone has this nice in depth review of KPE 3090
Warnings & Disclaimers
Consider everything given below as “educational material” and provided AS IS to aid in the understanding of the true power in your shiny new KINGPIN-branded card. Proceed with caution and at your own risk as only you are responsible for the possible outcome of out of spec stress.
Overclocking/overvoltaging your EVGA RTX 3080 Ti KINGPIN graphics card disregarding type of the cooling, is quite an adventure and usually safe for the hardware, as long as it’s done correctly. Always pay attention to details and fully research these topics before doing any VGA alterations. This guide will help with some key information and specifics.
Having patience and doing things in small incremental steps is key. Testing after each and every modification will provide the best user experience while keeping your hardware safe and benching over and over again. Data provided in this guide was verified on multiple cards to best effort, but slight variations in numbers or results for graphics adapters are still possible due to different test conditions and running environment.
EVGA does allow the end-user to perform a standard replacement of the cooling solution on the graphics card without losing the product warranty, but that only applies if the device was not mechanically or electrically altered. RMA inspection along with circuitry on the card can reveal modifications, even reverted. Always be honest and responsible for your actions with this enthusiast product.
Redistribution and use of this article, any parts of it or any images or files referenced in it, in source and binary forms, with or without modification, are permitted provided that the following conditions are met:
- Redistributions of the article must retain the above copyright notice, this list of conditions, link to this page (https://xdevs.com/guide/kpe3090/) and the following disclaimer.
- Redistributions of files in binary form must reproduce the above copyright notice, this list of conditions, link to this page (https://xdevs.com/guide/kpe3090/), and the following disclaimer in the documentation and/or other materials provided with the distribution, for example, Readme file.
All information posted here is hosted just for education purposes and provided AS IS. In no event shall the author, xDevs.com site, or any other 3rd party, including EVGA or NVIDIA be liable for any special, direct, indirect, or consequential damages or any damages whatsoever resulting from loss of use, data or profits, whether in an action of contract, negligence or other tortuous action, arising out of or in connection with the use or performance of information published here.
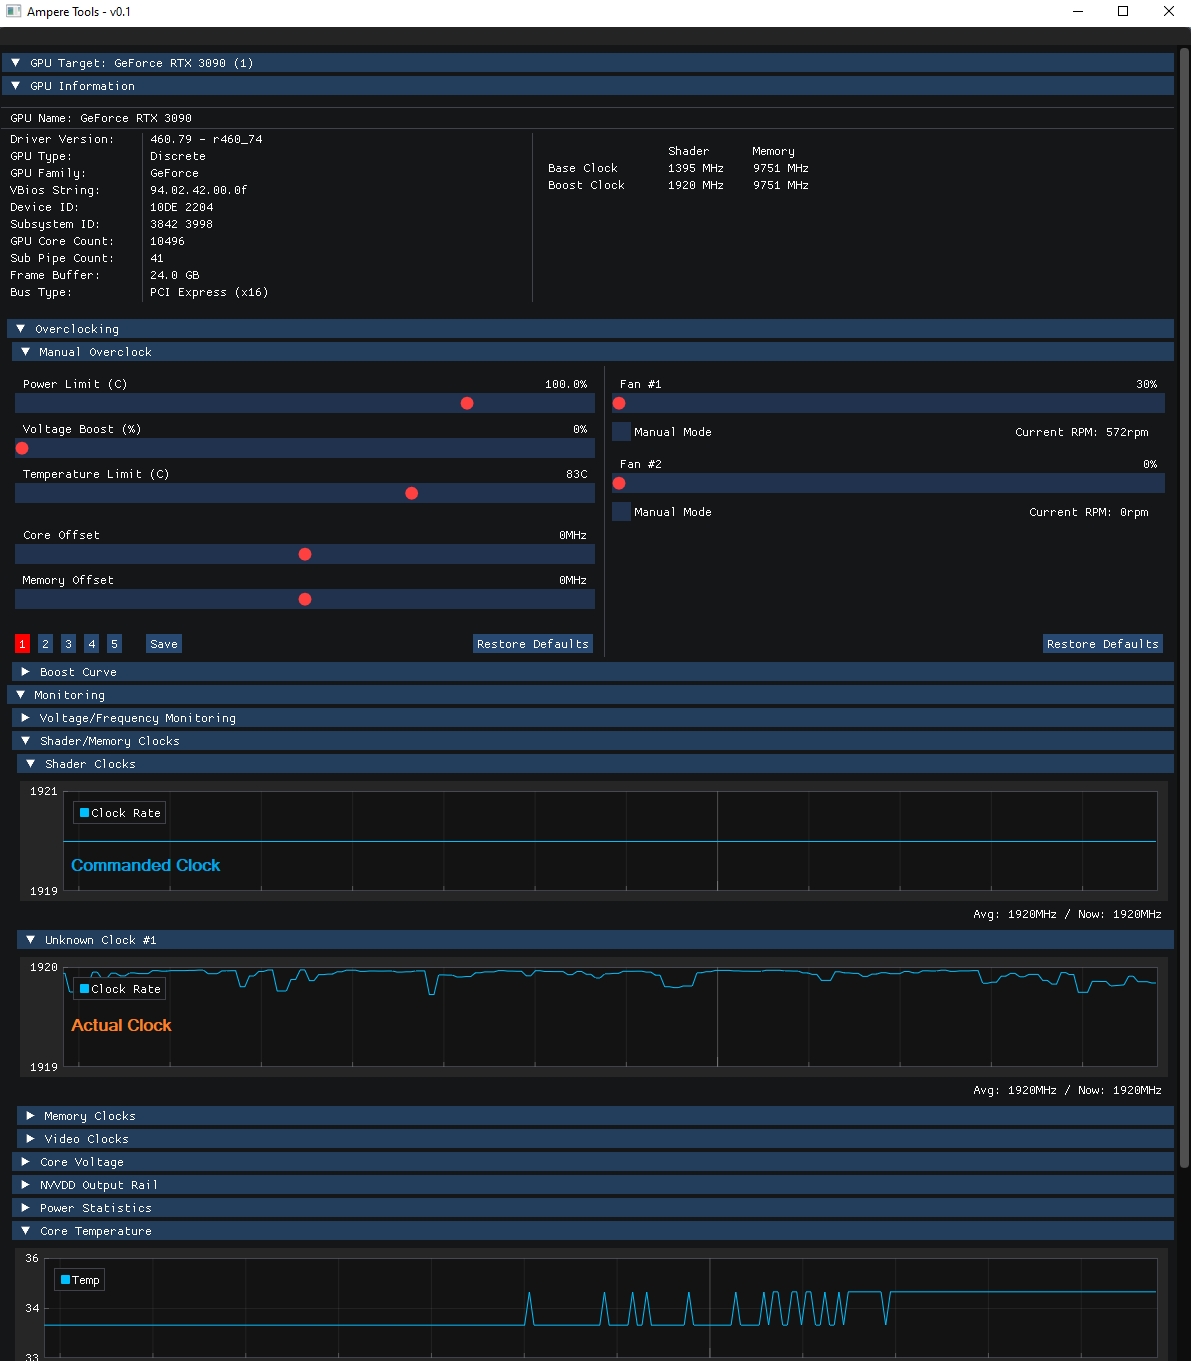
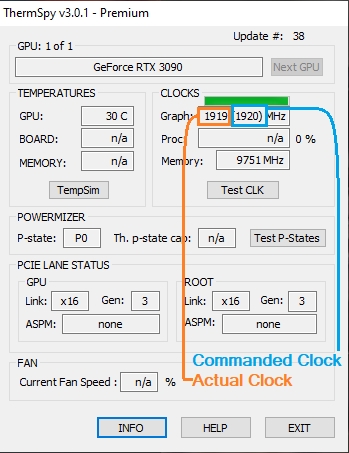
Clocks
With Ampere its important to know that the clocks you see arent what you are getting. The best way I can describe it is there is Commanded clock and there is actual clock. Most of your tools and utilities will reflect commanded clock. There are 3 pieces of software at the time of writing this specific article that read actual clocks. Thermspy, Ampere OC Tool, 3DMark, and Nvidia Inspector are the ones that work. For simplicities sake id use thermspy or Ampere OC Tool as it reads both values. 3DMark only reads actual and NVIDIA Inspector software is sadly not publicly available.
ProbeIt monitoring header
For voltage monitoring purposes this card has traditional EVGA ProbeIt, which is a 10-pin 2mm pitch PH-type connector near the top PCB edge. Pin definition as below:
| Number | Description |
|---|---|
| Pin 1 | GPU voltage / NVVDD |
| Pin 2 | Ground |
| Pin 3 | MEM voltage / FBVDD |
| Pin 4 | Ground |
| Pin 5 | PLL voltage / PEXV |
| Pin 6 | Ground |
| Row 7 | Onboard +1.8V power voltage |
| Row 8 | Ground |
| Row 9 | Onboard +12V PCIe power voltage |
| Row 10 | Ground |
ProbeIt pinout is same since the GTX 680 era, so you still can use your ProbeIt setup if you had it done before. The only difference is replacement of +3.3V probe point with +1.8V rail instead. This I/O voltage is used as main logic level on RTX series graphic cards now, providing power for BIOS, display outputs and various onboard auxiliary logic.
Also same helpful labels with voltage names is located on the bottom side of PCB near each ProbeIt connector pin to aid connection.
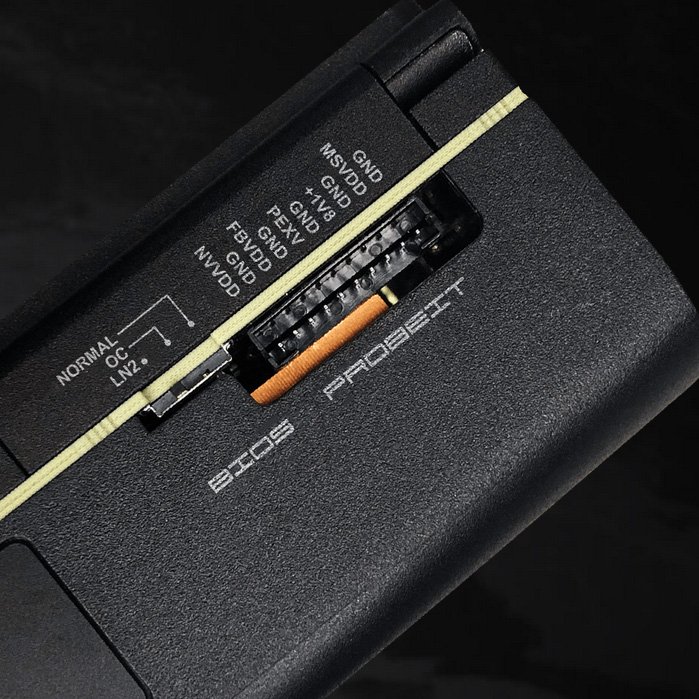
VBIOS Switch available on card, to select one of three BIOS chips.
Preloaded VBIOS
Just like all previous K|NGP|N Edition cards, 3090 KPE has three independent different BIOS ROMs and the corresponding switch to select between them. Default configuration with switch locked at right (towards power plugs), setting on NORMAL BIOS position.
BIOS difference comparison between the three is presented here.
| Normal BIOS switch | OC BIOS switch | LN2 BIOS switch | |
|---|---|---|---|
| GPU Clocks Boost/Memory clock | 1.92 GHz / 19.5 Gbps | Same as Normal | Same as Normal |
| BIOS Version | 94.02.42.00.0B | 94.02.42.00.10 | 94.02.42.00.0F |
| Fan stop at idle/low load | Yes | Yes | Yes |
| Power Limit | 100w-450w | 100W-480W | 100w-520w |
| TGP Range | -77%-105% | -77%-112% | -77%-121% |
| Protection function | Full Protection | Full Protection | No temperature protection |
LN2 BIOS switch position disable temperature protection by hardware. This is a crucial feature to enable for LN2-type cooling, but totally unnecessary(and even dangerous) for watercooling/aircooling use.
Using LN2 BIOS position is not recommended for daily use, but available for benchmarking purposes.
If you want to enjoy maximum fan speeds that 90.02.30.00.79 version provide, you can flash it into “Normal” or “OC” position instead, to maintain thermal protection mechanisms and safety. Any of the three BIOSes can be flashed with unofficial KPE BIOS ROMs and operated independently.
BIOS can be flashed using NVFlash from TechPowerUp. You need version 5.567.0 or newer.
Card is already shipped with three different BIOSes, available for download as backup dumps:
Normal BIOS, Version 94.02.42.00.0B This BIOS is stock baseline
OC BIOS, Version 94.02.42.00.10 This one is similar to Normal but with Higher TDP target limit
LN2 BIOS, Version 94.02.42.00.0F This one is similar to OC but with Higher TDP target limit
Custom unofficial XOC BIOS
Current normal BIOS provided above (as shipped with card) with maxed out 144% power limit target already allow GPU to reach maximum everyday frequency without need of special VBIOS or risks involved flashing it.
However, if you want to do benchmarking with extreme cooling, you might want to get purpose built custom ROM from link below. Keep in mind, this BIOS is not for everyday use.
XOC unofficial BIOS, Version 90.02.17.40.88 XOC overclocking version for RTX 3090 KINGPIN card.
This archive is password protected to ensure you have read this guide carefully and agree with the risks involved of flashing custom binary into your KINGPIN. Password from the archive is ipromisenottoRMAthiscard.
XOC BIOS have next limitations to restrict its use only for benchmarking purposes:
- All fans are always 100% speed (“jet engine mode”).
- Fan speed curves or adjustment in PX1 is disabled.
- Temp target is removed.
- Power limit is not there anymore. :)
- Card ID is generic in this BIOS.
BIOSes in this section are compatible only with EVGA RTX 3090 KINGPIN card. These BIOS are unofficial and provided AS IS, without any warranty for education purpose only. Do NOT hotlink this BIOS on forums or social media.
Precision X1 Software
RTX 3090 KPE supported by Precision X1 since version 1.1.2.0.
KINGPIN RTX 3090 have special hardware to actually measure all the relevant voltages in real-time and report those measurements to Precision X1 which can read and display real measured voltages in software and on OLED. It works automatically with every 3090 KINGPIN graphics card and does not need any settings adjustment. Just make sure you use Precision X1 version 1.1.2.0 or newer.
Release: 12/15/2020
- Fixes crash on opening due to profile mismatch
- Fixes issue where the VF Curve does not save correctly
Release: 12/14/2020
- Update firmware for FTW3 / XC3 LED fine-tune support.
- Fix KINGPIN iCX sensors read error issue
- Remove KINGPIN animation upload
- Fix lost MCU after firmware update
- Fix GTX 10 series OC Scan VF curve data issue
- Textbox input for fan speed
Release: 11/26/2020
- Adds support for EVGA GeForce RTX 3090 K|NGP|N
- Various Bug Fixes
Firmware
Stock – 3.01.23
After PX1 1.1.3 – 3.01.26
Classified Tool
There is traditional Classified tool available to play with various onboard KINGPIN RTX settings for maximum performance tweaking.
Uncheck “Auto” checkbox to unleash the beast. Keep an eye on temperatures!
Power consumption and stress to GPU is increased exponentially from elevated voltage, instead of linear for clock frequency OC only.
Do NOT set anything over 1200 mV for any type of near ambient cooling. Even with chilled watercooling and antifreeze your GPU temperatures under load will be positive and giving more juice to poor chip will only throttle it. It’s easy to see by lack of performance scaling (such as 3Dmark score / game fps).
When you use a tool, it’s a good idea not to mess with voltage control in Precision X1. Using multiple programs to control card settings can easily corrupt driver settings and create havoc. Great example of “Too many cooks in the kitchen”, because different applications do not communicate to each other, to gracefully apply settings.
This tool applies settings to hardware directly and settings will stay until the card is power cycled (complete shutdown). If you need reset to default settings – just power cycle the system, that will clear any classified settings. You do NOT need to keep tool open to maintain settings, they will stay set, until the card is power cycled.
For LN2 benchmarking make sure to disable NVVDD OCP and enable LN2 VRM mode settings!
There is also a modified Version of this tool. The only difference is you can send l2C commands.
Classified Tool Modified, for 3090 KPE
Ampere OC Tool
Ampere OC Tool or here locally
Thermspy
Some more information about Thermspy is here
Local copies also available, just in case:
Water Block Options
There are no open loop water block options right now.
EVGA: Hydro Copper is planned but not set in stone if its going to be a separate item or if there is going to be a additional SKU with a preinstalled block. Regardless as of late December 2020 all Hydro Copper blocks were delayed due to QC issues in early production samples.
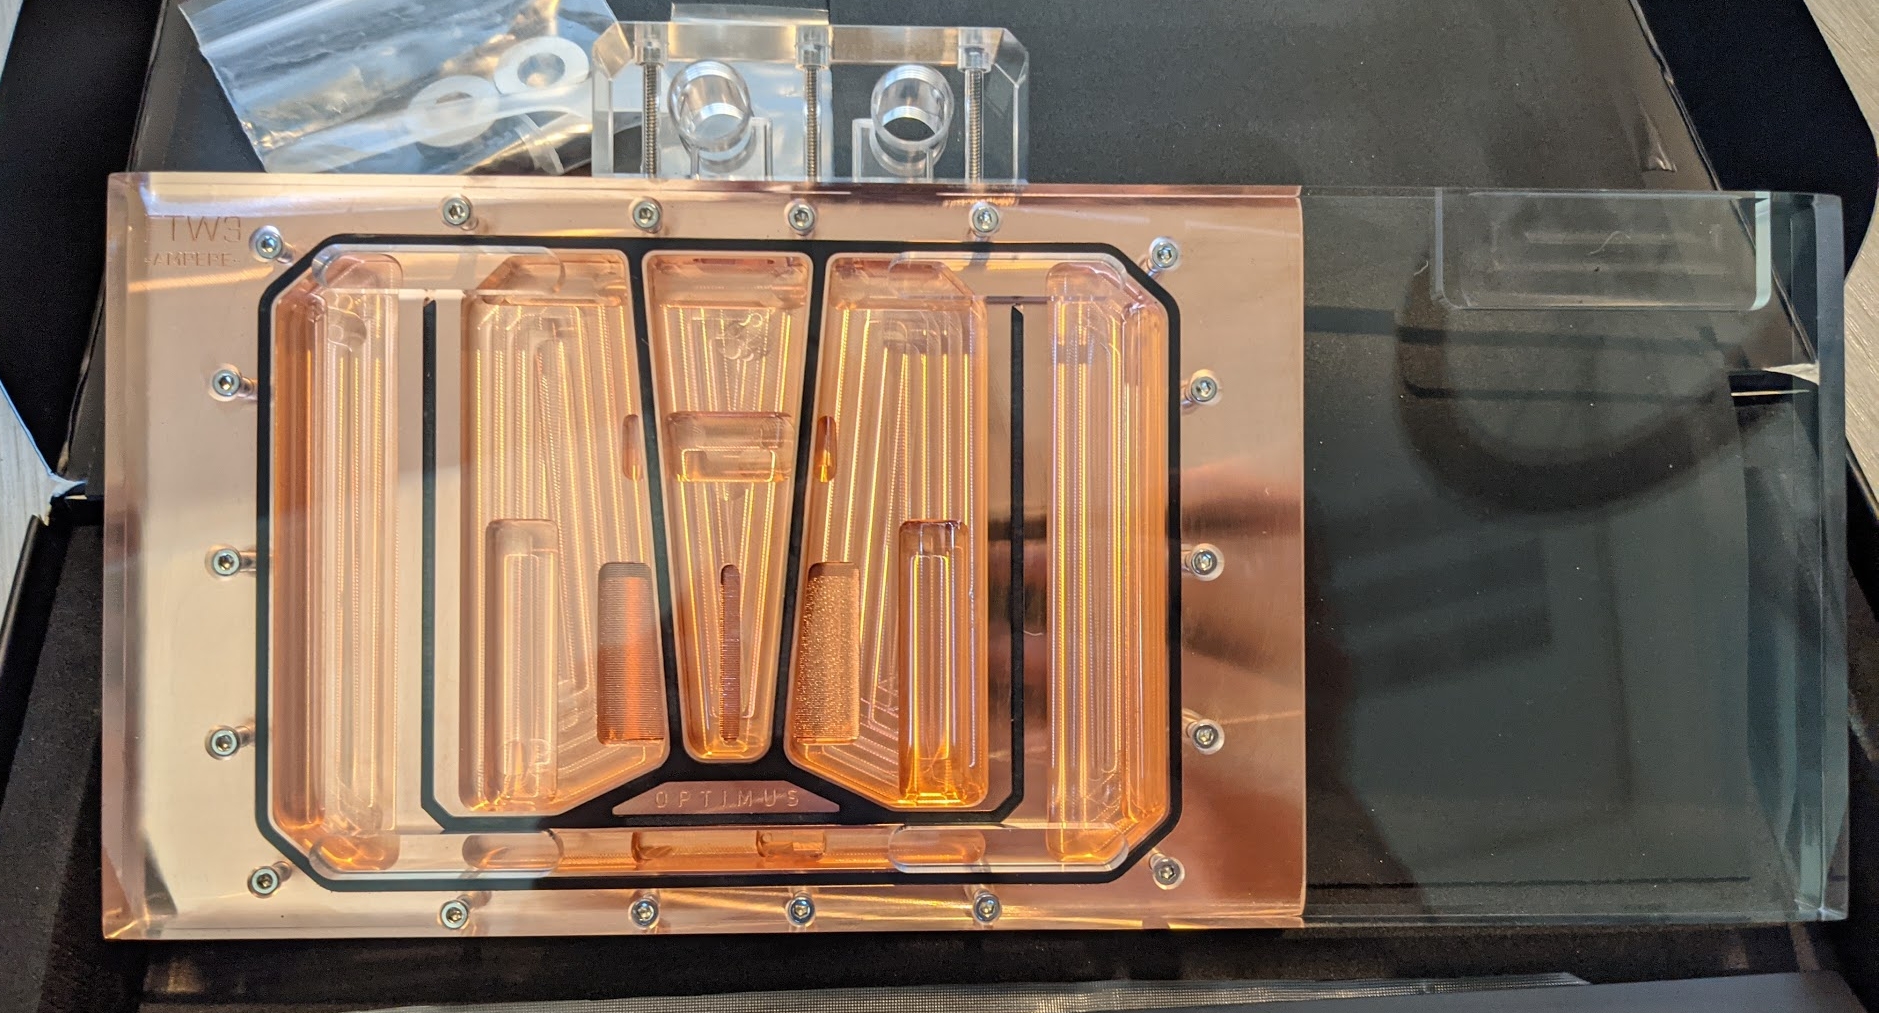
Optimus: Optimus PC has hinted that they are going to make Kingpin blocks but in their list of plans it is last and there is no ETA.
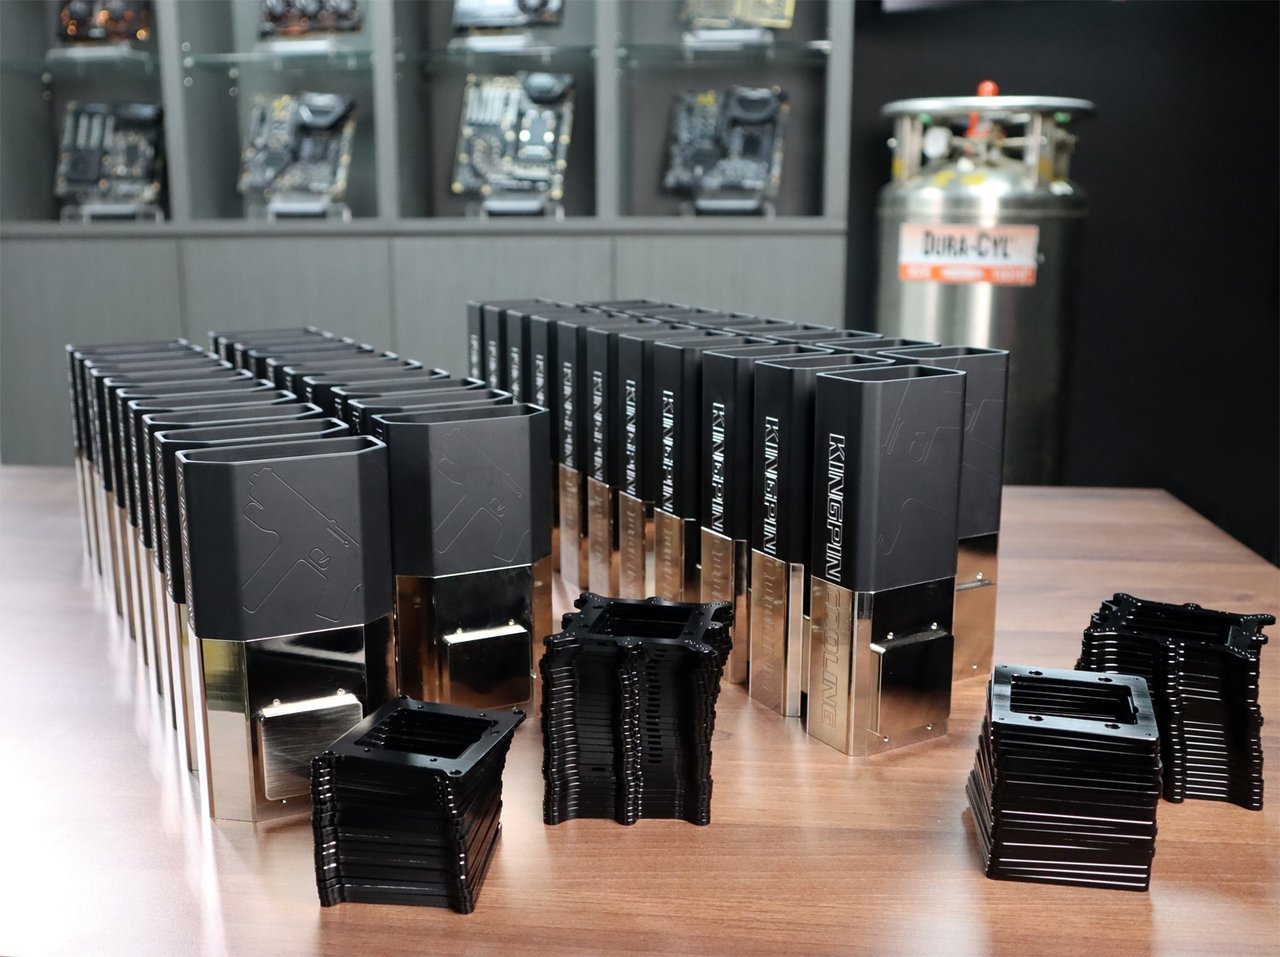
LN2 Extreme OC cooling compatibility
At this time there is only one LN2 pot available for ampere cards. That would be the one and only Kingpin Cooling Tek-9 Icon V5
Enjoy your overclocking!
Projects like this are born from passion and a desire to share how things work. Education is the foundation of a healthy society - especially important in today's volatile world. xDevs began as a personal project notepad in Kherson, Ukraine back in 2008 and has grown with support of passionate readers just like you. There are no (and never will be) any ads, sponsors or shareholders behind xDevs.com, just a commitment to inspire and help learning. If you are in a position to help others like us, please consider supporting xDevs.com’s home-country Ukraine in its defense of freedom to speak, freedom to live in peace and freedom to choose their way. You can use official site to support Ukraine – United24 or Help99. Every cent counts.
Modified: May 26, 2022, 5:24 a.m.