Scope diagram
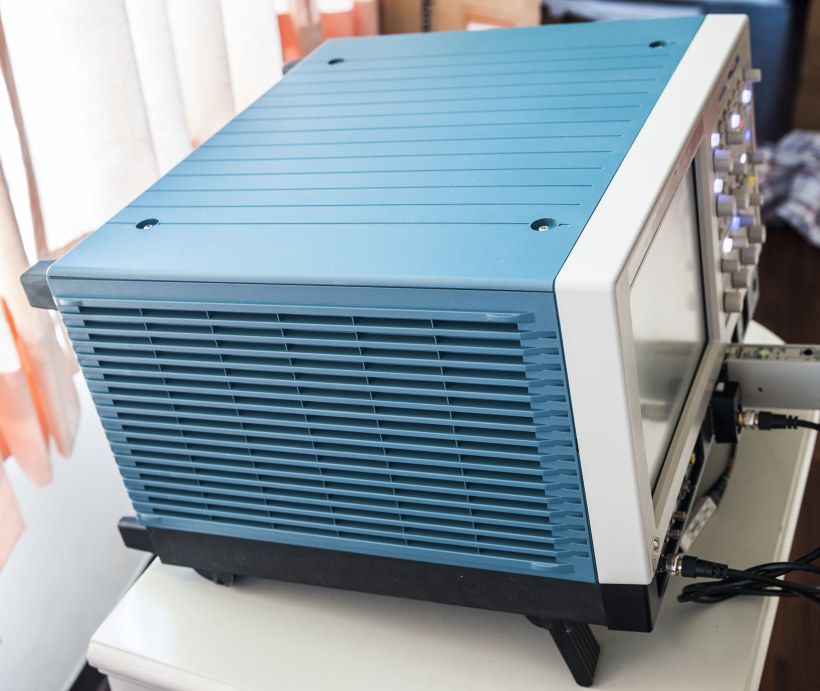
Recently we acquired Tektronix CSA7404 scope, bought as dead for parts. Unit come in pretty bad physical shape:

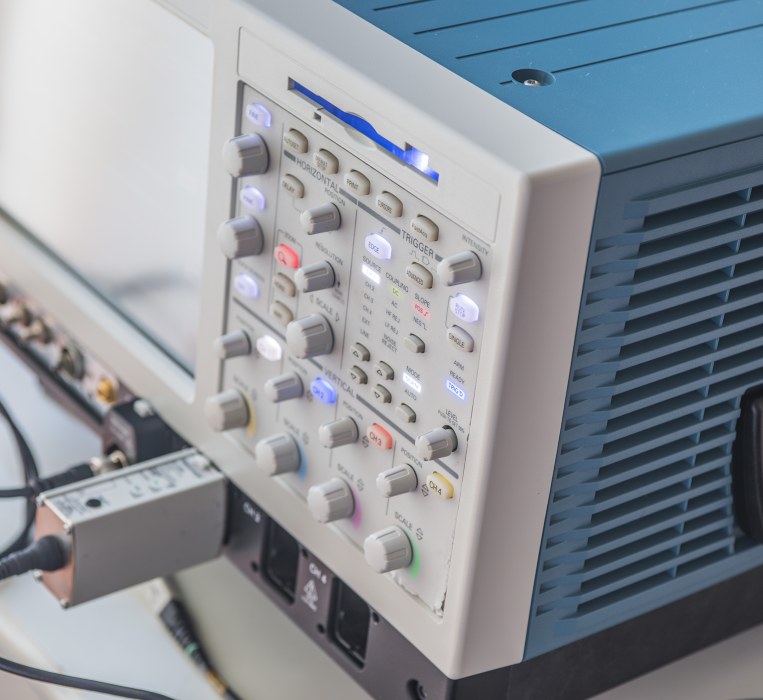
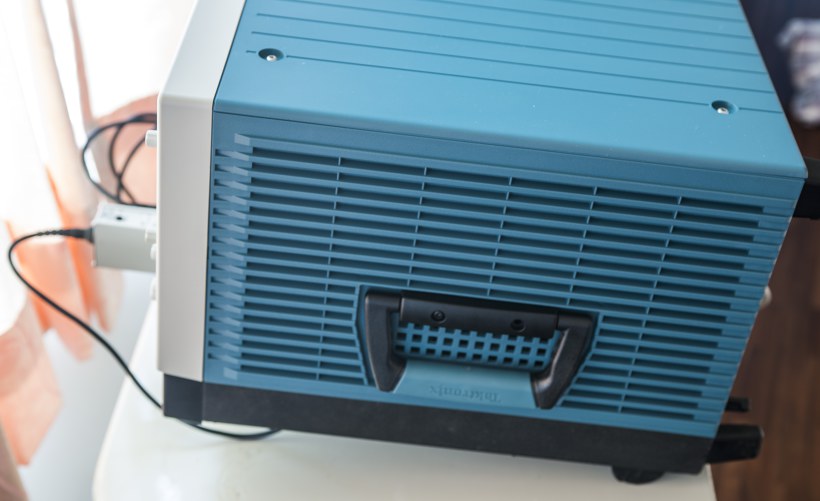
All plastic exterior parts except front panel were missing. Outside aluminum shielding/case covers were bent on corners, looked that scope was dropped on angle.

Despite of damages and poor look – it still was able to power on and booting Windows 98 OS. Hard drive had bad SMART status and was making clicking noise, so obviously it’s going to be replaced with new HDD as one of first steps of scope restoration.

While machine was able to boot OS without problems, main scope application, TekScope was unable to start. It was just showing welcome splash screen and hanging there. Downloading fresh copy of TekScope 2.5.3 Firmware for CSA7000/TDS7000 from Tektronix site and reinstalling application did not help either.
Before we dig in, let’s take a look on high-level block diagram of Tektronix CSA7404 from service manual :

There are four main modules/boards in scope.
- x86 PC system (NLX motherboard, Socket 370 Celeron 850/128/100 Coppermine CPU, i810 chipset, onboard VGA, network, USB, SDRAM PC133 × 2 slots (only one used with 256MB DIMM)
- PowerPC system (Tektronix custom board with interface to NLX and ACQ board (had installed 256MB DIMM on it))
- Acquisition board (ACQ, front-end to scope channels, custom Tektronix high-speed ASICs with dedicated RAM and interface to PowerPC board)
- Main power supply board (cross compatible, at least with tested CSA7404 and TDS7704B)
We had access to working Tektronix TDS7704B, which come handy to check some parts and do board-level testing. Obviously both these scopes use common architecture, and share same power supply board and similar (but not interchangeable) PowerPC/x86 combo.
As first measure of any electronic device troubleshooting – check power. Swap whole power supply module from TDS7704B to CSA7404 showed no functional issues or differences, which pretty safely can show that power supply delivery to other boards from mains PSU is OK.
Initial testing and debug
First step will be visual inspection of all internals of scope to see, if any components or boards are physically damaged or missing.

On acquisition board there was missing heatsink on one of big National Semi custom ASICs for channel 3. New heatsink was bought are placed on chip, hoping that it’s BGA connection to board is intact.
On x86 board there was leaky output electrolytic capacitor in CPU DC-DC convertor. It was replaced to new one, which is common operation for servicing old computer motherboards already for a while. As a side note, considering cost of such scopes even today it’s quite unpleasant to see low-end CapXon capacitors being used.
As was already stated earlier – there were no power supply board problems, as all voltages were present, and no visual damages were observed either. Swapping PSU from another scope did not make scope progress on loading app any further.
Interconnect boards (P200 between PPC board and ACQ, power delivery interconnect boards) were fine too, replacing them to same from TDS7704B did not change anything. So problem lied either in acquisition board, or PowerPC board or interfacing between NLX and PPC boards or PPC/ACQ. Interesting fact, that removing interconnect board P200 from PPC to ACQ on TDS7704B did exactly same – TekScope app stopped working and hung on welcome splash screen. This gives us information, that TekScope app needs to communicate successfully with PPC and ACQ boards to be able to start.
After some checks of x86 side of scope and trying to run few HDDs with Windows 2000 no obvious problems was found. CD-ROM drive was changed to DVD-RW from old laptop. Connection was standard notebook PATA. Original IBM Travelstar DARA-206000 6GB 4200RPM disk was changed to fresh IBM Travelstar IC25N020ATDA04-0 20GB drive. New Windows 2000 SP4 Professional was installed as maximum supported OS on this series scopes. Given current Celeron 850MHz CPU and 256MB this setup should run smoothly for beginning.
Moving our focus to PowerPC board as main suspect. This module There is handy debug 7-segment single digit debug LED, which according to service manual have next codes:

This LED is located on PPC board near riser connector and easily visible even when outer aluminum shell is installed.

Our board during power up and after was rolling from “.8” code to “L”, stays there for couple seconds, and then restarting from start again, and doing this infinitely in loops. On working TDS7704B post code LED was going from “.8” to “L”, then when OS started goes to “P” and finally to flashing “-”, staying there when TekScope application running. Looks like PowerPC board unable to finish it’s booting sequence.
NVRAM Failure (Scope boots, OS boots, but TekScope application hangs on welcome splash screens, front panel not responding)
Due to age of these machines and usage of battery-backed NVRAM (Dallas DS1245) it’s not rare that onboard 3V battery (similar to ones used in usual computers for CMOS data retention) loose it’s voltage. Unluckily, boot parameters and configuration is stored in PowerPC NVRAM as well, so after battery failure scope likely to fail, due to inability to load boot ROM from x86 PC system HDD. Visual diagnosis can be done by observing TekScope application to hang on splash screen, and debug POST code indicator rolling codes over and over from 4 to L on PPC board. This is happening because when PPC boot loader lost its boot settings and cannot find correct ROM anymore, it reboots after 10 seconds to try again. That’s why it’s staying on “L” phase for 10 sec before it repeats loop.
Quickly I found users with very same issues with their TDS7000/CSA7000 series machines here .
NVRAM repair solution / fix
First step is to replace faulty battery and allow Dallas NVRAM to be functional again.
Locate NVRAM on PPC board:

On CSA7404 it’s near NLX riser connector, and have PowerCAP module on top of DALLAS DS1245YP-100. PowerCAP is just simple PCB with BR1632 battery soldered on and plastic cover. I replaced old battery (voltage on it was 0.7V after removal) with new Panasonic BR1632A/FA. Make sure polarity is correct when soldering battery on. Latch PowerCAP with new battery back on top of NVRAM.
Now we need to reset again correct boot parameters. To do so there are few extra tools are required:
- Serial interface to your host, or RS232-USB dongle
- Few wires for connecting PowerPC debug serial port
- Any terminal software which can work on serial port
I had no RS232 on my PC, but had few UART-USB interface bridges based on Silabs CP2103. RS232 levels are converted from UART by onboard MAX232 Driver IC , which is located near NLX riser connector on PPC board. I connected GND (Pin 15), TX (Pin 11), RX (Pin 12) to Silabs CP2103 dongle inputs and connected terminal at 9600, 8N1 settings.

First boot output with 9600 baud rate, 8N1 settings :
UUUUUUUUUUUUUUUUUUUUUUUUUUUUUUUUUUUUUUUUUUUUUUUUUU

romPost: MPC106  Walking-one passed.
romPost: MPC106 configuration passed.
romPost: First PCI access  passed.
romPost: PC87560 Walking-one passed.
romPost: PC87560 configuration passed.
romPost: DEC21554 configuration passed.

romPost: PERFORMING ROM CHECKSUM TEST...
romPost: ROM checksum passed.

romPost: PERFORMING DRAM CELL TEST...

romPost: Enabling data cache...
romPost: Data cache enabled.
romPost: Enabling instruction cache...
romPost: Instruction cache enabled.

romPost: DRAM Cell test passed.
romPost: Disabling data Cache...
romPost: Data cache disabled.
romPost: Disabling instruction cache...
romPost: Instruction cache disabled.

romPost: PERFORMING DRAM MARCH TEST WITH CACHE OFF...
romPost: Writing address to each *address...
romPost: Reading address from each *address...
romPost: DRAM march test passed...

romPost: PERFORMING DRAM MARCH TEST WITH CACHE ON...

romPost: Enabling data cache...
romPost: Data cache enabled.
romPost: Enabling instruction cache...
romPost: Instruction cache enabled.
romPost: Writing address to each *address...
romPost: Reading address from each *address...
romPost: DRAM march test passed...

romPost: PERFORMING DRAM WALKING-ONE  TEST...

romPost: DRAM Walking-one test passed.

romPost: PERFORMING NV-MEMORY WALKING-ONE  TEST...

romPost: NV-MEMORY Walking-one test passed.
romPost: Disabling data Cache...
romPost: Data cache disabled.
romPost: Disabling instruction cache...
romPost: Instruction cache disabled.
romPost: Enabling instruction cache...
romPost: Instruction cache enabled.

romPost: POWER-UP DIAGNOSTIC COMPLETE.

Hel

                            VxWorks System Boot

Copyright 1984-1996  Wind River Systems, Inc.

CPU: Tektronix HPP - PowerPC 740
Version: 5.3.1
BSP version: 1.0.4.0
Creation date: Nov  2 2000, 11:03:34

Press any key to stop auto-boot...
 7 6 5 4 3 2 1 0

auto-booting...

boot device          : ??D?h?
processor number     : 0
flags (f)            : 0x0

Network interface   D¦h  unknown.

Can't load boot file!!
[VxWorks Boot]: Starting at 0xfff00100...
Then it rebooted and repeated above sequence again, and again, and again.
OK, so now we know that PowerPC board works, but obviously boot device “??D?h?” does not look right, thus it cannot load ROM and boot it’s OS.
So let’s halt auto-booting process by sending any char to terminal. By doing so we can stop loop and try to interact with PPC system. Now can send “?” command:
[VxWorks Boot]: ?
 ?                     - print this list
 @                     - boot (load and go)
 p                     - print boot params
 c                     - change boot params
 l                     - load boot file
 g adrs                - go to adrs
 d adrs[,n]            - display memory
 m adrs                - modify memory
 f adrs, nbytes, value - fill memory
 t adrs, adrs, nbytes  - copy memory
 e                     - print fatal exception
 n netif               - print network interface device address
 N                     - set ethernet address
 $dev(0,procnum)host:/file h=# e=# b=# g=# u=usr [pw=passwd] f=#
                           tn=targetname s=script o=other
 Boot flags:
   0x02   - load local system symbols
   0x04   - don't autoboot
   0x08   - quick autoboot (no countdown)
   0x20   - disable login security
   0x40   - use bootp to get boot parameters
   0x80   - use tftp to get boot image
   0x100  - use proxy arp
   0x1000 - use dio to get boot image

available boot devices: feippc bp sm
After some experimenting and searching web, I found somebody who had similar issues with CSA8000 oscilloscope. Tried very similar parameters and discovered that they work fine after minor modification for my system:
Send “c” command to set settings:
[VxWorks Boot]: c

'.' = clear field;  '-' = go to previous field;  ^D = quit

boot device          : sm
processor number     : 0
host name            : host
file name            : c:\vxBoot\vxWorks.st
inet on ethernet (e) : 192.168.0.2:ffffff00
inet on backplane (b): 192.168.0.2:ffffff00
host inet (h)        : 192.168.0.1
gateway inet (g)     : 192.168.0.2
user (u)             : anonymous
ftp password (pw) (blank = use rsh): anonymous
flags (f)            : 0x1000
target name (tn)     : target
startup script (s)   : c:\vxBoot\topScript.hw
other (o)            : nvfs=0x1000
I used path to standard location on my x86 HDD partition, which is hidden folder c:\vxBoot. So if your location different – path need to be corrected. Inet/network addresses are used by internal interface between x86 and PPC. No ethernet cable was connected to either network ports on scope itself.
Now reboot scope.
...
VxWorks System Boot

Copyright 1984-1996  Wind River Systems, Inc.

CPU: Tektronix HPP - PowerPC 740
Version: 5.3.1
BSP version: 1.0.4.0
Creation date: Nov  2 2000, 11:03:34

Press any key to stop auto-boot...
 7 6 5 4 3 2 1 0

auto-booting...

boot device          : sm
processor number     : 0
host name            : host
file name            : c:\vxBoot\vxWorks.st
inet on ethernet (e) : 192.168.0.2:ffffff00
inet on backplane (b): 192.168.0.2:ffffff00
host inet (h)        : 192.168.0.1
gateway inet (g)     : 192.168.0.2
user (u)             : anonymous
ftp password (pw)    : anonymous
flags (f)            : 0x1000
target name (tn)     : target
startup script (s)   : c:\vxBoot\topScript.hw
other (o)            : nvfs=0x1000

Initializing backplane net with anchor at 0x1e80000... done.
Backplane anchor at 0x1e80000... Attaching network interface sm0... done
done.
Attaching network PC1 dio device driver installed
interface lo0... done.
Attaching DIO client... done.
Loading c:\vxBoot\vxWorks.st...1773516
Starting at 0x200000...

Initializing backplane net with anchor at 0x16e0000... done.
Backplane anchor at 0x16e0000... Attaching network interface sm0... done
done.
PC1 dio device driver installed
Attaching network interface lo0... done.

Adding 6008 symbols for standalone.

 ]]]]]]]]]]]]]]]]]]]]]]]]]]]]]]]]]]]]]]]]
 ]]]]]]]]]]]]]]]]]]]]]]]]]]]]]]]]]]]]]]]
 ]]]]]]]]]]]]]]]]]]]]]]]]]]]]]]]]]]]]]]
      ]]]]]]]]]]]  ]]]]     ]]]]]]]]]]       ]]              ]]]]         (R)
 ]     ]]]]]]]]]  ]]]]]]     ]]]]]]]]       ]]               ]]]]
 ]]     ]]]]]]]  ]]]]]]]]     ]]]]]] ]     ]]                ]]]]
 ]]]     ]]]]] ]    ]]]  ]     ]]]] ]]]   ]]]]]]]]]  ]]]] ]] ]]]]  ]]   ]]]]]
 ]]]]     ]]]  ]]    ]  ]]]     ]] ]]]]] ]]]]]]   ]] ]]]]]]] ]]]] ]]   ]]]]
 ]]]]]     ]  ]]]]     ]]]]]      ]]]]]]]] ]]]]   ]] ]]]]    ]]]]]]]    ]]]]
 ]]]]]]      ]]]]]     ]]]]]]    ]  ]]]]]  ]]]]   ]] ]]]]    ]]]]]]]]    ]]]]
 ]]]]]]]    ]]]]]  ]    ]]]]]]  ]    ]]]   ]]]]   ]] ]]]]    ]]]] ]]]]    ]]]]
 ]]]]]]]]  ]]]]]  ]]]    ]]]]]]]      ]     ]]]]]]]  ]]]]    ]]]]  ]]]] ]]]]]
 ]]]]]]]]]]]]]]]]]]]]]]]]]]]]]]
 ]]]]]]]]]]]]]]]]]]]]]]]]]]]]]       Development System
 ]]]]]]]]]]]]]]]]]]]]]]]]]]]]
 ]]]]]]]]]]]]]]]]]]]]]]]]]]]       VxWorks version 5.3.1
 ]]]]]]]]]]]]]]]]]]]]]]]]]]       KERNEL: WIND version 2.5
 ]]]]]]]]]]]]]]]]]]]]]]]]]       Copyright Wind River Systems, Inc., 1984-1997

                              CPU: Tektronix HPP - PowerPC 740.  Processor #0.
                              Memory Size: 0x2000000.  BSP version 1.0.8.0 .
                             WDB: Ready.

usrNvFsInit: NAME=/nvram BASE=0xfd0ff100 BPB=512 BPT=8 NB=8 BO=0
nvfs: WARNING: Creating new NVRAM file system
tcsTableUnpack: checksum failed on buffer
tcsTableLoadFromNVRAM: tcsTableUnpack failed
tcsSynchronizeSensors:  ERROR:  Failed to create '/dev/tsAmbAcq'
tcsSynchronize: ERROR: Sensor synch failed
KERNEL: THERMAL CONTROL INITIATED
Executing startup script c:\vxBoot\topScript.hw ...
dbFsIoctl: invalid code 3
    #################### topScript starts ###############################
    #
    #  This script was initially constructed by running
    #	make scripts/topScript
    #  in the nextGen directory.
    #
    #  This script is for standalone prototypes that want to update
    #   their bootROMs to the newest version in the
    #   scope's c:/vxBoot directory.

    cd "pc:c:/vxboot"
value = 0 = 0x0
    tcsLoadTableToNVRAM "setup.tcs"
value = 0 = 0x0

   #
    # hopefully you get this message at the end:
    # 'value = 0 = 0x0'
    # REBOOT!!!
Great, now PowerPC board boots (diag POST LED shows “P” after “L” which means boot image is running).
Executing startup script c:\vxBoot\topScript.hw ...
dbFsIoctl: invalid code 3
    ################### topScript starts ###############################
     cd "dbfs:c:/vxBoot"
value = 0 = 0x0
    ld < TekScope.o
value = 23662048 = 0x1690de0
    ld < TekScopeSM.o
value = 23661408 = 0x1690b60
    pDbDev = ramDevCreate(0, 512, 1152, 1152, 0)
new symbol "pDbDev" added to symbol table.
pDbDev = 0x1692720: value = 23668544 = 0x1692740 = pDbDev + 0x20
    pDBfs  = dosFsMkfs("/db", pDbDev)
new symbol "pDBfs" added to symbol table.
pDBfs = 0x16909a0: value = 23661056 = 0x1690a00 = pDBfs + 0x60
    copy ("TekScope.DBF", "/db/TekScope.DBF")
value = 0 = 0x0

    overrideFPdefaults()
value = 0 = 0x0

   measurePPCtimebase
value = 0 = 0x0

    registerMemPartitionSizes ( 0x00000000 )
value = 0 = 0x0

   semInitForQueueCheckLogMsg
value = 21818112 = 0x14ceb00

   initSysWaiter()
value = 0 = 0x0

    raxInit
value = 0 = 0x0
    paiInit
done
value = 16983892 = 0x1032754 = PaiBaseRegisterTable + 0x948

    verifyAcqBoardID
value = 0 = 0x0

    tcsLoadTableToNVRAM "pc:c:/vxBoot/Setup.tcs"
value = 0 = 0x0
     updateAcqProcFirmware("dbfs:c:/vxBoot/acqProc.hex")
0x16975c0 (tShell): Device failed to verify at address 0x0000.
0x16975c0 (tShell): Burning new code into AT90S8535 processor.
0x16975c0 (tShell): 1370 bytes successfully programmed.
value = 1 = 0x1
     cd "pc:"
value = 0 = 0x0
   raxInitializeDevices
done
0x16975c0 (tShell): (Re)starting Acq Processor
value = 21815208 = 0x14cdfa8

    excHookAdd(stopStressForException)
value = 16770764 = 0xffe6cc = stopStressForException

   dsyInit
value = 21806440 = 0x14cbd68
    dsyWPApplyNextRegs
value = 16973768 = 0x102ffc8 = DsyRegisterTable + 0xab0

    # remove '#' from next line to set power up scope state to factory default:
    # NvramClearDb = 1

    nvram_initFileSys
0x16975c0 (tShell): >> Kernel version 1.0.8.0  does not match Boot ROM version 1.0.4.0
value = -49409789 = 0xfd0e1103 = pDbDev + 0xfba4e9e3

    TmgrInit("/db")
0x16975c0 (tShell): NO BACKUP SERIAL NUMBER FOUND, RESTORING VALUE FROM DISK...
0x16975c0 (tShell): NO BACKUP OPTION KEY FOUND, RESTORING VALUE FROM DISK...
0x16975c0 (tShell): NO BACKUP SERIAL NUMBER FOUND, RESTORING VALUE FROM DISK...
0x16975c0 (tShell): NO BACKUP OPTION KEY FOUND, RESTORING VALUE FROM DISK...
value = 0 = 0x0
    PhxProxyInit
value = 20819072 = 0x13dac80
    rtlInit
value = 0 = 0x0

    sysExtMemAddToPool memSysPartId,0x02000000,0x0e000000
value = 0 = 0x0

    hwAccount_init
sysEnetAddrGet: cc:aa:88:0c:0c:0c
value = 0 = 0x0
   GpibInit
value = 267500128 = 0xff1ba60

    wfmMemInit(1)
value = 57781984 = 0x371aee0

    vertInstall
value = 57774948 = 0x3719364

    calConStatus = cc_init(2)
0x16975c0 (tShell): Reading 300 bytes of service cal data from EEPROM[0] into 0x3719220
0x16975c0 (tShell): nvMem_read succeeded
0x16975c0 (tShell): Reading 82 bytes of service cal data from EEPROM[300] into 0x3719300
0x16975c0 (tShell): nvMem_read succeeded
0x16975c0 (tShell): cc_restoreBank: can't open file C:/vxBoot/calCons/0
0x16975c0 (tShell): cc_init: bank 0 chksum failed, NOT reset to factory
0x16975c0 (tShell): cc_restoreBank: can't open file C:/vxBoot/calCons/1
0x16975c0 (tShell): cc_init: bank 1 chksum failed, NOT reset to factory
0x16975c0 (tShell): cc_restoreBank: can't open file C:/vxBoot/calCons/2
0x16975c0 (tShell): cc_init: bank 2 chksum failed, NOT reset to factory
0x16975c0 (tShell): cc_restoreBank: can't open file C:/vxBoot/calCons/3
0x16975c0 (tShell): cc_init: bank 3 chksum failed, NOT reset to factory
0x16975c0 (tShell): cc_restoreBank: can't open file C:/vxBoot/calCons/5
0x16975c0 (tShell): cc_init: bank 5 chksum failed, NOT reset to factory
0x16975c0 (tShell): cc_restoreBank: can't open file C:/vxBoot/calCons/6
0x16975c0 (tShell): cc_init: bank 6 chksum failed, NOT reset to factory
0x16975c0 (tShell): cc_restoreBank: can't open file C:/vxBoot/calCons/7
0x16975c0 (tShell): cc_init: bank 7 chksum failed, NOT reset to factory
0x16975c0 (tShellcalConStatus): cc_restoreBank: can't open file  = C:/vxBoot/calCons/0x8
0x16975c01335528 (tShell: value = ): cc_init: bank 332638 chksum failed, NOT reset to factory
 = 0x0x16975c081ef (tShell): cc_restoreBank: can't open file
C:/vxBoot/calCons/    15
0x16975c0
 (tShell): cc_init: bank     ver15tPostCalRestoreIns chksum failed, NOT reset to factory
tal0xl16975c0 (tShell):
Optical hardware is not present.
value = 0 = 0x0

   MathMeasCreateTheMathandMeasurementLibraries
value = 57602368 = 0x36ef140
    initAcqMapper
0x16975c0 (tShell): initAcqMapper: Enter
value = 0 = 0x0
    trigMapInit
value = 0 = 0x0
    dsyMapInit
value = 0 = 0x0
    mathMapperInit
value = 0 = 0x0
    utilMapInit
value = 57599712 = 0x36ee6e0
    TmgrHookup
value = 0 = 0x0
    PhxProxyHookup
value = 0 = 0x0
    hookupAcqMapper
value = 20074648 = 0x1325098 = AcqMapperRtlDataList
    MathMeasMapHookup
value = 23687912 = 0x16972e8
    dsyMapHookup
value = 23688016 = 0x1697350
    utilMapHookup
value = 23688048 = 0x1697370

    rtlHookup
value = 0 = 0x0
    horizMapHookup
value = 23688008 = 0x1697348
    fastFrameMapHookup
value = 23688032 = 0x1697360

    trigMapHookup
value = 23688040 = 0x1697368
    vertMapHookup
value = 23688032 = 0x1697360
    spcMapHookup
value = 23688032 = 0x1697360
    autosetMapHookup
value = 23688072 = 0x1697388
    timeSyncMapHookup
value = 23688064 = 0x1697380
   auxTrigMapHookup
value = 23688048 = 0x1697370
    dpoMapHookup
value = 23688040 = 0x1697368


    TmgrStartup
value = 56629168 = 0x36017b0
    PhxProxyStartup
value = 56578624 = 0x35f5240
    taskDelay(2)
0x3681ea0 (tmgr): >> optNewOptKey: Bad instru Id
value = 0 = 0x0

   gpibHwInitC
value = 0 = 0x0
    gpibTaskSpawn
value = 56182496 = 0x35946e0

   gpibIoInit "/dbios/DBIO005","/dbios/DBIO006"
value = 56356992 = 0x35bf080

   enablePowerupDiags = 0
enablePowerupDiags = 0x12fad08: value = 0 = 0x0

    EnableHorizInterpolation=1
new symbol "EnableHorizInterpolation" added to symbol table.
EnableHorizInterpolation = 0x14bc820: value = 1 = 0x1

    runPowerupDiags
done
dipSwitch = 0x0, enablePowerupDiags = 0, puMode=0
CalDiagPowerUpDiagsEnabled = 0
!! SKIPPING POWERUP DIAGNOSTICS !!
value = 0 = 0x0

    rtlStartup
value = 0 = 0x0

   tsComp
value = 0 = 0x0

   ################### topScript ends ###############################
Done executing startup script c:\vxBoot\topScript.hw
KERNEL:  RUNNING TIME SLICED AT 10 TICKS PER SLICE!
->
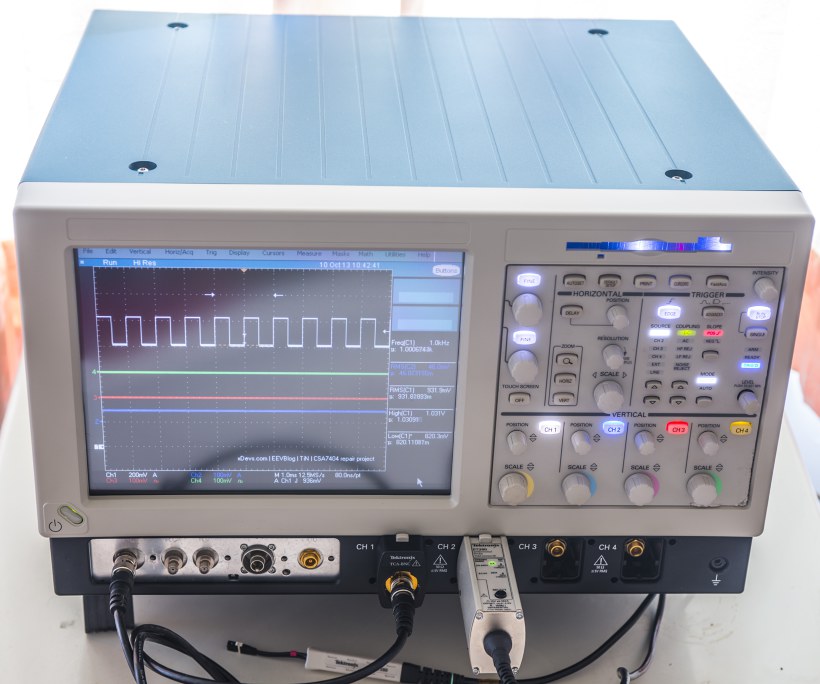
Now scope application able to run successfully, and I got first waveforms on screen :).

Also seem like this particular scope got all options enabled, but some applications required for those options are missing, as I had installed fresh OS.
So system/software spec is:
CSA7404 (4GHz, optical hardware present) running Windows 2000 Pro SP4 Ru
TekScope version 2.5.3
Option 4M: 32 Meg Max 8M/Channel
Disk Drive Measurements 2 (Option 48)
Option 49
USB 2.0 Test package (Option 50)
Option 51
Option 52
Option 53
Option 54
RT-Eye Serial Compliance and Analysis
InfiniBand Compliance Module
PCI-Express Compliance Module
Pretty nice set got there for use in digital/PC hardware development and debug. Scope input interface for all four channels is proprietary TekConnect, and inputs are all 50 Ohm only. So to be able use regular passive BNC probes high-impedance adapter system TCA-1MEG is required, to use 50 ohm direct interface to target environment one can use TCA-BNC or TCA-292MM or TCA-SMA. As drawbacks of high-performance capabilities of such high-speed scopes special probing accessories are required, increasing total using cost. Passive probes cannot be used without TCA-1MEG.
We already got pair of Tektronix P7380 8GHz Differential probes, which are designed for high-speed signal acquisition with special solder-on tip system. Going to buy some lower speed single-ended active probes as well later.
Using this probe is really using for debug hardware, like DDR interfaces on VGA/DIMMs/MB’s:

DDR3 DIMM clock measurement


RT-Eye report:

PCI-Express 1.0 report

Next steps:
- Buy replacement parts for plastic housings and front panel.
- Design and assemble few custom probes for high-impedance environment
- Upgrade Celeron 850/128/100 to Pentium III 1000/256/100 CPU
- Add more memory to x86 system
- Installing missing options software
Bonus:
Replace LEDs behind front panel indicators and push-buttons, just like in newer DSO/MSO series.

Current scope state:
Update 11/07/2015:
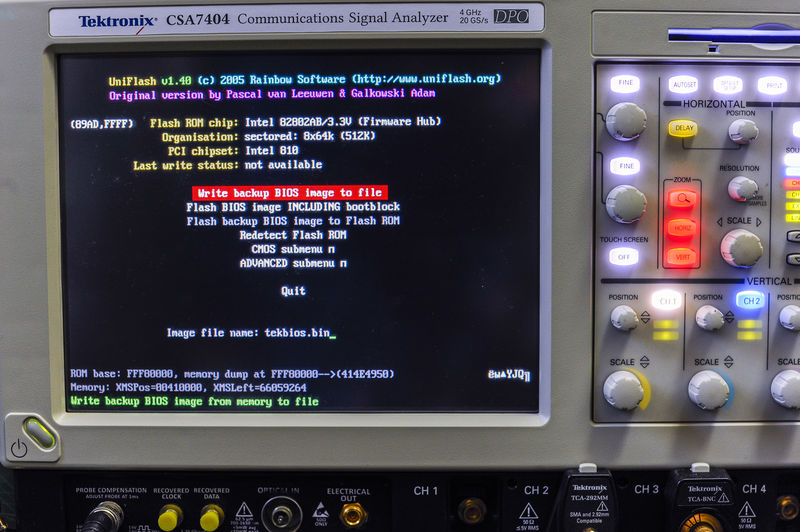
Downloaded current BIOS From CSA7404:
Tektronix CSA7404 Intel SF810 motherboard BIOS dump – CRC32 Checksum: C357A520
Bootloader binary dump
Handy UNIFLASH tool did the job saving BIOS.
GUI Fonts fix
To get TekScope app to correctly show symbols like Ω and such, download these fonts and install them on your scope OS.
Projects like this are born from passion and a desire to share how things work. Education is the foundation of a healthy society - especially important in today's volatile world. xDevs began as a personal project notepad in Kherson, Ukraine back in 2008 and has grown with support of passionate readers just like you. There are no (and never will be) any ads, sponsors or shareholders behind xDevs.com, just a commitment to inspire and help learning. If you are in a position to help others like us, please consider supporting xDevs.com’s home-country Ukraine in its defense of freedom to speak, freedom to live in peace and freedom to choose their way. You can use official site to support Ukraine – United24 or Help99. Every cent counts.
Modified: March 16, 2024, 7:29 p.m.