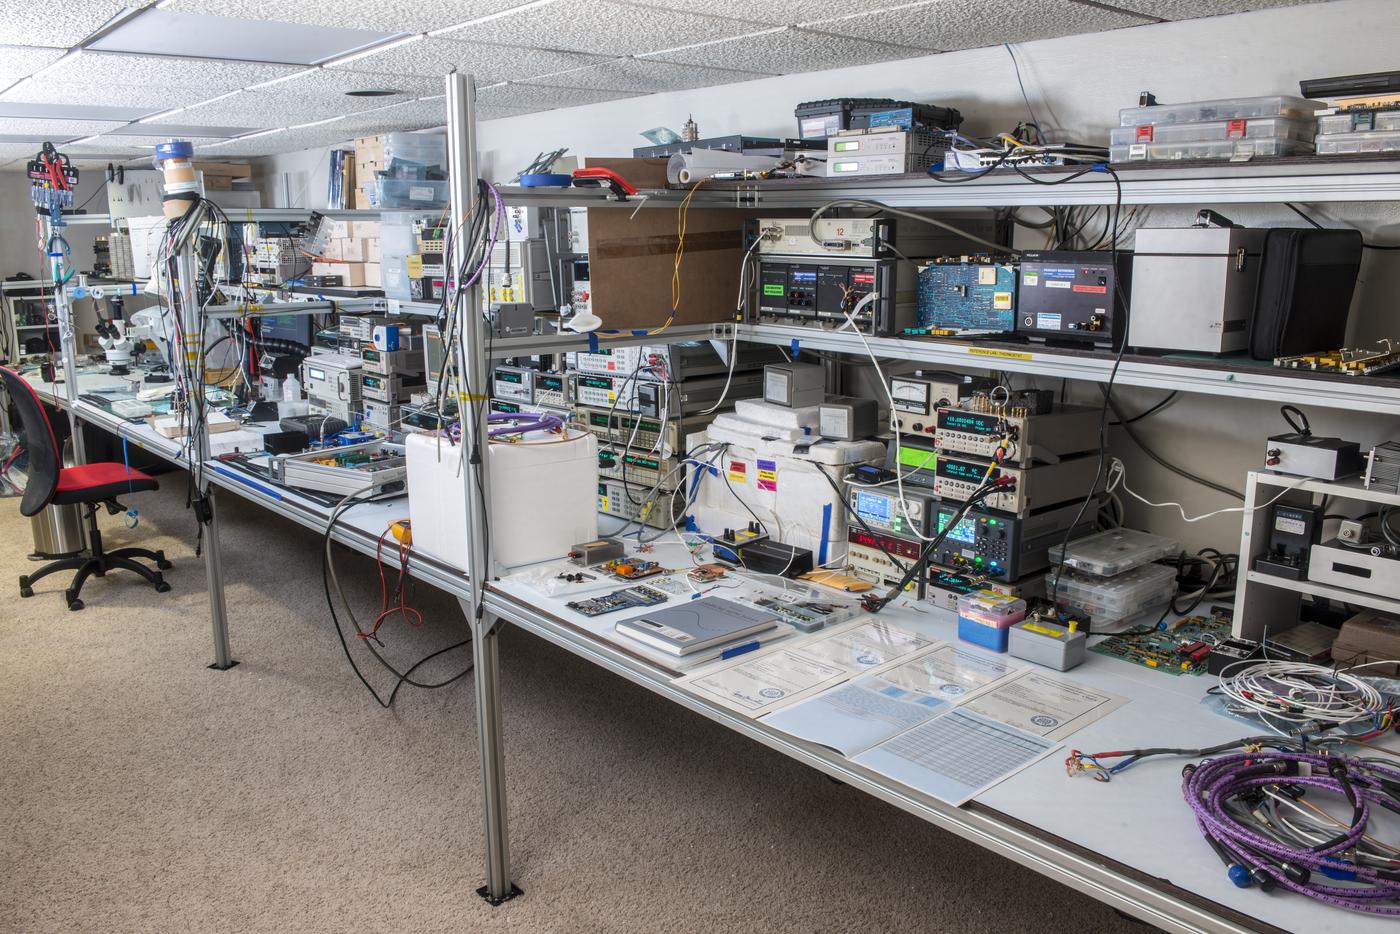
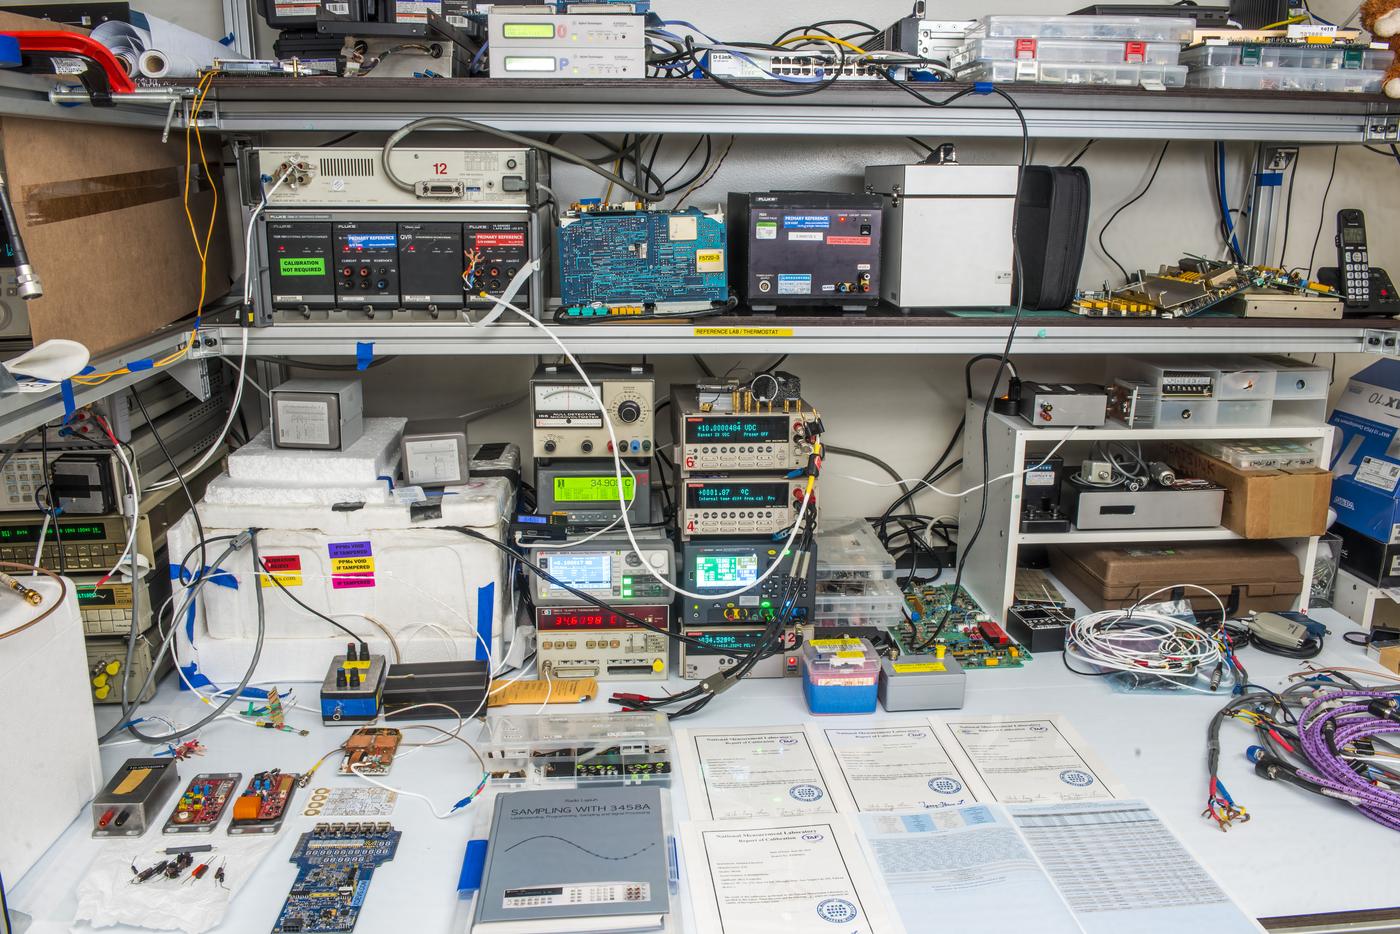
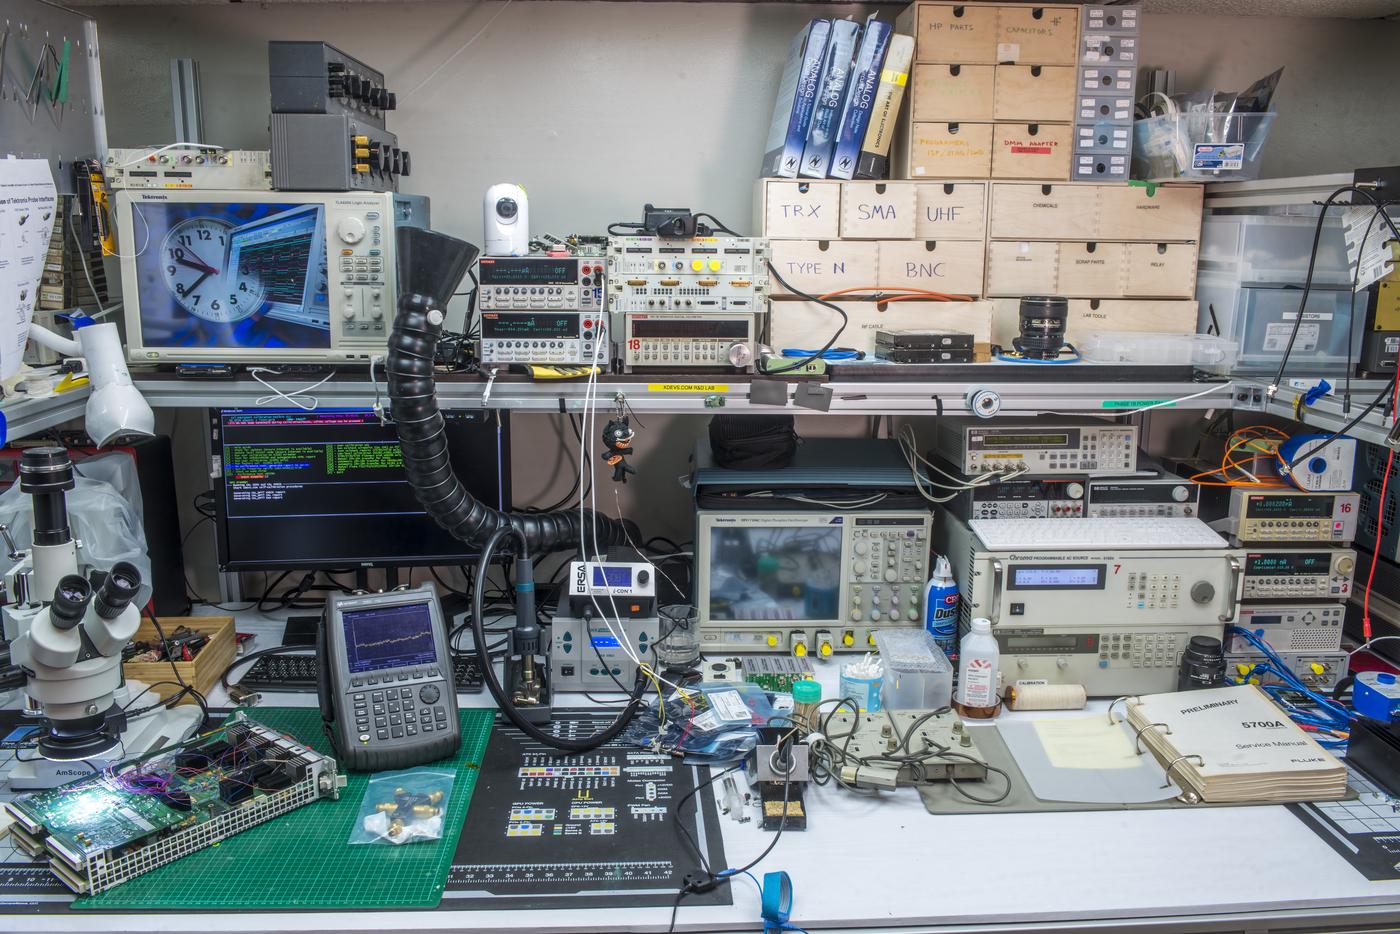
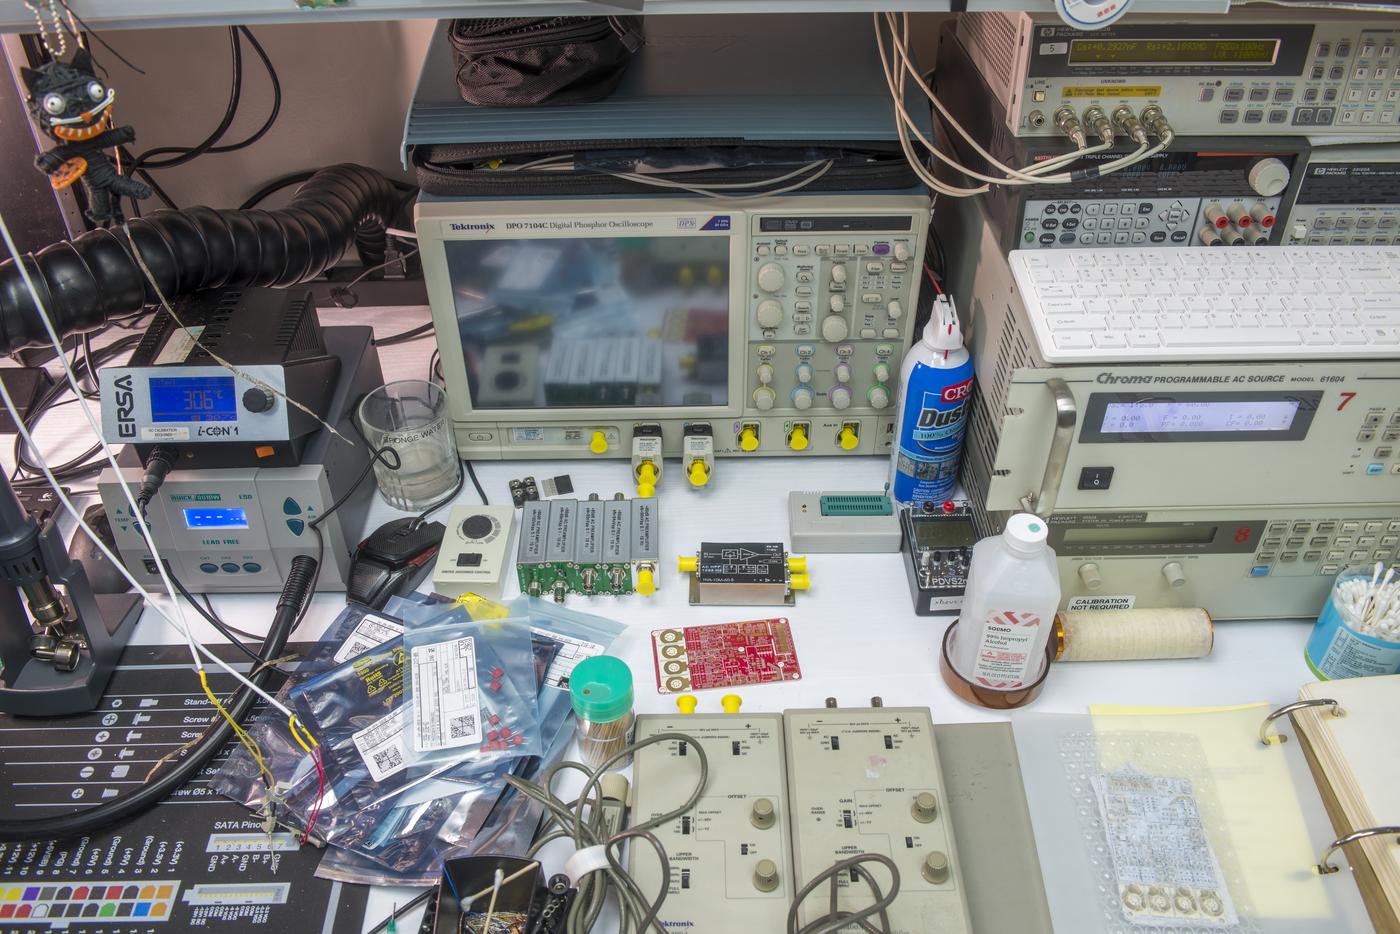
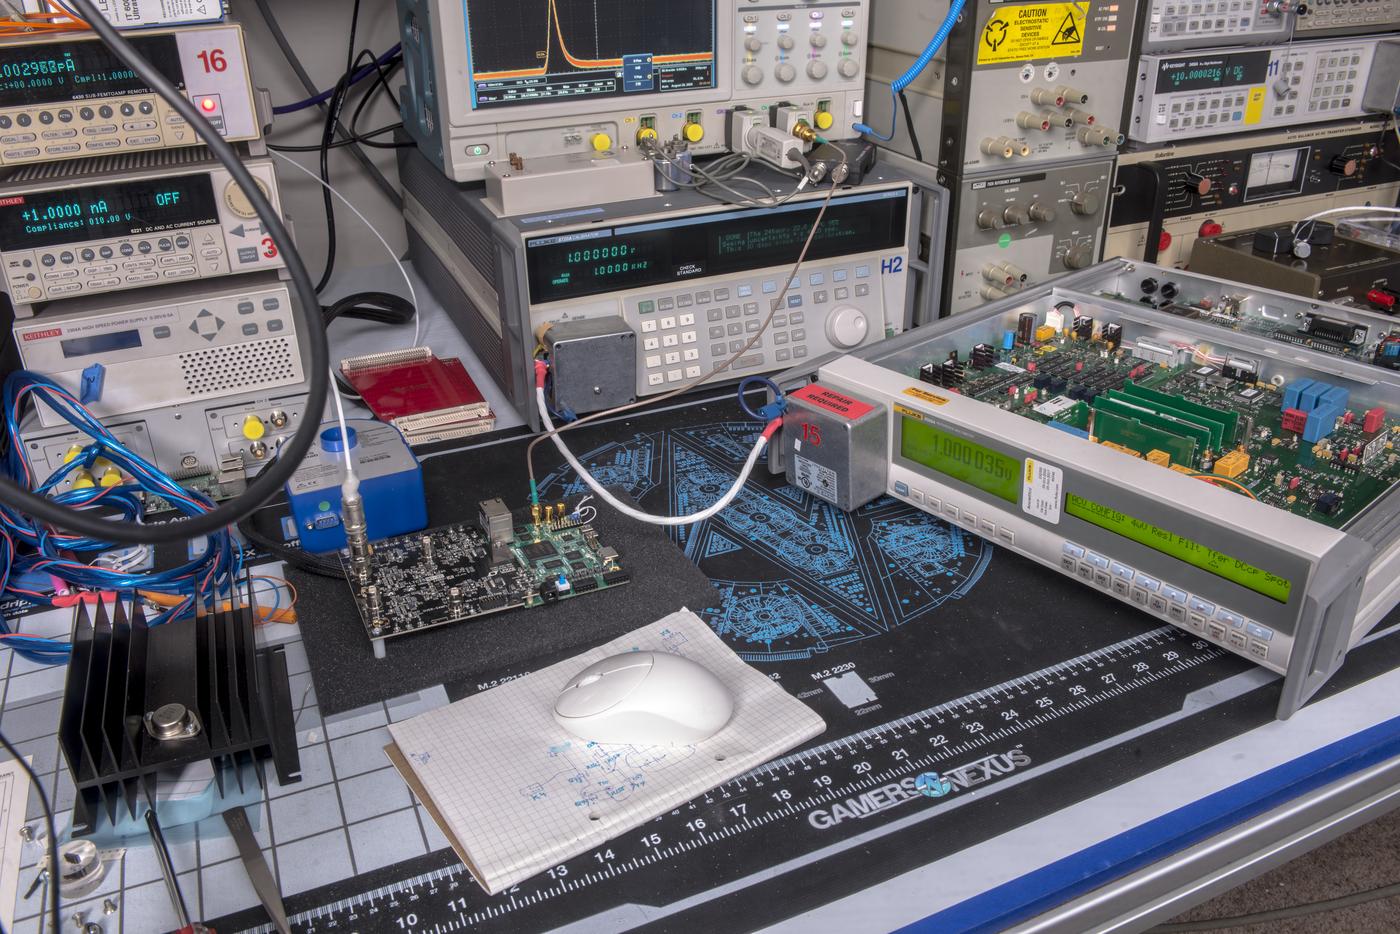
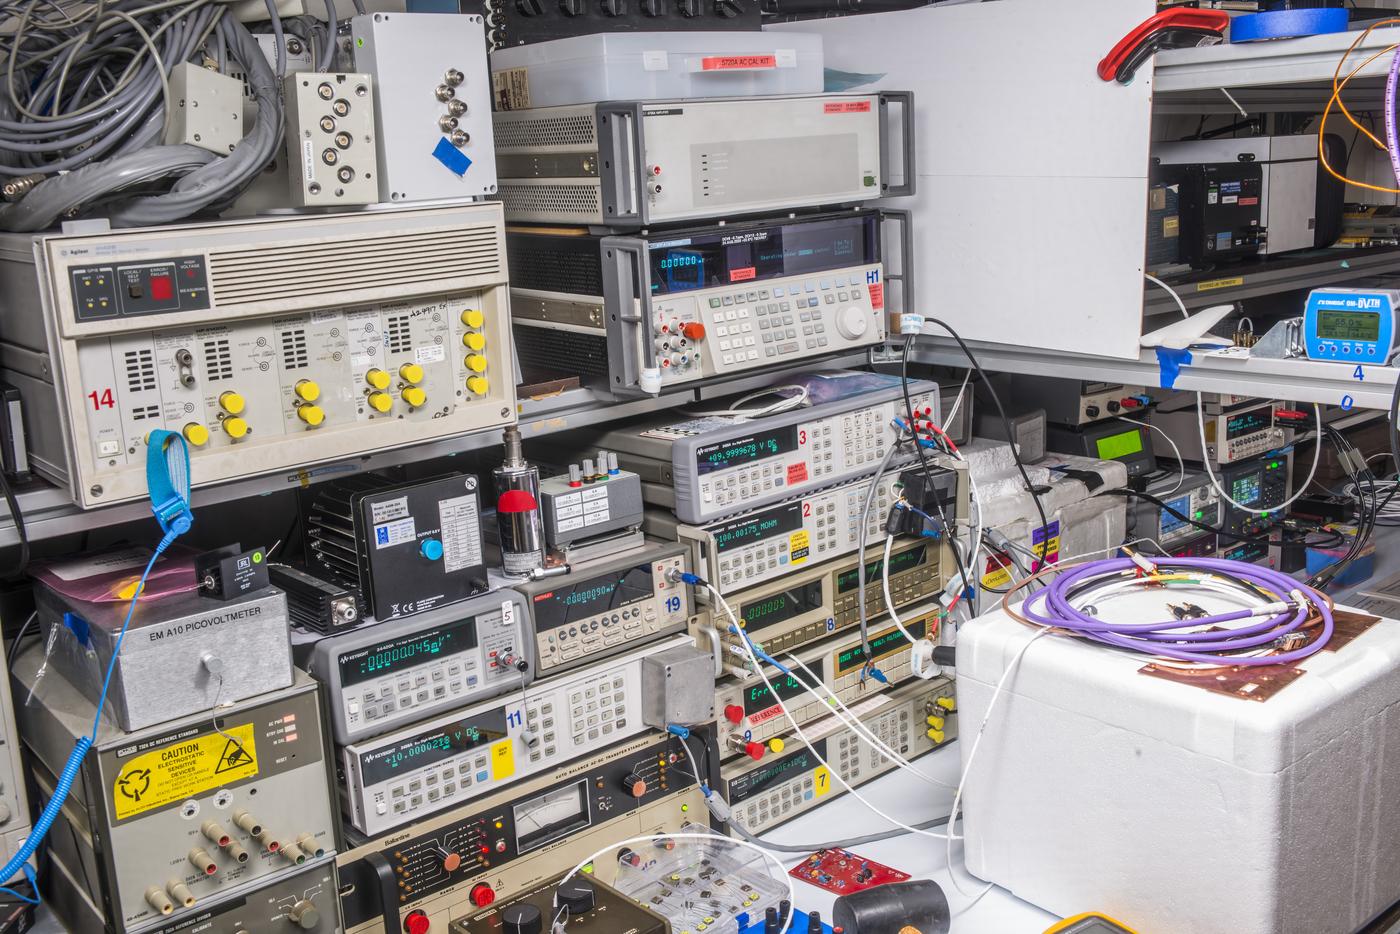
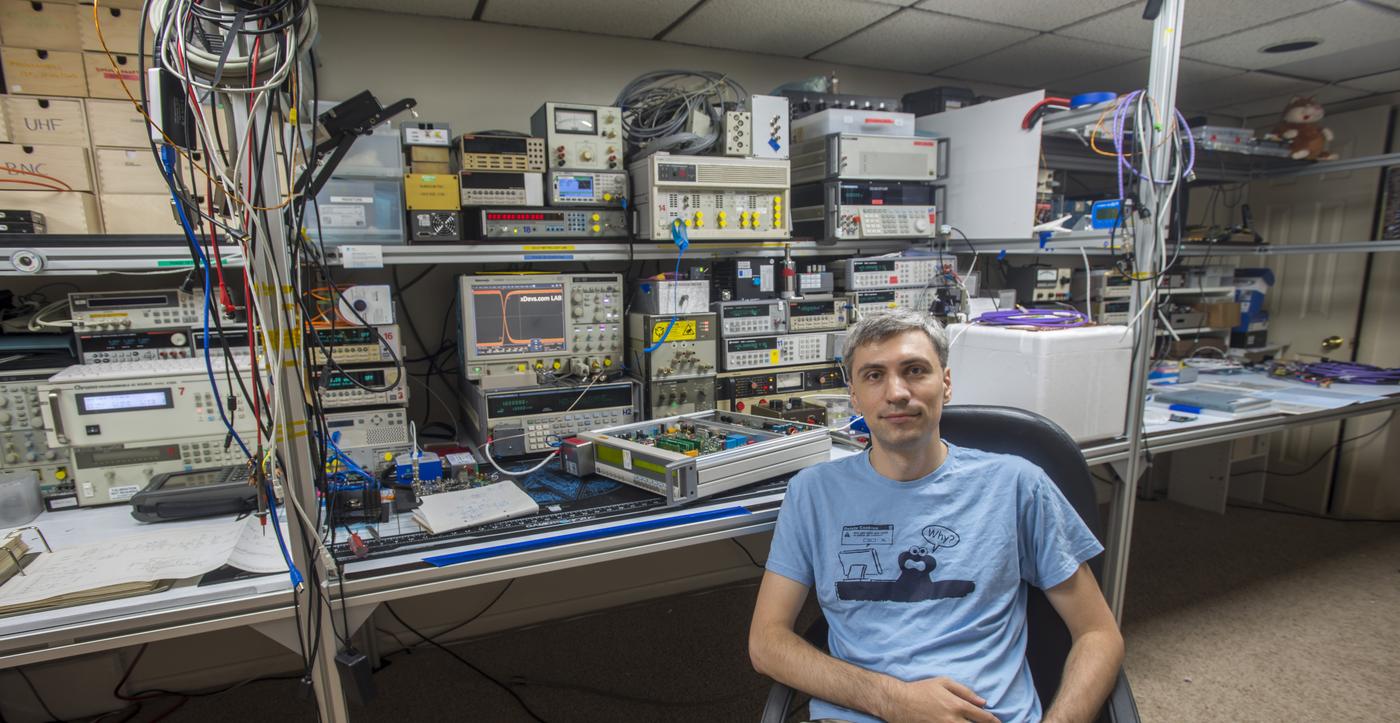
- E-Bench Model 2 – 3 unit desk – Year 2010
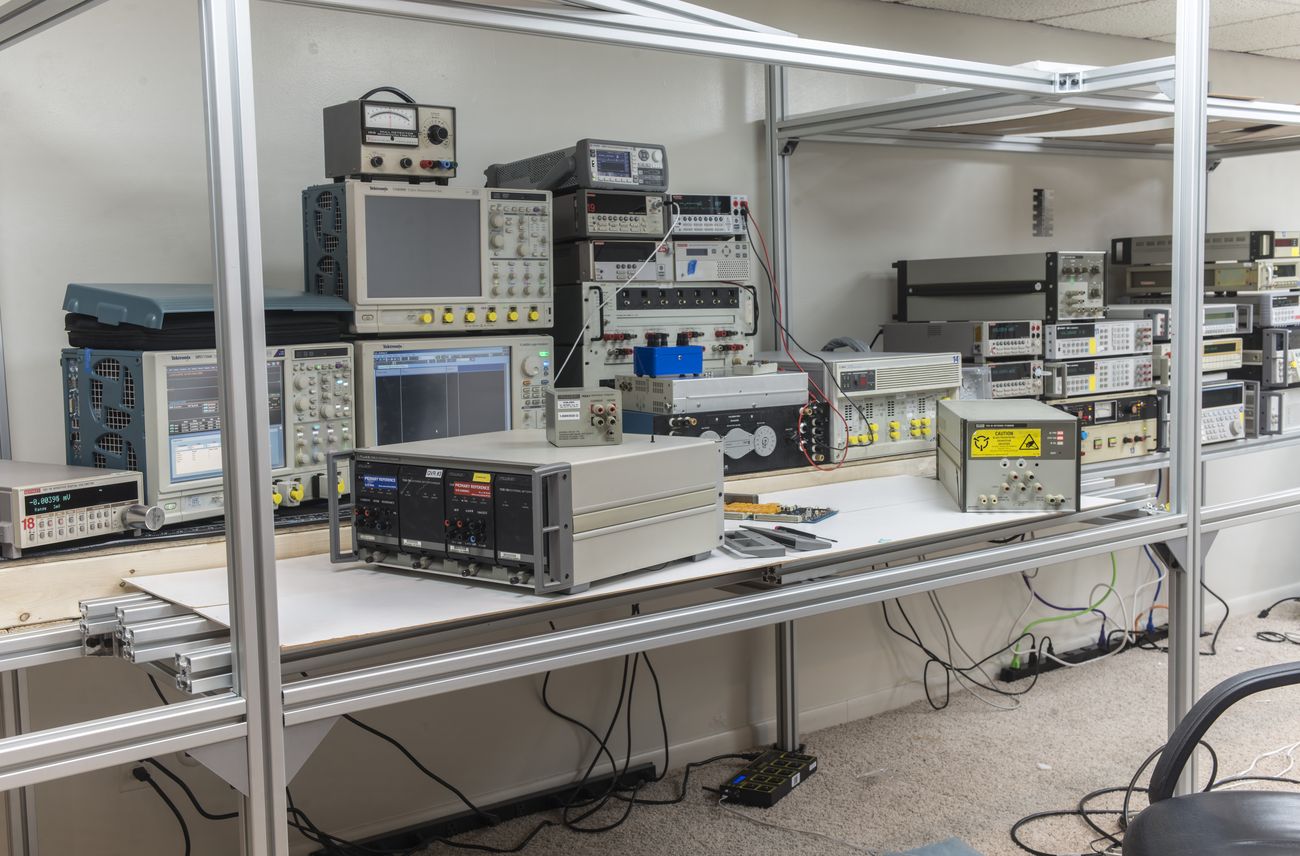
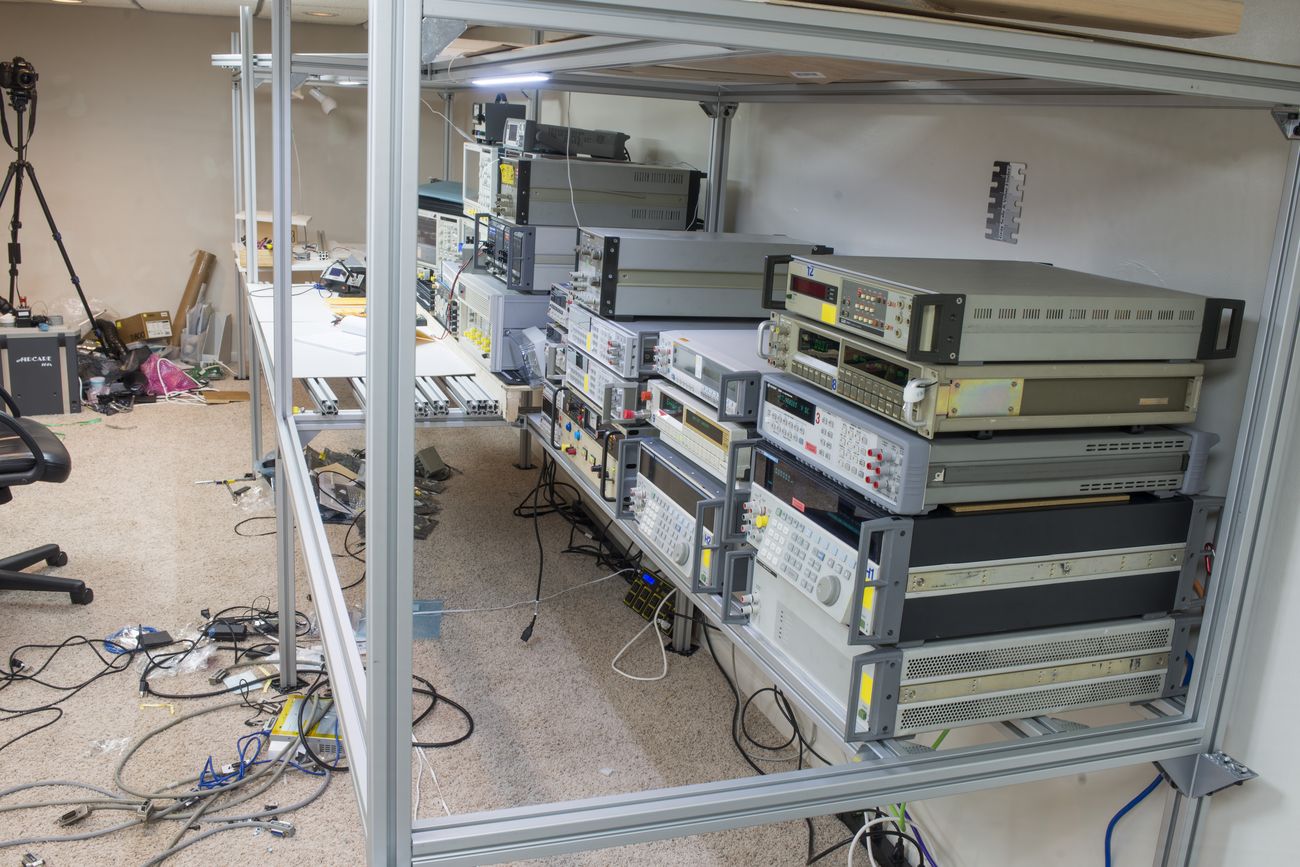
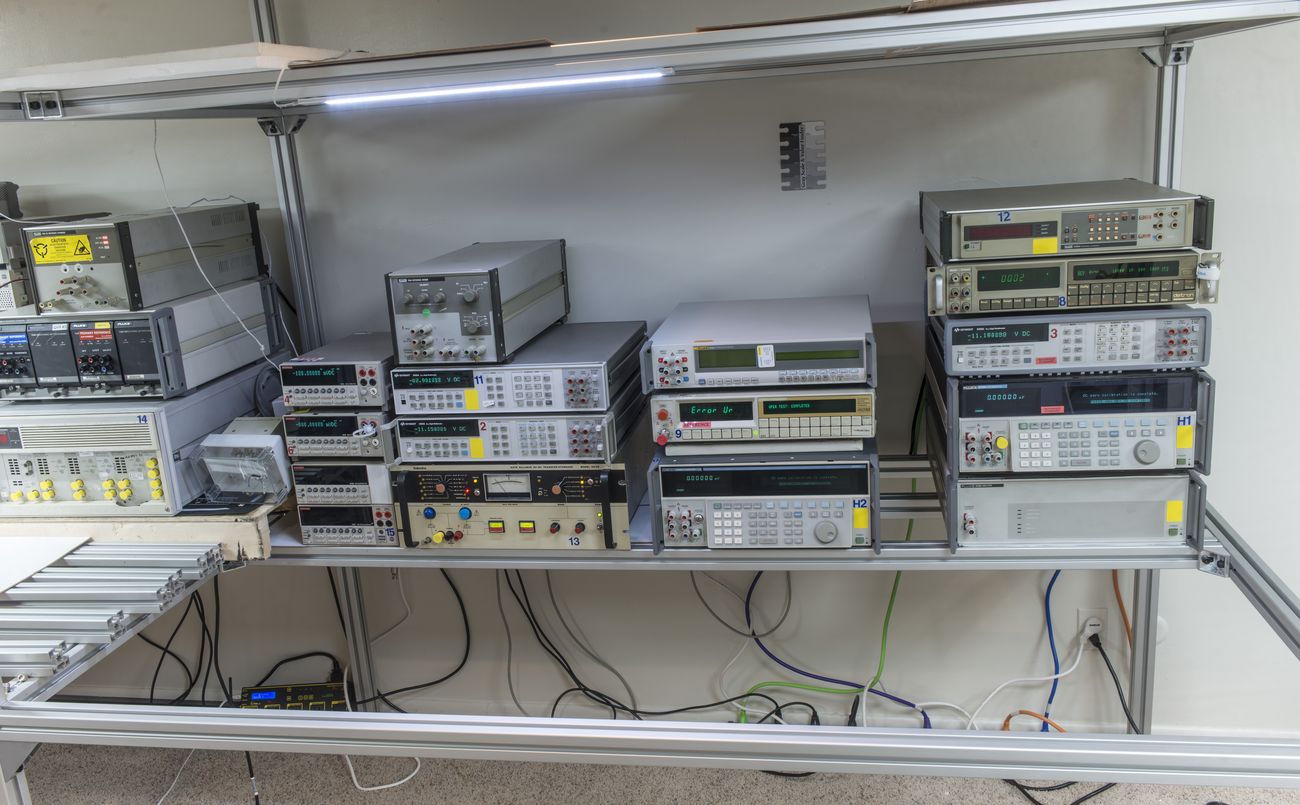
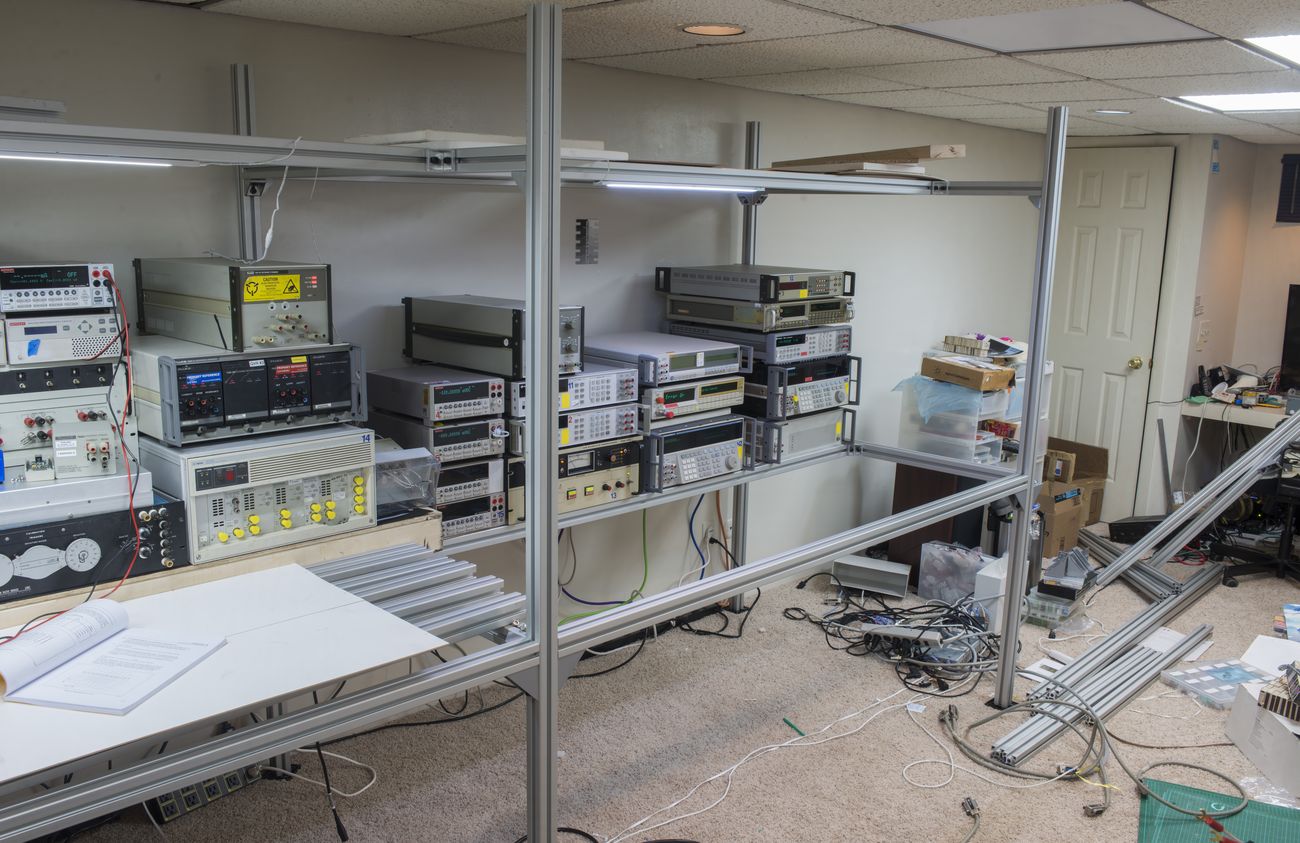
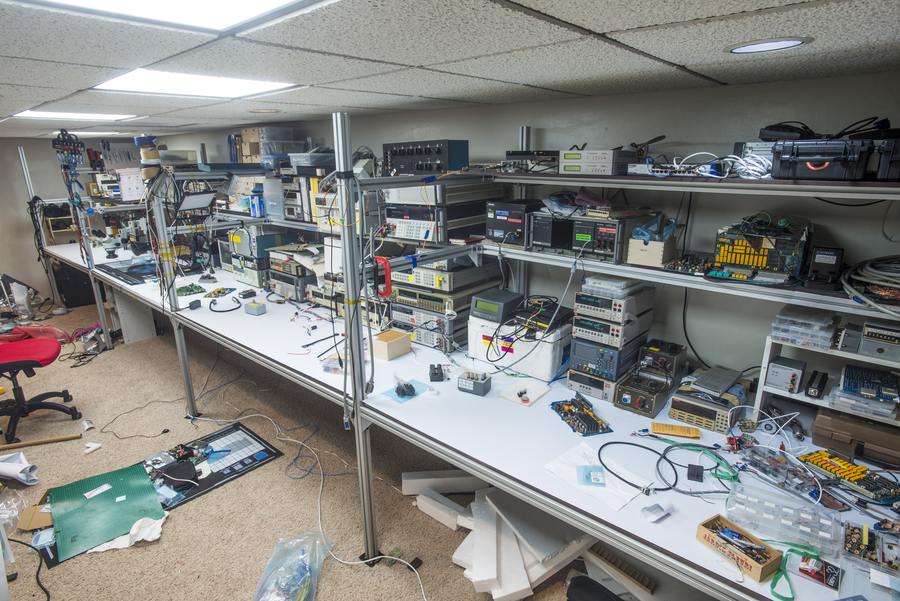
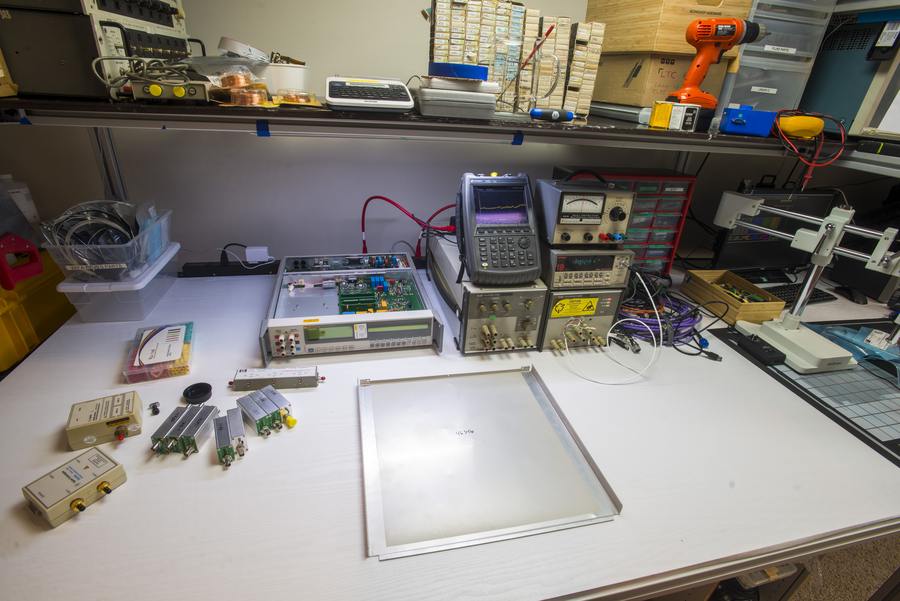
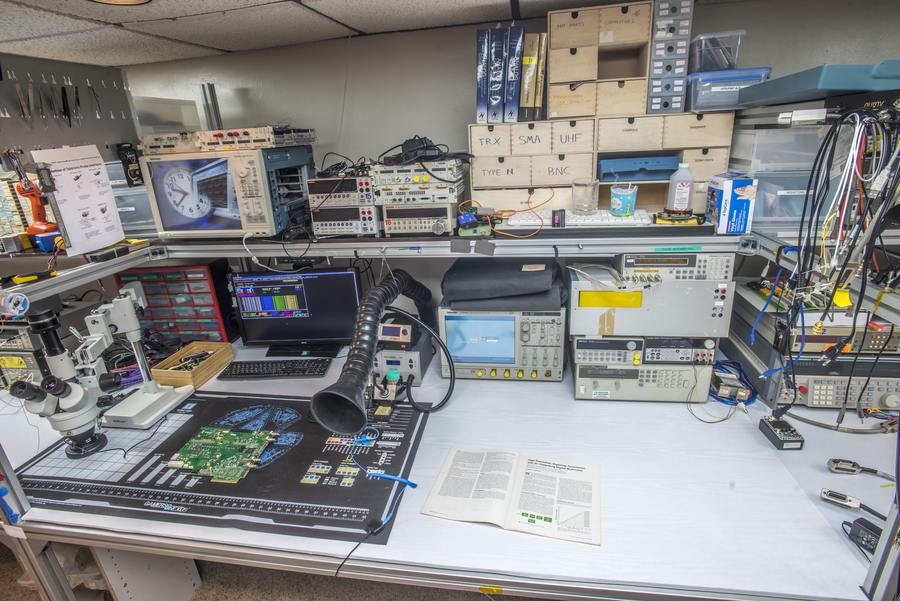
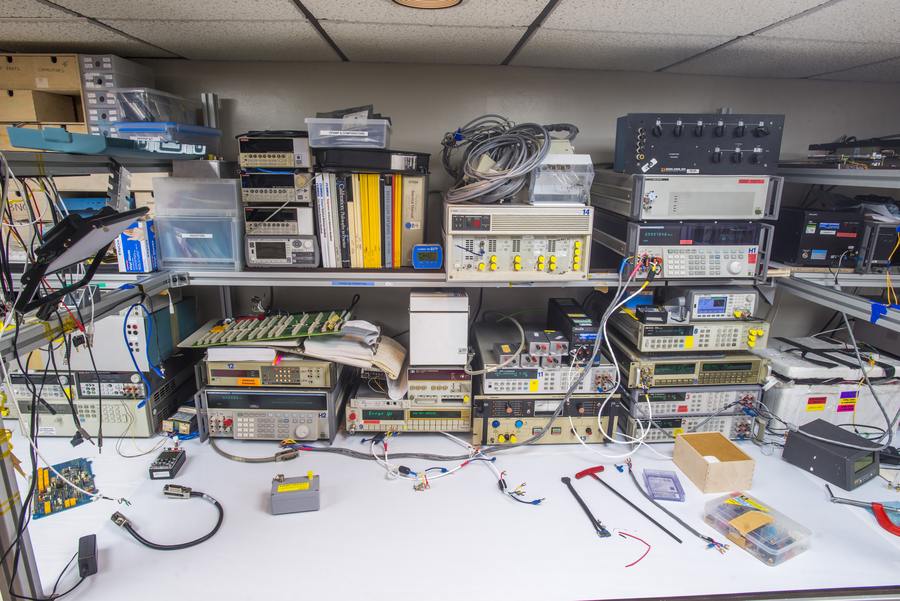
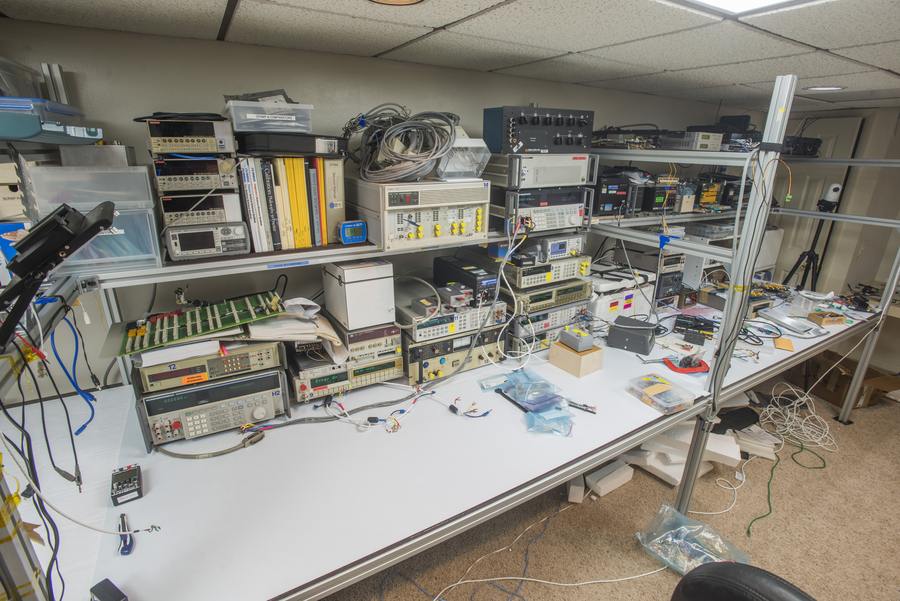
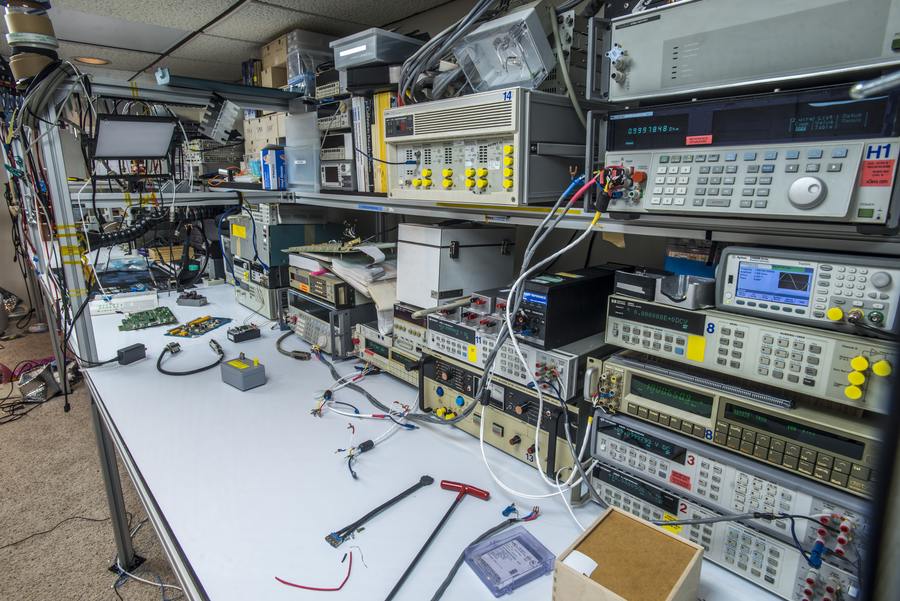
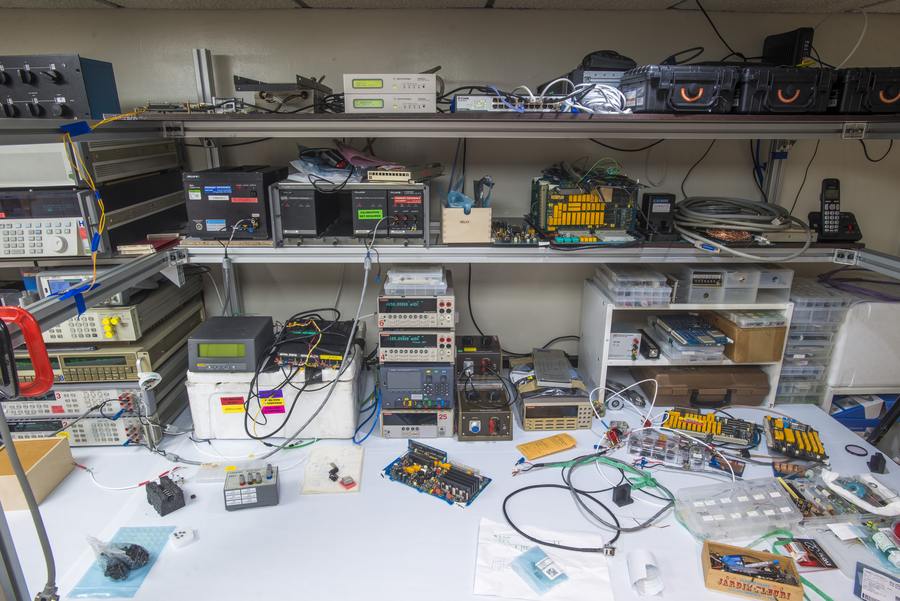
- E-Bench Model 3 – 4-unit desk at xDevs HQ – Year 2019-present
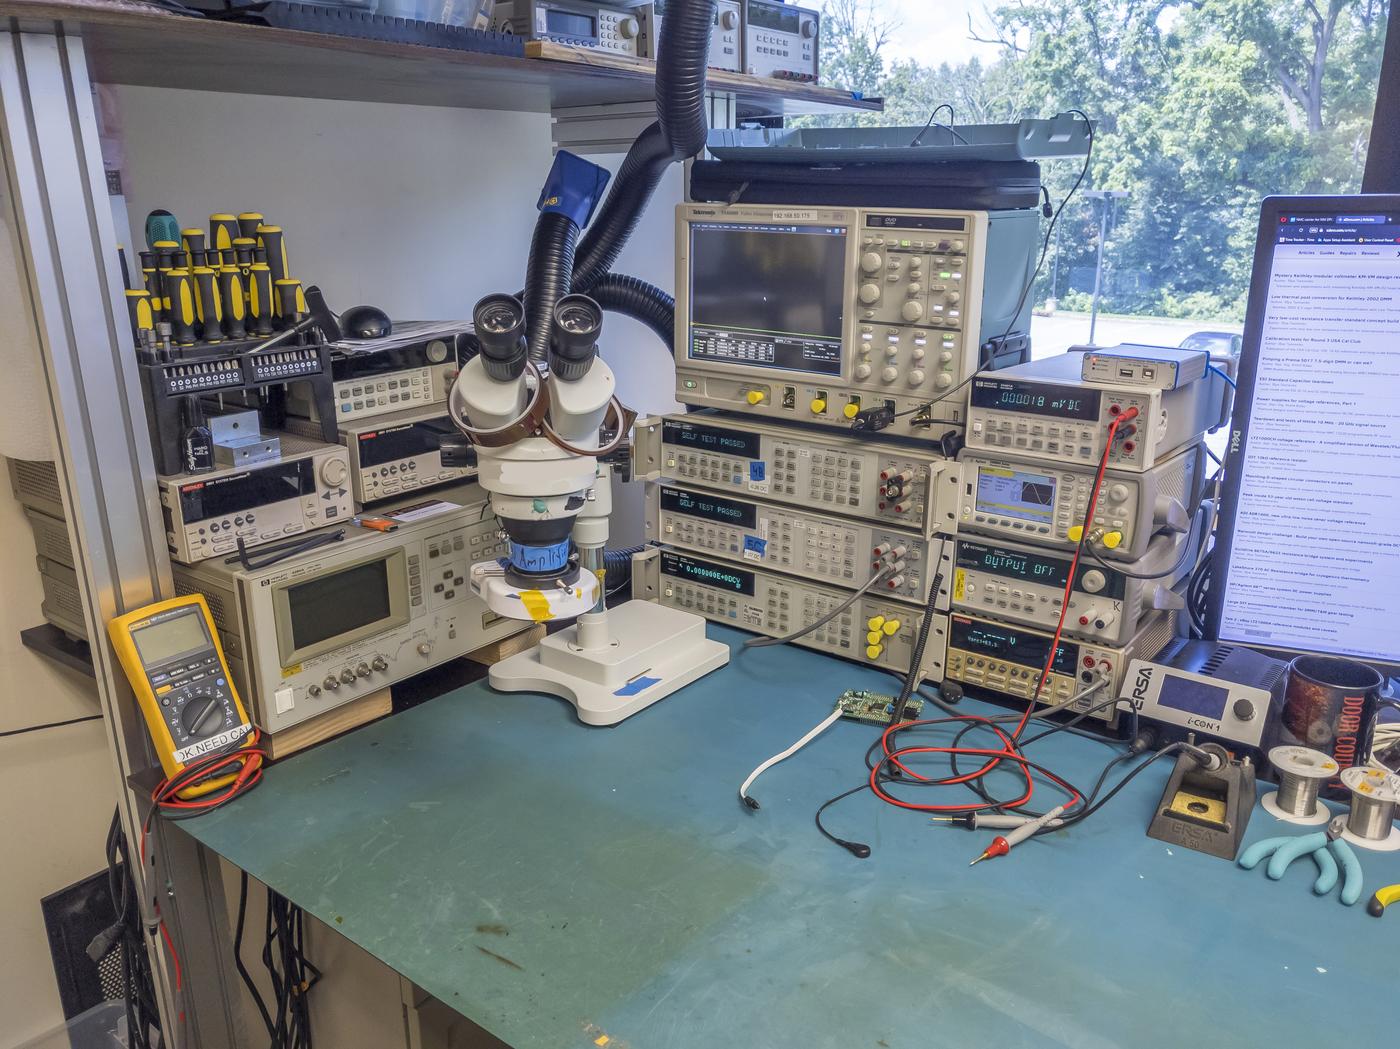
- E-Bench Model 4 – single desk for werk – Year 2023
Intro
A thoughtfully envisioned and ergonomically designed workbench serves as an essential tool for good productivity in the realm of hardware electronics engineering. It’s fascinating how anecdotes and playful narratives often circulate within labs, echoing the sentiment that one’s workbench can reveal a glimpse of their engineering persona. Indeed, a considerable portion of our lives transpires at these workbenches and within the laboratory, where we dedicate ourselves to the intricate processes of hardware design, rigorous testing, and skillful troubleshooting.
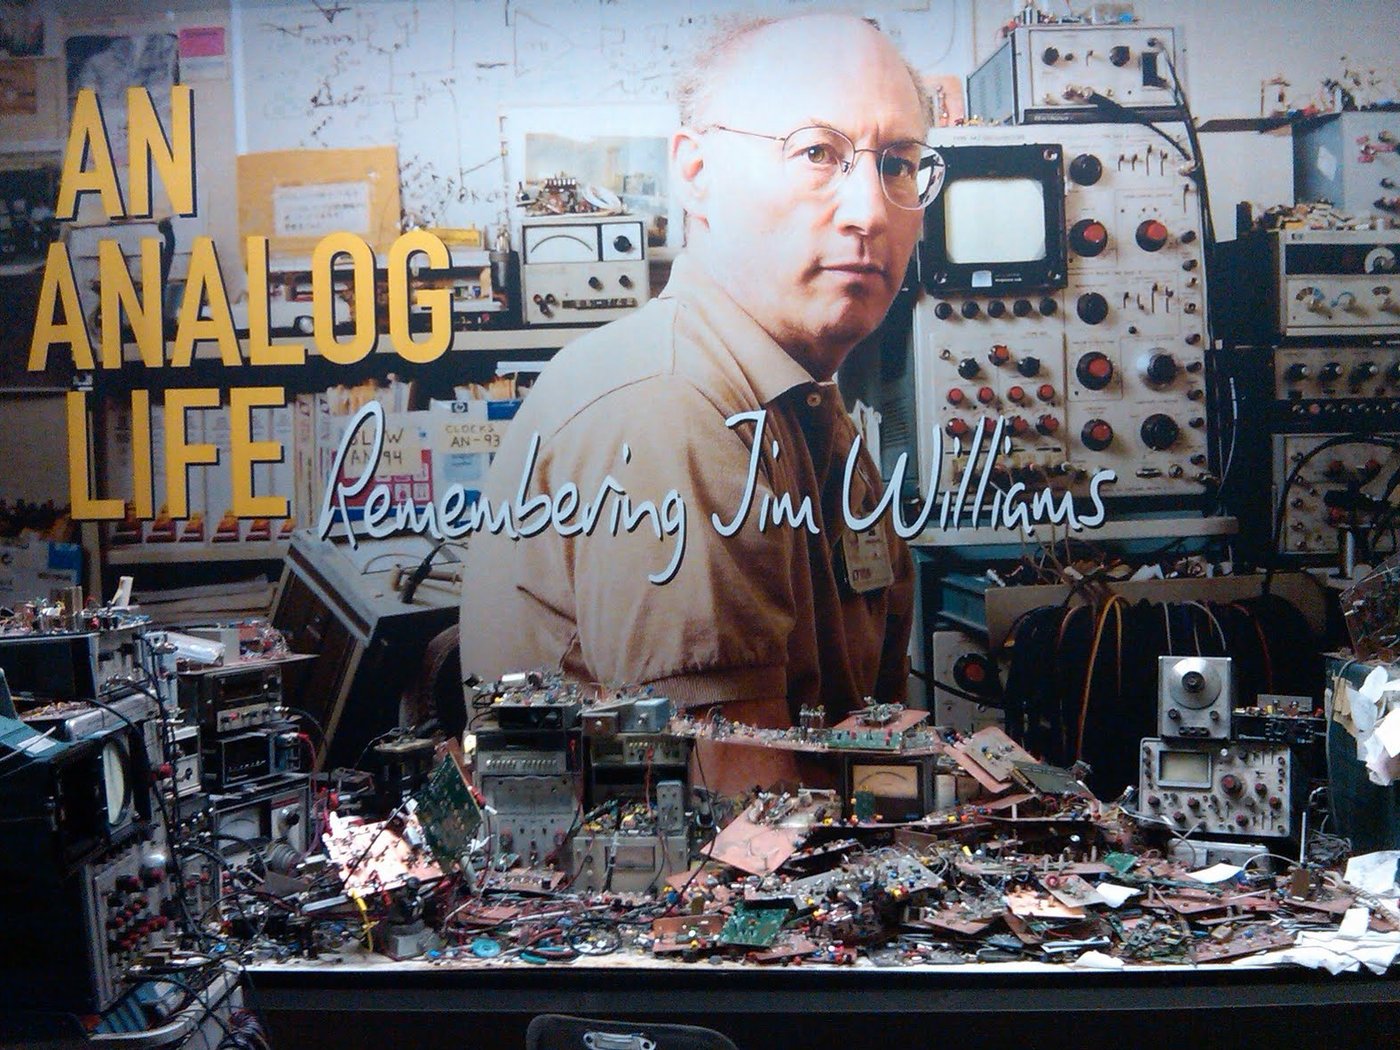
One of famous examples of bench importance is one used by Jim Williams at Linear Technology. Every volt-nut and ppm-nut learned so much from Jim’s legacy and countless application notes. Much of his work also inspired my own projects and studies into electrical metrology.
Moreover, the unique blend of individual statures, body structures, and distinct requisites further underscores the necessity to steer clear of the conventional, “one-size-fits-all” approach when selecting a pre-assembled workbench from hardware or home improvement stores. While it may seamlessly accommodate the needs of one individual, it might invariably manifest as a source of agony and an unpleasant ordeal for another. Author of this article is almost 2 meters tall found using something made for average height person as a noticeable compromise in comfort and stress.
Available room on the bench is important factor. in stark contrast to numerous software or IT engineering vocations, the very essence of proficient work hinges upon tangible, physical tools of the trade—be it the soldering iron, the multimeter, the fume extractor, or the oscilloscope. No amount of trendy AI or digital processing advancement can replace the actual measurement of the circuit behavior or troubleshooting problems with actual real device on a table.
In a nutshell good and practical workbench should fulfill next important criteria:
- Provide enough estate to fit daily used test tools, such as oscilloscope, power supply, DMM, soldering gear, microscope.
- Conform to ergonomical needs of the user, with matching height off the floor, access to tools within arms reach, etc.
- Robust and sturdy construction, so precise mechanical work can be done, like soldering tiny components under microscope.
- Flexible and expandable for future needs and applications. It’s not good to waste time shuffling items from/to storage when you start project.
- Room for computer workstation to review datasheets, perform CAD/CAM design and data analysis.
Author’s preference gravitates towards the use of aluminum extrusion systems for crafting workbenches. We used such benches for many years since 2007. Number of designs will be demonstrated in this article to inspire other engineers to implement their own vision of perfect bench for EE work.
By combining profiled T-slotted beams with materials like reinforced plywood sheets and readily available fasteners, the resulting assembly can seamlessly adapt to the unique confines of any designated area and dimension. These versatile extrusion systems inherently satisfy all criteria above, rendering them a great fit for an extensive array of applications, including the most meticulous undertakings like deployment within sterile clean room environments in semiconductor fab floors.
It’s worth noting that this level of adaptability does come at a cost, as these extrusion systems often bear a relatively higher price tag and could necessitate additional shop services like precision length cut. This, however is a reasonable trade-off in comparison to more commonplace workbenches found in hardware outlets.
E-Bench Model 2 – 3 unit desk – Year 2010
Depth of that bench was 1100 mm and it was very nice to use, but I didn’t have large instruments back then in Ukraine those years.
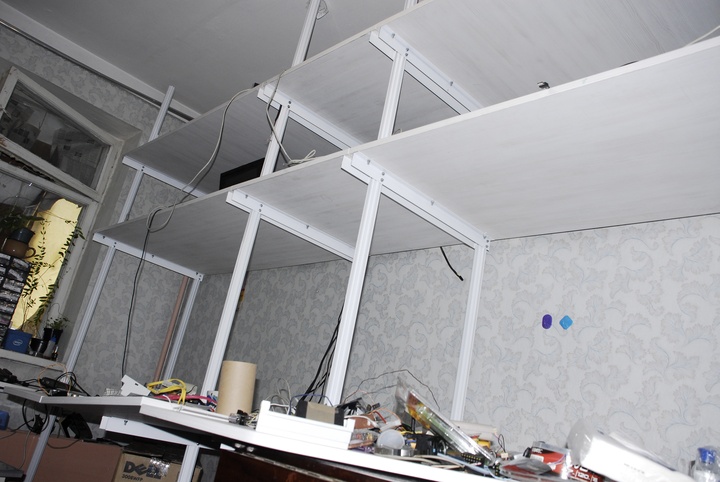
Width of segment was 1370 mm and there was zero support under the wooden sections. Laminated MDF did sag but bench didn’t collapse on me after daily use for 2 years.
I found old images from xDevs.com server for reference as well from year 2010:

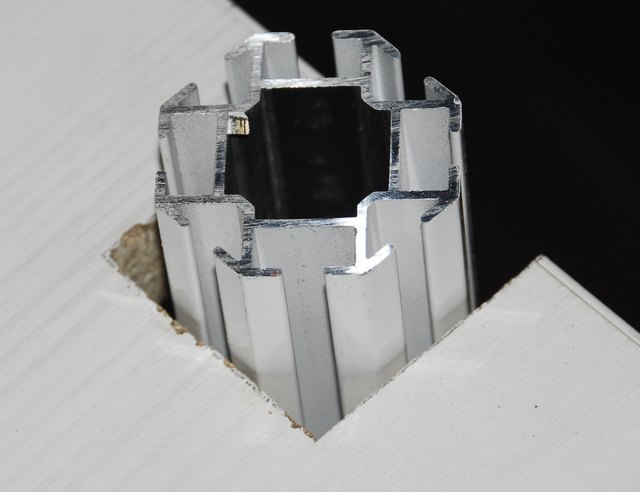
Beams:
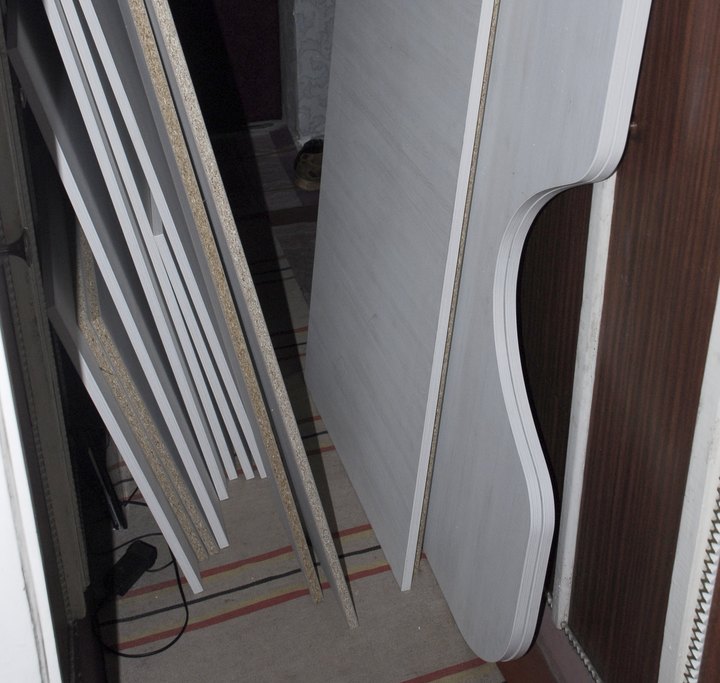
MDF sectors with laminated surface
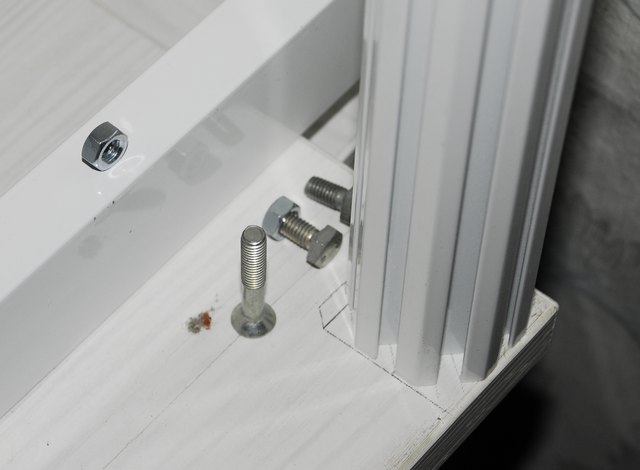
Mounting hardware
Shelf support:
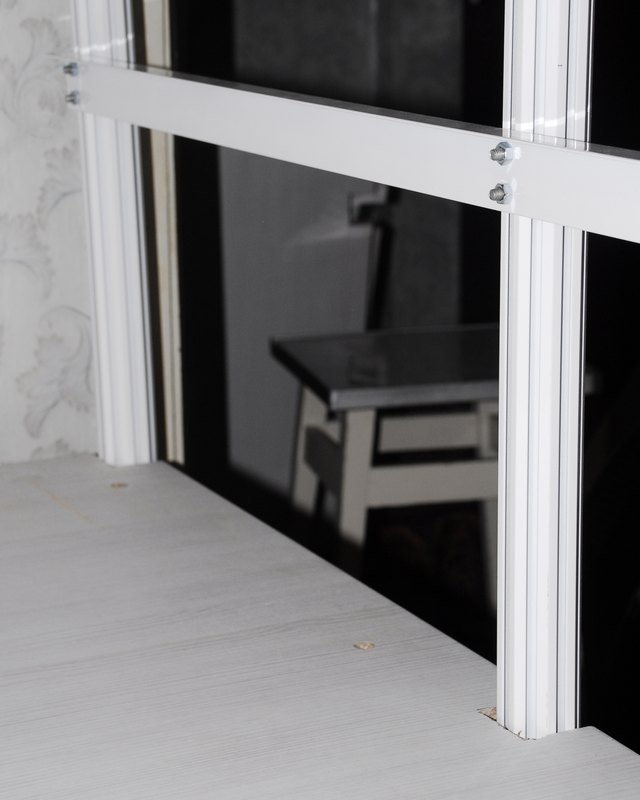
Assembled:
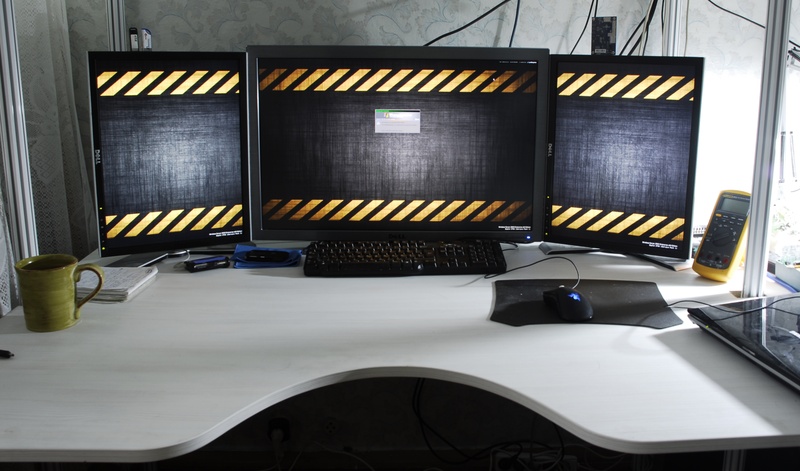
Workbench with monitors (Dell 3008WFP + two Dell 2007FP in pivot)
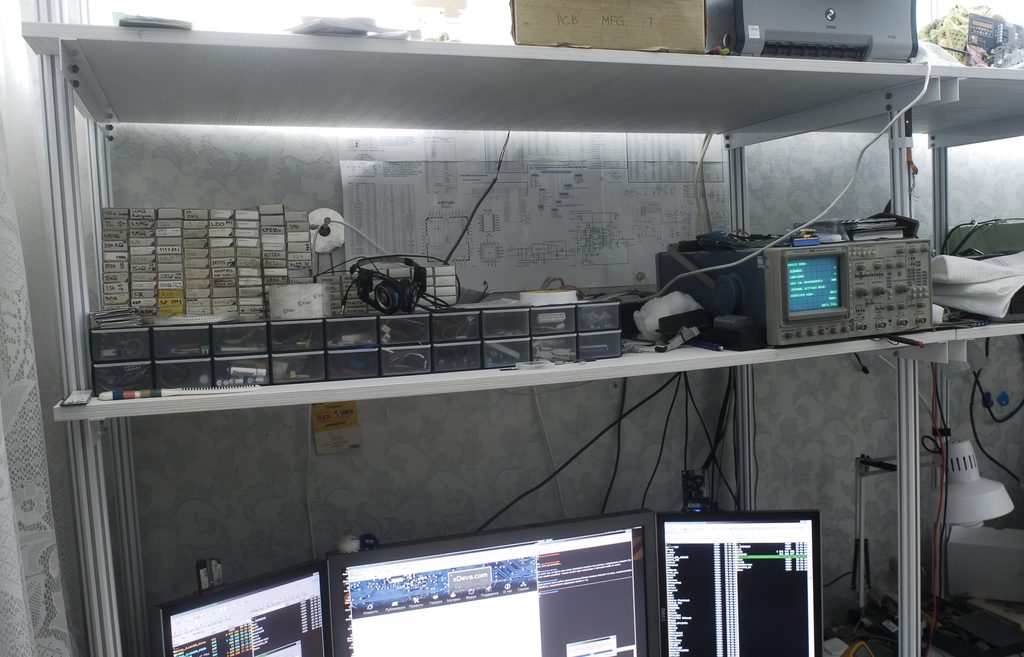
Middle shelf.
Obviously this design wouldn’t survive the new needs, hence I go with much beefier aluminum system and full square supports under working areas, and reduce from 2 shelf to 1 shelf build.
E-Bench Model 4 – single unit edition for werk – Year 2023
Design below showcases large single work space bench, with total dimension measuring 1220 mm depth by 2440 mm length. It is full rectangle frame mounted to four vertical aluminum extrusion T-slot beams at the corners. Bench main level is set at 870 mm, and stool required with adjustment height range from 600 to 700 mm.
I’ve used already available extrusion left over from another project, hence it is much heavier and stronger than actually required for electronics bench. Next T-slot beam configurations were used:
- 2 pcs 2440 mm length 80×80 mm double T-slot beams for long side support
- 3 pcs 1500 mm length 80×40 mm double T-slot beam as corner legs
- 1 pcs 1450 mm length 80×80 mm double T-slot beam as remaining corner leg
- 2 pcs 940 mm length 80×40 mm double T-slot beam as short side support
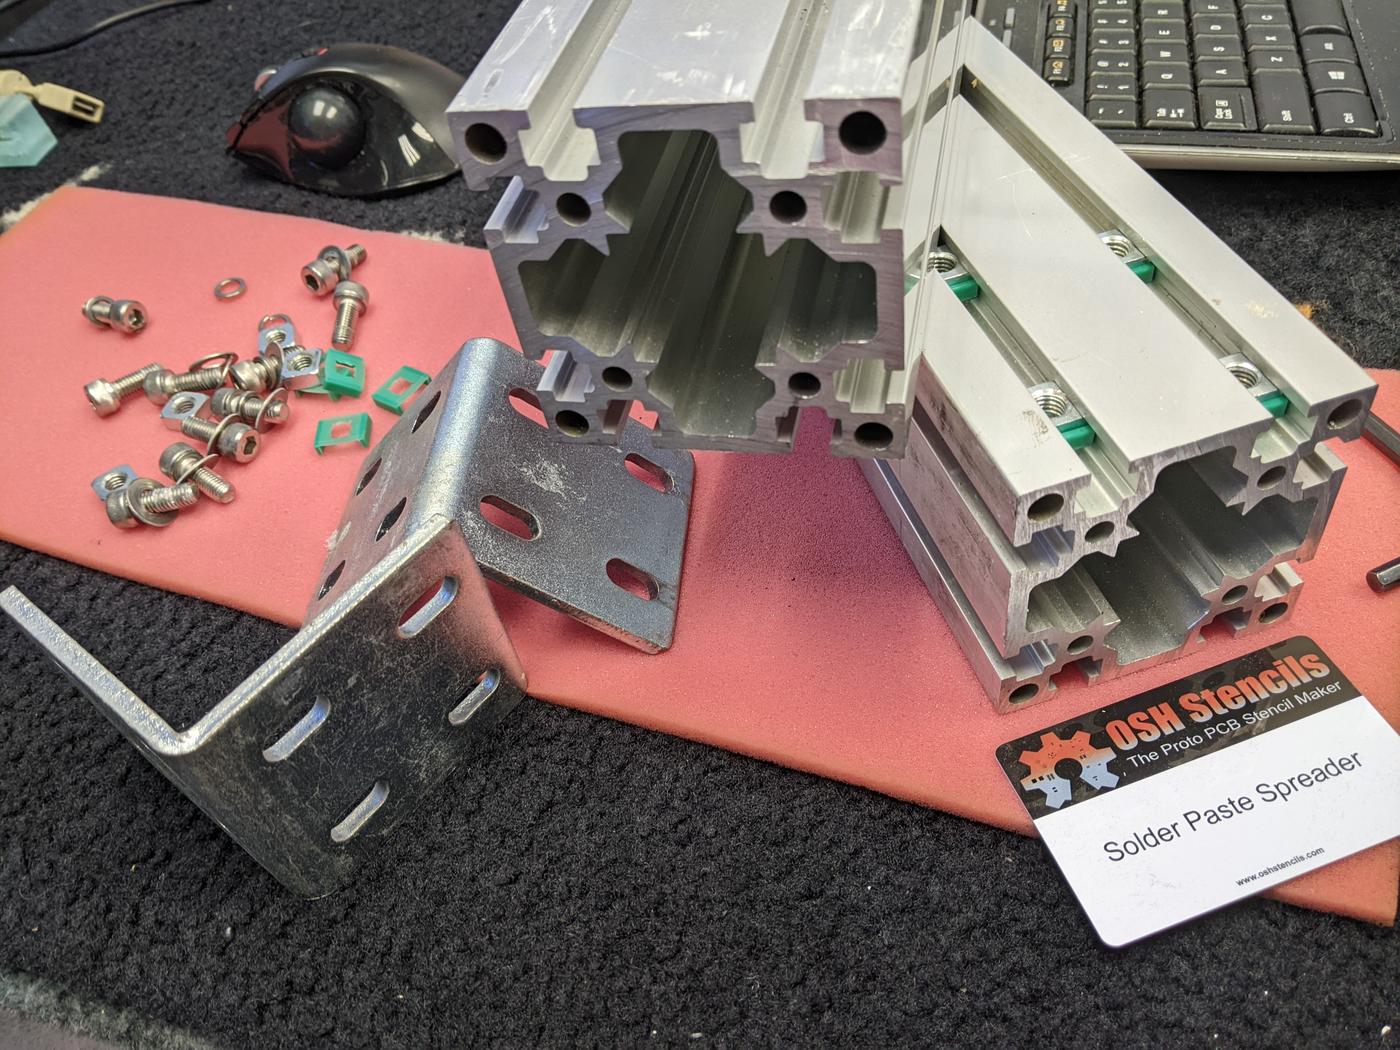
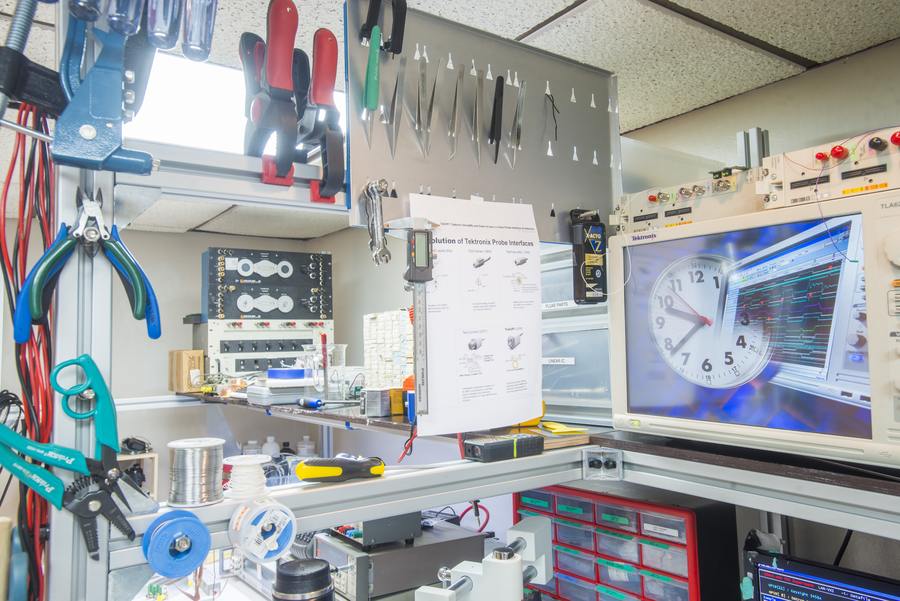
The primary objective was not to fashion a bench that was a museum piece or flawlessly precise in its measurements. Instead, the focus was on time spent on the building a very functional workstation that can be integrated into the daily engineering workflow and eliminating the need for extended downtime spent on meticulous dimensioning and aesthetic enhancements. As a result, you might observe a variance in the lengths and configurations of the beams, reflecting the prioritization of speed and operational continuity over uniformity. Worthy to note nice green plastic U-bracket clamps that prevent square nuts from sliding in the T-slot willy-nilly.
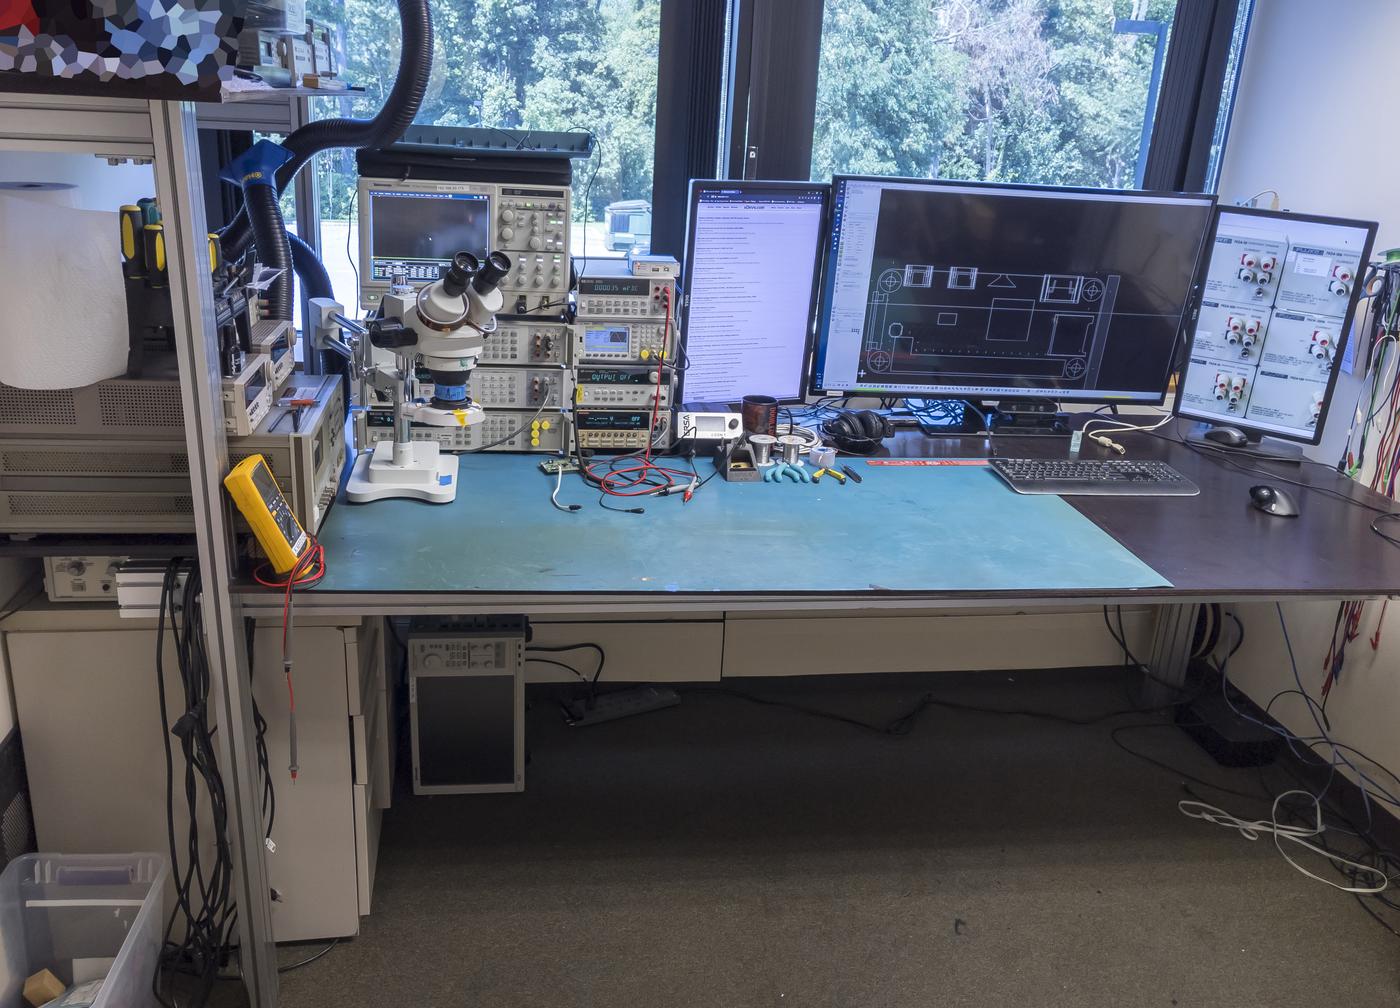
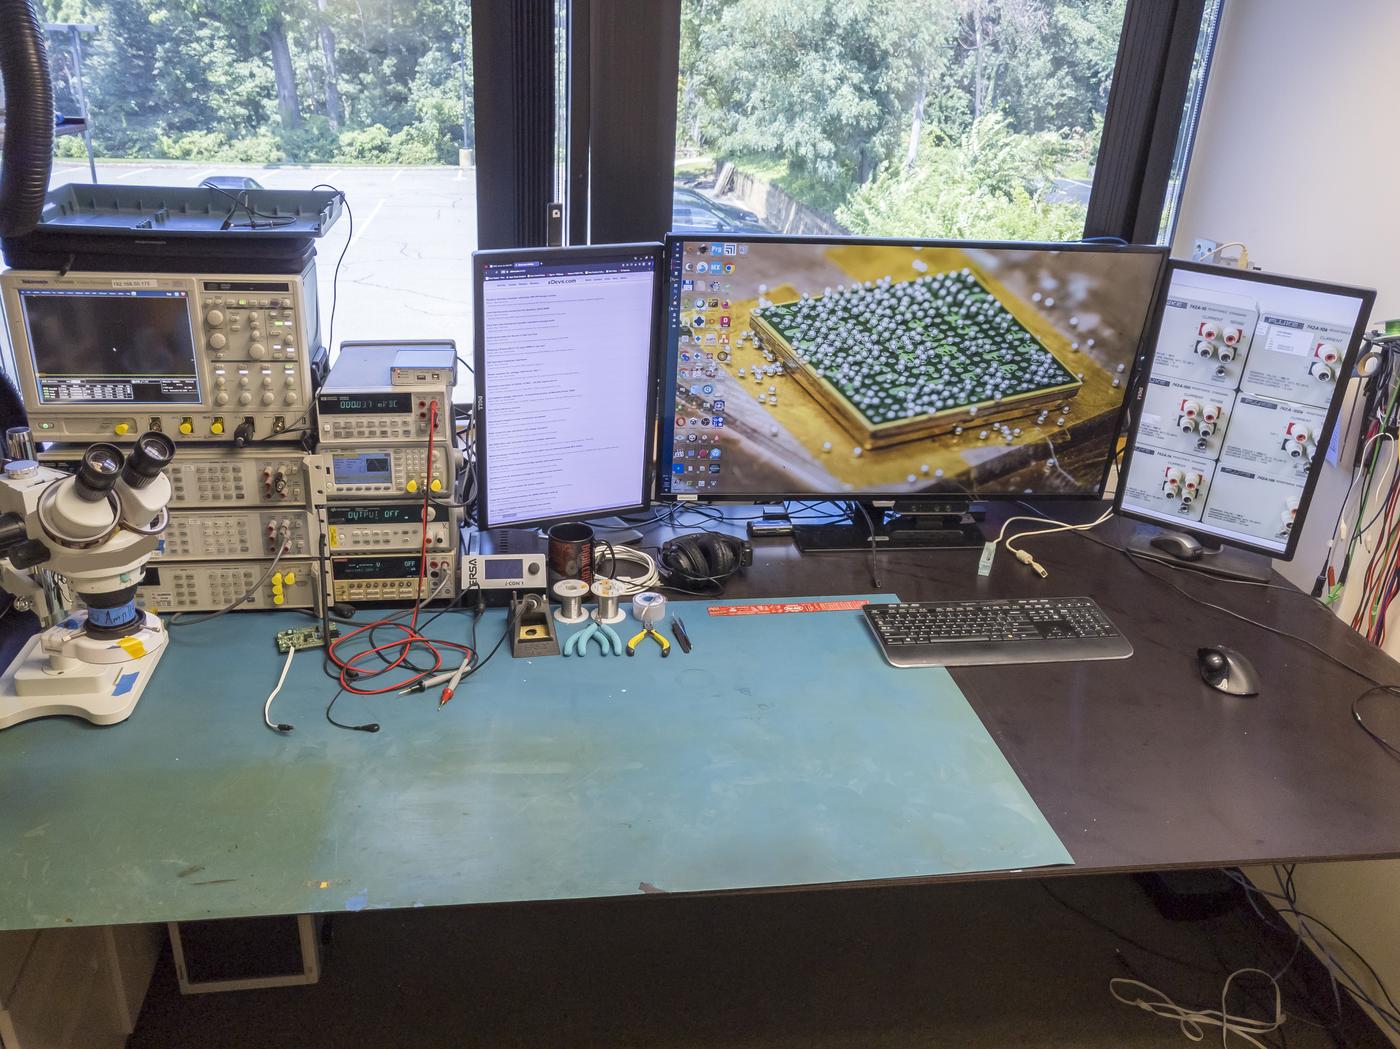
Bench work surface utilized a single sheet of reinforced plywood, covering whole 1220 × 2440mm frame space. Due to use of larger beam in one of the corners a small cut around 100 × 100 mm was done on right far corner to clear plywood from interference. ESD-dissipative heat-proof mat is placed on the bench to protect the surface from hot soldering iron bits. It was cut to size of the old bench, so you can see how much smaller that was before.
The loading capability of an 80×80 aluminum beam with a full 2440 mm length of the bench is way more than this desk will ever see, providing with robust construction. It can easily support hundreds of kilograms load, even without cross beam supports. Version 3 multi-sectioned bench that is used daily at xDevs.com lab is built using 45×45 mm T-slot beams and there is very minor deflection across lengths, despite 200+ kg loads with equipment on each section. I climbed on top of the bench many times to connect wiring at cabling at the equipment in the back of the bench and there was no any worry for rigidity. Each corner is fixtured with array of M10 stainless steel bolts and solid 5mm thick steel angles.
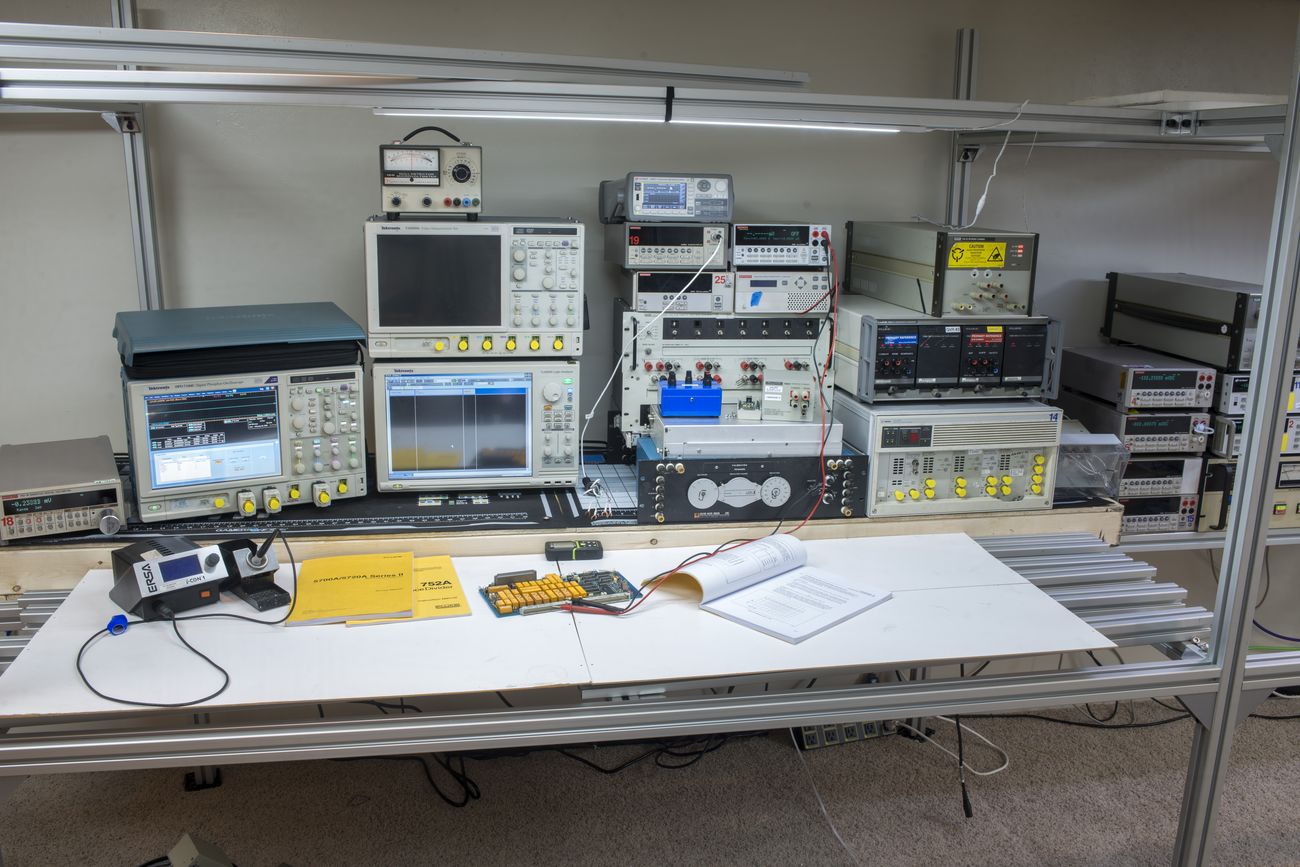
One of reasons to have 1200+ mm of depth is to allow even larger equipment like full size 19” instruments to be placed on the bench for everyday use without sacrificing useful space in the frontal area of the table. I often work on rather large instruments, such as Fluke 5720A calibrator which is 620 mm deep, or need rework some large size PCBs or systems without bumping into all the gear on the table around.
I prefer to setup all instruments with all wiring/cabling required at the back, including remote GPIB control. So there is no frequent need to actually reach anything at the back of the bench. In this particular setup bench occupy full length of the available room, from wall to wall. This means the only way to reach something at the back of the instruments is to actually climb on top of the bench and reach out. So 80×80 T-slot profile is earning it’s keep here :)
Also for additional size reference – central monitor is actually full 43” diagonal. It is Philips BDM4350UC 4K IPS display, which provides perfect solution for 100% Windows OS 1:1 scaling with DPI very similar to 24” FHD monitors. This monitor is actually based on same IPS panel used more expensive 43-inch Dell Ultrasharps. I can’t wait when 6K 43-55” monitors become more available for even more screen real estate. Until then two pivoted 24” DELL IPS panels would work as secondary displays for stuff like reading datasheets, answering e-mails and searching DigiKey for those unobtainable chips stock.
Somebody with keen eye might recognize nice wallpaper on the main display. It was HFD204 chip during manual reballing, which is Tektronix SiGe-based 12.5 GSPS 8-bit ADC out of broken Tektronix DPO7354 oscilloscope. I took that photo during repair attempts in 2019 :).
Equipment I have on the bench for daily use:
- HP 3458A 8½-digit DMM
- HP 3458A 8½-digit DMM
- HP 3245A 6½-digit universal generator/ARB
- HP 34401A 6½-digit DMM
- Keithley 2400 6½-digit SMU
- HP 4284A Precision 20 Hz – 1 MHz LCR
- METCAL hot air station HCT-910
- Few of Keithley 2601
- Keysight E3644A 1-channel power supply + few others on shelf
- Agilent 33622A 2-channel ARB
- Tektronix DPO7104 4-channel 40 GSPS oscilloscope
- Tektronix TLA7012 with TLA7AA4 card and P6810 + P6860 probe leadsets.
- Binocular microscope with 0.5x barlow and 10x eyepieces + LED ringlight + boom stand
- ERSA I-CON 1
- ITIC 1480A USB 2.0 protocol analyzer
- Trusty Fluke 187 hand-held DMM
- Few HAKKO Omnivise to hold various boards during reworks.
- HAKKO FA-430 soldering fumes extractor
- Workstation desktop (sits behind 43” monitor) with Xeon E2690 8-core CPU, EVGA X79 DARK, 64GB RAM and RAID1 SSD.
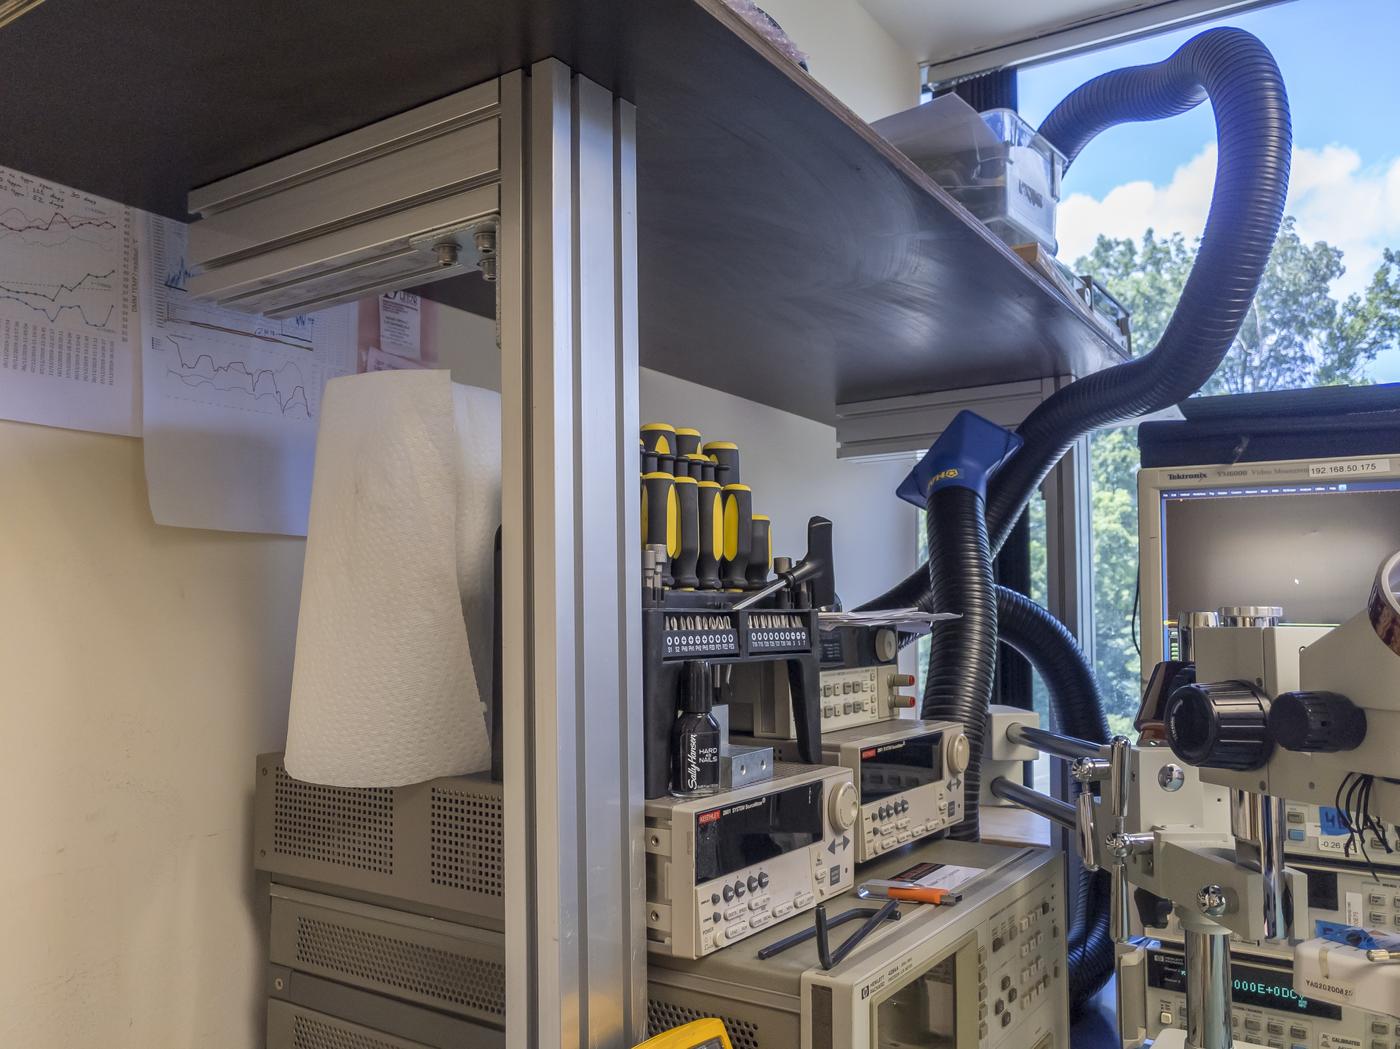
- Sencore PR570 variable isolation transformer/analyzer (sits under HP LCR)
Additional shelf was mounted on two short 80×80mm T-slot arms to store various electronic components, seldom used tools and circuit boards. It is sturdy enough to support weight of some lighter equipment as well, in case such need arise.
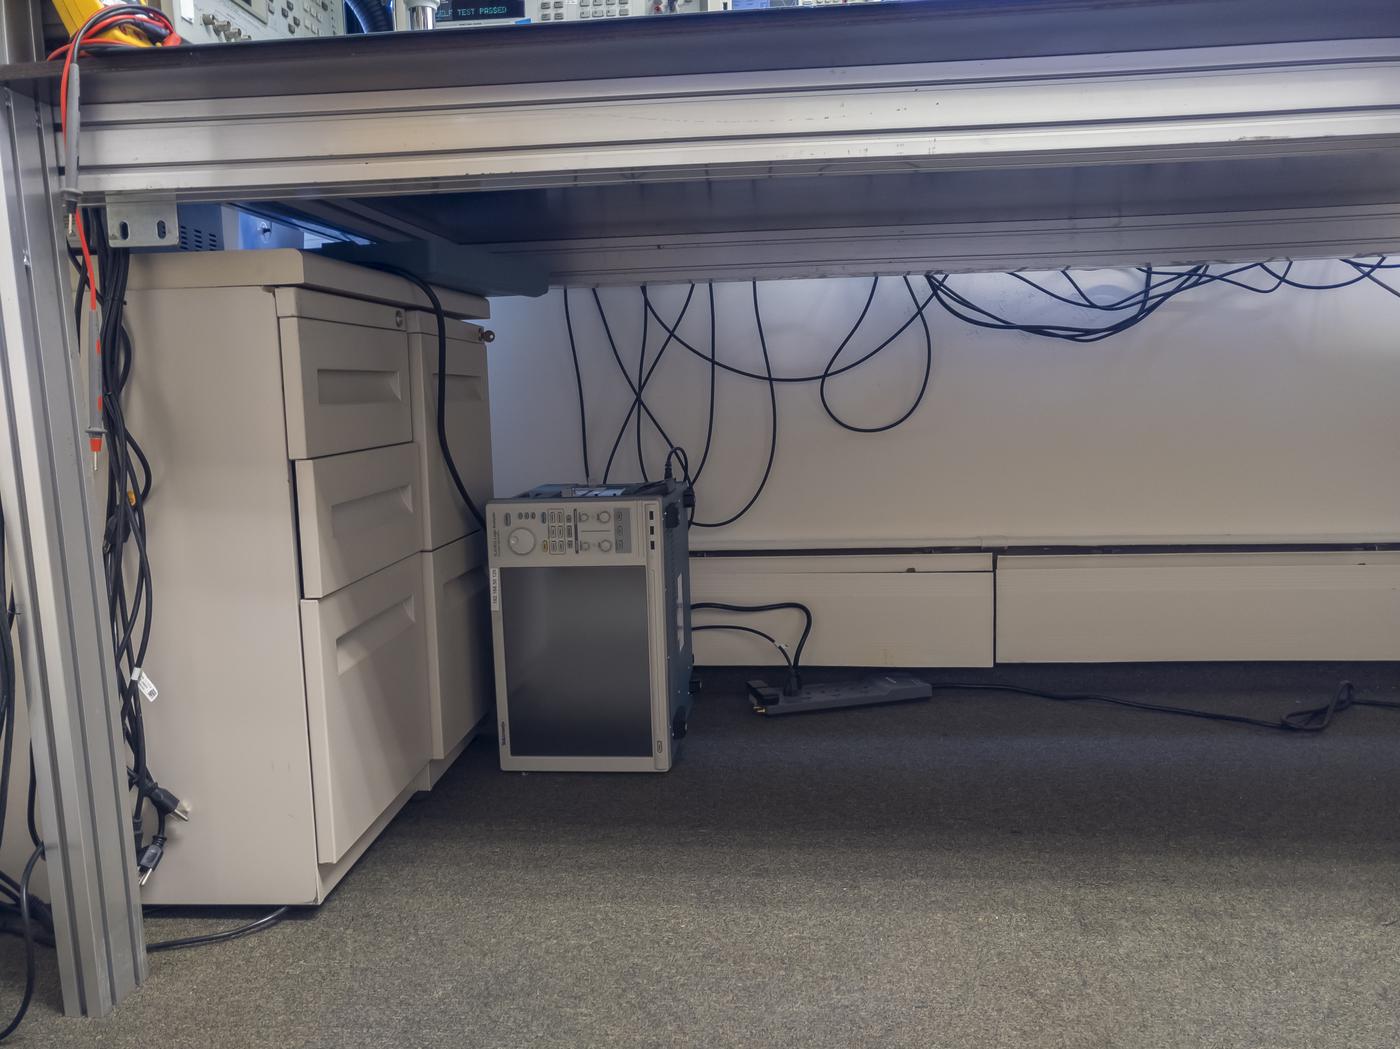
Good depth of the bench also allow enough room at the back on the floor for larger equipment that is used only remotely from network. In my example it is Tektronix TLA7012 logic analyzer, with only long lead probes connected and placed at the bench work area. It is large 19” 6U-tall box with low resolution screen and Windows XP which would eat up way too much useful space on the desk in any normal scenario. TLA is not used often, but it’s essential when there is need to debug something with large amount of channels or complex triggering state machines. I’m still not over Tektronix actually killing up their TLA lineup. :(
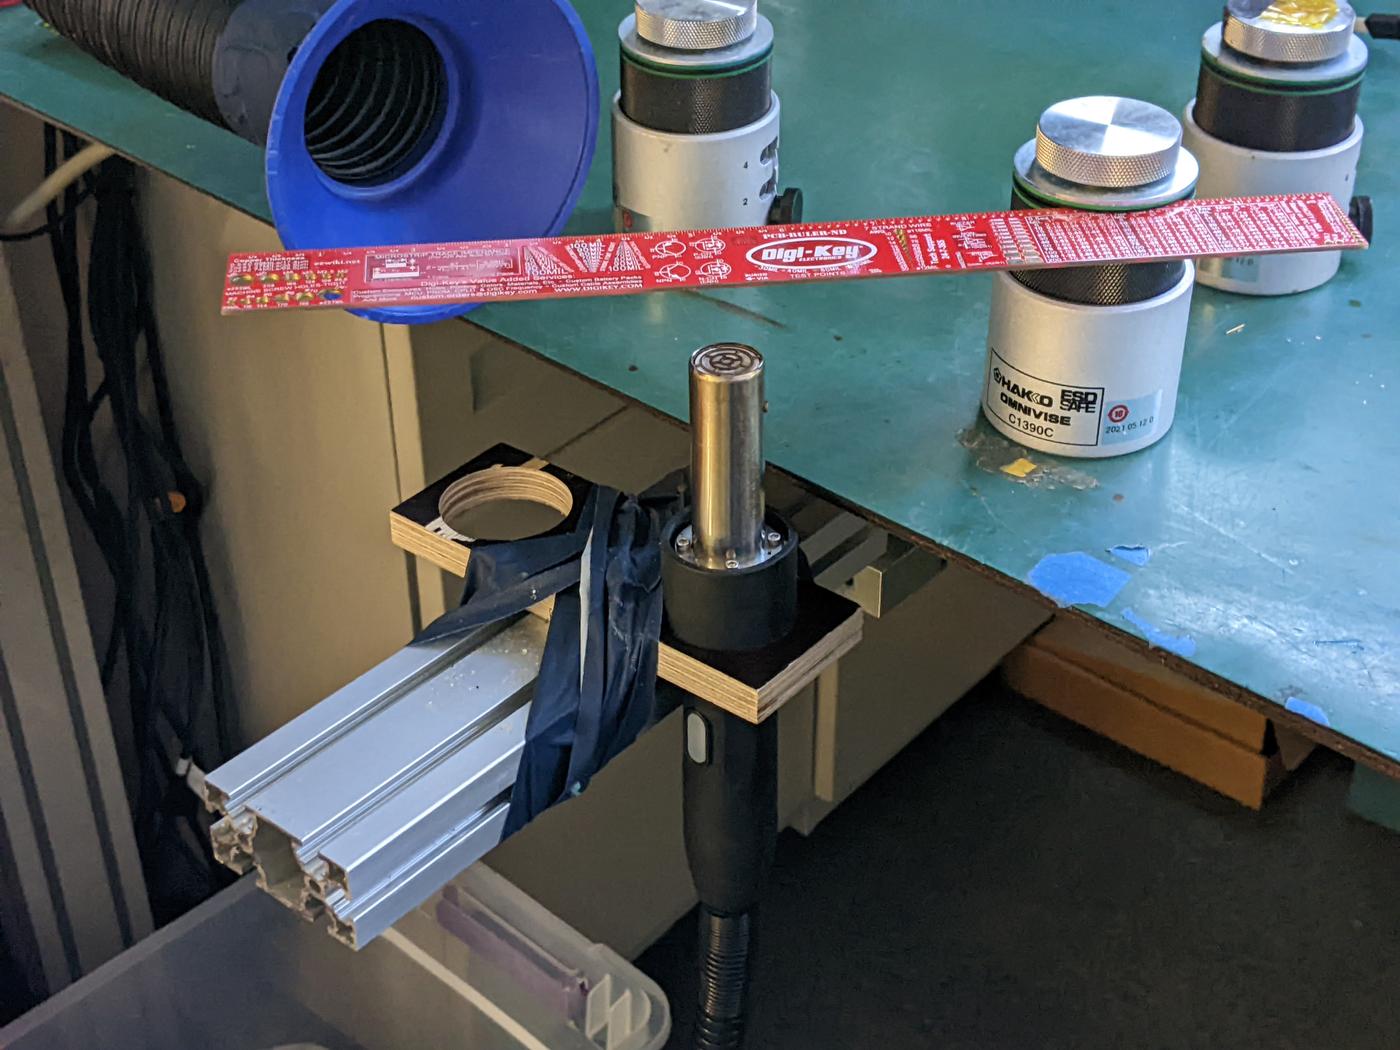
Ability to attach various items and helpers is one of reasons why T-slot profile is very nice. For a recent project I needed to rework number of connectors on the copper-heavy multi-layer PCBs. This required decent amount of preheat from the bottom of the board, while using ERSA soldering iron from the top side. It was somewhat 3-hand job. After quick easy fixturing with a short piece of 60×30 T-slot extruded piece and some EE-approved blue tape a makeshift holder for METCAL HCT-910 hotair station was attached.
May not look very pretty but did the job just perfectly fine, and it took 1 minute to detach and remove after the rework project was complete. Same goes to any shelving that can be attached to the bench for further expansion. Whole assembly of this workbench took about 8 hours most of which was reconnecting all equipment back together and fine-tuning the setup.
E-Bench Model 3 – 4-unit desk at xDevs HQ – Year 2019-present
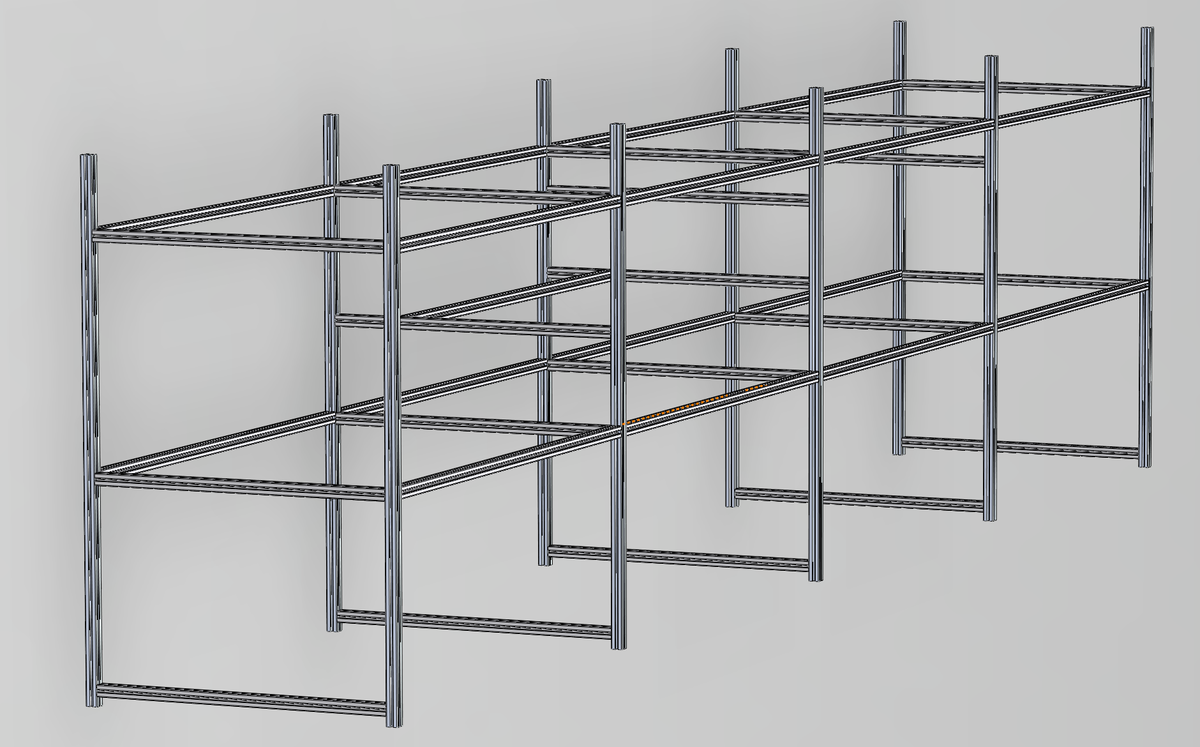
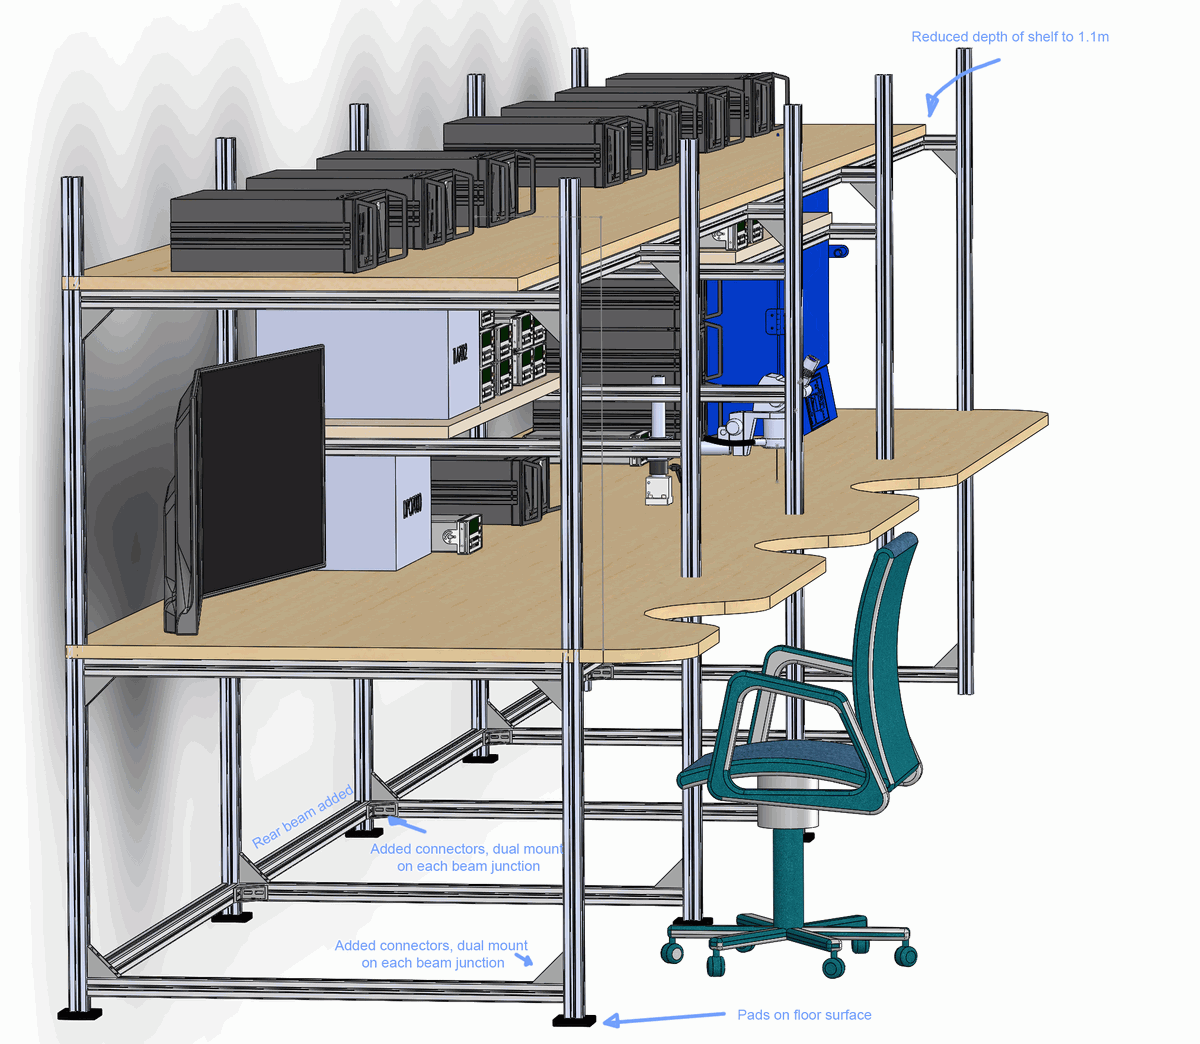
But to really go in town with wider coverage of metrology applications in the lab more space is required. This task is handled by longer sectioned frame workbench, expanding on aluminum extrusion profile use into multi-sectioned design.
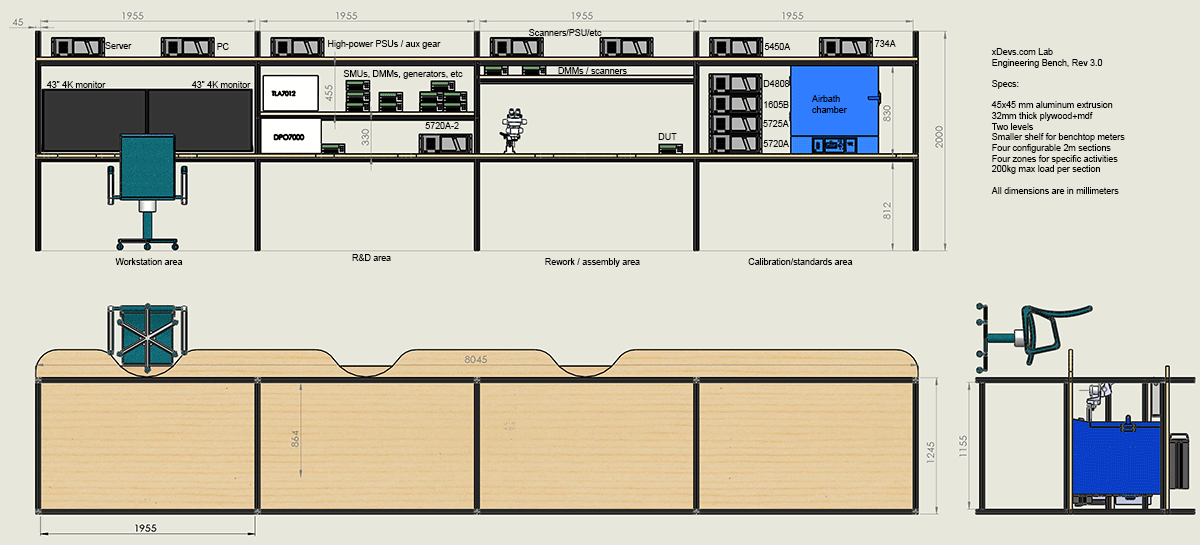
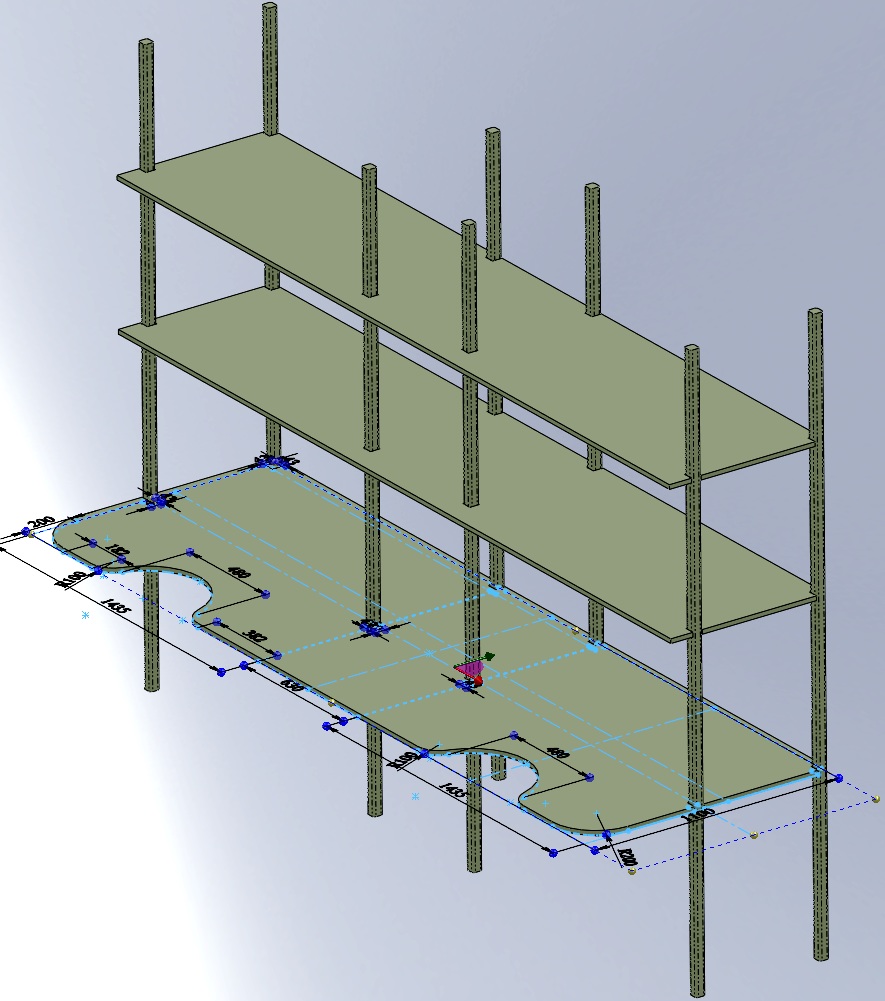
Such frame will carry all the weight and loading of all xDevs ppms. About 80 meters of extrusion, ~150kg and $2.7k total just in aluminum and bolts/fixtures. Total dimensions of this bench are 1440 × 9775 mm and it is split into 4 sections per specific functions.
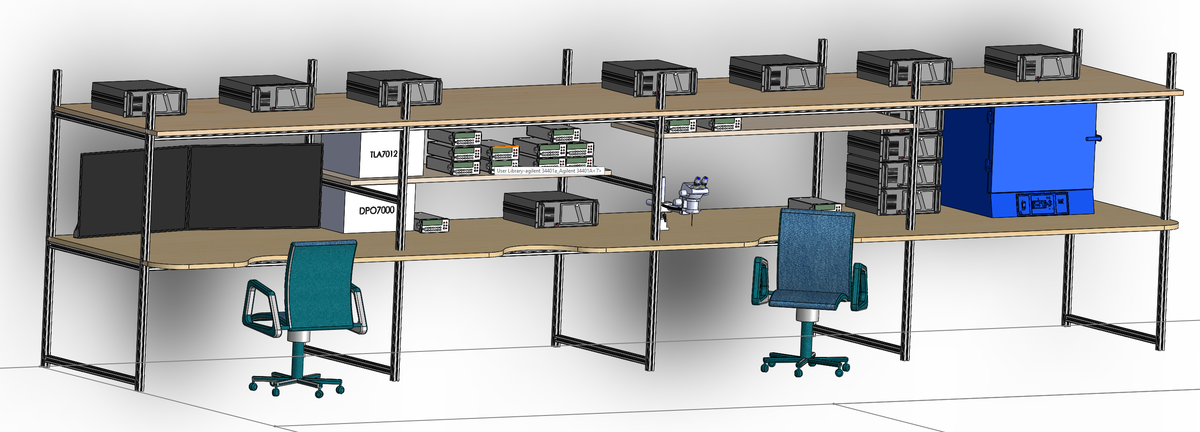
Estimated layout:
Many standard benches don’t have enough depth to put full-size test equipment, such as calibrators, network analyzers or even just high-end oscilloscope and still leave enough area in front to work comfortably on DUTs/boards. This design supposed to solve this issue, with 1440 mm deep main level working area, and additional 1350 mm deep shelf for stuff like power supplies/scanners/standards/aux gear that don’t need often front-panel access.
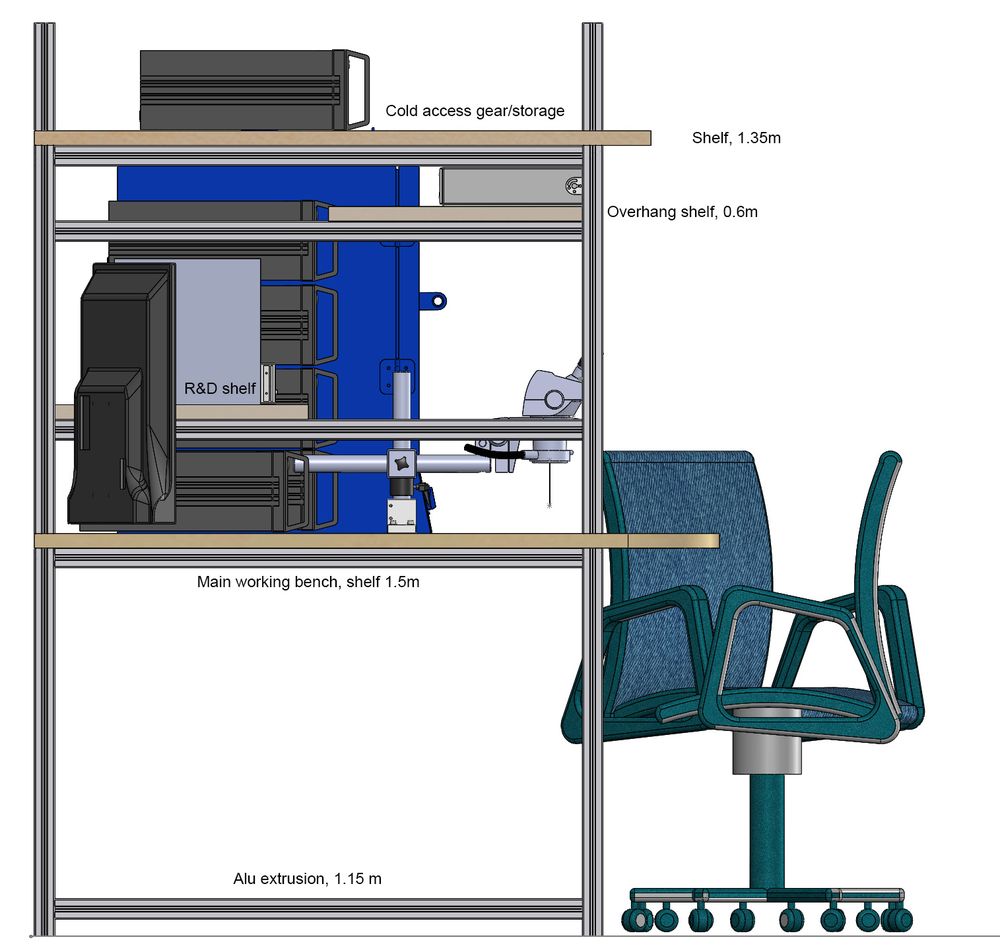
Here each 2 meter long section shown leveled, but actual design is flexible, and each surface can have own level to fit specific use/project. Stuff on top shelf would be rarely needing front panel/knob access. Part of the reason is that everything in lab interconnect via GPIB or LXI bus. So far I often find large gear like PSU or parametric analyzer occupy valuable working area space while running days long experiments. Some of my gear need 630-650 mm depth, plus cables plus space for airflow for cooling fans.
Moving gear out can help to resolve this issue. LED panels would also be installed on top shelf’s inside surface,as well as ambient lights. LED panels, such as 60×60 cm ceiling type are one of reasons why I thought to make top shelf as deep. To mount light out of sight if one sits in normal position, looking forward.
For monitors, I spent a decade with 30”+24” or 30”+20”+20” setups until moving to single 43” 4K monitor in 2018. Day and night improvement, life without bezels and 4K resolution with Windows scaling 100%. 32-34” is just too small for 4K. There will be small 24” FHD screen in assembly/rework area. And fume extractor as usual, under the bench.
AC power cords, Ethernet cables, switches, UPS stuff, all that will go to top shelf. Only smaller power distribution board would be installed on two middle sections for daily work. I am rather tall person (almost 2m) so large legroom space is paramount for me. This means no drawers, no shelf or anything like that under the workbench. Hate to bump into stuff when move from one side of the bench to another.
Got some proper M12 bolts and screwdrivers for assembly. Got one more section added.
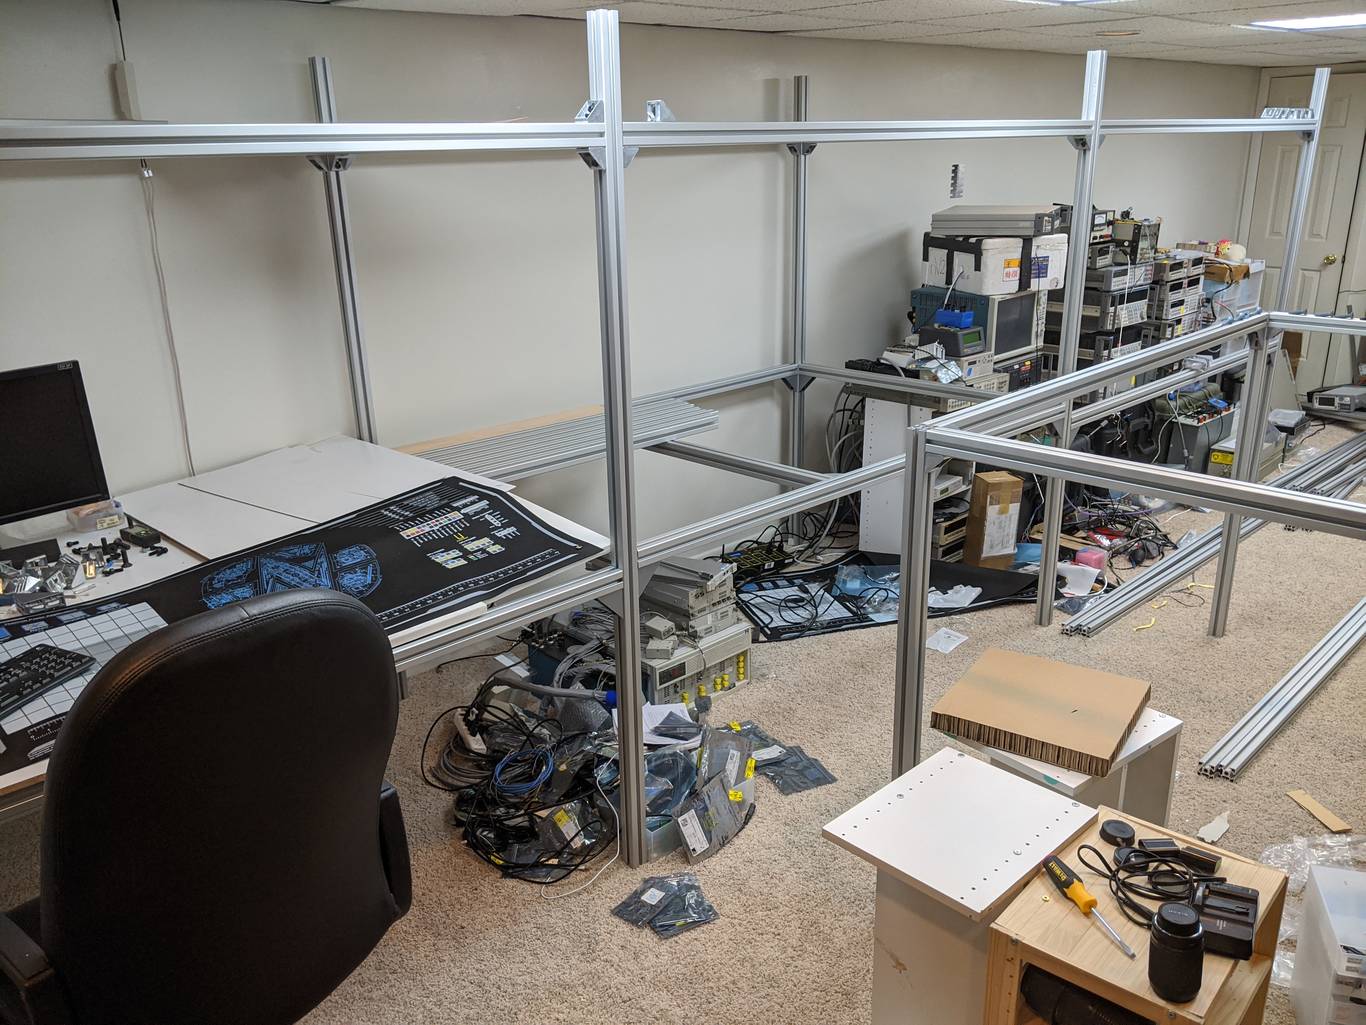
Just to illustrate the area available put some pressed wood panels. 24” monitor looks tiny on the bench.
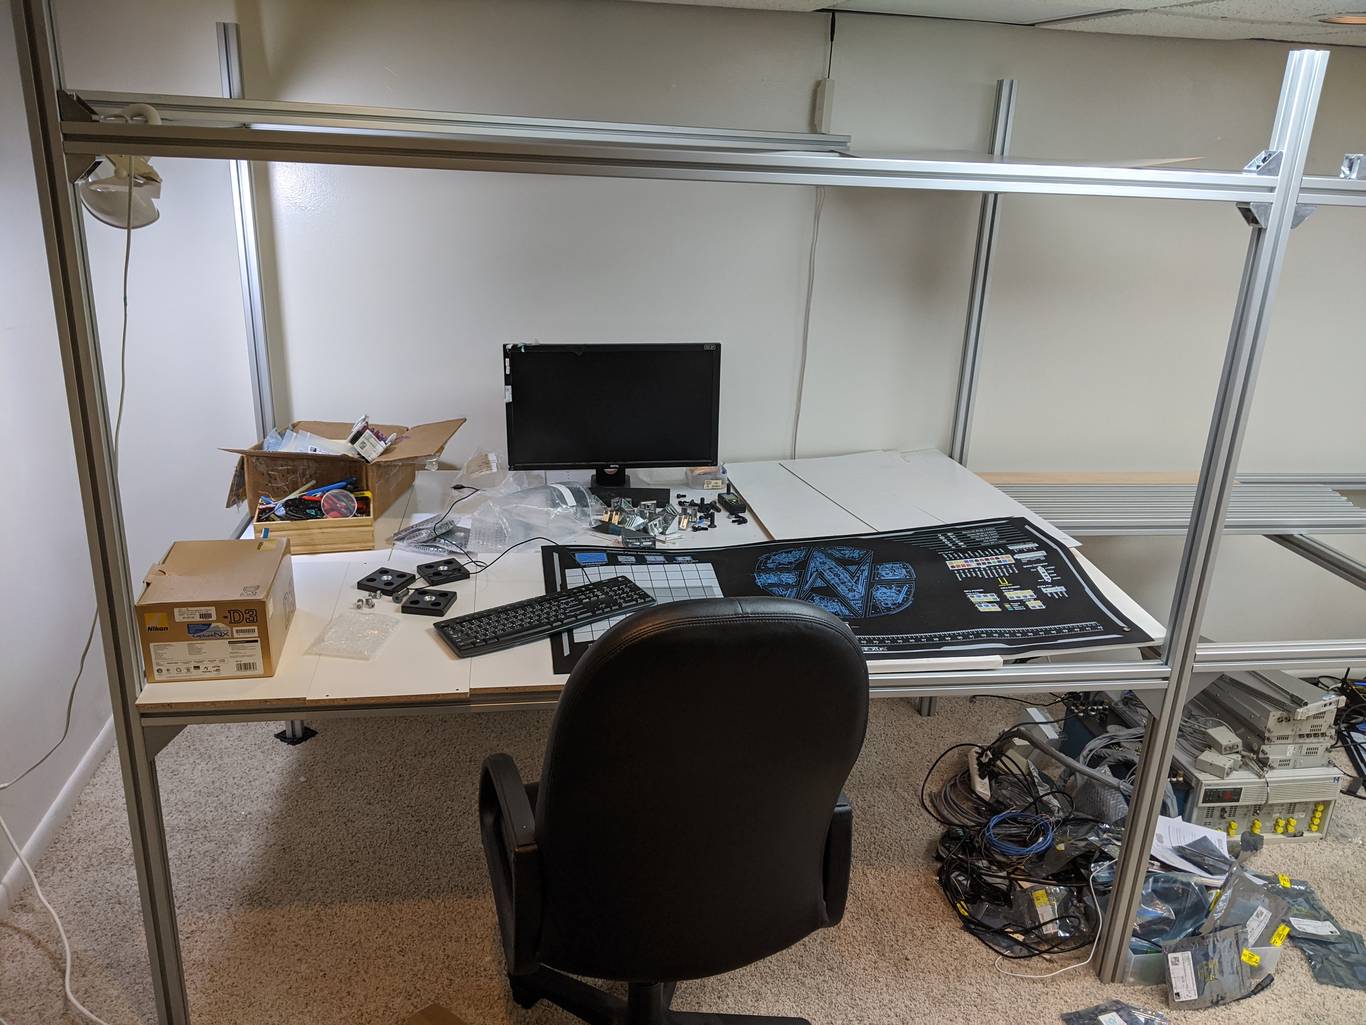
This black ESD mat is 2 × 4 ft size. Will be moving equipment away tomorrow and finishing the complete frame.
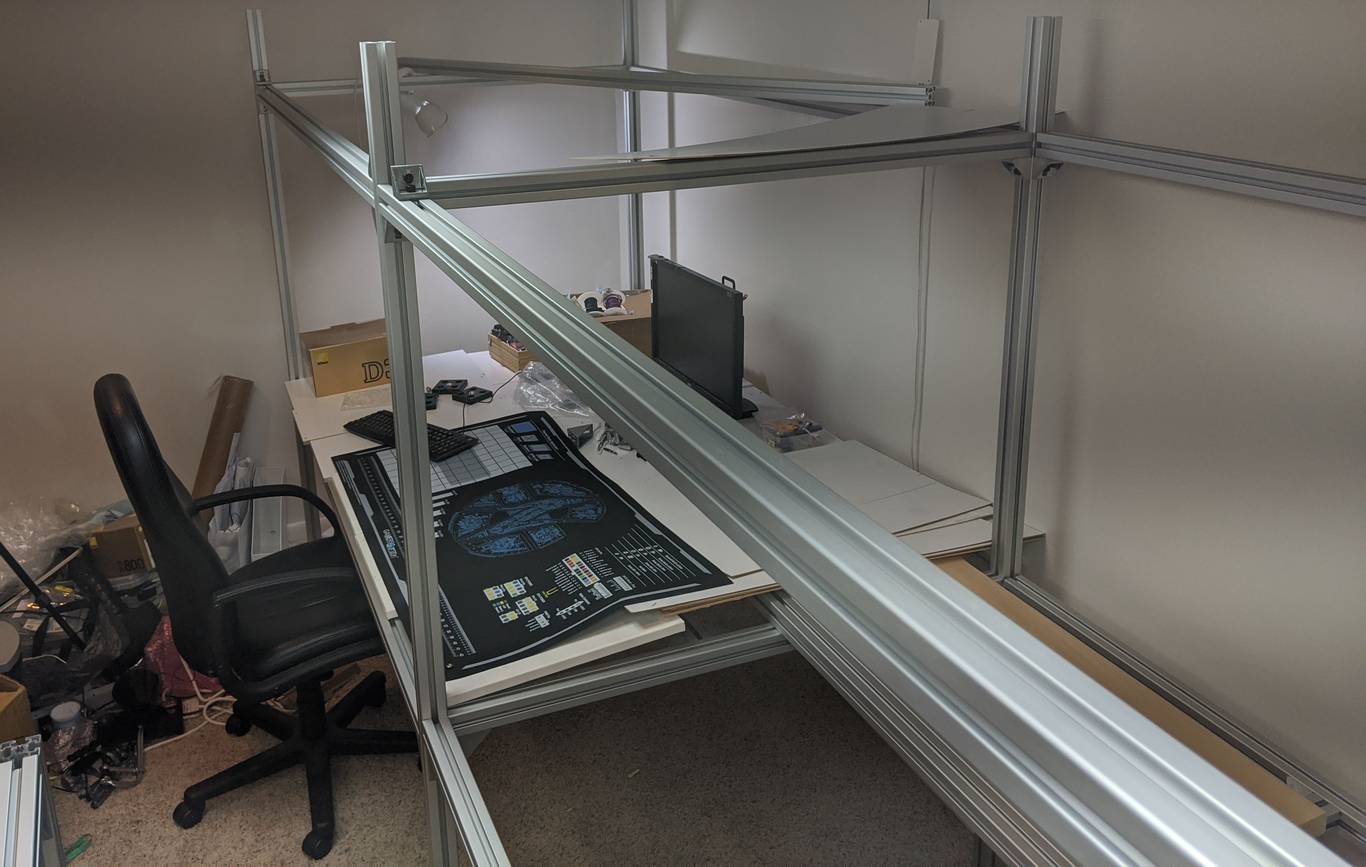
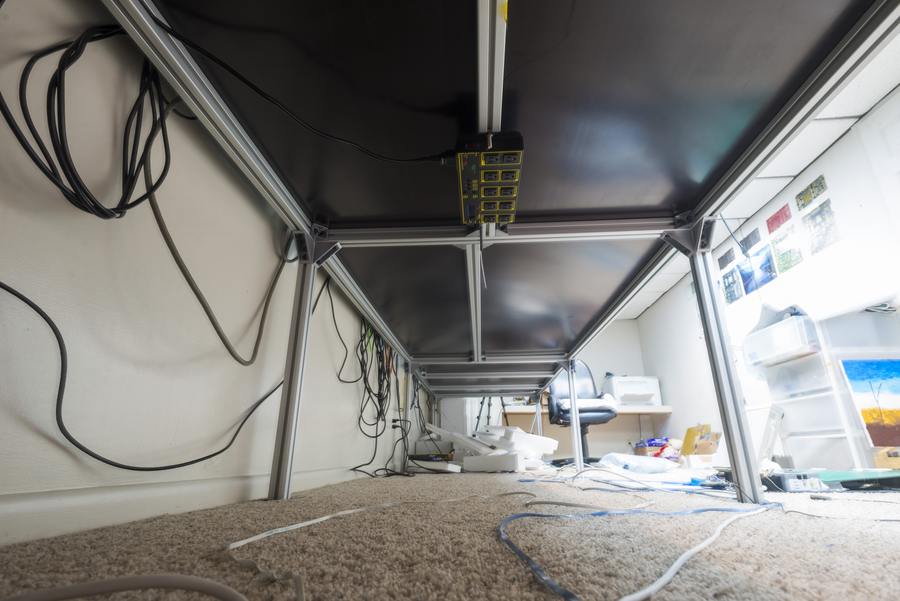
View under for stiffener beam. I have few extra extrusion beams, so I can reinforce one or two sections where I plan to put lot of heavy gear.

Next step is fine-tuning plywood desk drawings and ordering that to custom cut from 5×10’ panels. Illustration with some shipping pallet on section 2 with piled gear and get a feel of layout.
Reach to scope by the left and to top gear is little too far, but nothing stops me from moving that gear 10-15 closer to the front. Otherwise distance is perfect, and I still have plenty of space in front half to work on full-size equipment.
I’ve put additional 2m beam on section 3 and loaded it up with ~200kg of calibration equipment.
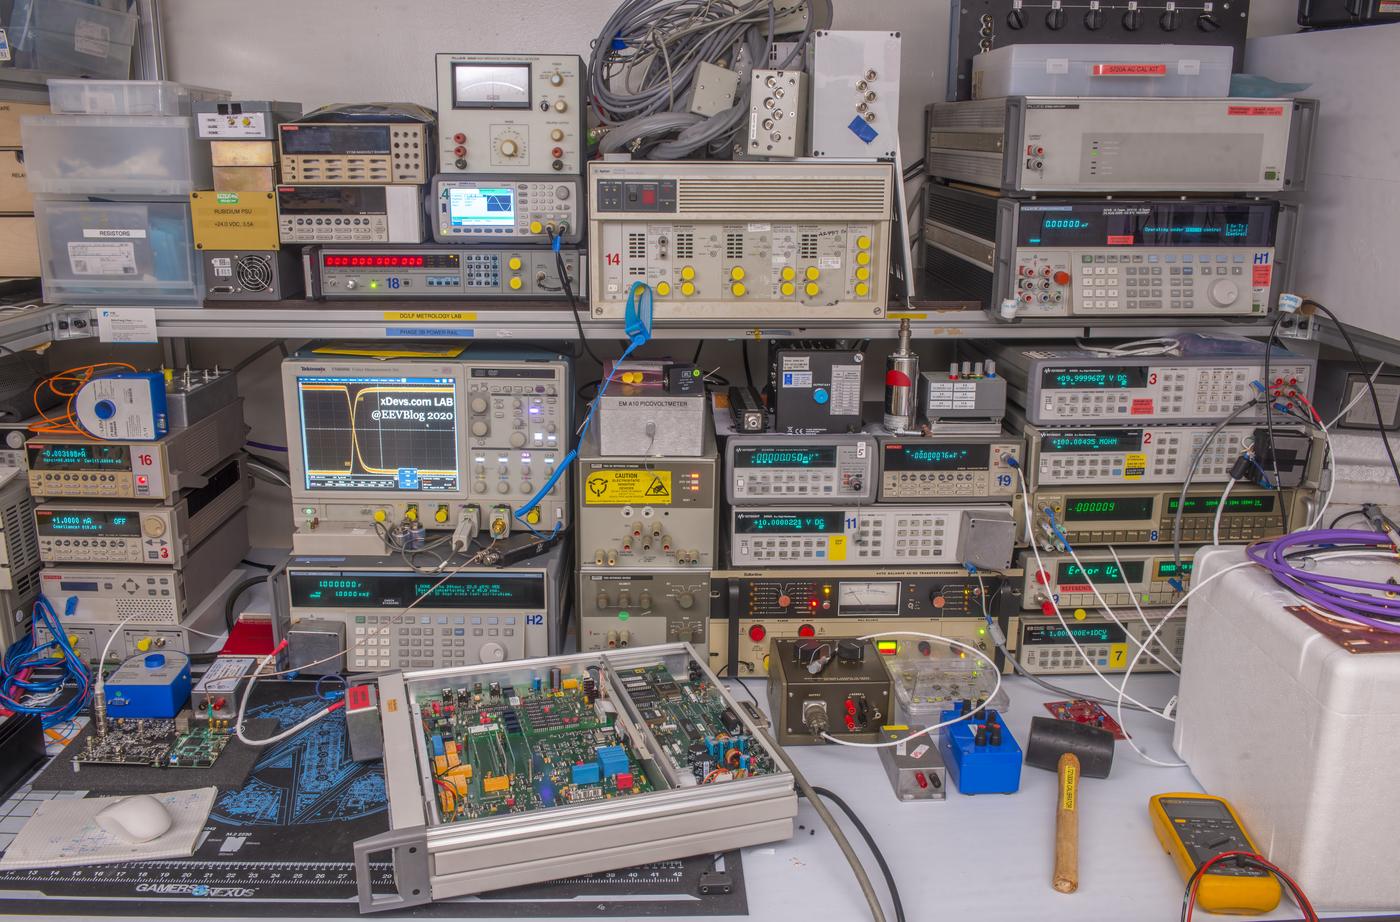
Measured bend in the middle of the extruded beam is ~9mm. Once I get plywood on surface, it will be even less due to spread load across larger area. One can clearly see on this photograph that deep equipment such as calibrators occupy good half of the available bench depth. Hopefully this illustrate a reason of having 1220mm depth in a first place here.
Remaining section to build will be located by the right of the calibration gear. Long term experiments will be hosted on that part, with thermal chamber, datalogging stuff and auxilary hardware for that. Perhaps my primary voltage, resistance and current standards will be moved there too, onto top shelf.
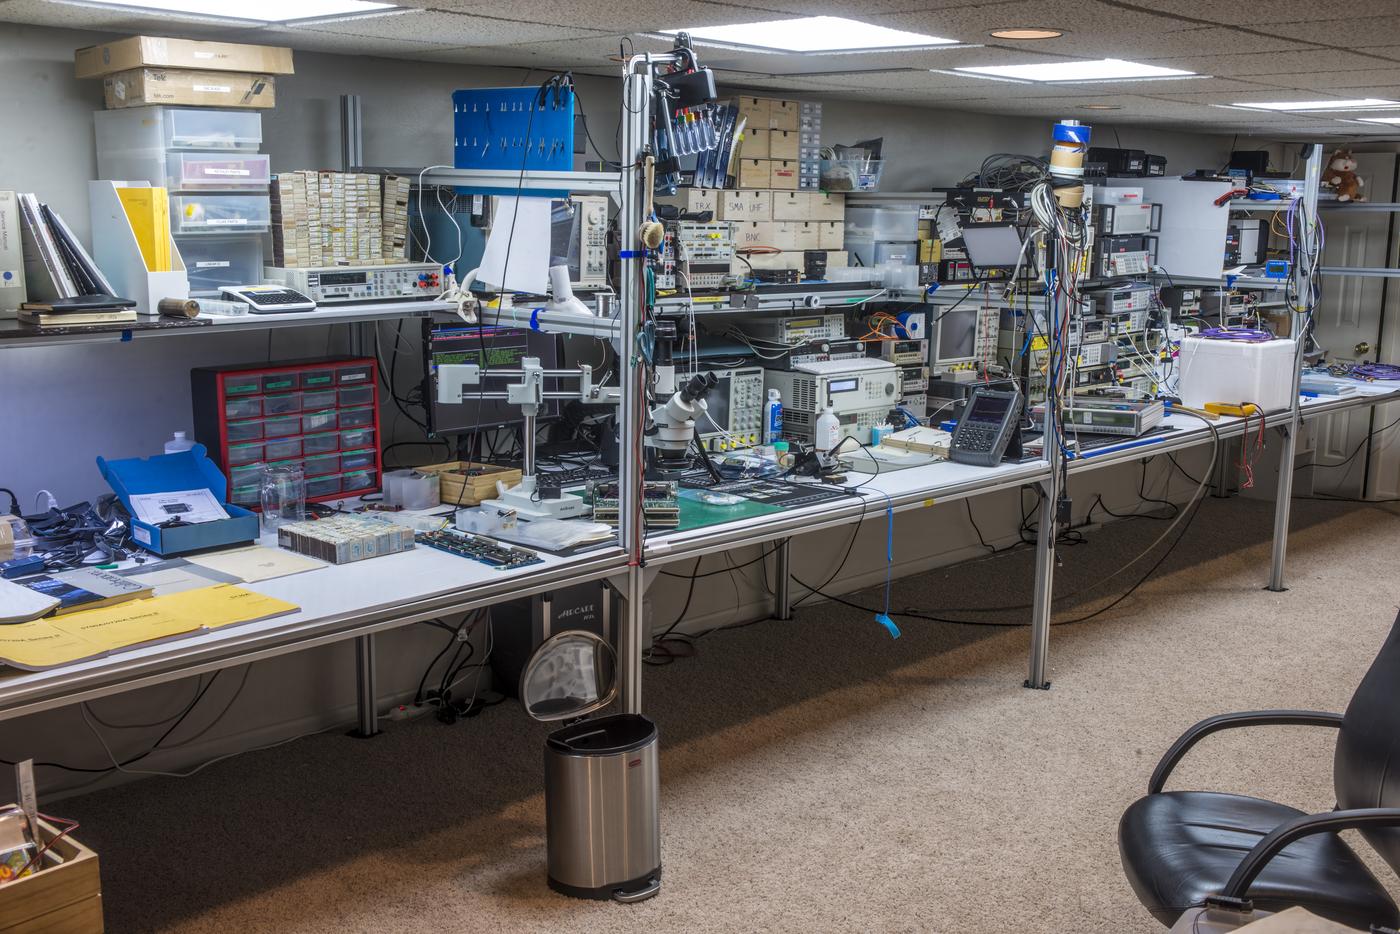
Overall, I am happy how this shaping up, and 1220 mm bench depth is just right. No compact siglols or riglols in my lab, old HP and Fluke boat anchor instruments love proper depth to allow decent working area and room for projects in the front. Photos after assembly:
Short timelapse of the assembly process:
Section 1 – Various auxilary gear, storage for tools and long-time projects.
Section 2 – main working area, rework equipment, fume extractor, scope, logic analyzer, power supplies, SMUs, microscope.
Section 3 – reference DMMs, calibrators, AC measurement equipment
Equipment layout. Bench have enough room to put full-size full-depth 19” equipment in front of lab gear, which was primary goal for bench depth choice.
Section 4 – calibration standards, temperature chamber box, AC standards. xDevs server on top 3rd shelf.
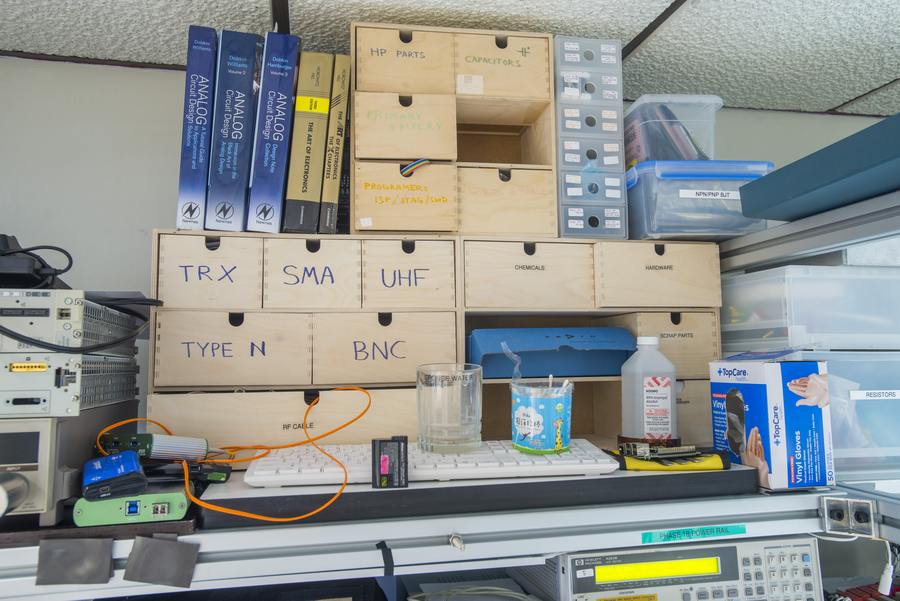
Storage IKEA boxes for connectors, parts, etc.
Various tools hanging off vertical beams :)
Underside supports for benches. Can see IP-controlled mains power switch.
And updated state of the bench as of end 2020:
Dave featured this very same bench in EEVBlog #1420 Mailbag video.
Conclusion and summary
Assembling a workbench from scratch and aluminum T-slot profile unveils a world of possibilities, allowing for a tailor-made workspace that seamlessly aligns with individual needs and preferences. While the journey might involve challenges and adjustments, the end result is a functional tool that seamlessly integrates into daily workflows and needs. It stands not only as a workstation but as a reflection of the efficiency and optimized use of engineer time. In a world where standardization often prevails at expense of long-term flexibility and growth DIY workbench stands as a pursuit to inspire next generation of inventors.
Projects like this are born from passion and a desire to share how things work. Education is the foundation of a healthy society - especially important in today's volatile world. xDevs began as a personal project notepad in Kherson, Ukraine back in 2008 and has grown with support of passionate readers just like you. There are no (and never will be) any ads, sponsors or shareholders behind xDevs.com, just a commitment to inspire and help learning. If you are in a position to help others like us, please consider supporting xDevs.com’s home-country Ukraine in its defense of freedom to speak, freedom to live in peace and freedom to choose their way. You can use official site to support Ukraine – United24 or Help99. Every cent counts.
Modified: Aug. 18, 2023, 4:18 a.m.

