- Intro
- Disclaimer
- National Instruments GPIB-USB-HS dongle
- Raspberry Pi setup with automatic script
- Obsolete manual setup procedure, do not use together with automated script
- Configuration for linux-gpib and interfacing
- Testing GPIB operation
- Python-application to talk GPIB from Raspberry Pi
- Additional interfaces, LXI via Python
- NI USB-GPIB-HS repairs
- Resetting hanged NI dongle on RPi remotely
Intro
While GPIB interface is slowly replaced by USB, LAN and other less popular modern interfaces, lot of instrumentation are still rely on GPIB as industry standard. Majority of production systems and automated measurements setups using GPIB for decades already. All these usually require a host GPIB controller to run program and issue operations over the bus.
Using PC is easiest thing, especially Windows-based machines, as most of vendors already supply ready to use libraries and packages to interface their instruments via GPIB. But if you go little aside, using Linux-based OS, things get tricky very quick, especially for engineers who are not familiar of *nix environment and way of things. Often simple plugging GPIB adapter into system and expecting things to work cause havoc and countless hours wasted, resolving dependencies, compiling pieces of code, tweaking kernels and such.
Disclaimer
Redistribution and use of this article or any images or files referenced in it, in source and binary forms, with or without modification, are permitted provided that the following conditions are met:
- Redistribution of article must retain the above copyright notice, this list of conditions, link to this page and the following disclaimer.
- Redistribution of files in binary or source form must reproduce the above copyright notice, this list of conditions, link to this page, and the following disclaimer in the documentation and/or other materials provided with the distribution, for example Readme file.
All information posted here is hosted just for education purposes only and provided AS IS. In no event shall the author, National Instruments, Raspberry Pi foundation, or any other 3rd party be liable for any special, direct, indirect, or consequential damages or any damages whatsoever resulting from loss of use, data or profits, whether in an action of contract, negligence or other tortuous action, arising out of or in connection with the use or performance of information published here.
National Instruments GPIB-USB-HS dongle
First, let’s take a look on hardware interface which we will be using in this tutorial.
There are multiple versions of USB-GPIB interfaces from National Instruments, we use previous generation GPIB-USB-HS. There is already newer version available, GPIB-USB-HS+ for about same price ~600 USD new.
Features:
- Custom ASIC provides maximum IEEE 488.2 performance
- High-performance GPIB controller
- No GPIB cable requirement for instrument connection
- Transfer rates up to 1.8 MB/s (IEEE 488.1) and up to 7.9 MB/s (HS488)
- License included for NI-488.2
While NI site lists Linux support, it’s declared only for RedHat, Scientific Linux and SUSE. If we want use it with something like Raspberry Pi with it’s Debian-based Linux system we are alone in the wild.
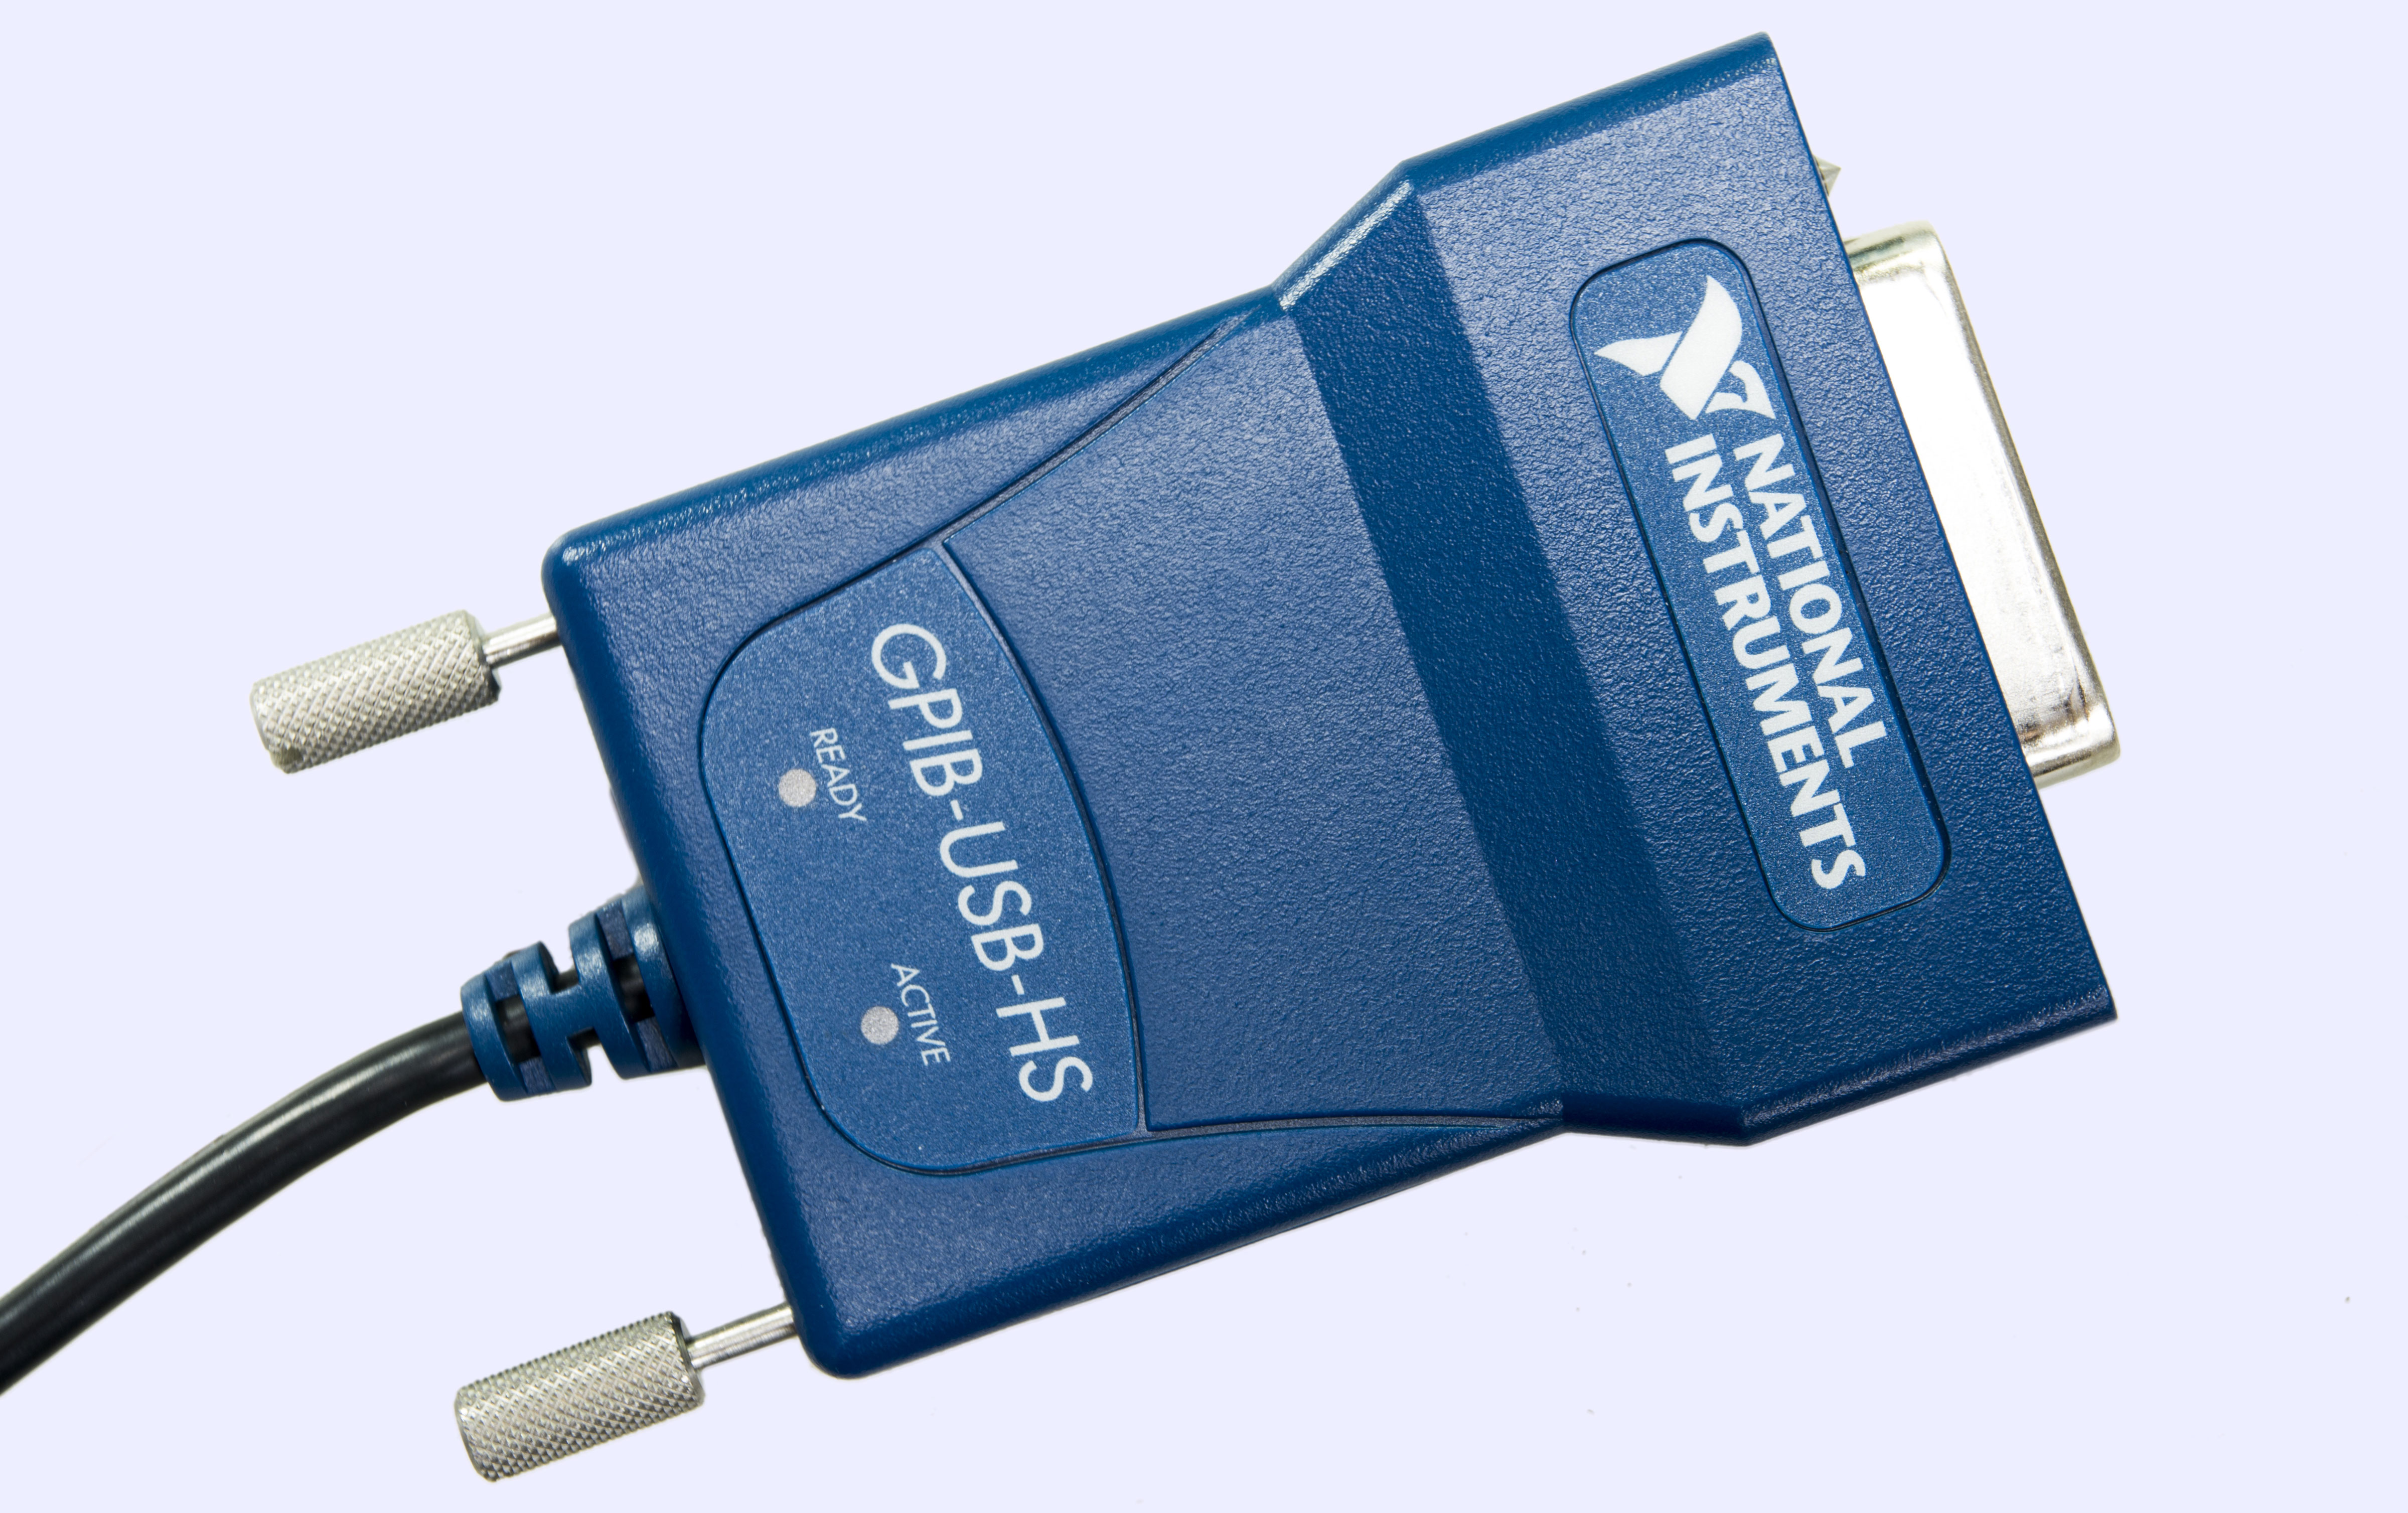
Image 1: NI GPIB USB adapter dongle
Very brief datasheet just covers basic installation and specification.
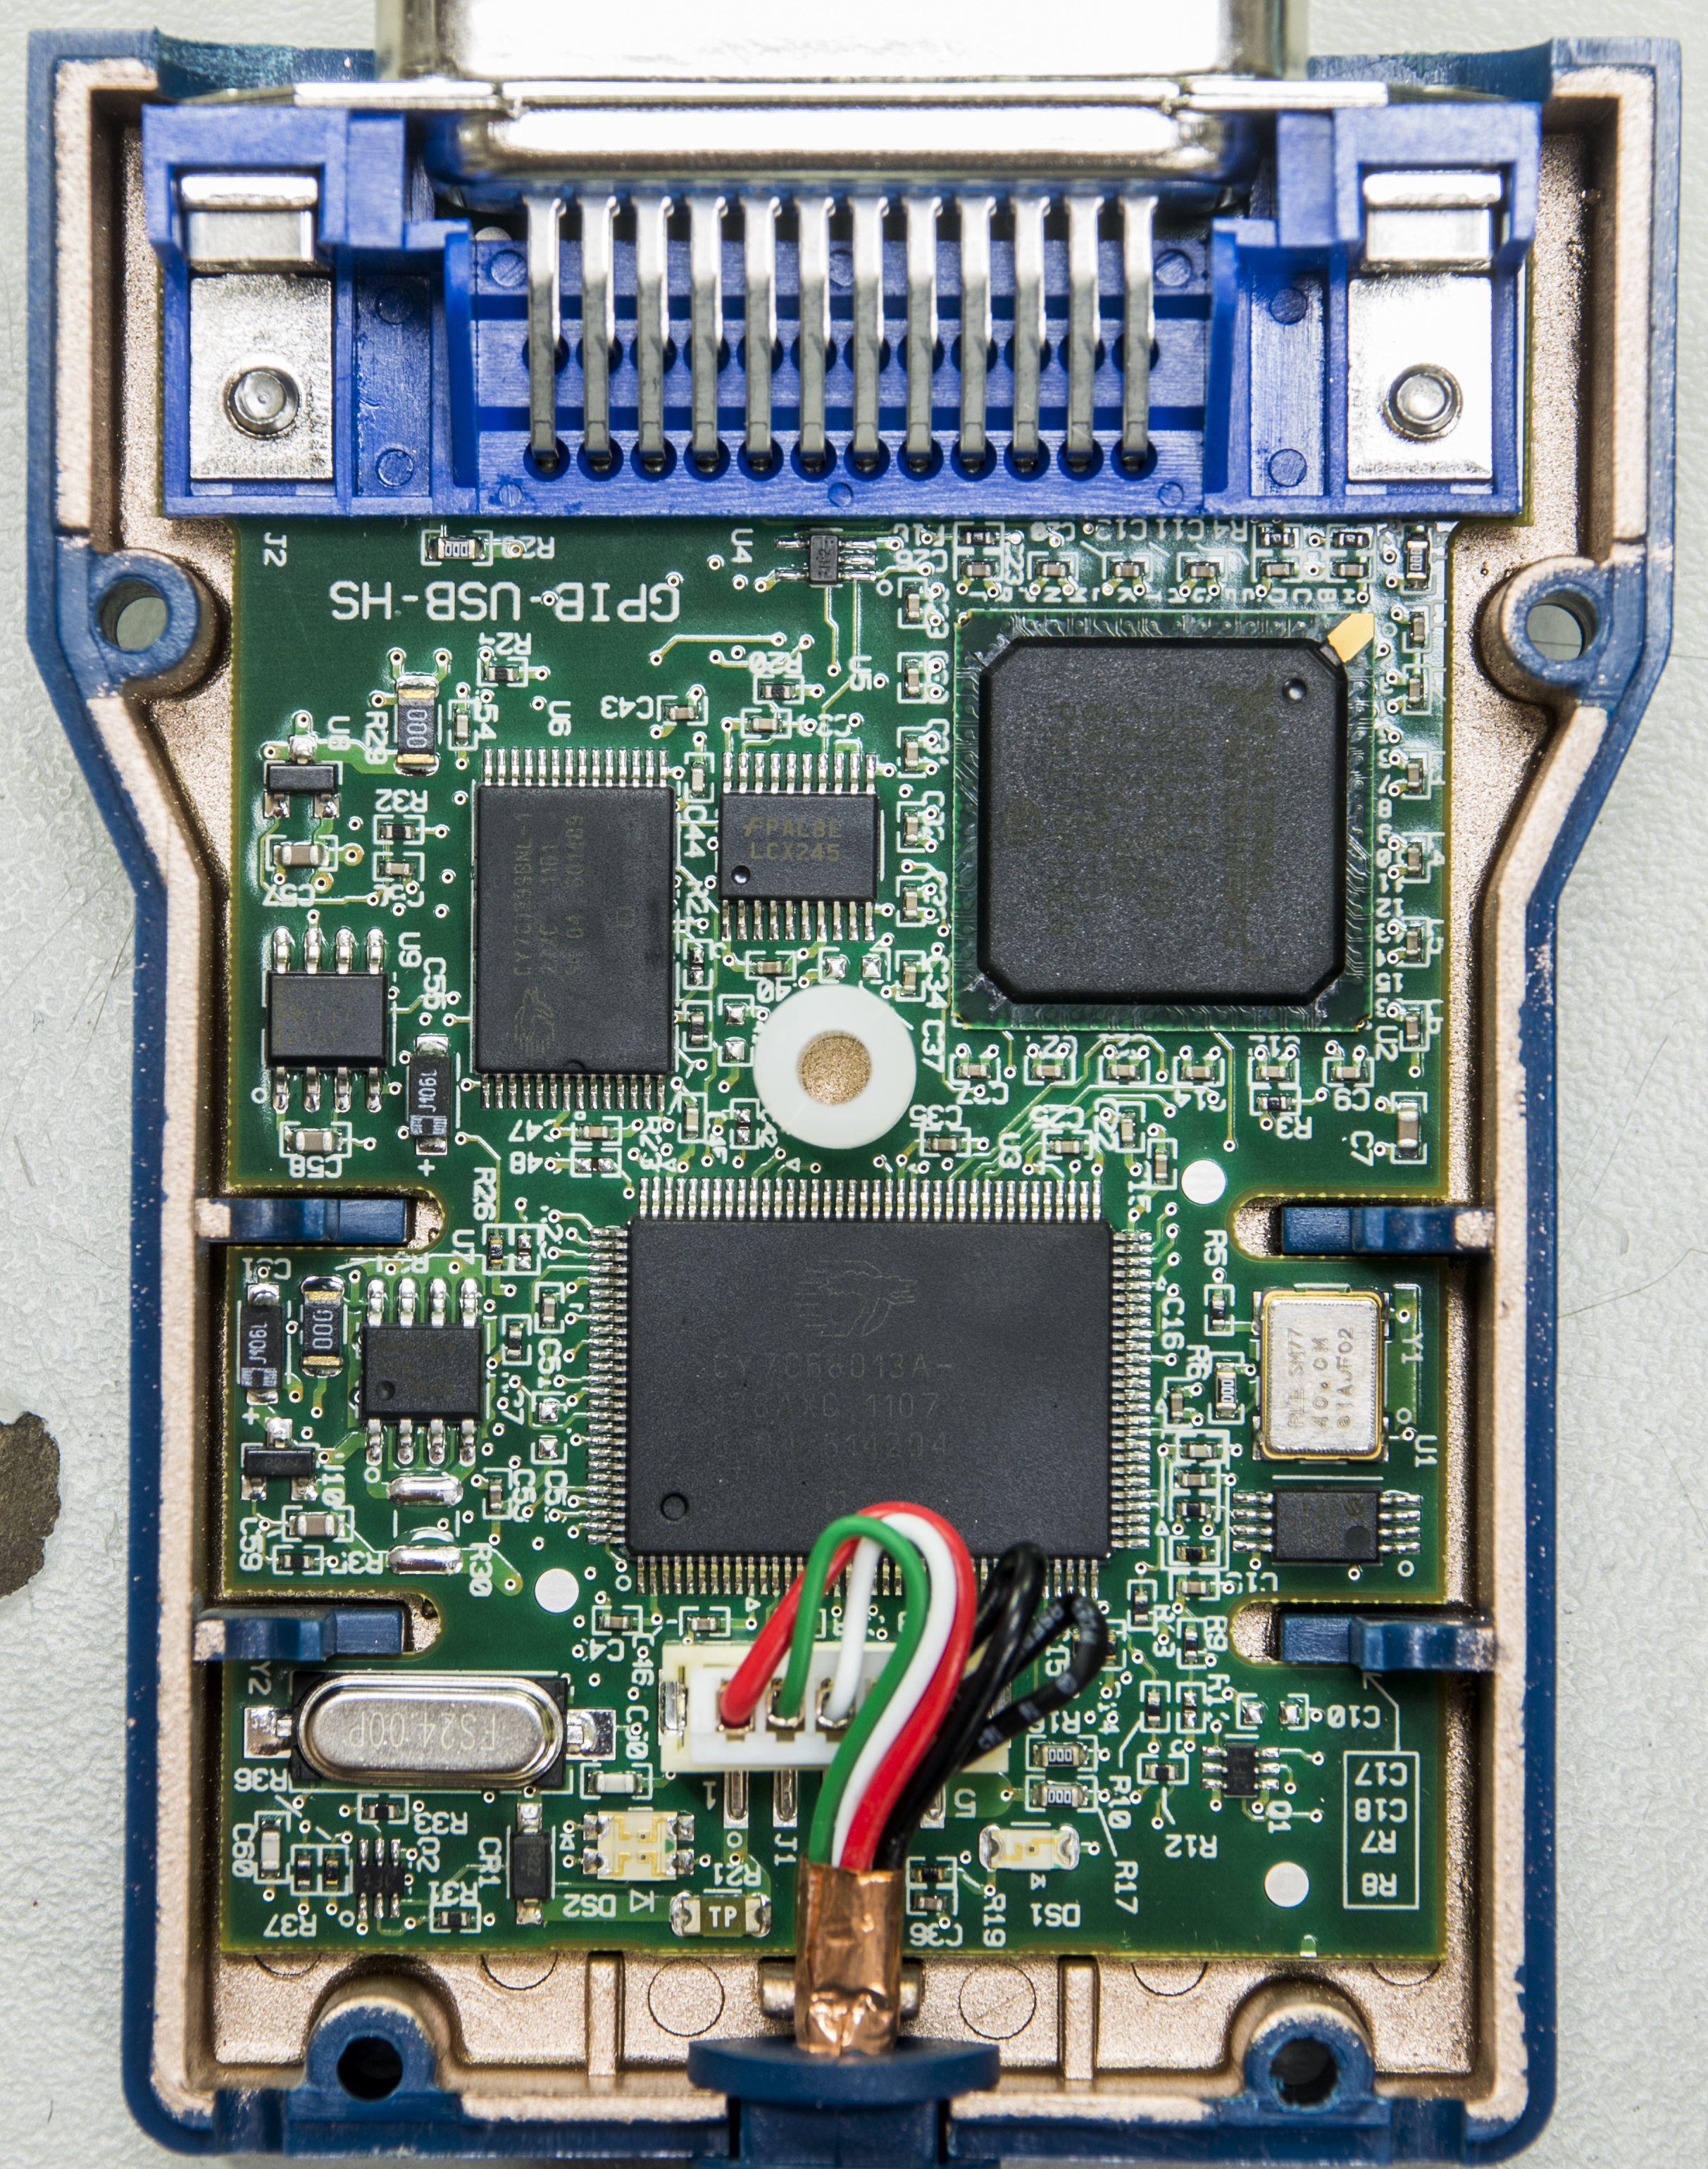
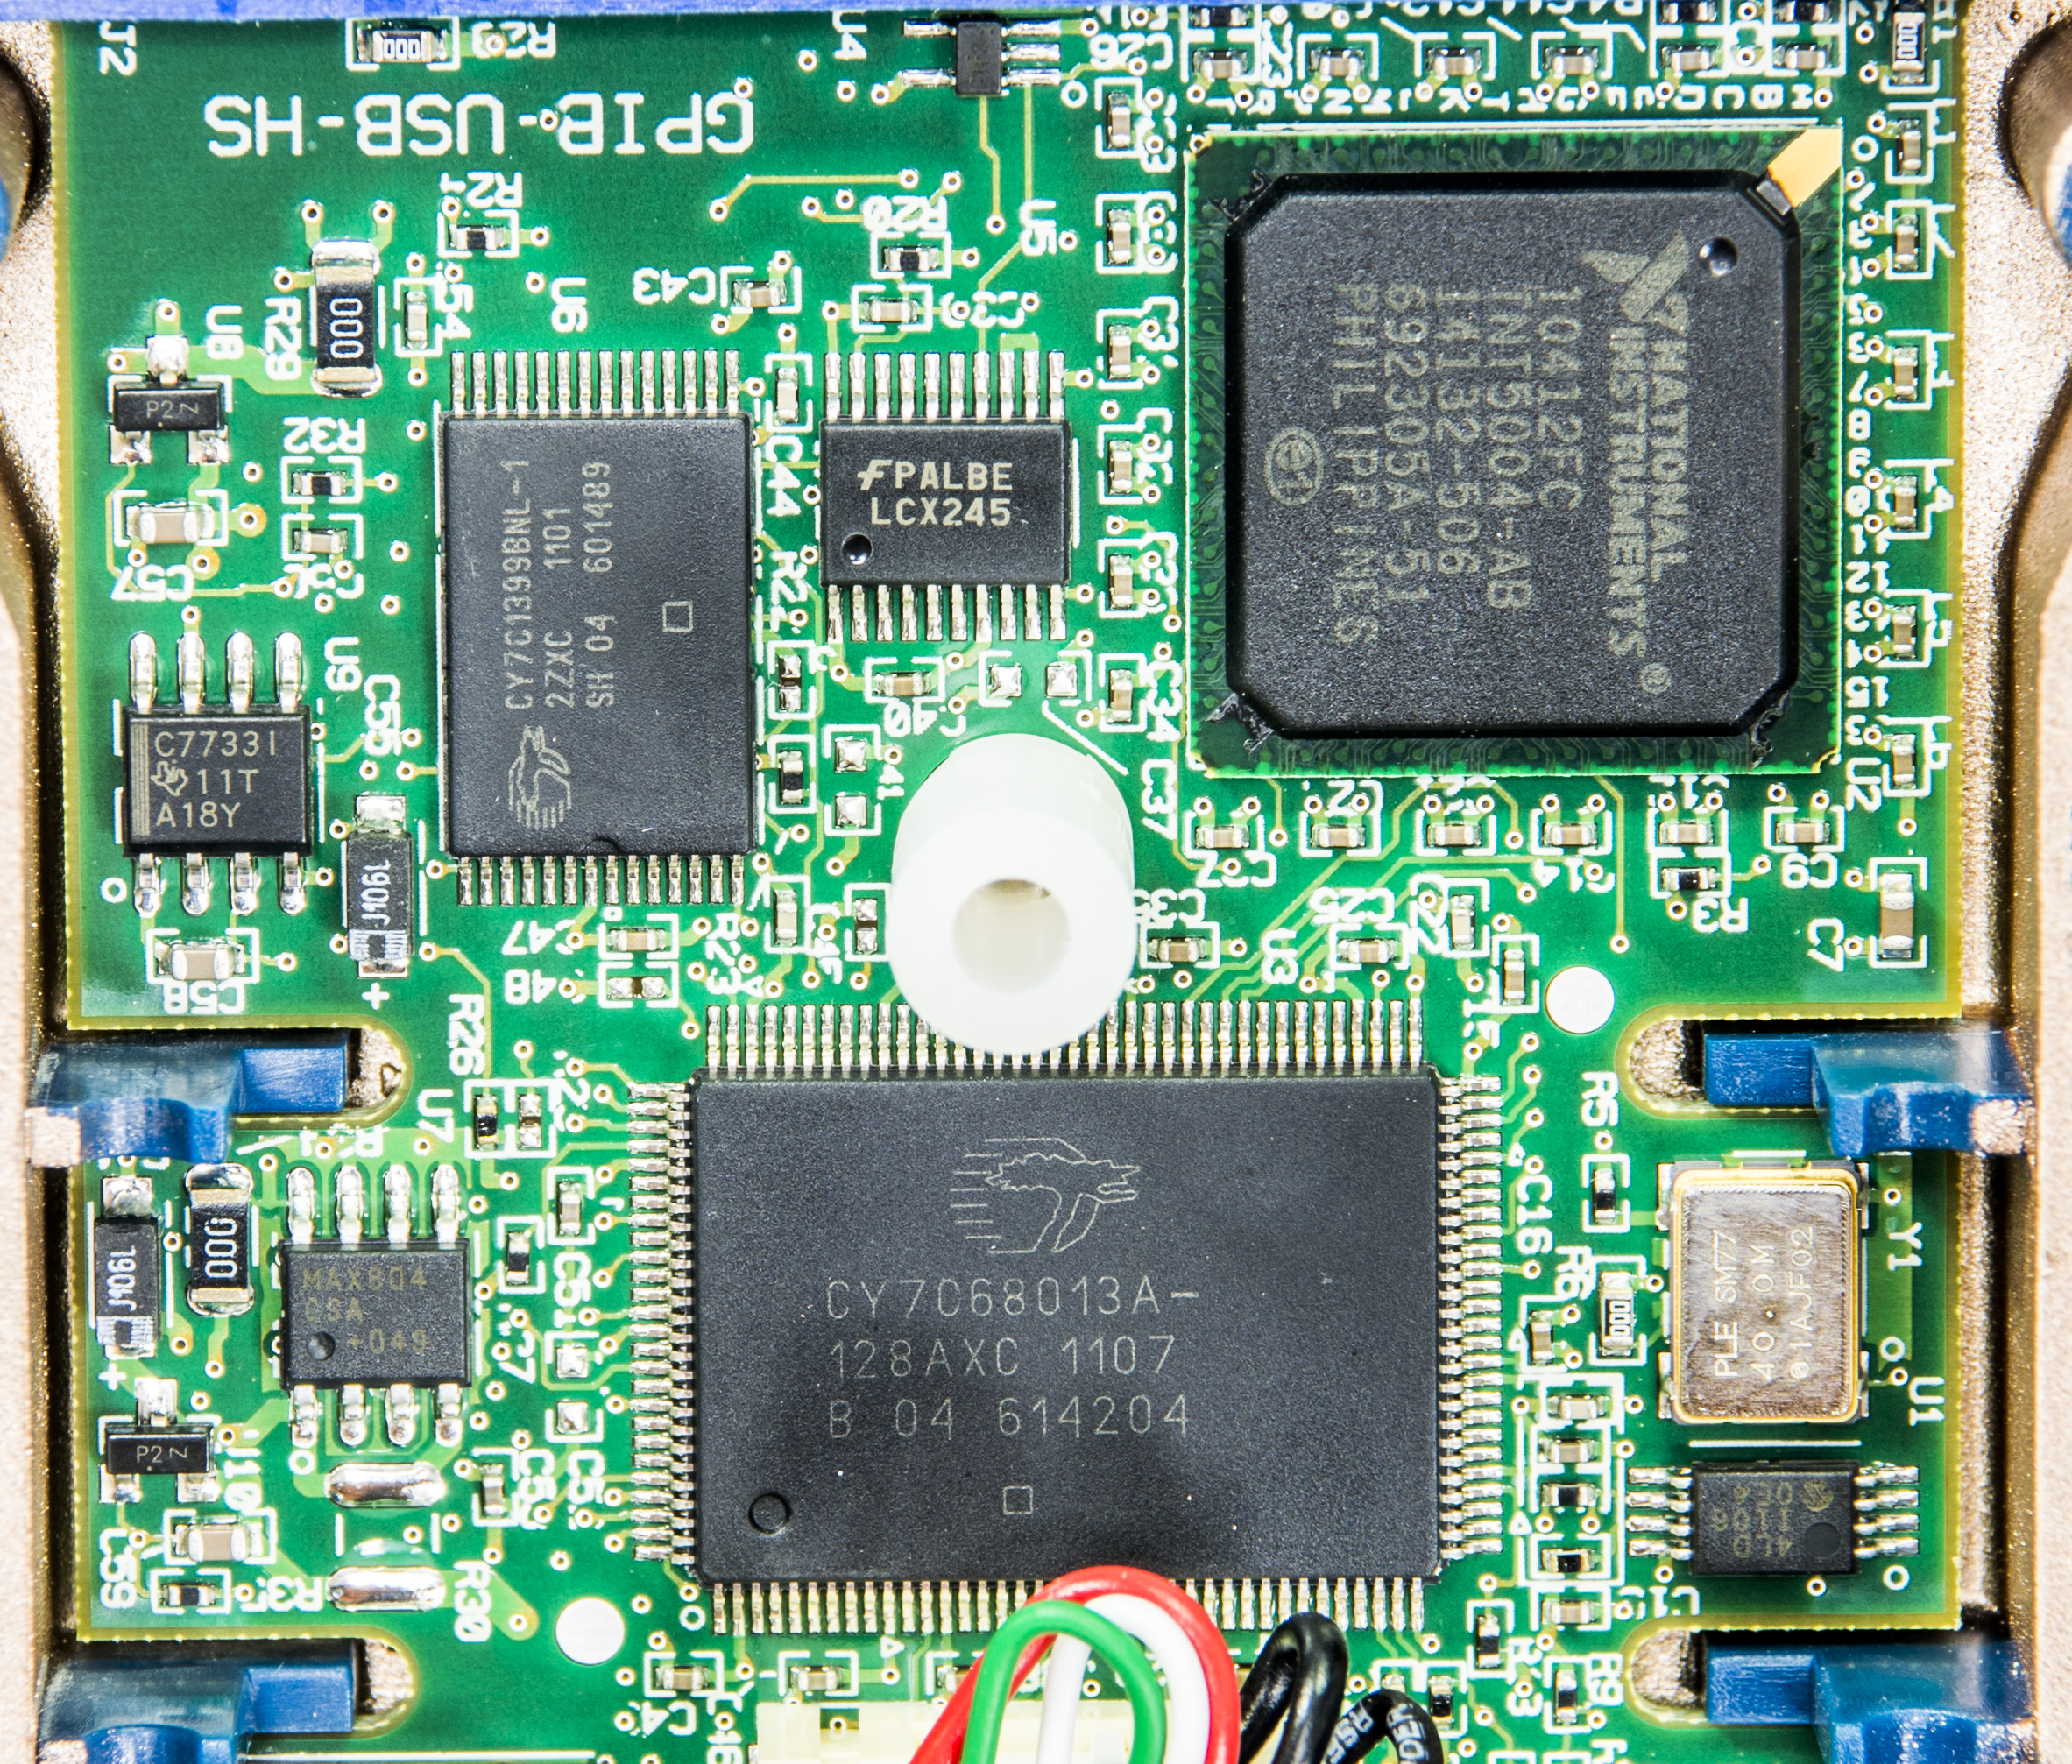
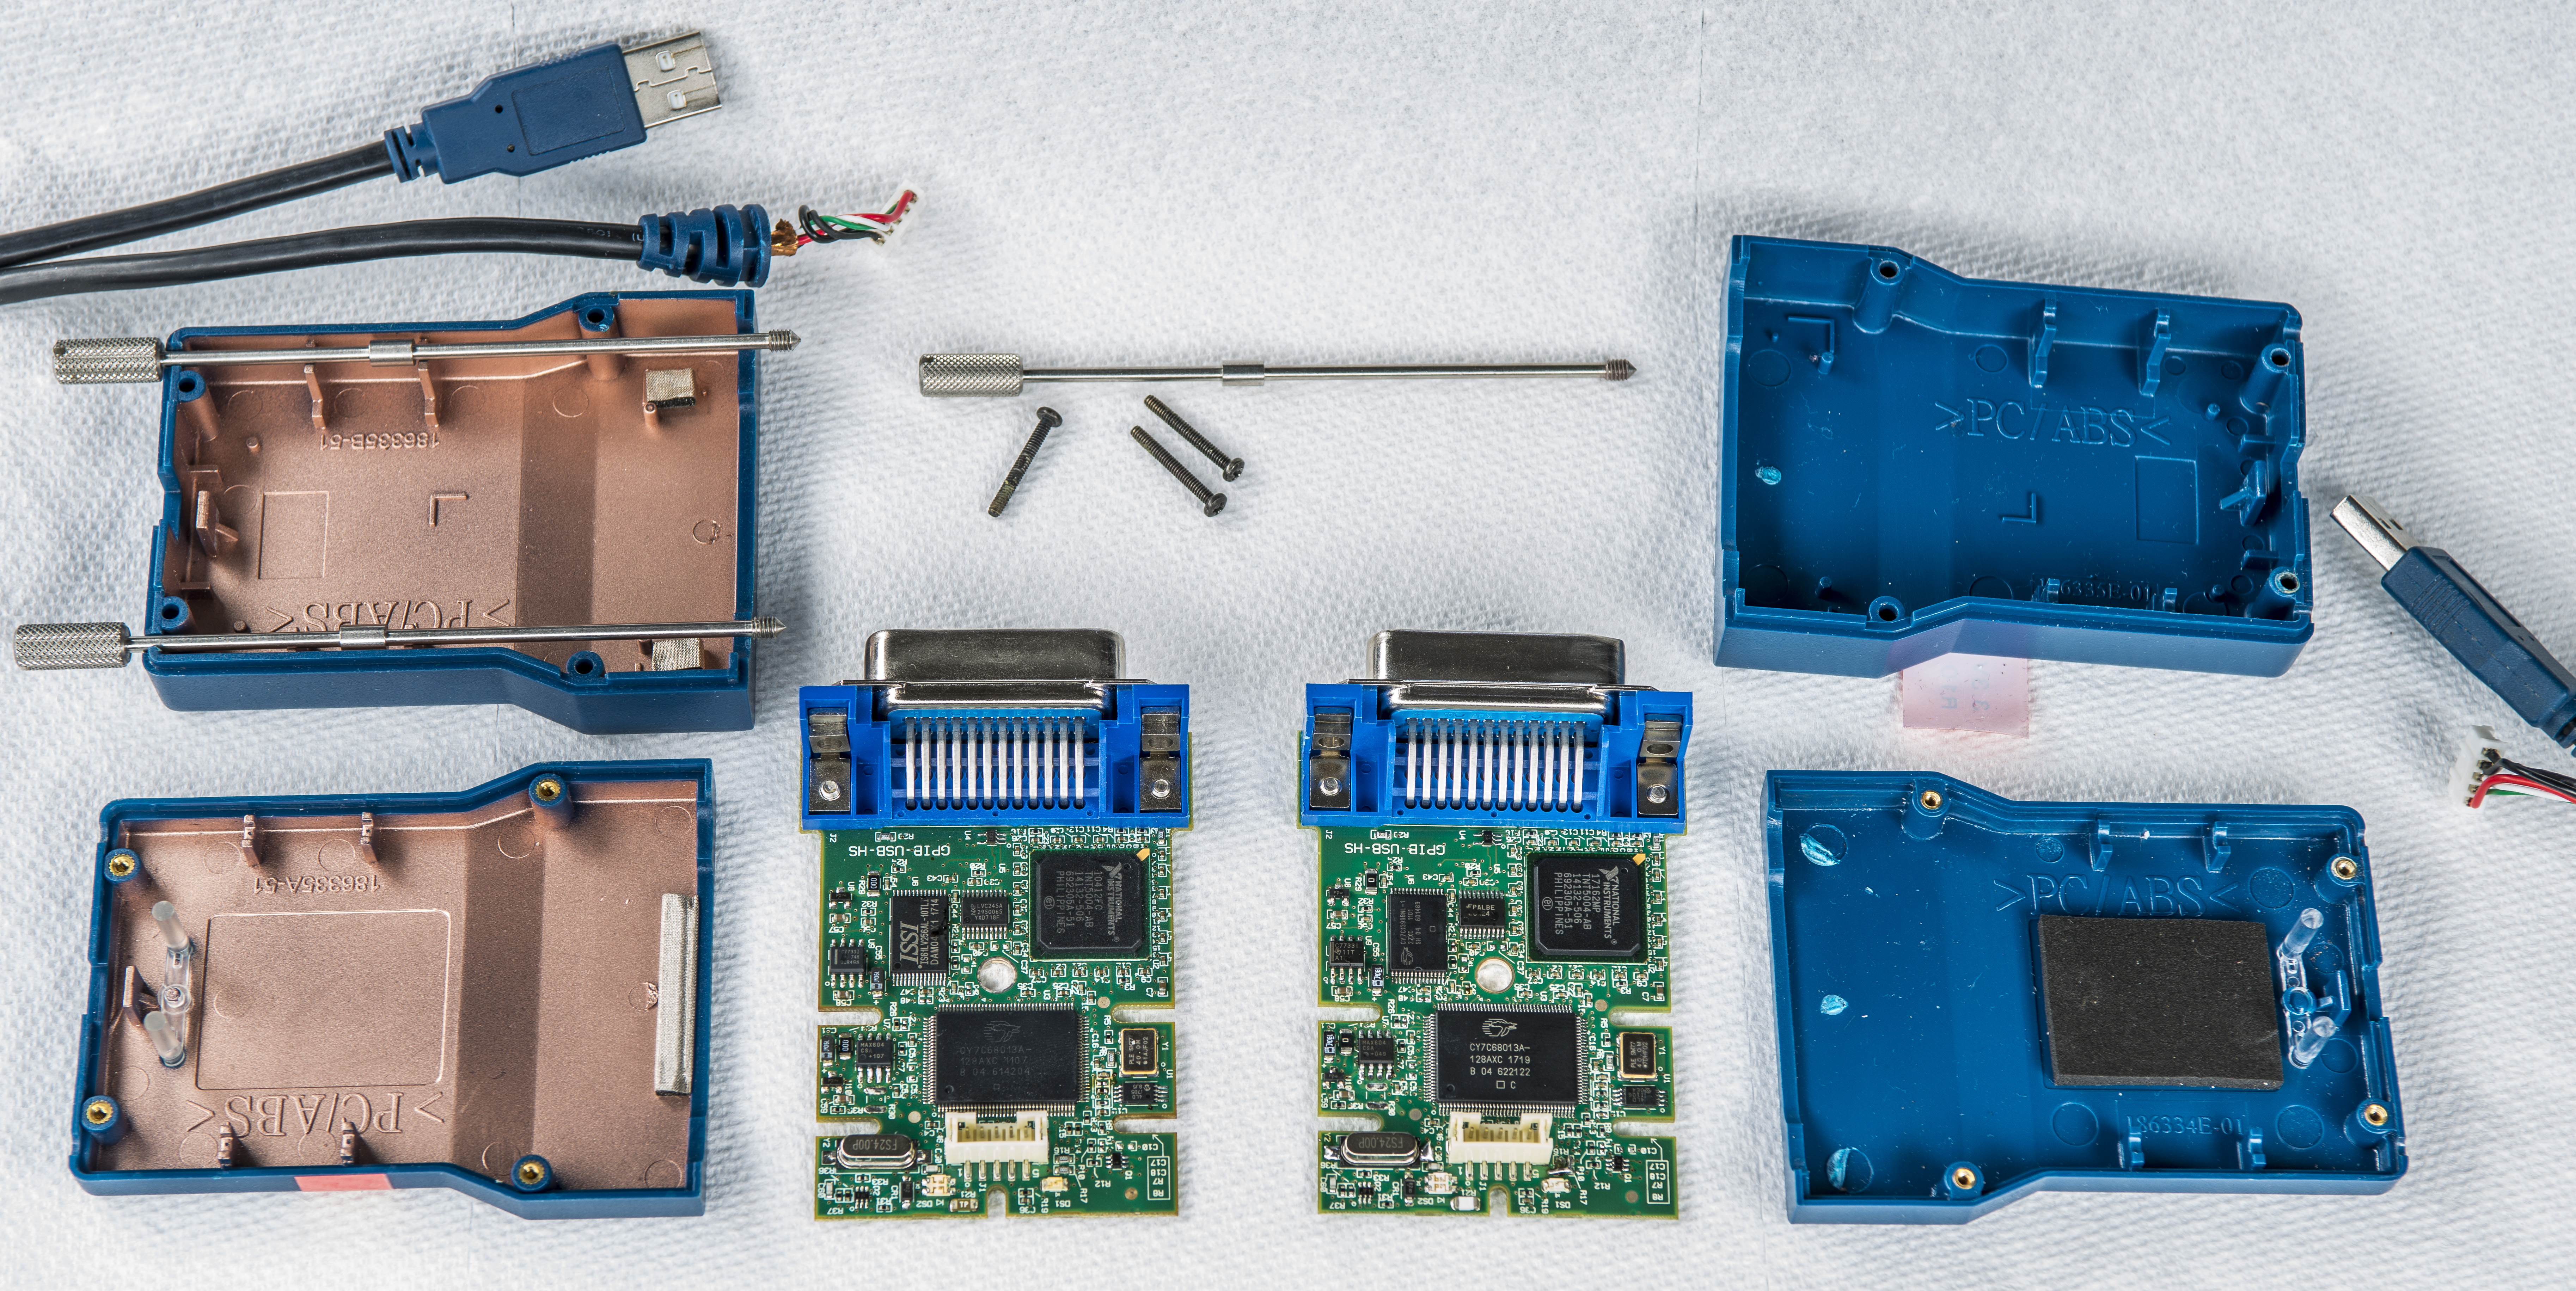
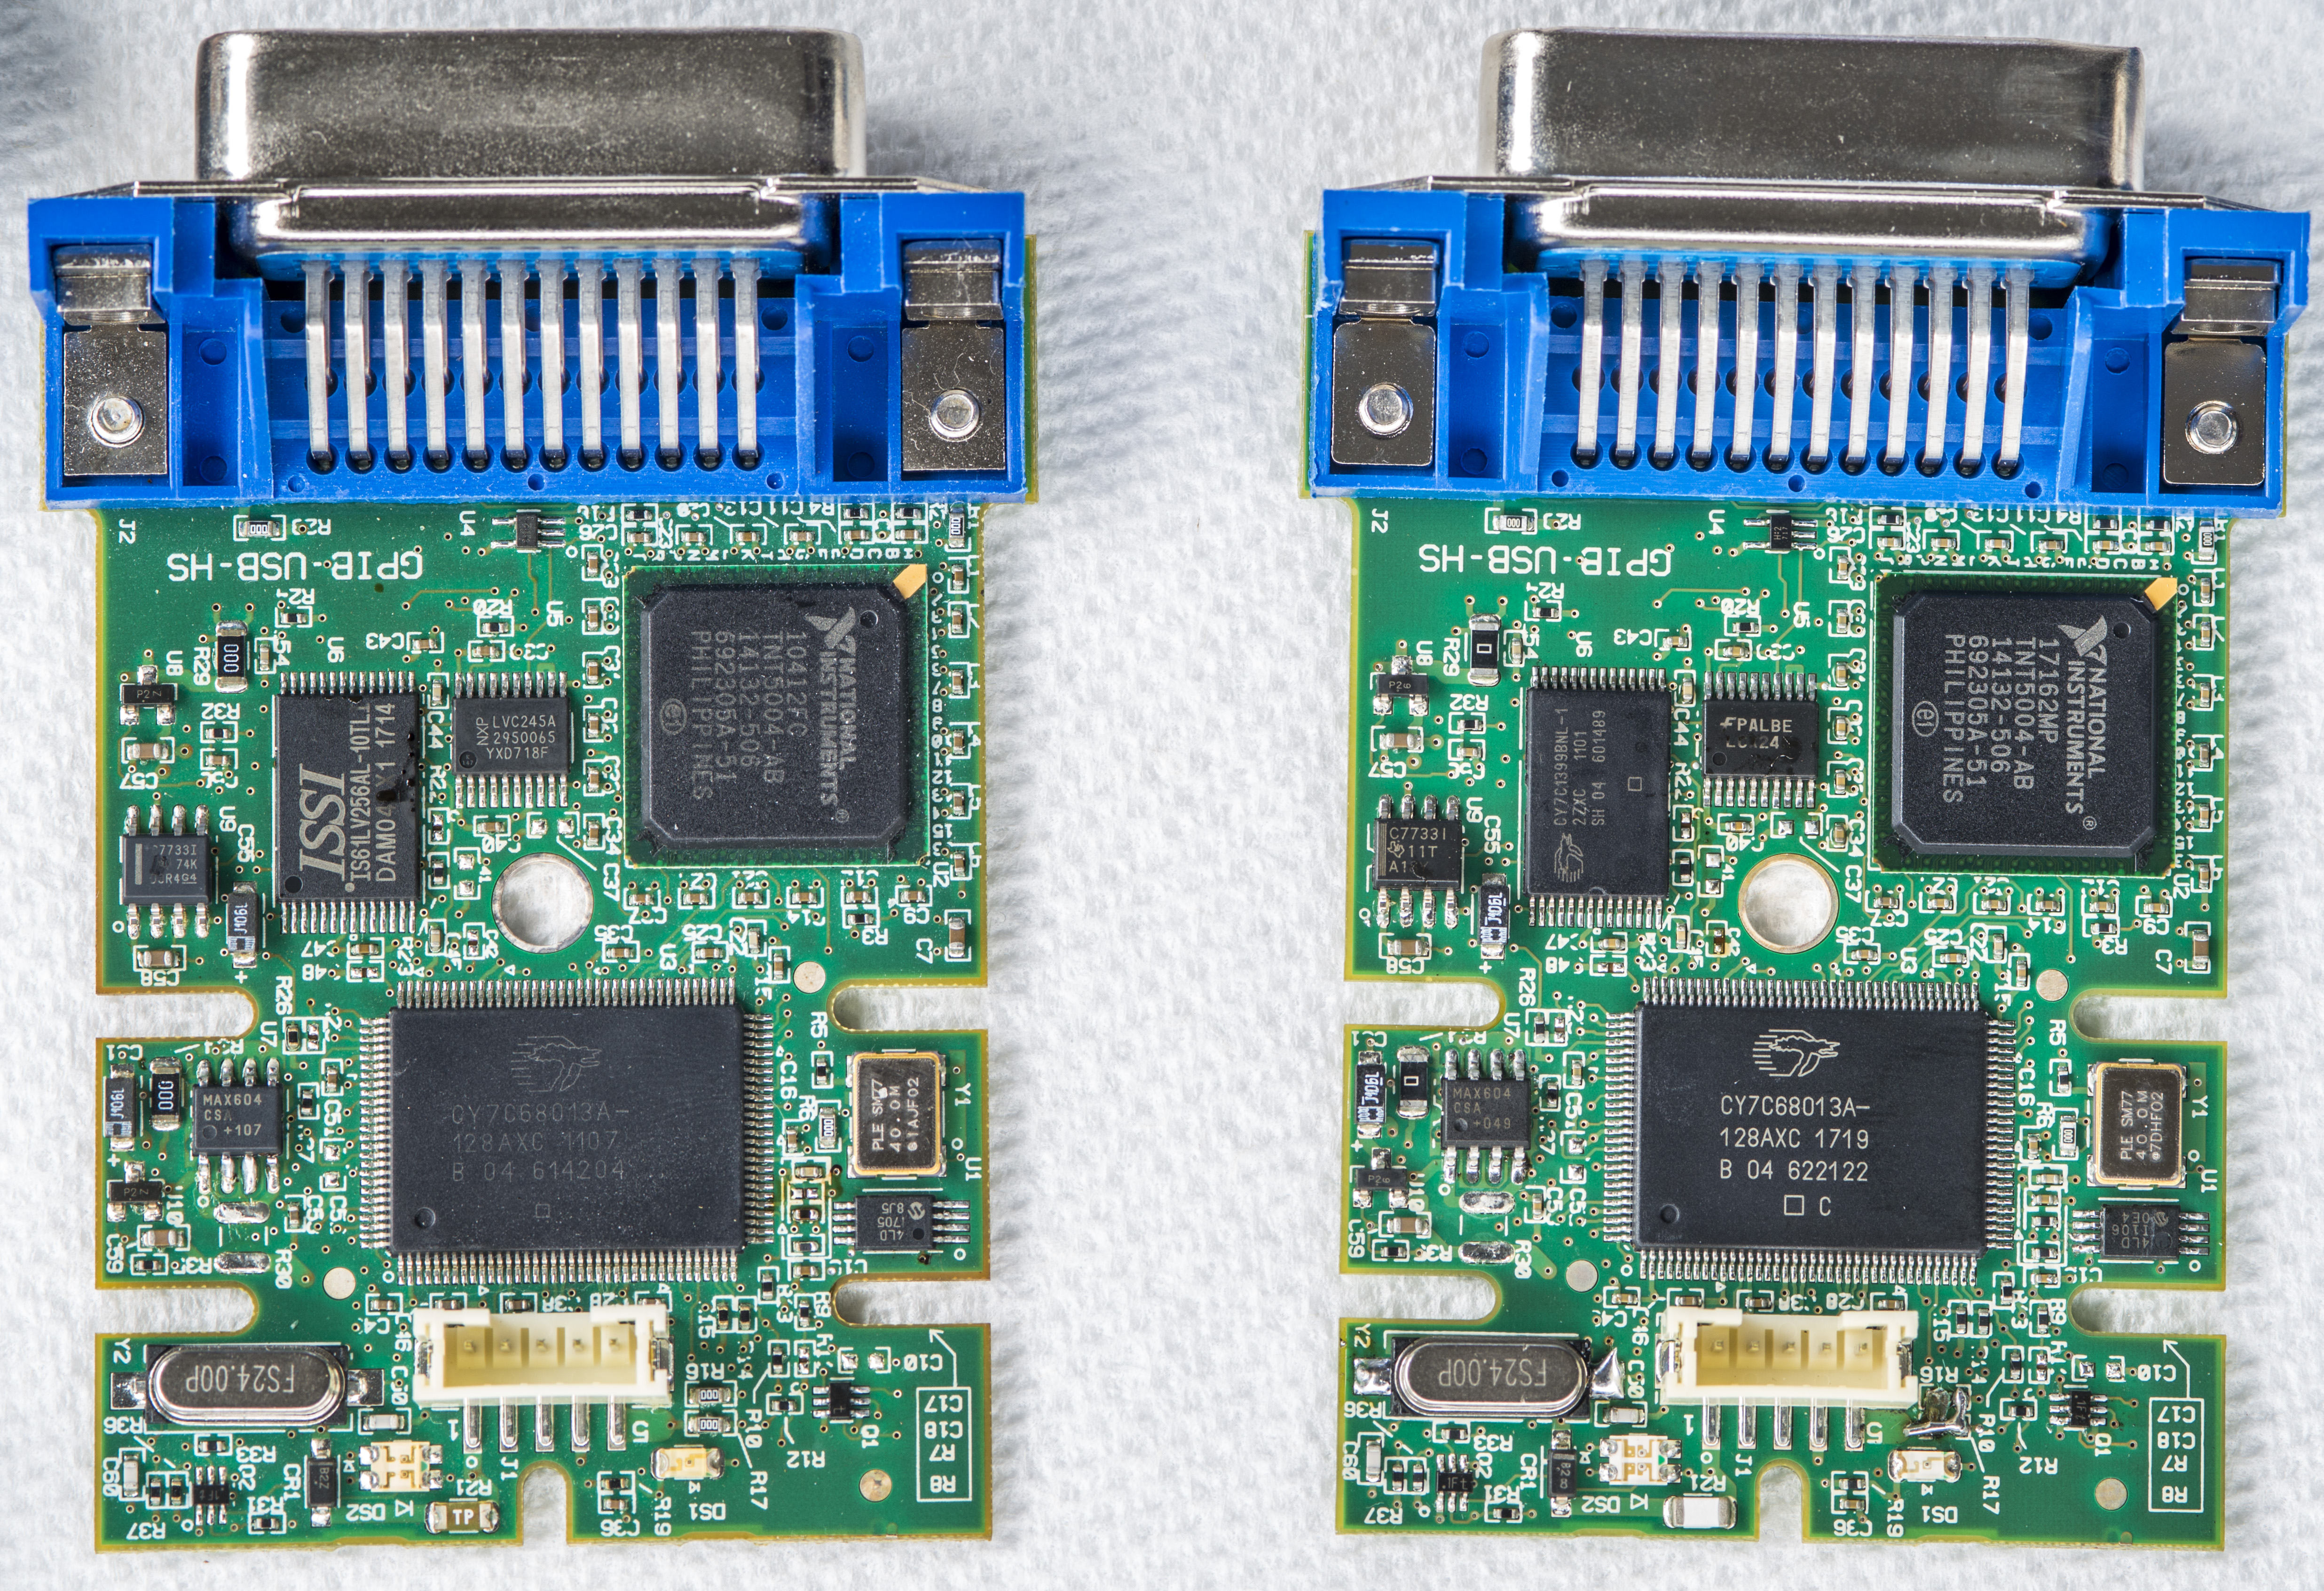
Image 2,3: NI GPIB USB adapter PCB components and closeup
Main micro-controller to interface USB side is Cypress CY7C68013A, which is EZ-USB® FX2LP™ USB Microcontroller High-Speed USB Peripheral Controller based on 8051.
GPIB side is served by own National Instruments ASIC, TNT5004-AB, which is GPIB Controller with PCI and Generic interfaces. It’s documentation is subject of NDA, but there is public datasheet for GPIB talker/listener only version TNT5002-AB, which brings light to most ASIC’s inner structure. Cypress CY7C1399BN is just 256-Kbit (32K x 8) SRAM to store realtime data during transfers. System clock is generated by 40 MHz generator.

Image 4: Adapter’s processor block diagram
There are also Texas Instruments TLC7733I and Maxim MAX804CSA supervisors, and few other small logic chips. No parts are populated on PCB’s bottom side.
For comparison purposes, here’s photo of older GPIB-USB-B adapter, which using Cypress FX and National Instruments TNT4882C-BT GPIB Controller chipset. Documentation for controller TNT4882*C* chip is also available only under NDA from NI, but talker/listener only version, TNT4882 without C have brief datasheet here
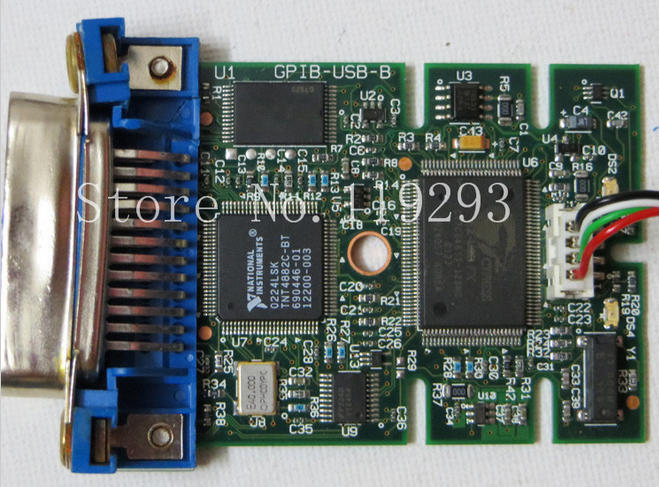
Image 5: Old USB 2.0 NI GPIB-USB-B adapter PCB photograph
Few extra photos of GPIB-USB-HS. Plastic cover is metallized on inner surfaces to aid EMI and shielding.
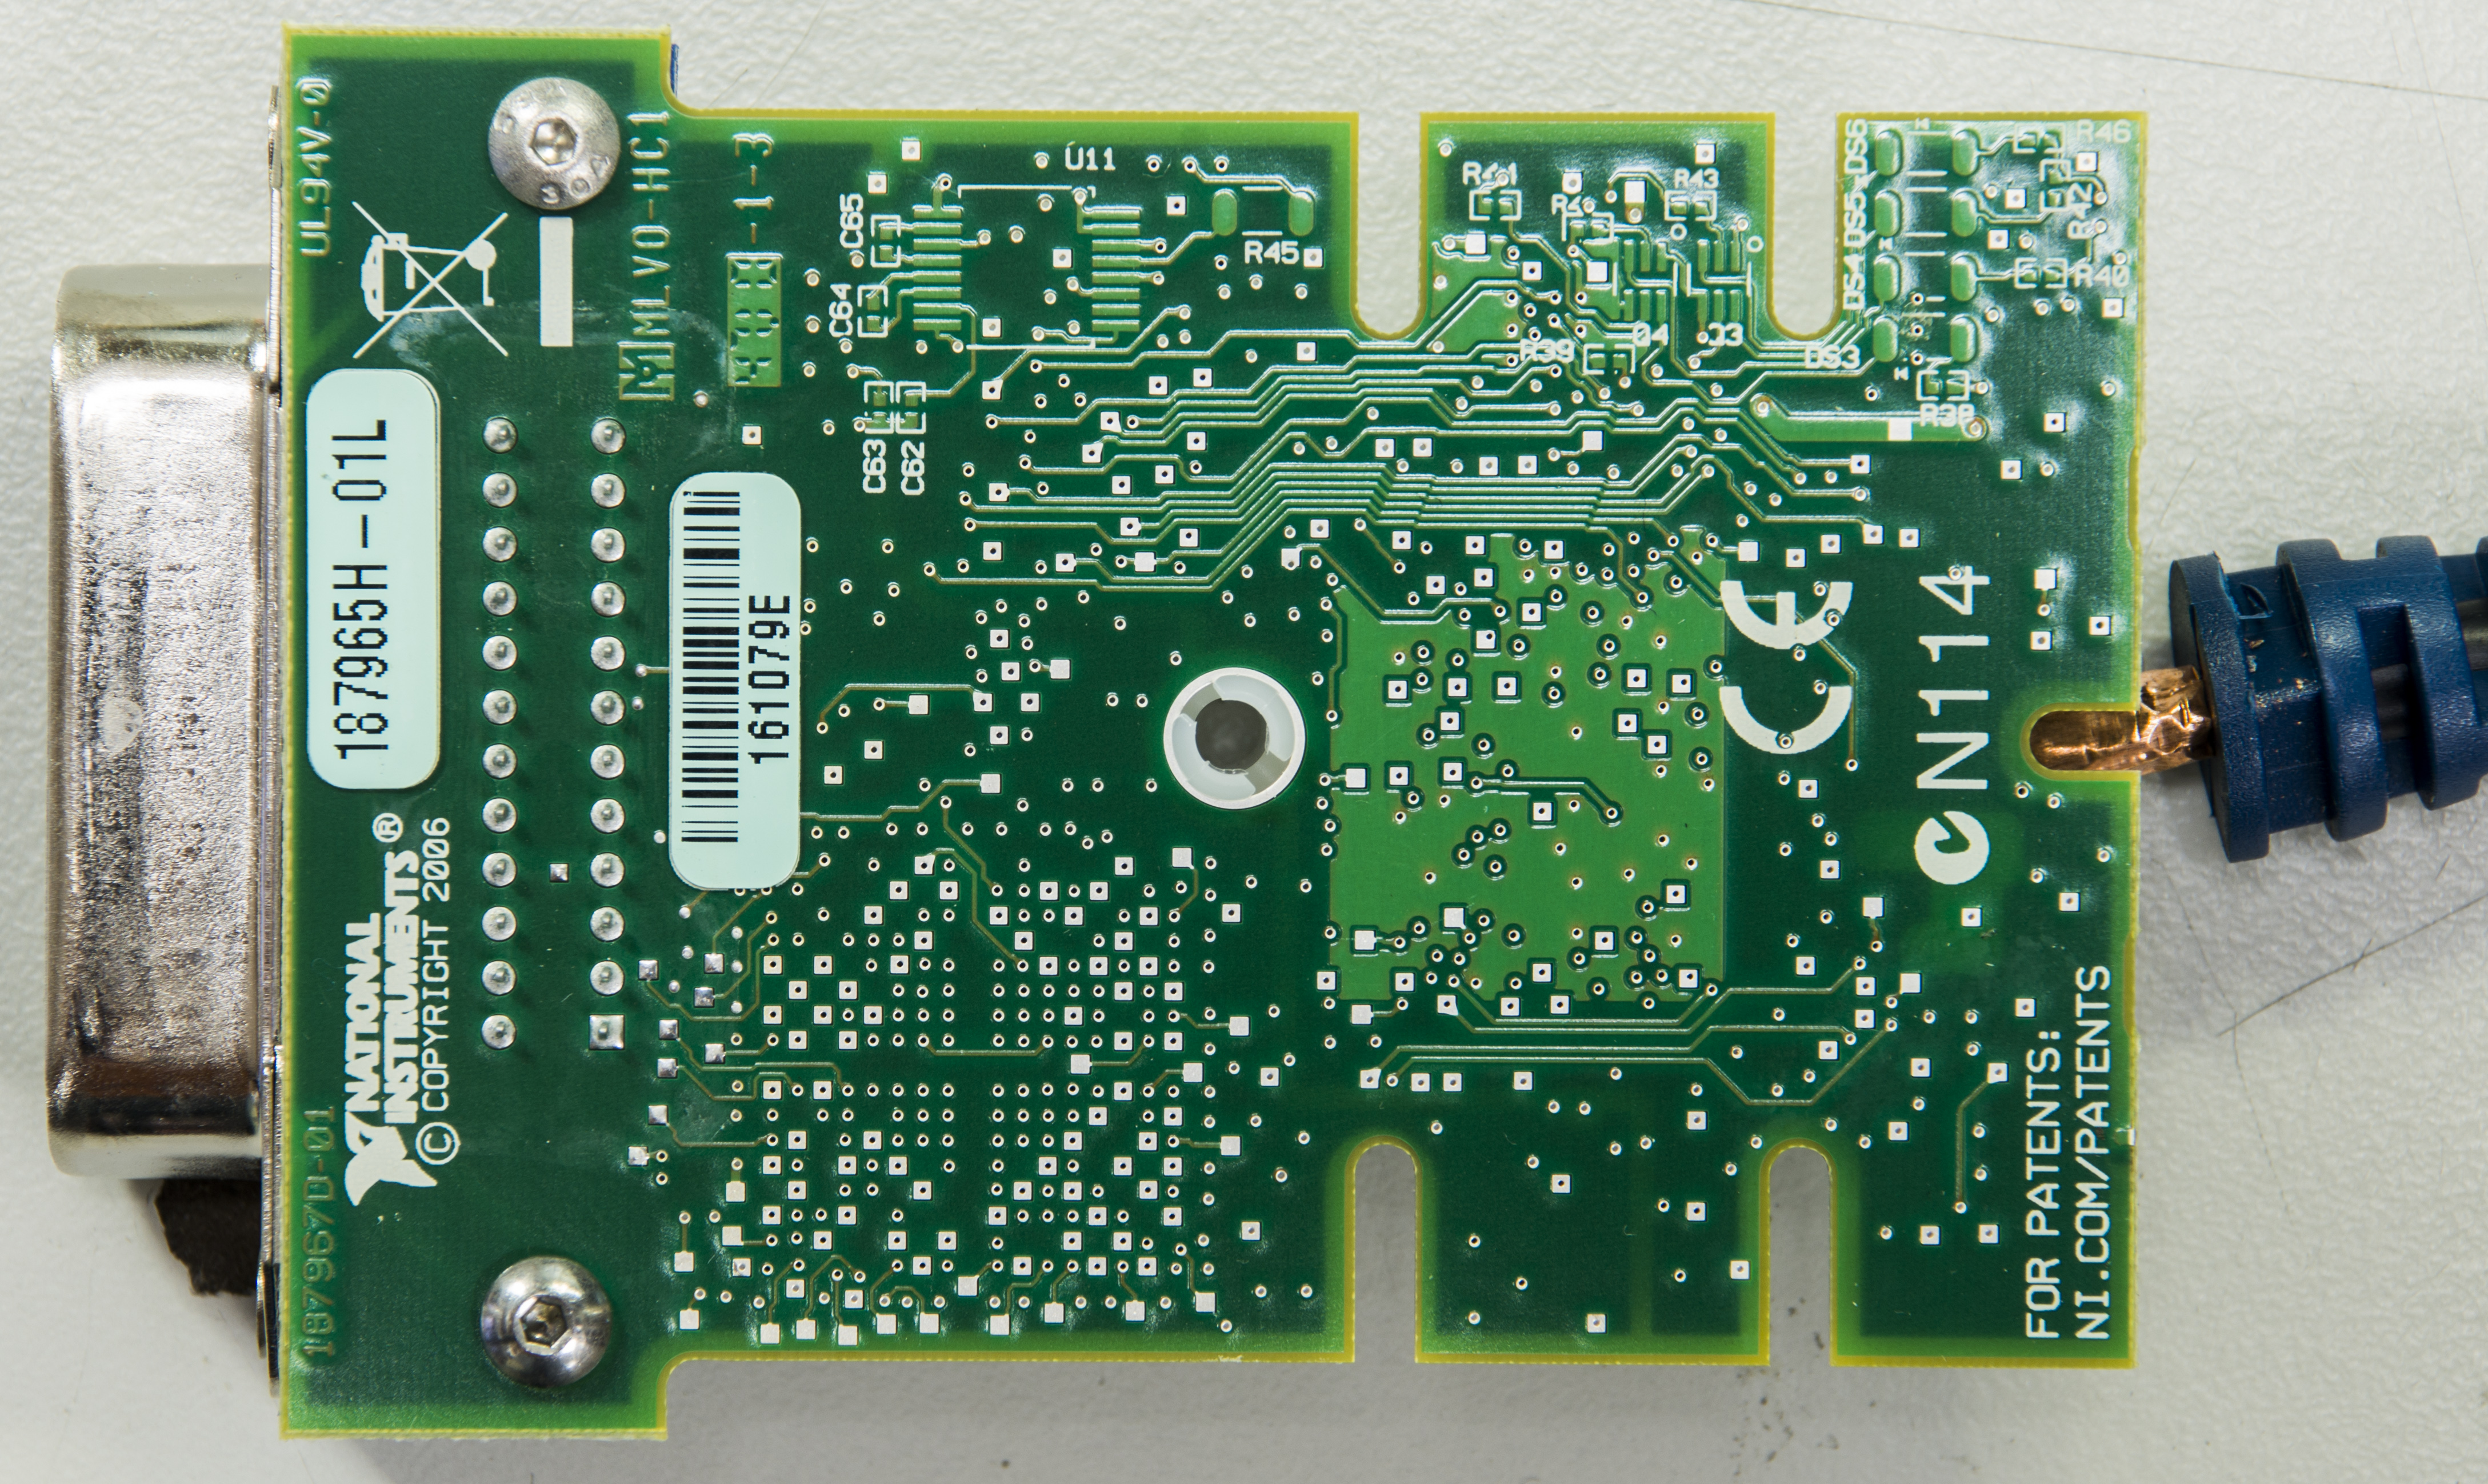
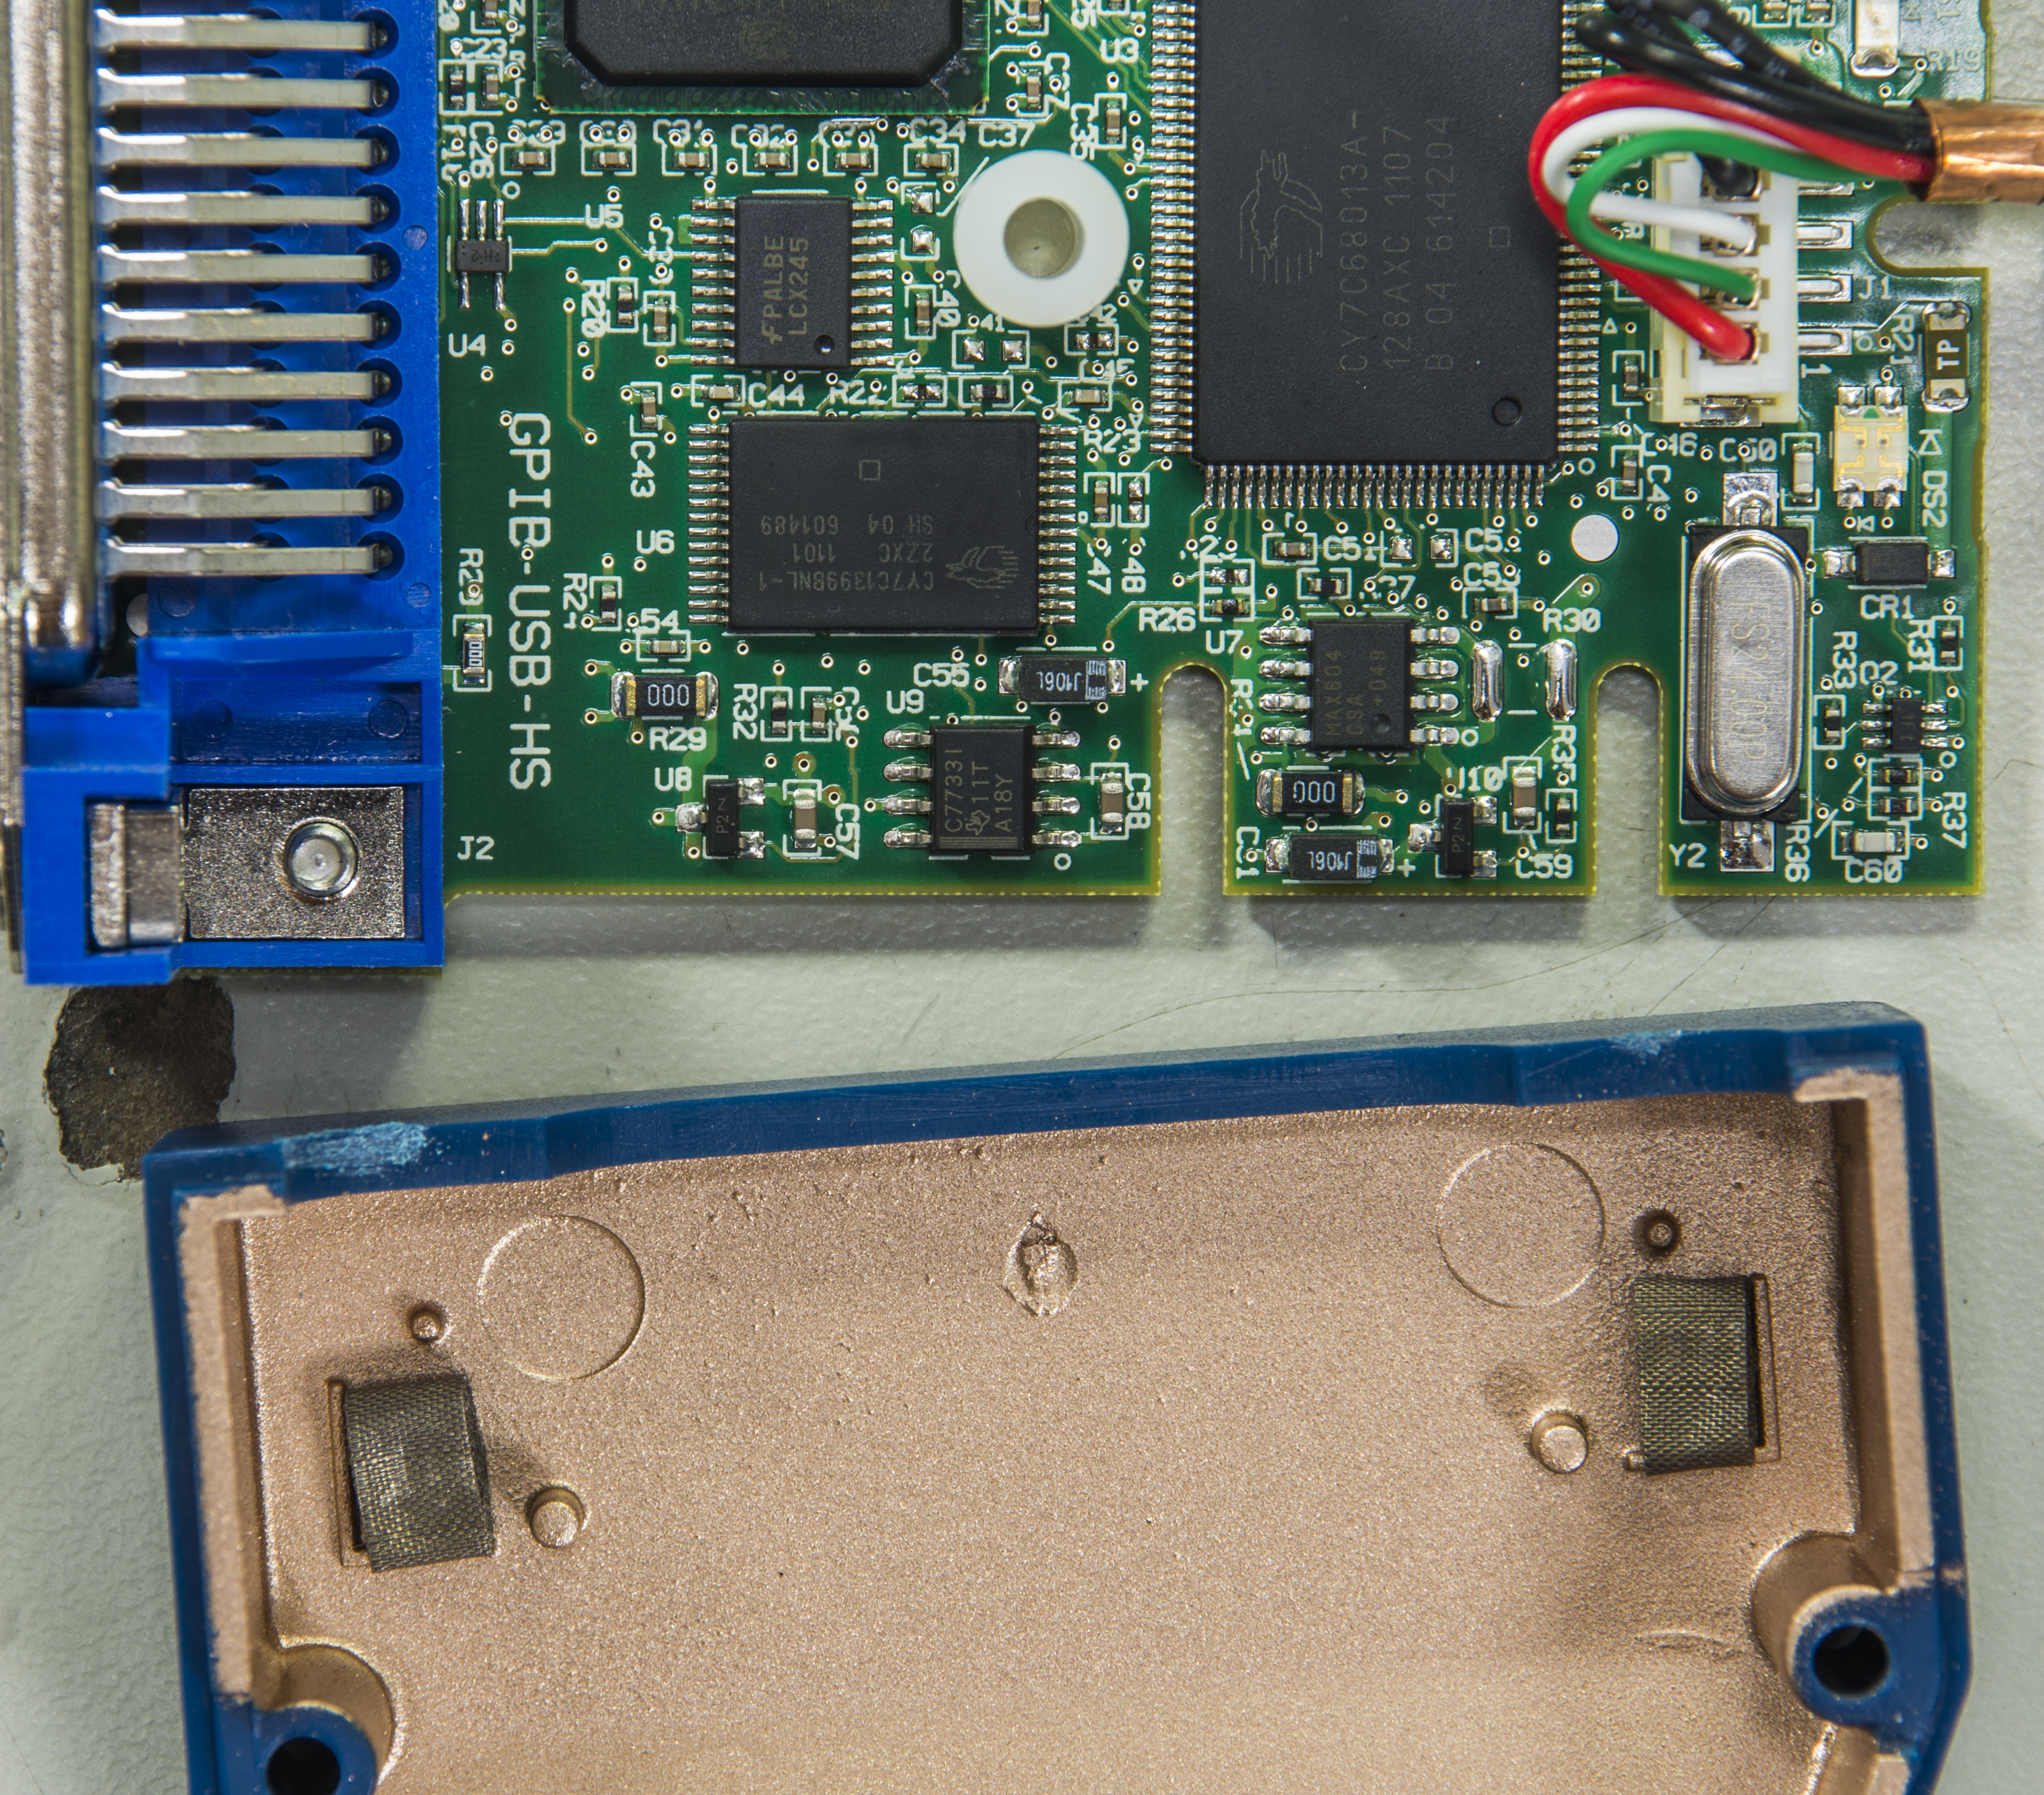
Image 6,7: Rear view of GPIB-USB-HS PCB and shielded enclosure case
Enough hardware, let’s dig into Linux world to set everything up and try talking some instruments.
Raspberry Pi setup with automatic script
Updated setup procedure from December 2021
For easy installation please use automated script installer listed below. It is designed to operate with latest Raspberry Pi Image and tested with both NI USB-GPIB-HS and Agilent dongles.
Requirements for this automatic script are:
- Raspberry Pi 3B model (should work with Pi 4, but not tested yet)
- Fresh SD card with installed 32-bit Raspberry Pi OS Image (tested with buster and bullseye)
- Attached NI USB-GPIB-HS or Agilent USB GPIB dongle
- GPIB device connected to dongle to test the operation (optional)
install_linux_gpib.sh bash script
Environment monitoring module BME280 install/configuration script
Readme file with changelist history
For BME280 support the thermo_installer.run file should also be copied
The following 3 files should be copied to the SD card /boot directory:
- install_linux_gpib.sh
- empty ssh file
- thermo_installer.run
BME280 support will need the sensor attached to the I2C bus. Use the +3.3 V supply for the sensor. Linux-GPIB support will need the USB interface dongle plugged in BEFORE the drivers are installed. The NI USB-GPIB-HS controller works best and a hot plug script is added for it as well.
Manual entry of gpib_config command should not be needed after reboot. This is handled automatically now.
Installation Steps:
- ssh into pi@‘IP address’
- sudo raspi-config
- “Interface Options” -> SSH , SPI , I2C should all be enabled (SSH is important so it will be accessible on next boot)
- “Localization Options” -> Locale and time zone should be configured.
- Do not change boot options just yet. They will be configured later
- Finish and exit raspi-config. ‘Yes’ to reboot.
- cd /boot
- sh install_linux_gpib.sh
- Enter yes to update and install system software.
- ‘Yes’ to reboot once the update finishes.
- cd /boot
- sh install_linux_gpib.sh
- ‘No’ to update software
- ‘Yes’ to install linux-gpib
- ‘Yes’ or ‘No’ to install teckit (teckit is xDevs.com’s Datalogging app for automated measurements)
- ‘Yes’ or ‘No’ to install samba
- PITFT hat support: ‘Yes’ or ‘No’ to install Pitft hat support. If ‘No’ is selected, goto step 27 Select the correct Pitft hat (2) Select the rotation. (270 puts the HDMI port on top) ‘Y’ to put console output on the display. Rapsi-config has been modified to boot to the console without auto-login ‘Y’ to reboot. Next option will fail unless the pi is rebooted
- cd /boot
- sh install_linux_gpib.sh
- Select ‘n’ until you get to enabling the desktop on the display
- ‘Y’ to enable desktop frame buffer
- ‘Yes’ to reboot
- sudo raspi-config
- System Options -> Boot / Auto Login -> Desktop Autologin
- Finish and Yes to reboot
- The Desktop should now be on the lcd
- Before adding support for the BME280, it will be important to know its address on the I2C bus. Run the following command and note its hex address: I2Cdetect -y 1. The number will be in hex. ie 76 = 0×76 or 77 = 0×77. The datasheet only lists two possible hex addresses.
- cd /boot
- sh install_linux_gpib.sh
- Select ‘n’ until prompted to add BME280 support.
- Select ‘y’
- Select ‘n’ to display THP data on the lcd. Otherwise, select ‘Y’ for headless display. Selecting ‘y’ will not install the gui server
- Select ‘y’ to reboot
- If the THP data isn’t displayed, the launcher.sh file in /home/pi may not have the right permissions. sudo chmod +x launcher.sh and then ‘sudo reboot’.
- If the screen is oriented in the wrong direction, it can be changed in the /boot/config.txt file at the bottom. Default is 270 degrees
Now Pi should have linux-gpib operational and GPIB communications can be tested with ibtest utility.
Obsolete manual setup procedure, do not use together with automated script
Detailed manual procedure for Wheezy/Jessie Raspberry Pi OS images
All information below is tested on Raspberry Pi 1 model B rev 2 and Raspberry Pi 3 model B rev 2, using on-board USB connection for GPIB dongle. Two Linux versions were tested, RASPBIAN Debian Wheezy and RASPBIAN Debian Jessie.
We already went through basic setup doing I2C stuff on RPi before, in this article. If you need to setup system from scratch on blank SD card, suggest to reference that article first.
Below we go step by step for whole process of getting GPIB-USB-HS working with Raspberry Pi system. Forum thread on EEVBlog.com from member bingo600 was a great help, and definitely saved loads of time and efforts. While he was using Beiming S82357 and Agilent 82357B, but idea behind flow is exactly same. If you have one of those, be sure to check out Agilent-version of this article
- Before we start installing stuff, highly recommended to update current packets. All commands below are issued under admin root rights, so if you don’t usually logon under root, you may need use sudo.
apt-get update
- Previously we had to build old headers to use with kernel 3.8.10, but it’s possible to use latest kernel by building kernel headers following rpi-source to build kernel headers for current kernel (follow the example)
wget https://raw.githubusercontent.com/notro/rpi-source/master/rpi-source -O /usr/bin/rpi-source && sudo chmod +x /usr/bin/rpi-source && /usr/bin/rpi-source -q --tag-update
2016-03-07 13:25:38 (4.12 MB/s) - /usr/bin/rpi-source saved [12424/12424]
Current version of kernel I used was 4.1.17+
pi@pi2:~ $ uname -a
Linux pi2.xdevs.com 4.1.17+ #838 Tue Feb 9 12:57:10 GMT 2016 armv6l GNU/Linux
rpi-source also require bc and bison packages on the system, if it’s not installed, you would need to do so by running apt-get install bc bison.
- Now execute rpi-source to build headers for system’s kernel.
root@pi2:/repo/new_hdr# rpi-source
 *** gcc version check: OK
 *** Using: /usr/share/doc/raspberrypi-bootloader/changelog.Debian.gz
 *** Latest firmware revision: 3442862c10fab68c2e88d660d2e69c143bb1f00c
 *** Linux source commit: ca312f557513e057c456598528e663fe9d009498
 *** Download kernel source
 *** Unpack kernel source
 *** Create symlink: /root/linux
 *** Create /lib/modules/<ver>/{build,source} symlinks
 *** .config
 *** Module.symvers
 *** make modules_prepare
 *** Help: https://github.com/notro/rpi-source/wiki
This operation take about 5 minutes, so you can go make some coffee/tea to spare waiting.
- If you get error about gcc version mismatch like:
root@pi2:/# rpi-source
ERROR:
gcc version check: mismatch between gcc (4.9.2) and /proc/version (4.7.2)
Skip this check with --skip-gcc
Install gcc 4.9 or other version, depends on what is requested on ERROR message above.
root@pi2:/# apt-get install -y gcc-4.9 g++-4.9
Reading package lists... Done
Building dependency tree
Reading state information... Done
The following additional packages will be installed:
  cpp-4.9 libasan1 libgcc-4.9-dev libstdc++-4.9-dev
Suggested packages:
  gcc-4.9-locales gcc-4.9-doc libstdc++6-4.9-dbg libgcc1-dbg libgomp1-dbg libitm1-dbg libatomic1-dbg libasan1-dbg liblsan0-dbg libtsan0-dbg libubsan0-dbg libcilkrts5-dbg libquadmath0-dbg
  libstdc++-4.9-doc
The following NEW packages will be installed:
  cpp-4.9 g++-4.9 gcc-4.9 libasan1 libgcc-4.9-dev libstdc++-4.9-dev
0 upgraded, 6 newly installed, 0 to remove and 75 not upgraded.
Need to get 21.7 MB of archives.
...
If installation completed successfully, now can setup gcc versions
update-alternatives --install /usr/bin/gcc gcc /usr/bin/gcc-4.9 50
update-alternatives --install /usr/bin/g++ g++ /usr/bin/g++-4.9 50
$ gcc --version
root@pi2:/# gcc --version
gcc (Raspbian 4.9.3-14) 4.9.3
Copyright (C) 2015 Free Software Foundation, Inc.
Used gcc version can be changed by running
update-alternatives --config gcc
bc package also required, it can be installed by apt-get install bc. After this rpi-source should execute to get kernel stuff done.
root@raspberrypi:/home/pi# rpi-source
 *** gcc version check: OK
 *** Using: /usr/share/doc/raspberrypi-bootloader/changelog.Debian.gz
 *** Latest firmware revision: 748fb17992426bb29d99224b93cb962fefbdc833
 *** Linux source commit: f1a1eec4c38d3c36b67c609f6c27805d04dab978
 *** Download kernel source
--2018-09-06 06:17:59--  https://github.com/raspberrypi/linux/archive/f1a1eec4c38d3c36b67c609f6c27805d04dab978.tar.gz
...
Location: https://codeload.github.com/raspberrypi/linux/tar.gz/f1a1eec4c38d3c36b67c609f6c27805d04dab978 [following]
After this libraries and additional packages can be installed:
root@pi2:/repo/new_hdr# apt-get install tk-dev build-essential texinfo texi2html libcwidget-dev libncurses5-dev libx11-dev binutils-dev bison flex libusb-1.0-0 libusb-dev libmpfr-dev libexpat1-dev tofrodos subversion autoconf automake libtool mercurial
Reading package lists... Done
Building dependency tree
Reading state information... Done
....
0 upgraded, 19 newly installed, 4 to remove and 19 not upgraded.
Need to get 4,651 kB of archives.
After this operation, 6,192 kB of additional disk space will be used.
Do you want to continue? [Y/n] Y
Now install linux-gpib itself. Enter home directory and run next:
root@tin:/home/# mkdir linux-gpib
root@tin:/home/# cd linux-gpib
root@tin:/home/linux-gpib# svn checkout svn://svn.code.sf.net/p/linux-gpib/code/trunk linux-gpib-code
A    linux-gpib-code/linux-gpib
A    linux-gpib-code/linux-gpib/test
A    linux-gpib-code/linux-gpib/test/runtest
...
...
A    trunk/linux-gpib/examples/ibtest.c
Checked out revision 1755.
- At this moment we have latest linux-gpib from SVN and ready to configure and install it.
root@tin:/home/linux-gpib# cd linux-gpib-code/linux-gpib-kernel/
root@tin:/home/linux-gpib/linux-gpib-code/linux-gpib# ./bootstrap
configure.ac:25: installing './config.guess'
configure.ac:25: installing './config.sub'
configure.ac:7: installing './install-sh'
configure.ac:7: installing './missing'
- Now run ./configure in linux-gpib-kernel directory to prepare it for our system environment.
root@tin:/home/linux-gpib/linux-gpib-code/linux-gpib# ./configure
checking for a BSD-compatible install... /usr/bin/install -c
checking whether build environment is sane... yes
checking for a thread-safe mkdir -p... /bin/mkdir -p
checking for gawk... no
checking for mawk... mawk
checking whether make sets $(MAKE)... yes
checking whether make supports nested variables... yes
checking whether to enable maintainer-specific portions of Makefiles... no
checking for util/.scm_version.tmp... yes
checking build system type... armv7l-unknown-linux-gnueabihf
checking host system type... armv7l-unknown-linux-gnueabihf
checking Linux kernel directory... ok
checking Linux kernel compile flags... WARNING: could not open /repo/linux-gpib/linux-gpib-code/linux-gpib-kernel/util/linux_flags/fake.c: Invalid argument
ok
checking for depmod... /sbin/depmod
checking that generated files are newer than configure... done
configure: creating ./config.status
config.status: creating Makefile
config.status: creating drivers/Makefile
config.status: creating config.h
- Compile and install linux-gpib-kernel
root@tin:/home/gpib/linux-gpib-3.2.21# make
make  all-recursive
...
...
This will take some time. After this step do make install
Now exit linux-gpib-kernel folder and do same ./bootstrap, ./configure and make & make install steps in linux-gpib-user folder. Also copy gpib.conf from examples to /etc/gpib.conf:
root@tin:/repo/linux-gpib/linux-gpib-code# cd linux-gpib-user/
root@tin:/repo/linux-gpib/linux-gpib-code/linux-gpib-user# ./bootstrap
root@tin:/repo/linux-gpib/linux-gpib-code/linux-gpib-user# ./configure
root@tin:/repo/linux-gpib/linux-gpib-code/linux-gpib-user# make
root@tin:/repo/linux-gpib/linux-gpib-code/linux-gpib-user# make install
root@tim:/repo/linux-gpib/linux-gpib-code/linux-gpib-user# cp util/templates/gpib.conf /etc/gpib.conf
These steps must complete without errors in the end. Also may be worth to run ldconfig to link all installed libraries
Configuration for linux-gpib and interfacing
After everything successfully installed without errors, let’s connect GPIB-USB-HS adapter to Raspberry Pi and try to talk with it.
Make sure your Pi powered with good short high-current USB cable and +5 VDC power supply with at least 2 Amp , as NI GPIB-USB-HS is taking some decent amount of power and with cheap USB cable connected to PC port it was causing unstable operation, LAN LEDs on Pi were blinking like crazy and nothing worked, as voltage drop too much.
Checking interface connection is simple, just run lsusb to see which devices are present on USB bus:
root@tin:/etc# lsusb
Bus 001 Device 002: ID 0424:9514 Standard Microsystems Corp.
Bus 001 Device 001: ID 1d6b:0002 Linux Foundation 2.0 root hub
Bus 001 Device 003: ID 0424:ec00 Standard Microsystems Corp.
Bus 001 Device 004: ID 3923:709b National Instruments Corp. GPIB-USB-HS
Unlike old GPIB-USB-B, which need Cypress FX firmware upload every time after connection, GPIB-USB-HS does not need any firmware uploads and ready to work right from the box.
Let’s load kernel module with modprobe:
root@tin:/home/gpib/linux-gpib-3.2.21# modprobe ni_usb_gpib
root@tin:/home/gpib/linux-gpib-3.2.21#
Should be no error messages here. Can check if module was correctly used as well by lsmod.
root@tin:/home/gpib/linux-gpib-3.2.21# lsmod
Module                  Size  Used by
i2c_dev                 6970  0
i2c_bcm2708             5306  0
ni_usb_gpib            26063  0
gpib_common            31031  1 ni_usb_gpib
Now I tried using gpib_config tool to test operation, but got nasty error instead:
root@tin:/home/gpib/linux-gpib-3.2.21# gpib_config
failed to configure boardtype: ni_usb_gpib
failed to configure board
main: Invalid argument
Oops… After some amount of trial and error, and googling similar issues on web, answer is simple: this is due to actual driver called different name compared to kernel module. In our case driver for NI GPIB-USB-HS need to be properly selected in interface block, so related configuration on /etc/gpib.conf should follow next example:
interface {
    minor       = 0             /* board index, minor = 0 uses /dev/gpib0, minor = 1 uses /dev/gpib1 */
    board_type  = "ni_usb_b"    /* type of interface board being used */
    name        = "violet"      /* optional name, allows you to get a board descriptor using ibfind() */
    pad         = 0             /* primary address of interface             */
    sad         = 0             /* secondary address of interface           */
    timeout     = T30s          /* timeout for commands */
    eos         = 0x0a          /* EOS Byte, 0xa is newline and 0xd is carriage return */
    set-reos    = yes           /* Terminate read if EOS */
    set-bin     = no            /* Compare EOS 8-bit */
    set-xeos    = no            /* Assert EOI whenever EOS byte is sent */
    set-eot     = yes           /* Assert EOI with last byte on writes */
    master      = yes           /* interface board is system controller */
}
You also may get error on RPI2, like shown below
root@raspberrypi ~/linux-gpib/linux-gpib-code/linux-gpib $ gpib_config:
error while loading shared libraries:
To fix this, just execute command ldconfig before gpib_config.
Everything working well now:
root@tin:/home/gpib/linux-gpib-3.2.21# gpib_config
root@tin:/home/gpib/linux-gpib-3.2.21#
No error messages, yay! Let’s test how it works now.
You may want to add /usr/local/sbin/gpib_config into /etc/rc.local to have it executed automatically during Raspberry Pi boot, if it is not done automatically.
Testing GPIB operation
To test I had NI GPIB-USB-HS connected to Fluke 5720A. Instrument is configured with GPIB Address = 1 in this example below.
root@tin:/# ibtest
Do you wish to open a (d)evice or an interface (b)oard?
        (you probably want to open a device): d
enter primary gpib address for device you wish to open [0-30]: 10
trying to open pad = 10 on /dev/gpib0 ...
You can:
        w(a)it for an event
        ...
        ...
        (r)ead string
        perform (s)erial poll (device only)
        change (t)imeout on io operations
        request ser(v)ice (board only)
        (w)rite data string
: w
enter a string to send to your device: *IDN?
sending string: *IDN?

gpib status is:
ibsta = 0x2100  < END CMPL >
iberr= 0

ibcnt = 6
You can:
        w(a)it for an event
        ...
        ...
        (r)ead string
        perform (s)erial poll (device only)
        change (t)imeout on io operations
        request ser(v)ice (board only)
        (w)rite data string
: r
enter maximum number of bytes to read [1024]: 1024
trying to read 1024 bytes from device...
received string: 'FLUKE,5720A,7543315,1.4+B+*'
Number of bytes read: 28
gpib status is:
ibsta = 0x2100  < END CMPL >
iberr= 0

ibcnt = 28
Now we can confirm that interface is working, and data send/received correctly.
Python-application to talk GPIB from Raspberry Pi
It’s time to write some simple program to talk with our instruments over GPIB.
One of easy choices would be using Python, as this high-level language is very easy to write data-logging programs and format data, without worry much about low-level coding.
To use GPIB in Python we need to have python-dev library installed and working:
root@tin:/# apt-get install python-dev
Reading package lists... Done
Building dependency tree
Reading state information... Done
The following extra packages will be installed:
  libssl-dev libssl-doc python2.7-dev
The following NEW packages will be installed:
  libssl-dev libssl-doc python-dev python2.7-dev
0 upgraded, 4 newly installed, 0 to remove and 0 not upgraded.
Need to get 2,699 kB/31.4 MB of archives.
After this operation, 41.4 MB of additional disk space will be used.
Do you want to continue [Y/n]? Y
....
Setting up python2.7-dev (2.7.3-6+deb7u2) ...
Setting up python-dev (2.7.3-4+deb7u1) ...
Python-dev library is needed to access GPIB module.
Now we can install python egg to include Gpib module with our python system environment:
root@tin:/home/linux-gpib-code/linux-gpib-user/language/python# python ./setup.py  install
running install
running build
running build_py
running build_ext
running install_lib
running install_egg_info
Writing /usr/local/lib/python2.7/dist-packages/gpib-1.0.egg-info
Simple Python test can help to check access, for multimeter sitting on GPIB bus with address 17. Test is simple sending IDN? request and reading back 100 bytes:
root@raspberrypi:/repo/linux-gpib/linux-gpib-code/linux-gpib-user/language/python# python
Python 2.7.13 (default, Nov 24 2017, 17:33:09)
[GCC 6.3.0 20170516] on linux2
Type "help", "copyright", "credits" or "license" for more information.
>>> import Gpib
>>> inst = Gpib.Gpib(0,1) # Device address 1
>>> inst.write("*IDN?")
>>> inst.read(100)
'FLUKE,5720A,7543315,1.4+B+*\n'
>>>
Hope this article help to use little, but mighty Raspberry Pi with industry standard GPIB instrumentation. Size and capabilities of small microcomputer, such as Raspberry Pi can make something wild possible, such as integrating it into old GPIB-interfaced instruments to bring modern computing power and interfacing, such as interactive web via LAN port or even having instrument on remote location, controlled thru Internet. No need big bulky computer with Windows tied to it.
# xDevs.com Python test GPIB app
# http://xdevs.com/guide/ni_gpib_rpi/
import sys
import Gpib
inst = Gpib.Gpib(0,10) # Instrument GPIB Address = 10
inst.write(":DISP:WIND:TEXT:DATA 'Raspberry Pi GPIB;)'")
inst.write(":DISP:WIND2:TEXT:DATA 'xdevs.com/guide/ni_gpib_rpi'")
inst.write(":DISP:WIND:TEXT:STAT ON")
inst.write(":DISP:WIND2:TEXT:STAT ON")
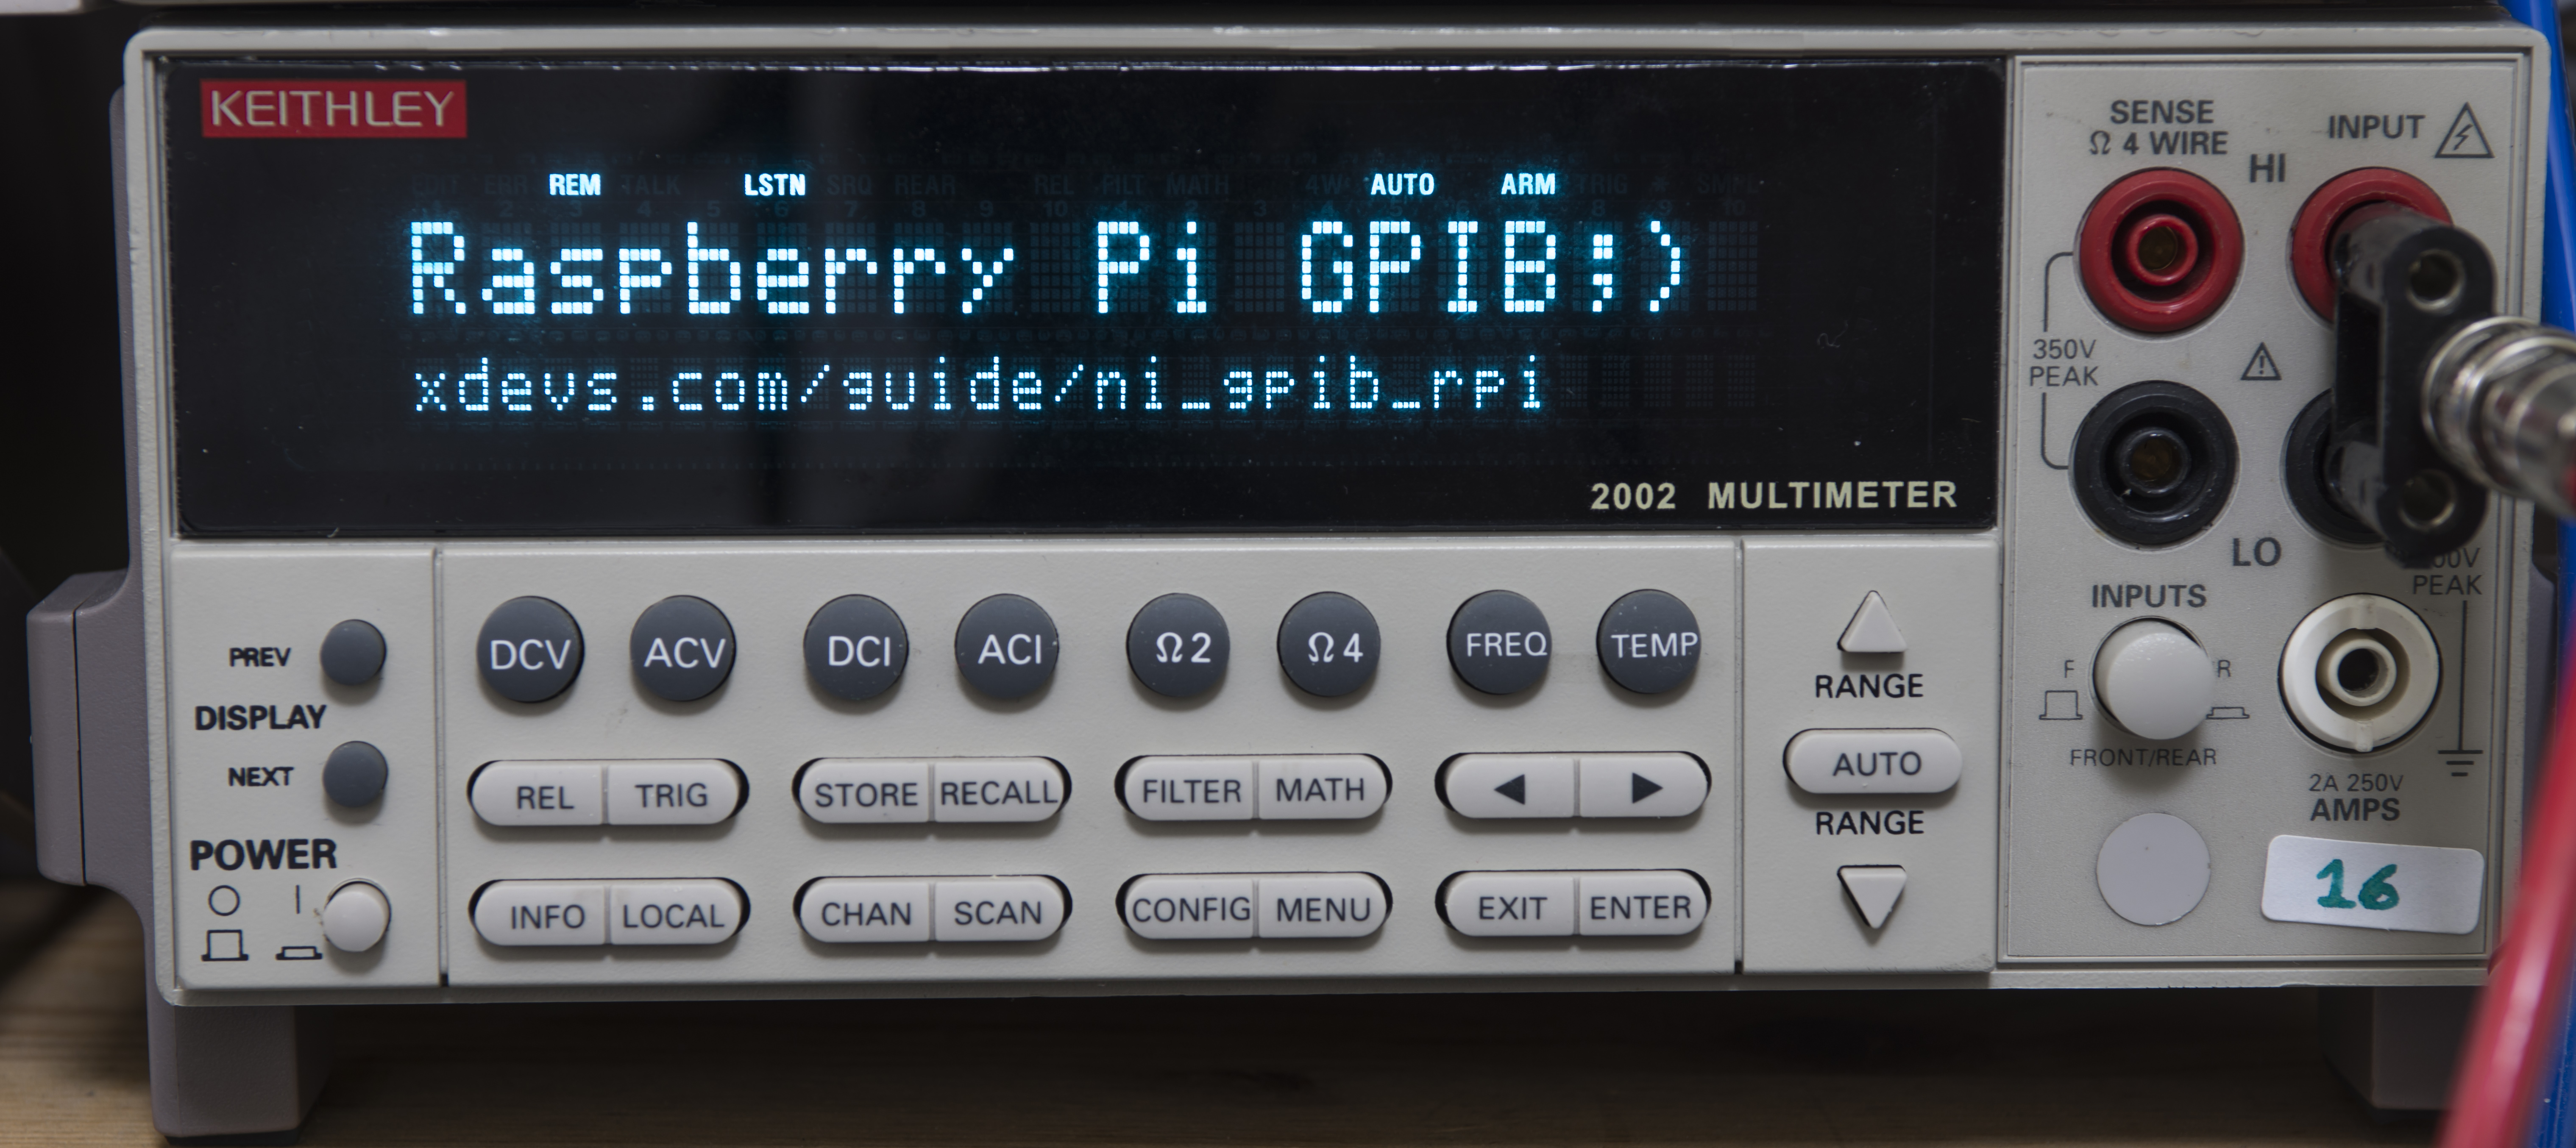
Image 8: Keithley 2002 DMM displaying python code result
Here’s another app example, to setup and read data from HP 3458A multimeter
# xDevs.com Python 10V test for 3458A
# https://xdevs.com/guide/ni_gpib_rpi/
# https://xdevs.com/article/hp3458a_gpib/
# https://xdevs.com/fix/hp3458a/
import sys
import Gpib
import time

inst = Gpib.Gpib(0,3, timeout=60) # 3458A GPIB Address = 3
inst.clear()

#Setup HP 3458A
inst.write("PRESET NORM")
inst.write("OFORMAT ASCII")
inst.write("DCV 10")
inst.write("TARM HOLD")
inst.write("TRIG AUTO")
inst.write("NPLC 200")
inst.write("AZERO ON")
inst.write("LFILTER ON")
inst.write("NRDGS 1,AUTO")
inst.write("MEM OFF")
inst.write("END ALWAYS")
inst.write("NDIG 9")

cnt = 0
tread = 2
temp = 38.5
inst.write("TEMP?")
temp = float(inst.read())
reflevel = 10.0000000
ppm = 0

with open('10v_3458_nplc200_mm.csv', 'a') as o:
    o.write("date;hp3458a;level;temp;ppm_level;\r\n")
    o.close()

while cnt <= 10000000:
    cnt+=1
    with open('10v_3458_nplc200_mm_08451_opt002.csv', 'a') as o:
        tread = tread - 1
        if (tread == 0):
            tread = 20
            inst.write("TARM SGL,1")
            inst.write("TEMP?")
            temp = inst.read()
        inst.write("TARM SGL,1")
        data = inst.read()
        ppm = ((float(data) / reflevel)-1)*1E6
        inst.write("DISP OFF, \"%3.3f ppm\"" % float(ppm))
        time.sleep(1)
        print time.strftime("%d/%m/%Y-%H:%M:%S;") + ("[%8d]: %2.8f , dev %4.4f ppm, T:%3.1f" % (cnt, float(data),float(ppm),float(temp) ) )
        o.write (time.strftime("%d/%m/%Y-%H:%M:%S;") + ("%16.8f;%16.8f;%3.1f;%4.3f;\r\n" % (float(data),float(reflevel),float(temp),float(ppm) ) ))
        o.close()
Additional interfaces, LXI via Python
One of our readers also mentioned possibility of using LXI-compatible instruments with Raspberry Pi.
To use this simple guideline can be followed. Create folder (for example /home/LXI).
mkdir /home/LXI
Enter directory and get SVN repository for python-vxi
svn checkout https://github.com/python-ivi/python-vxi11
Enter /home/LXI/python-vxi11/trunk directory
python setup.py install
Now python-vxi should be installed on your Raspberry Pi
Here’s example python app to talk with VXI instrument:
import vxi11
instr =  vxi11.Instrument("192.168.0.8")
print(instr.ask("*IDN?"))
In case of correct installation and connection reply can be as below:
Keithley Instruments Inc., Model 2636B, 1234567, 3.2.1
More information is available on github for python-vxi11 or Alex Forencich’s site
He also had created python-usbtmc for Python USB commnication with instruments, so check it out.
NI USB-GPIB-HS repairs
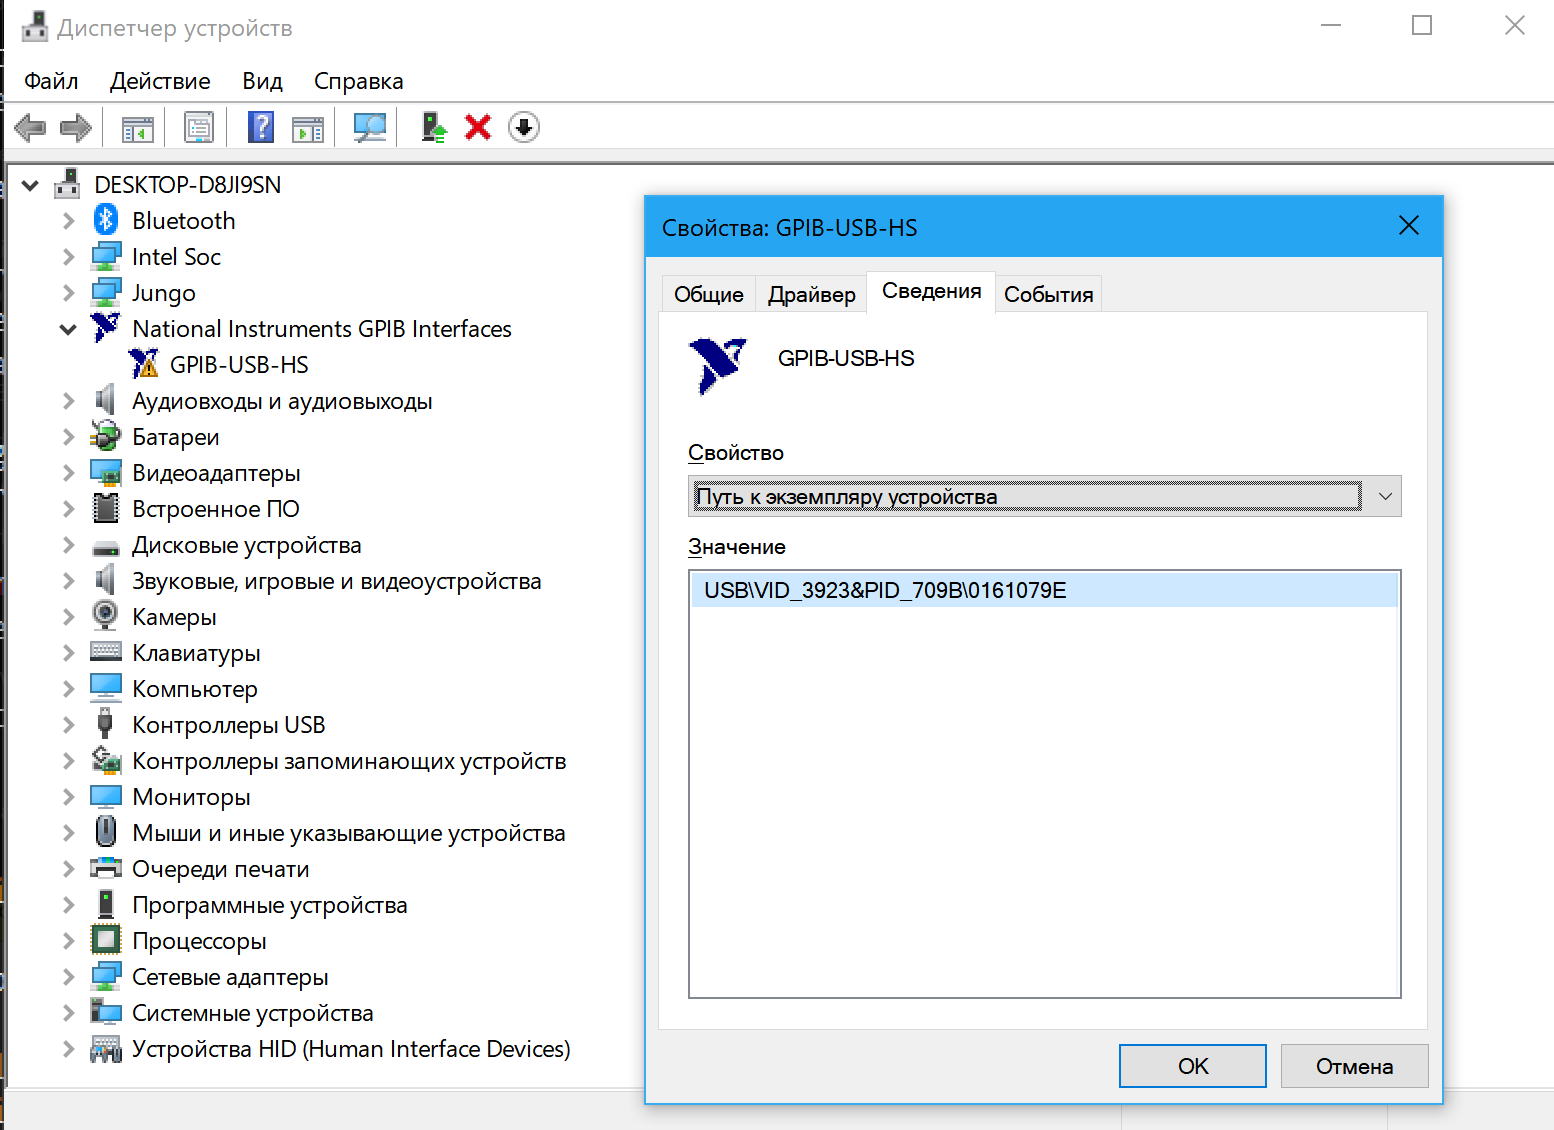
Recently one of dongles I had stopped working. When attempted to use with linux-gpib software in Raspberry Pi environment it just returned “OS Errors”. In Windows-based system dongle was properly detected at first as NI USB-GPIB-HS interface but few seconds driver reported failure with “device cannot start or the driver is missing”.
Another USB-GPIB-HS dongle was operating just fine in same Linux/Windows environment. So now that I have confirmed that it is a dongle hardware issue, time to take one apart and do some troubleshooting.
I have checked power rails on a dongle. Both +3.3V and +5V were OK, and current draw of the dongle was matching other good dongle within few percent. Next suspect – I2C EEPROM corruption.
I was not alone with such problem, some users from EEVBlog forum also reported issues with EEPROM on these dongles. Forum member issue was however bit different device was detected as USB\VID_04B4&PID_8613 which are default Cypress USB 2 development kit IDs and not the NI USB-GPIB-HS.
Either way Microchip 24LC256 I2C EEPROM contents was dumped from the good dongle, written into bad dongle, but this rendered my bad dongle not even detect properly. Instead it blinked green LED few times and then was presented as Unknown USB device.
EEPROM dump binary from good NI USB-GPIB-HS, U1 position
At this point dongle was sitting on a shelf, until I got another dead dongle from Nikonoid. His dongle was plain dead, not detecting by computer and no any LED activity at all. R10 and R19 0 ohm 0603 size SMT-resistors on his dongle were burned to crisp. For comparison, Nikonoid’s dongle PCB is on the right side in the next photo.
R21 is a polyfuse on main +5V entry from USB cable. It was OK, no problems with power here. +3.3V rail however is loaded down. It is regulated by MAXIM MAX604CSA linear regulator. Good dongle measured DC resistance +3.3V to ground around 50 kΩ while this bad dongle reported 300 Ω. When powered +3.3V rail was drawing 45mA or so, with correct +3.3V.
I didn’t want to spend too much time with these (you can buy one of the knock-off USB-GPIB-HS dongles from ePay for $100 or less USD). There is no help from vendor, lack of schematics and it is 4-layer PCB. Next just things I tried to do, swapping parts between my “Unknown Device” and this brain-dead dongle in timelog sequence:
- Swap MAX604 LDO, even though I was pretty sure it was not a problem. Didn’t help either dongle.
- Swap supervisor IC which is U9 TI TLC7733. Didn’t help either dongle.
- Swap U5 74LCX245A logic chip. Didn’t help either dongle.
- Swap U6 SRAM TSSOP28 chip. Winner, now my dongle that had issues with driver or ID now works totally fine.
I did not immediately suspect bad SRAM chip, but it was not totally impossible. Perhaps rogue cosmic ray shoot thru some capacitors inside SRAM array and killed it :).
Dongle with loaded down +3.3V rail still have problem, perhaps it is bad cracked capacitor somewhere or damaged USB microcontroller Cypress CY7C68013A or even worse, bad BGA NI TNT5004-AB chip. I might continue troubleshooting for this dongle in future, but for now its going back on shelf.
Hopefully this repair worklog can help somebody who may have broken NI USB-GPIB-HS.
Resetting hanged up NI USB-GPIB-HS dongle on Raspberry Pi over remote interface
Sometimes during long-term data logging USB dongle may hicckup and hang up. When this happens gpib_config command will refuse to work and throw errors. Any communications via linux-gpib or Python apps would not work either.
root@raspberrypi:/repo/scripts# gpib_config
failed to bring board online
failed to configure board
main: Input/output error
One of local solution is to unplug and plug dongle back into RPi host. But if logging done remotely without physical access to hardware, alternative solution required.
Similar problem was discussed here.
In case of NI GPIB dongle, command to reset dongle would be next:
sudo usb_modeswitch -v 0x3923 -p 0x709b --reset-usb
This sucessfully tested and confirmed working on Raspberry Pi 4B host.
Article version:
- Update 9/6/2018 using 4.14.50-v7+ kernel with rebuilded headers and linux-gpib #1755 build.
- Update 3/7/2016 using 4.1.17+ kernel with rebuilded headers. Thanks to feargus!
- Initial article, using 3.8.10 kernel + downloaded headers, PDF-archived
If you have any comments and suggestions – feel free to join in comments!
Projects like this are born from passion and a desire to share how things work. Education is the foundation of a healthy society - especially important in today's volatile world. xDevs began as a personal project notepad in Kherson, Ukraine back in 2008 and has grown with support of passionate readers just like you. There are no (and never will be) any ads, sponsors or shareholders behind xDevs.com, just a commitment to inspire and help learning. If you are in a position to help others like us, please consider supporting xDevs.com’s home-country Ukraine in its defense of freedom to speak, freedom to live in peace and freedom to choose their way. You can use official site to support Ukraine – United24 or Help99. Every cent counts.
Modified: Feb. 6, 2023, 4:56 p.m.
References
- EEVBlog : Using a Raspberry PI with linux-gpib
- Linux GPIB Package Homepage
- Ubuntu forums : GPIB-USB-HS on 14.04
- RaspberryPi forum : How to upgrade to the latest kernel
- Element14 : shared article version
- RFPOWERAMP : NI GPIB-USB-HS under Linux
- Useful data for Keysight LXI & GPIB Python controls
- KO4BB GPIB overview and DIY cables
- Recipe for target 'libgpib_la-ibConfLex.lo' failed : error on compiling??
- EEVBlog : Using linux-gpib with NI PCI GPIB card