- Intro
- Manual references
- Initial photos and conditions
- Day 1: Power checks and initial diagnostics and repairs
- Day 2: Verification after initial calibration adjustment
- Day 3: DC 10VDC test with reference input
- Days 4-10: SN18 ADC stability test, 3458 ‘C’ unit
- Days 4-10: SN18 ADC stability test, 3458 ‘D’ unit
- Day 11: Calibration adjustment prior to final test
- Day 13: Final calibration tests and report
- Summary
Intro
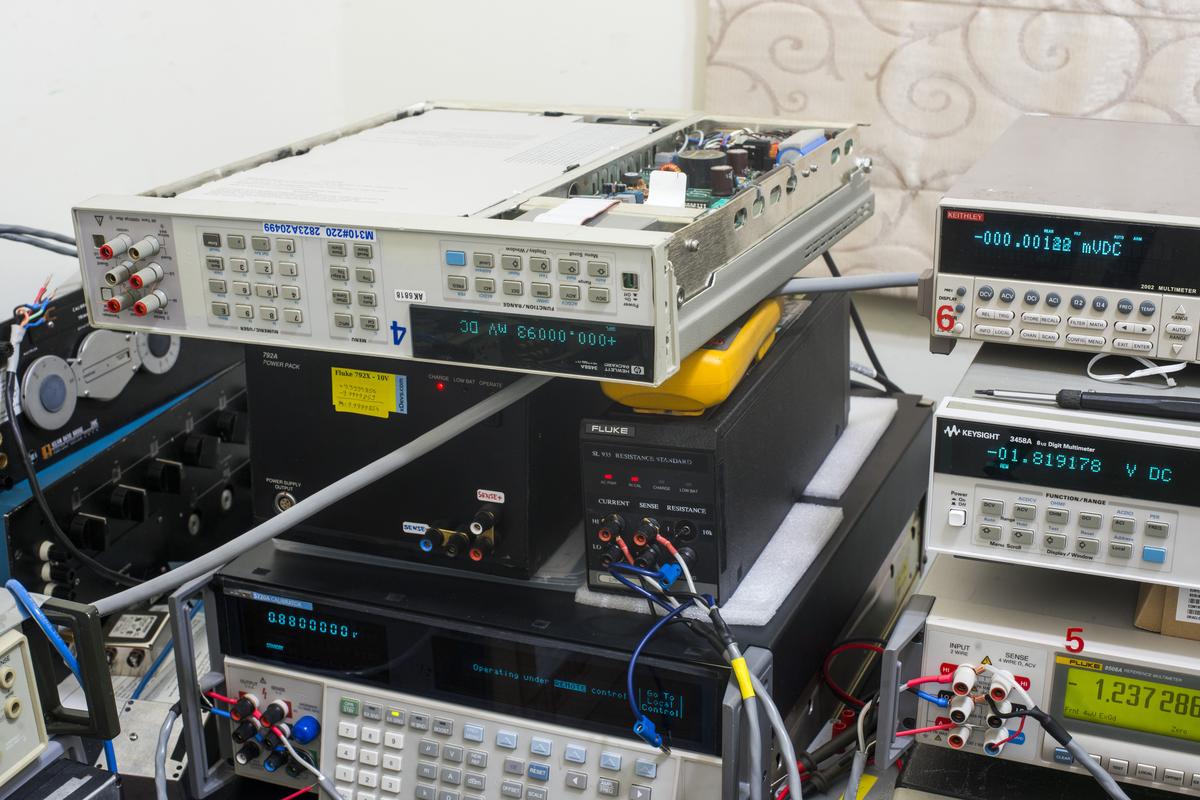
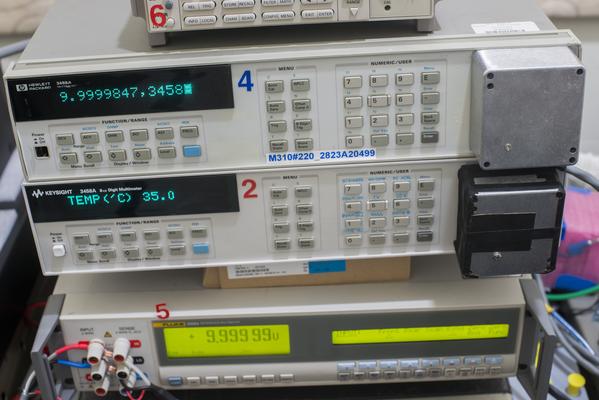
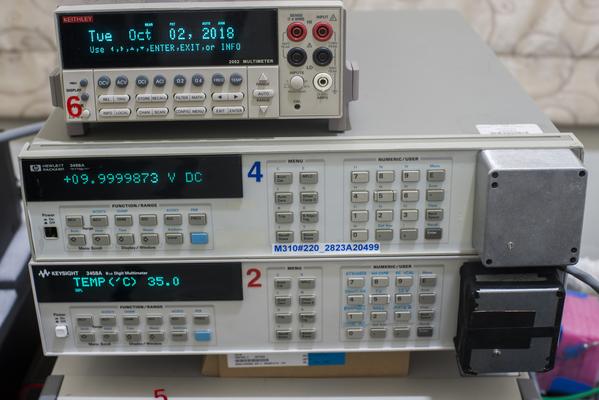
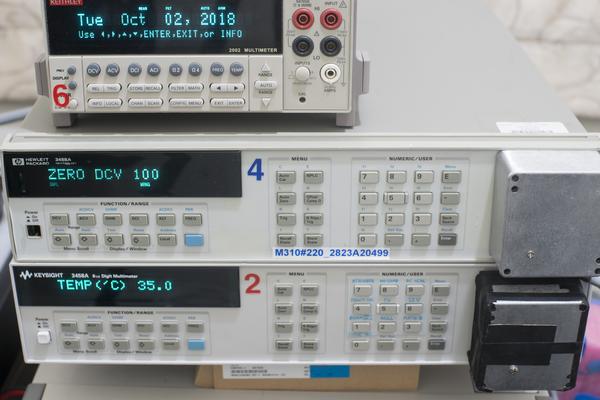
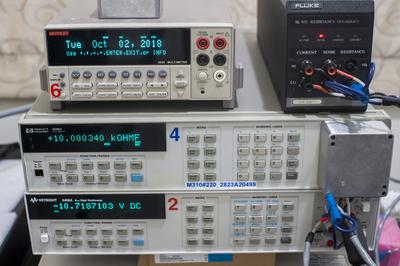
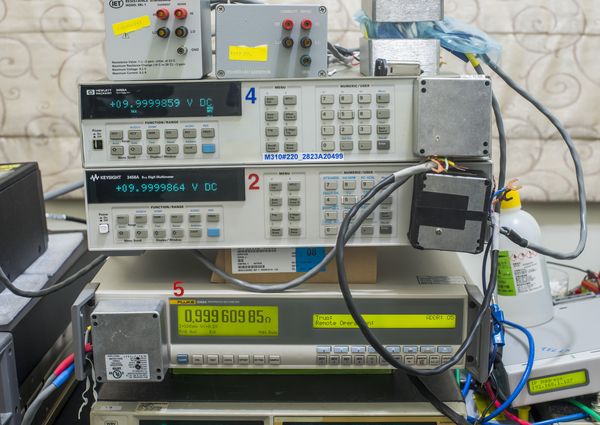
Almost ten years ago, before any content on xDevs.com was published, works started on repair our first benchtop DMM, 7½-digit Keithley 2001. That project grew over time, and in year 2014 we had no less than eight 2001’s in various condition and state. Fast forward to end of 2018, now we have zero 2001’s, but quantity of DMMs remained the about the same. Only difference now, all of these are top of the line 8½-digit beasts.
Why would we need so many expensive meters? Answer is simple – statistics play very important role in reducing uncertainty for precision measurements. Sampling signal with single instrument (even very good one) rely on that single instrument being in spec and free of the failures, hidden or obvious. Two instruments sampling same signal provide better confidence, but increase challenge of tracking the measurement results, introducing “man with two watches” problem or Segal’s law. Correct way to reduce uncertainty of the signal measurement is to use at least three or more detectors so the voting scheme can be applied, and overall confidence in results increased.
In practical result, if single source measured by six good meters in calibration, all of them should agree very well with each other. If we see sudden jump in data (e.g. +10ppm up) and all meters reflect this change in same way, assumption of source output change can be made with good confidence. But if only one or two meters show the jump, but others do not register it – that could mean error was introduced by external influence (e.g. EMI/RFI noise near the two suspect meters), but not the source issue. Lot of research and PhD thesis was done over decades on this subject. Splitting hairs (or ppm fractions of deviation between signals) by no means an easy task.
For same reason commercial calibrations often use banks of references and “golden” verified meters, to provide best uncertainty possible, instead of using single standard as reference point. Common financially viable path is to use four references in tandem. Fluke manufacture and sell bank of four Fluke 732B/732C DC Voltage Standards in single enclosed unit – Fluke 734A/732C. Datron/Wavetek had similar design in shape of Model 4910 and System 7004/7010N.
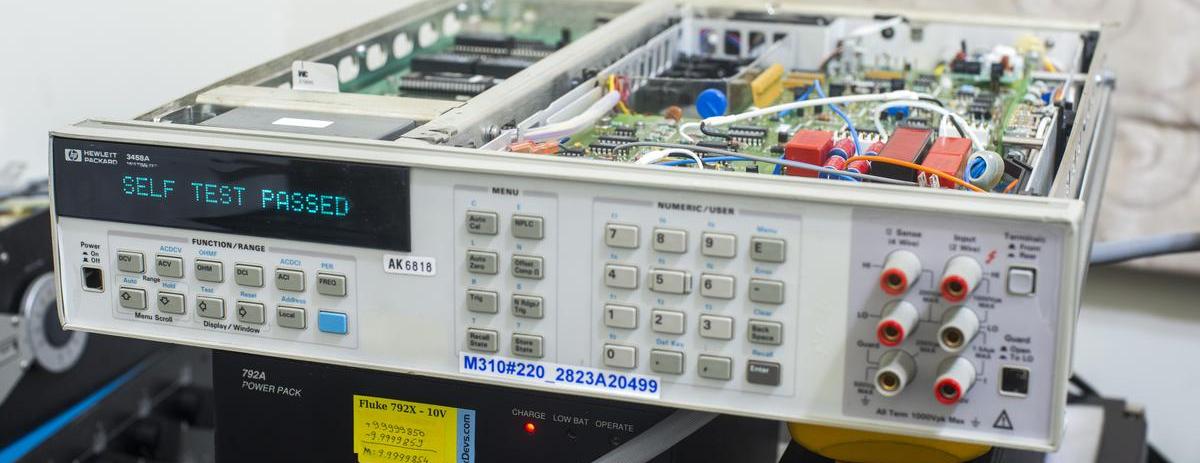
And to follow this direction, we proceed with same direction to increase quantity of Keysight 3458A DMMs in 24/7/365 operation for our experiments in metrology with third unit. To make it interesting, third meter also bought as broken parts mule. To refresh memory, be sure to check first rusty 3458A in-depth worklog and second 3458A repair worklog.
Unit was advertised as “missing A3 board, for parts or repair, no returns”. Time to see how difficult (read – expensive) is this box to get in order!
Manual references
A User’s Guide to Keysight 3458A Front Panel Operation
3458A Multimeter User’s Guide, Edition 7
Keysight 3458A Multimeter datasheet
Agilent 3458A : Quick Reference Guide, Edition 2, Dec 2000
3458A Multimeter Calibration Manual, Edition 7
3458A Multimeter Calibration Manual, Edition 6
3458A Multimeter Assembly Level Repair Manual, Edition 2
3458A Multimeter Component Level Repair Manual
Service notes
There are service notes/engineering changes were published during years of 3458A’s lifecycle. If your unit is old, worth to check if any of them required to do.
Service note 3458-01C : A/D Linearity Improvement
Service note 3458-04A : Apparent failure at turn-on or when given a “RESET” command
Service note 3458-07B : Modification to Fix Intermittent Error “Multislope Rundown Conversion”
Service note 3458-08A : Incorrectly Labeled Line Voltage Switches May Cause Switch Setting Confusion
Service note 3458-10A : 3458A Documentation Available As “On-Line” Files
Service note 3458-12B : Outguard Firmware Upgrade: Enhancements, Fixes, & Changes
Service note 3458-12C : Outguard Firmware Upgrade: Enhancements, Fixes, & Changes
Service note 3458-13A : GPIB Communication Failures Using the 3458A
Service note 3458-14B : Calibration Error After Power “On” or After an “ACAL”
Service note 3458-17 : Errors May Occur if ACAL AC is Initiated From the 4-Wire Ohms Function
Service note 3458-20 : Bad SRAM causing Cal Ram batteries to fail prematurely
Initial photos and conditions
Here are list (likely not complete) of issues present with the box.
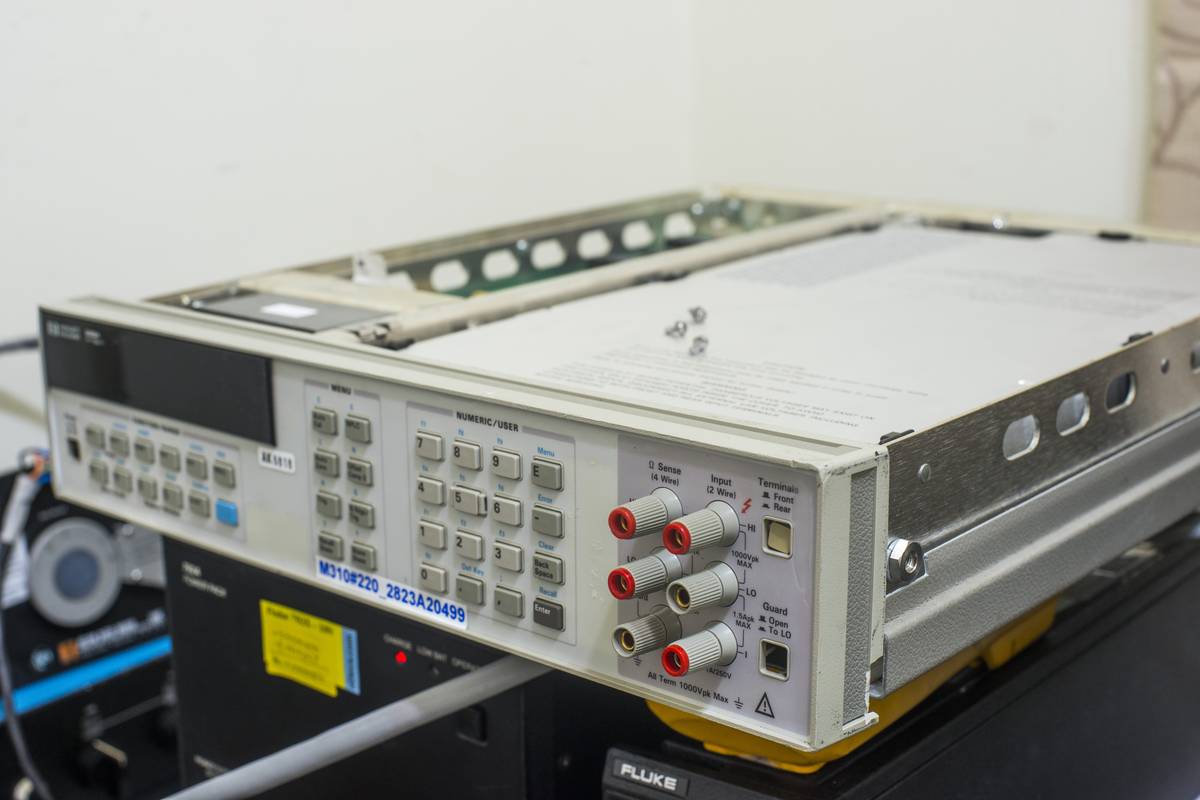
Image 1: Front panel of fresh 3458A patient
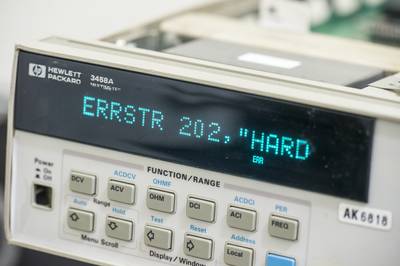
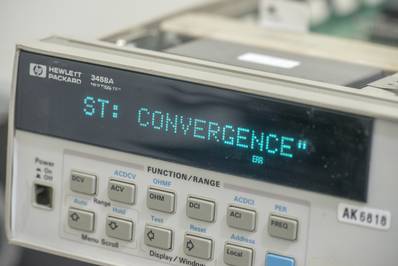
- Bad A5 PCBA (Outguard controller) – error ROM 0 LO CHK Replaced NVRAM, reprogrammed Firmware ROM with Rev9.
- Dimm VFD. Still useable, no service will be made
- Missing rear bezel. TBC
- Damaged front panel bezel Replacement planned
- Scratched display window Replacement planned
- Missing power switch and guard/LO pushrod and caps%{color:#007700}Replacement planned%
- Damaged front terminal block Replacement planned
- A3 stability unknown. To be checked per SN18 procedure.
- Calibration data is incorrect. Wrong A5 cal data, due to mismatched board set
Day 1: Power checks and initial diagnostics and repairs
Phyiscally front panel have severe damages on sides and does not fit steel frame correctly. Somebody wrote cryptic message on the bottom cover with marker.
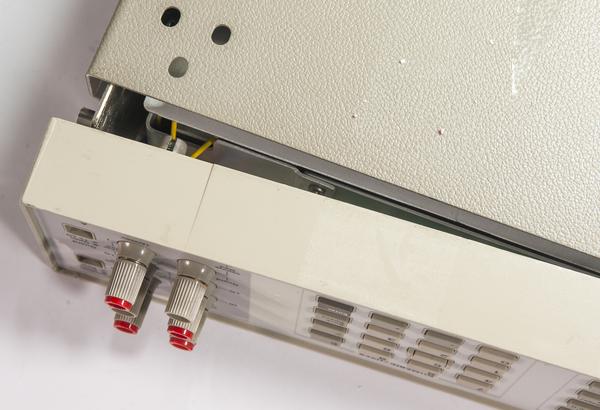
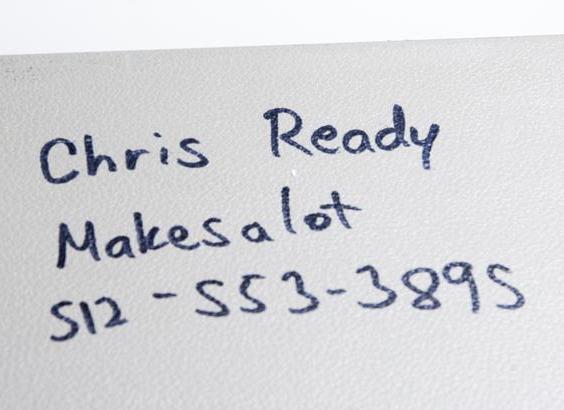
Image 2-3: Misaligned front panel and “Chris Ready message”.
Fan filter is clean, like this meter was never actually used and just sat in storage for years. Fan blades also suggest very little use, if any at all.
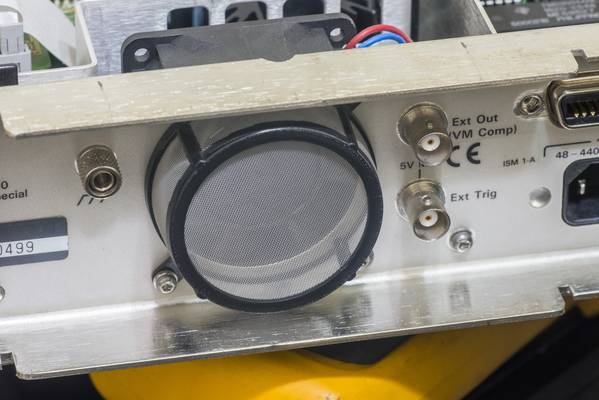
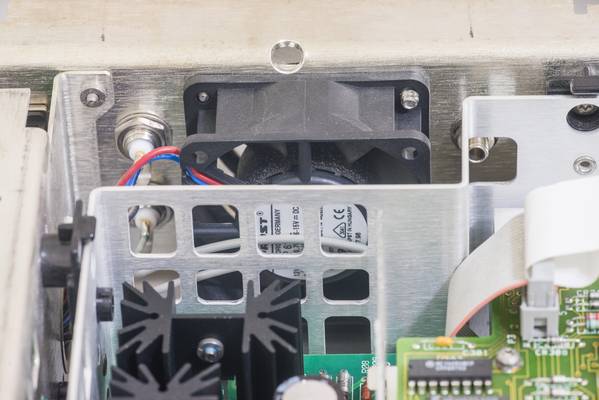
Image 4-5: Rear fan filter condition and original PAPST fan.
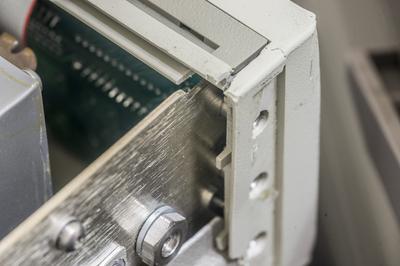
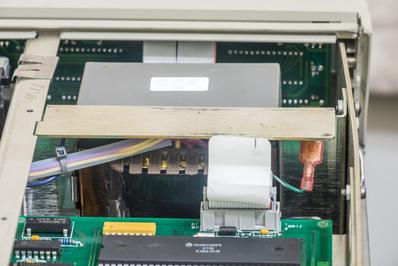
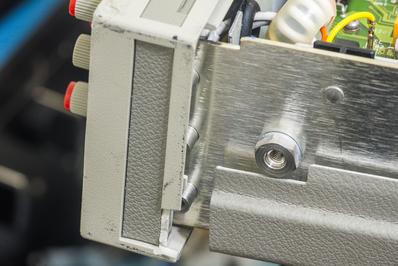
Image 6-8: Main steel frame damage on the front left corner.
Terminal blocks also look nice and clean, except few missing red inserts on the front.
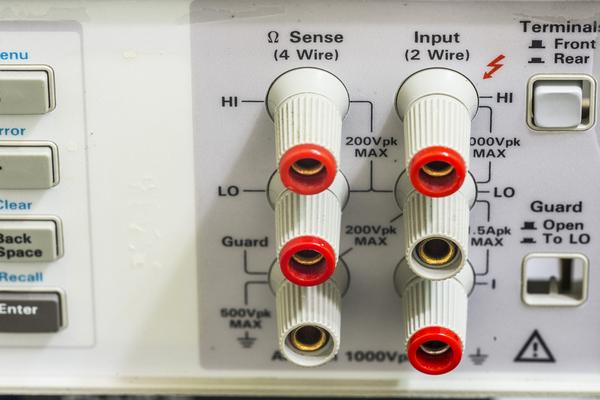
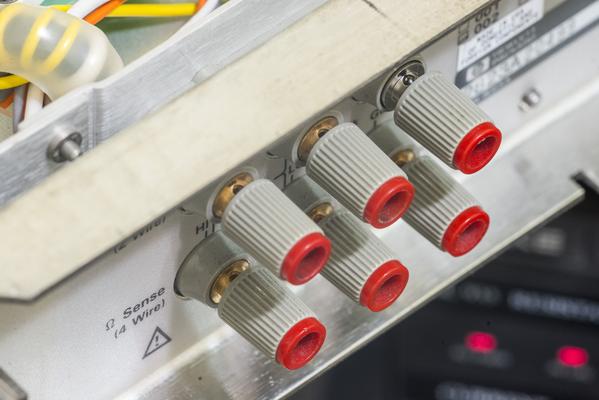
Image 2: Front and rear 5-way low-thermal binding posts.
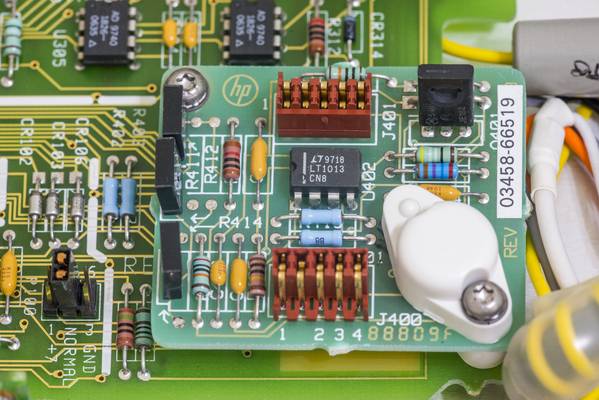
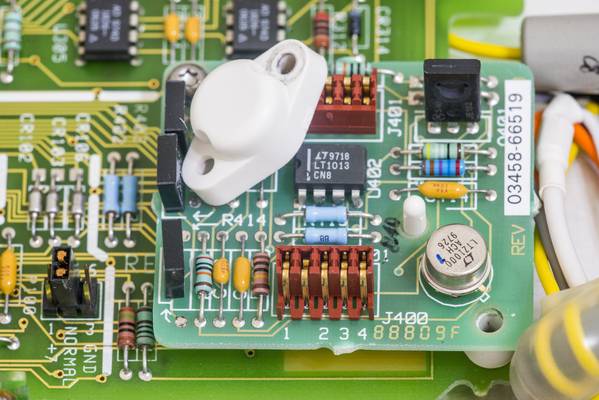
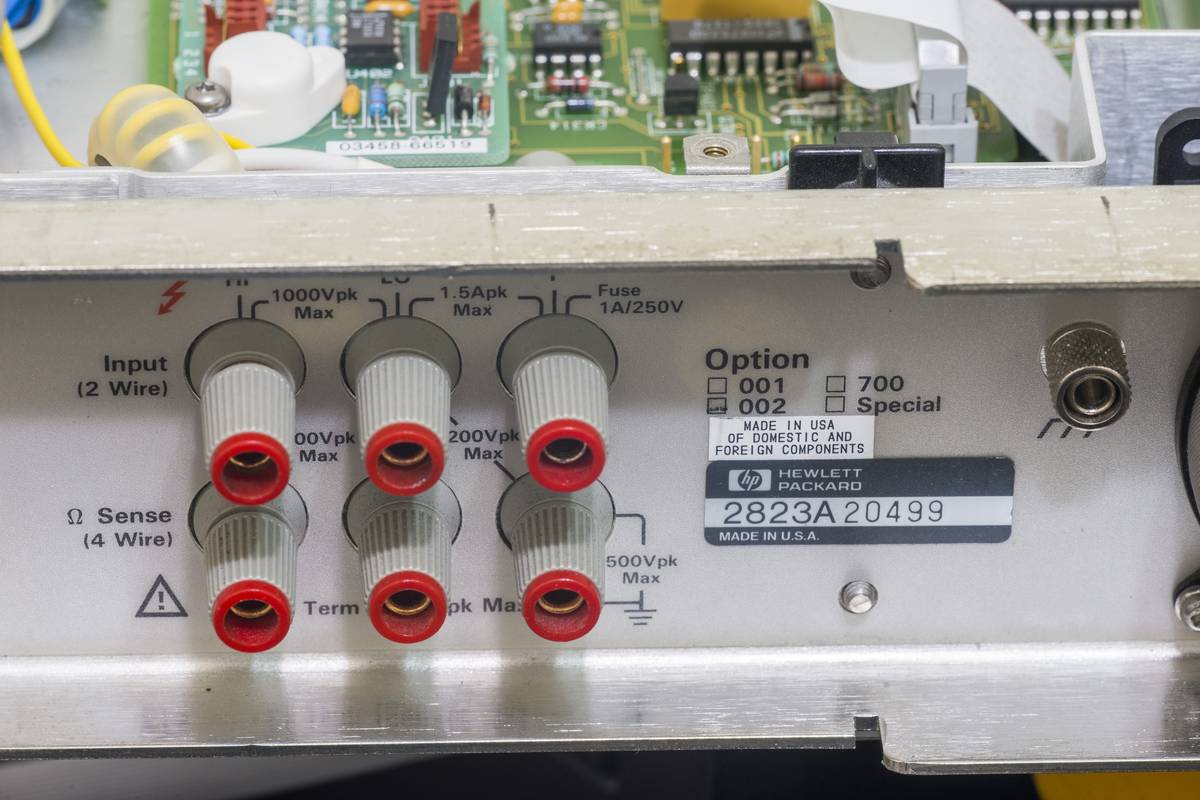
One can also guess faint marking of Opt 002, which means this meter might have high-stability selected LTZ1000A-based voltage reference module, Keysight P/N 03458-66519. This option cost about $980 USD, and bring max drift of main DCV range down to 4 ppm per year. Standard 3458A unit specified for 8 ppm/year. Only better option is special “HFL” reference option, used before for rare Fluke/HP 3458A/HFL meters, with specified drift no more than 2 ppm/year. That option still available from Keysight on special request.
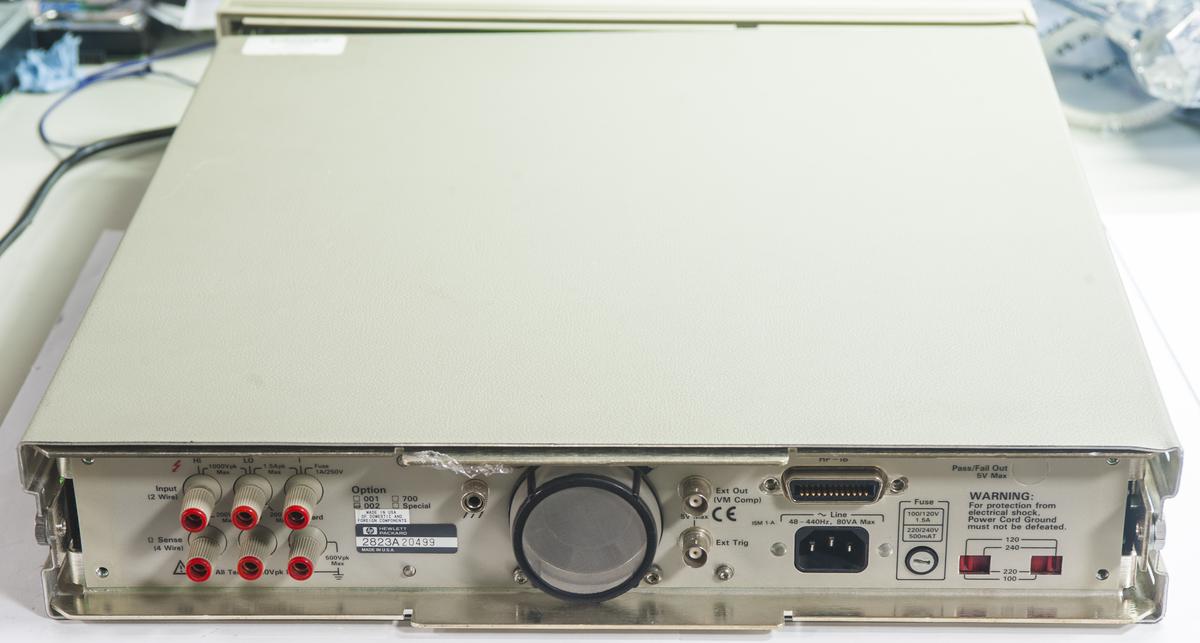
Image 2: Rear panel overview and unit configuration label
Initial inspection did not reveal any electrical damages or obvious burnt parts. Resistance check on transformer connectors also confirmed no problems with windings.
Meter was configured for 120 VAC mains voltage, and initial power performed on first test.
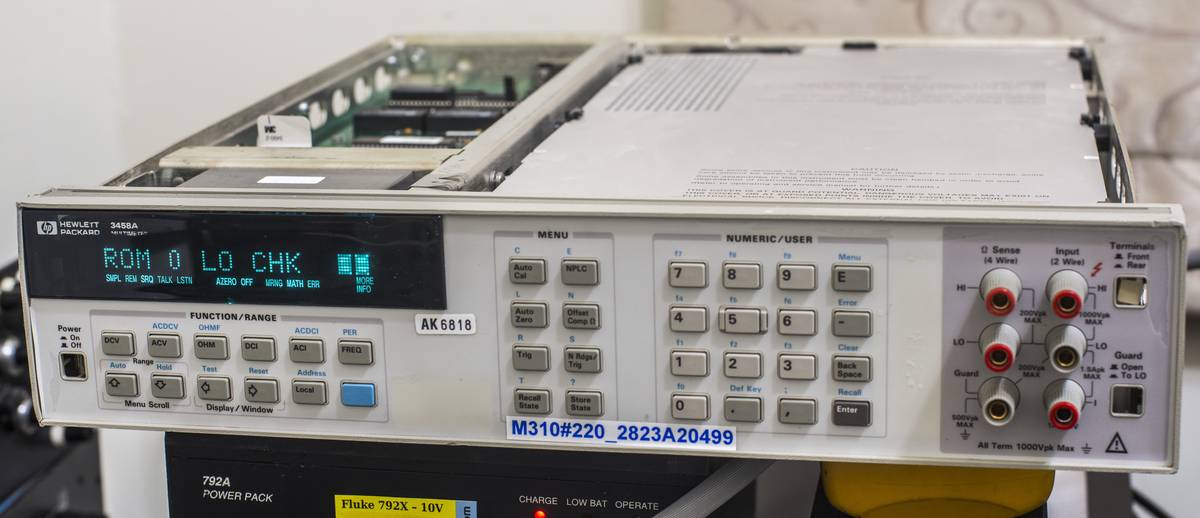
Image 2: First issue with HP 3458A multimeter. CHK means checksum, suggesting that ROM 0 LO is corrupt.
This
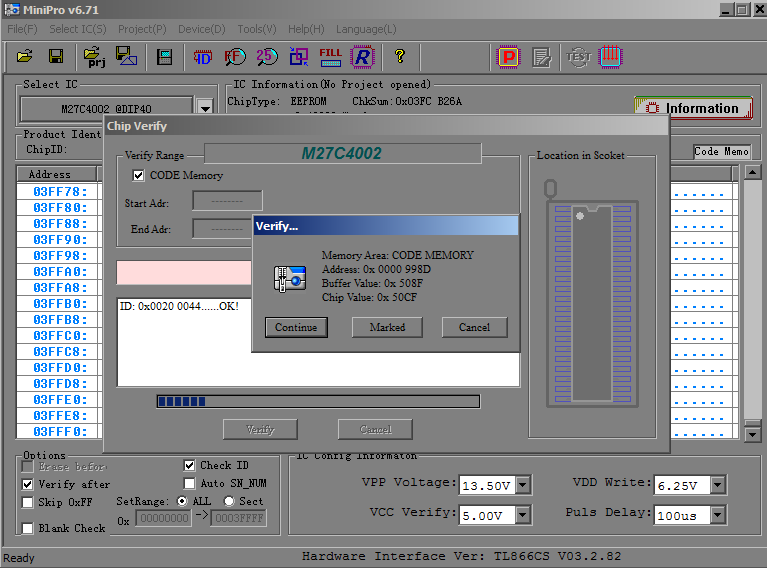
Image 2: Rear panel
Image 2: Rear panel
Take a look on that sick box. Understanding is beyond me, how these precision very specialized instruments can end up in shape like this.
Rear side is okay, nothing bad there, except obvious sign of missing A5 Outguard board with GPIB connector.
lastic front panel is literally torn in pieces, just like some angry hulk was hungry. Front panel terminals did not survive the abuse, so that’s a $229 USD right there, if one decide to replace the damaged terminals (Keysight P/N 03458-62111).
Rear terminals are OK, and they are exactly same part as one used in front. So I will move terminal block from rear to front, and use another solution on the rear side. More details to come later in the article about this.
Key rubber pads are not held in place correctly, perhaps due to front panel plastic damage?
FP PCBA is there at least, we can see a VFD glass thru the scratched front panel window.
Panel plastic is definately going to be replaced. During disassembly it was literally falling apart.
And now it’s clear why rubber keypads were not in place. Every single FP PCBA locking notch is broken. That is the result of front face impact. Perhaps someone dropped unit on its front face? I’m afraid fragile VFD glass is broken.
But VFD glass looks okay! Will see if it’s fully functional after power up with donor A5 digital board.
Day 2: Verification after initial calibration adjustment
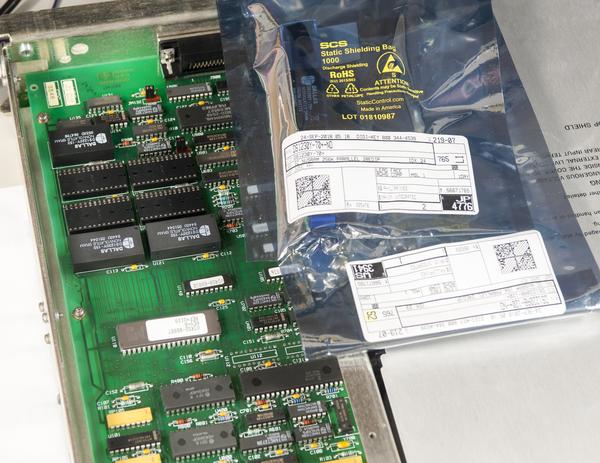
Outguard controller has arrived and ready for initial check and service. This A5 PCBA is newer to Rev.A from original HP 3458A, manufactured in 1996 with single firmware ST M27C4002 in DIP40 packag ROM chip. This ROM is UV-erasable EPROM, making firmware update relatively easy and possible in field, using regular UVA-UVC lamp and EEPROM-programmer.
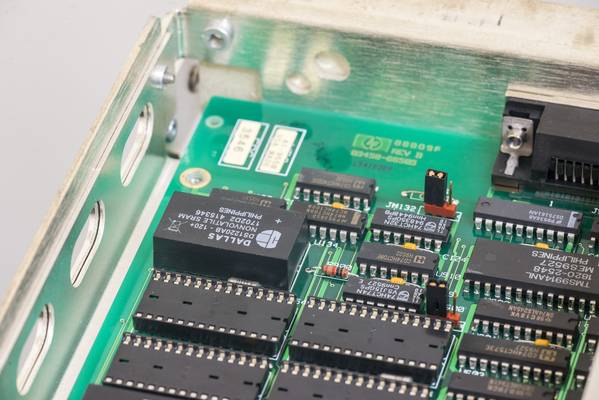
Board P/N is 03458-66505 Rev.B and Engineering Revision tag is 3313. Two-layer PCB made in USA.
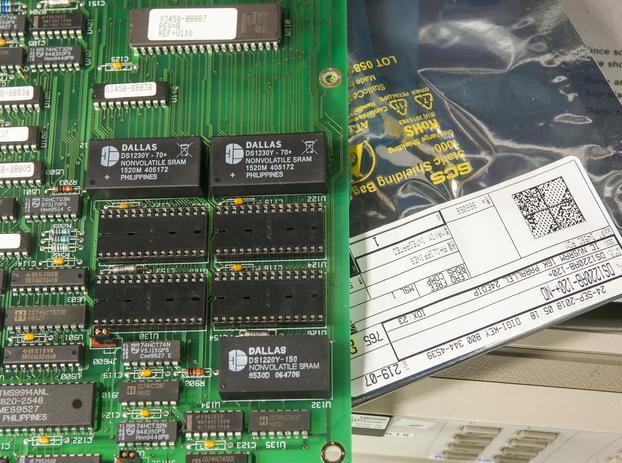
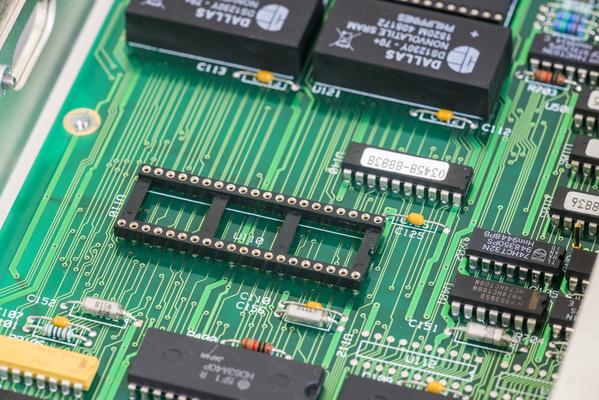
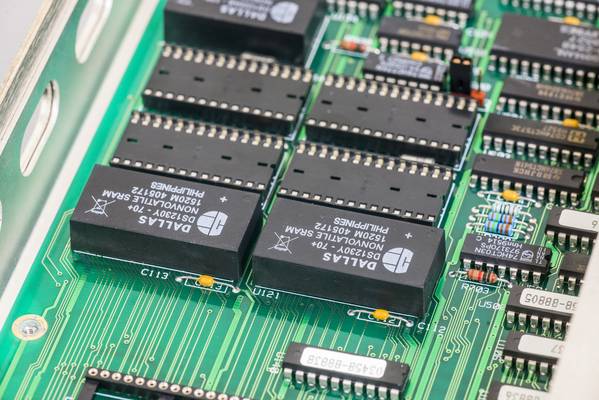
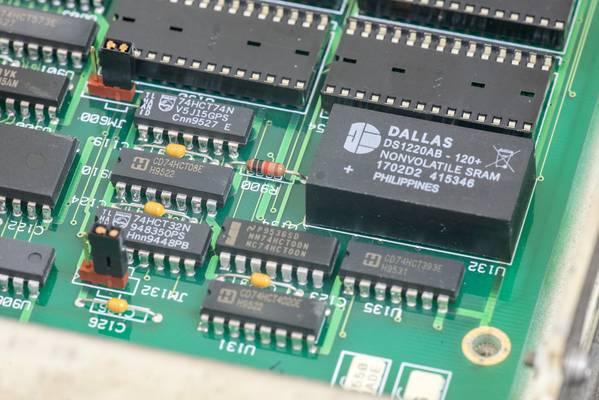
Board came with RAM socket and old 1995-dates Dallas chips, so those are to be removed and replaced with good quality collet sockets, to install fresh new Dallas NVRAMs. RAM on this board formed by pair non-volatile Dallas (today it’s MAXIM) DS1230, high and low bytes separately. If these NVRAM become bad, meter during power-on self-test will throw error RAM TEST 1 LOW or RAM TEST 1 HIGH depends on which IC died and lockup further operation.
No bodges or issues on bottom side of the board, overall pretty clean.
New DS1230AB and DS1220 installed in sockets, ready for test. I programmed DS1220 with calibration dump from my good 3458A, so I could test operation of this A5 without losing calibration. Digital boards in 3458A can have different revisions and firmware versions, and calibration can be transferred intact, just make sure calibration DS1220 ROM is transferred between boards.
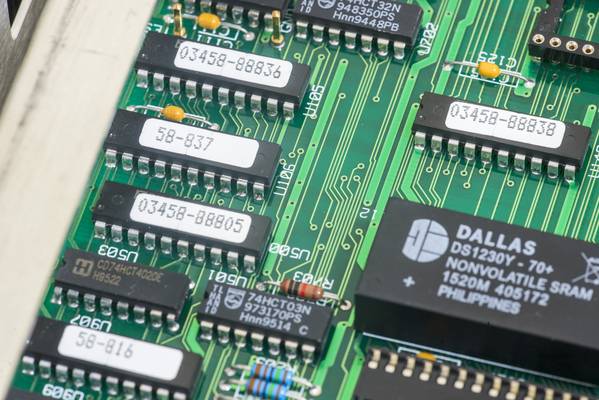
Original firmware on meter’s A5 board Rev 8. I will update it later to latest Rev.9. Here is collection of firmware ROM dumps for reference:
Firmware ROM dumps for HP/Agilent/Keysight 3458A, read by general purpose ROM programmer. I used TL866CS from eBay to work with firmware ROMs. From information we have, firmware dumps are compatible with all hardware versions.
| ROM | Revision 2 | Revision 4.6 | Revision 6 | Revision 7 (1992) | Revision 8 (1998) | Revision 9 (latest) |
|---|---|---|---|---|---|---|
| U110 | 03458-88820 | 03458-88840 | 03458-88860 | 03458-88870 | 03458-88880 | 03458-88890 |
| U111 | 03458-88821 | 03458-88841 | 03458-88861 | 03458-88871 | 03458-88881 | 03458-88891 |
| U112 | 03458-88822 | 03458-88842 | 03458-88862 | 03458-88872 | 03458-88882 | 03458-88892 |
| U113 | 03458-88823 | 03458-88843 | 03458-88863 | 03458-88873 | 03458-88883 | 03458-88893 |
| U114 | 03458-88824 | 03458-88844 | 03458-88864 | 03458-88874 | 03458-88884 | 03458-88894 |
| U115 | 03458-88825 | 03458-88845 | 03458-88865 | 03458-88875 | 03458-88885 | 03458-88895 |
| 03458-88877 | 03458-88887 Single ROM |
Table 3: Firmware ROM dumps
Board installed in good 3458A revealed no problems, everything works as expected, including GPIB interface. And to confirm that calibration is not lost or changed, here’s quick GPIB datalog chart, showing LTZ1000 module readout.
Reading is within ±0.2ppm from original value, prior to A5 board swap.
Since I already installed this fresh A5 in my good meter, I decided to keep it there, so no other hidden issues would arise, while this second sick 3458A will get it’s old A5. There is no functional difference, as both boards running now same Rev.9 firmware.
Day 3: DC 10VDC test with reference input
As high voltage AC path has incorrect reading, let’s check input HV AC attenuator operation. Schematics fragment from CLIP will be a great help on this.
First suspects are U201, which is DG211 analog switch, low leakage protection JFETs and zeners Q202,Q203,CR203,CR204 and attenuation network resistors R204,R205,R206,R207,R208,R209.
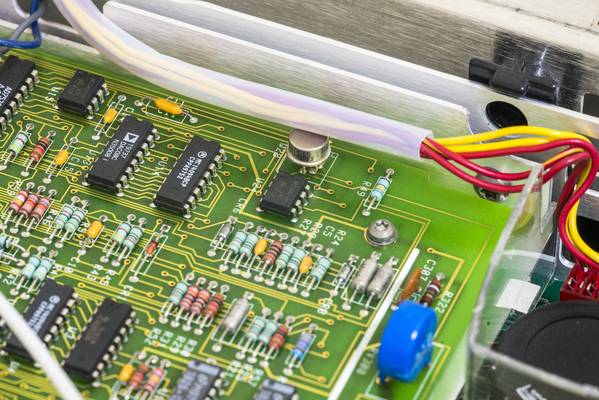
Measurement of ADC references, which are derived by Linear LT1001 opamps and resistor network inside custom HP ASIC U180, which is famous for main cause of A/D failures and excessive drift.
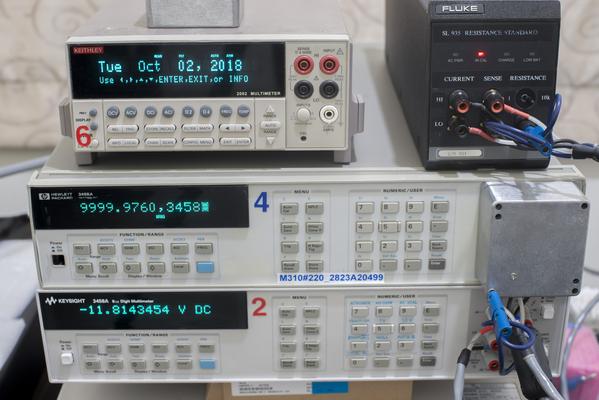
Here’s result taken by Keithley 2002 with scanner card and F732B as 10V cross-check reference.
No need further comments, U180 is dead. These +5, -12, +12 should be fixed ratio of main 7V output of LTZ1000A module A9, but due to bad resistors inside U180 hybrid, we can see large drifts over just few hours of time.
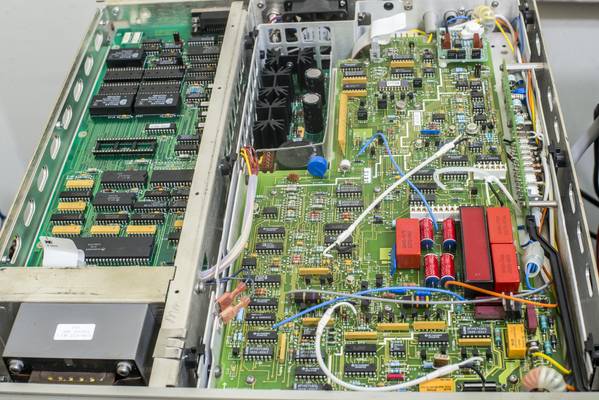
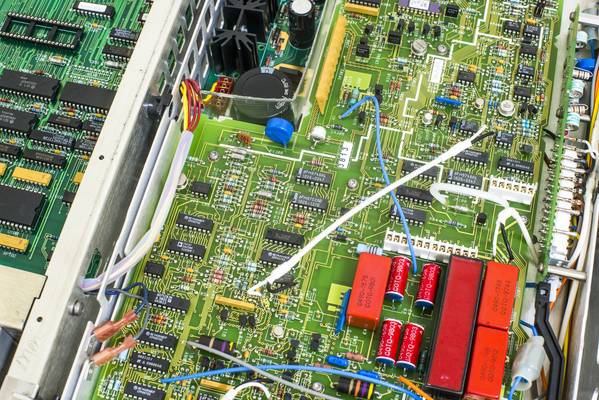
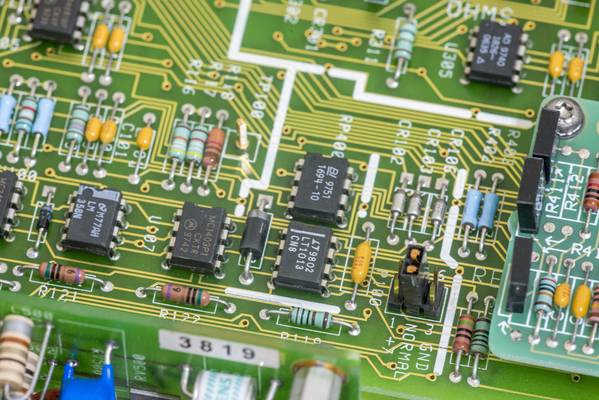
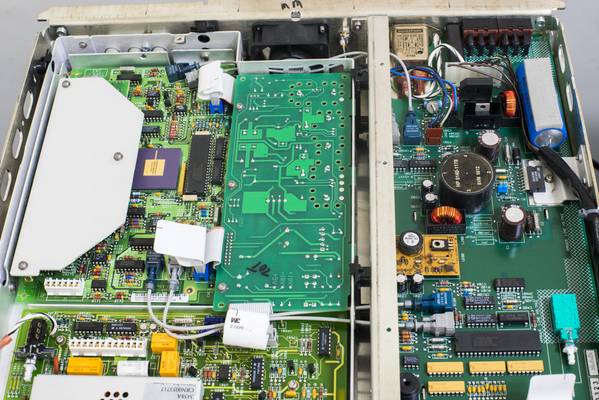
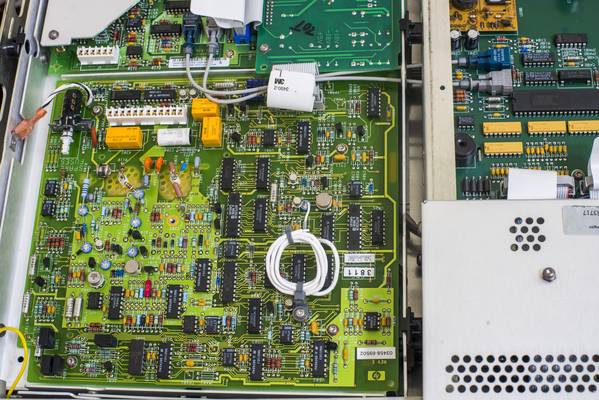
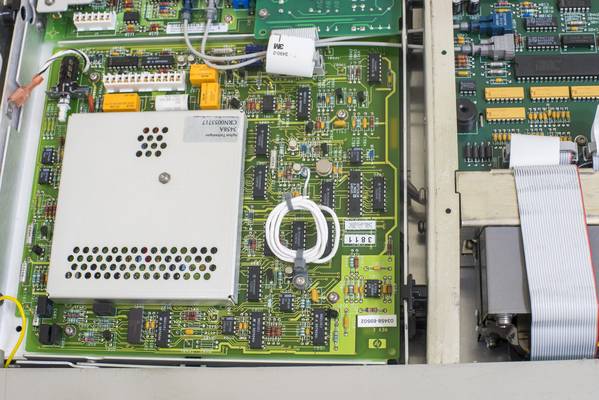
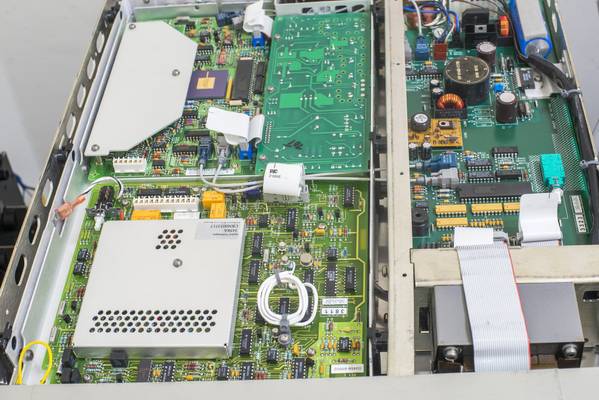
Also few extra photos were taken.
A4 PCBA:
Now we need to repeat all that “find-good-A3” quest once again. Anyone still believe it’s possible to get good working 3458A on eBay under 3000-4000$ USD? Cost of A/D PCBA from Keysight service center is around $1550 USD, if reminder is required.
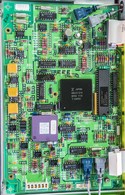
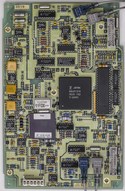
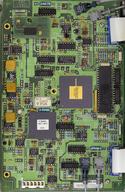
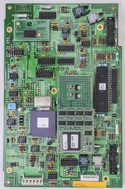
After several weeks of wait, brand new replacement A3 finally arrived. There are multiple revisions of A3 board assembly in 3458A units over its 28 years of lifetime.
Table 4: A3 PCB versions
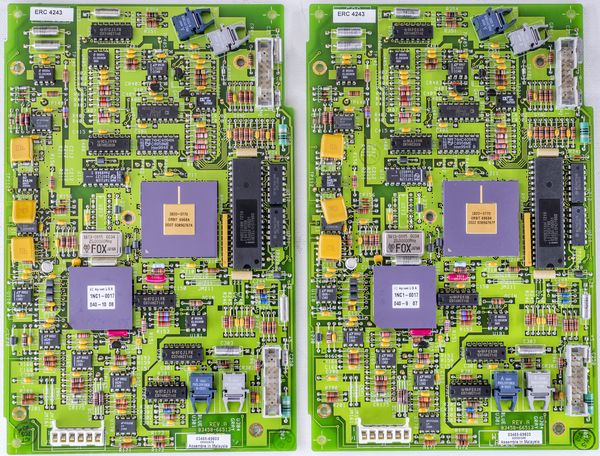
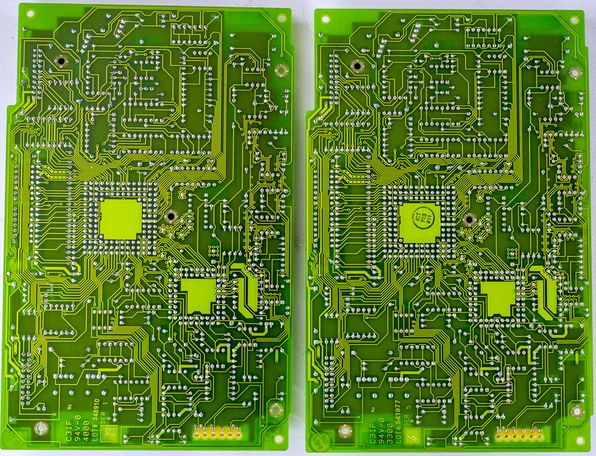
It’s very recent, according to date codes on ICs made in week 16 year 2016, with most of opamps and logic ICs made in 2015. As Keysight running into more and more difficulties to replace old obsolete parts, they were forced to design patch PCB with P/N 03458-26550 with ALTERA CPLD (RTL code 03458-85550) to replace gate array ASIC with digital logic of A/D converter.
Soldering points around patch boards is still covered in flux and has solder bits, so it’s bit how-ya-doing job there. There is also visible flux around integrating capacitor, perhaps it was selected and replaced after board was originally assembled?
Since used MAX V CPLD is not a direct replacement, without support of 5V logic level, array of Texas Instruments SN74LVC8T245 8-Bit Dual-Supply Bus Transceivers used to interface main A3 PCB signals. There are also two LDOs in center, U11 and U12 with bunch of 0402 and 1210 caps around for decoupling. Three LEDs LD1/LD2/LD3 used for status reporting and unpopulated 6-pin 2.54mm spaced header is likely CPLD JTAG port for ISP.
Another patch PCB 03458-66530 is installed to replace obsolete Elantec EL2018CN fast ±15V comparator.
Let’s see if this ADC board is good, as it came untested without any warranty. To do this I’ll run test covered in Service Note SN18 which compares ADC A3 stability versus A9 LTZ1000 reference, assuming later one is good and stable. A week or so of data would be sufficient to tell the initial result.
Days 4-10: SN18 ADC stability test, 3458 “C” unit
So far initial test revealed no problem, let’s proceed with quick calibration to Fluke 732B 10V DC standard by executing CAL 10.000000 command and repeat same test, together with datalog of 10V. This will let us to see stability with DC signal applied on 10VDC range.
| Date/time | Meter temperature | CAL? 72 | CAL? 1,1 | CAL? 2,1 | Deviation, ppm |
|---|---|---|---|---|---|
| OCT.03.2018 12:50, Initial CAL | 36.7 | 985.444618E-03 | 39.9998362E+03 | 7.09842204 | |
| OCT.04.2018 11:20 | 35.9 | 985.429852E-03 | 39.9998362E+03 | 7.09841741 | |
| OCT.04.2018 03:50, Refine CAL | 36.9 | 985.429610E-03 A | 39.9997625E+03 | 7.09842447 | Reference, 0.00 |
| OCT.05.2018 06:44 | 34.7 | 985.425128E-03 | -4.54 (-4.54) | ||
| OCT.06.2018 11:20 | 36.3 | 985.422173E-03 | -2.99 (-7.55) | ||
| OCT.07.2018 11:03 | 35.5 | 985.419786E-03 | -2.42 (-9.96) | ||
| OCT.08.2018 05:10 | 33.7 | 985.413456E-03 | 7.09841499 (-0.34 ppm) | -6.42 (-16.39) | |
| OCT.10.2018 14:36 | 36.5 | 985.400617E-03 B | -13.02 (-29.42) | ||
| NOV.11.2018 07:36 | 37.8 | 985.023950E-03 | |||
| NOV.11.2018 22:17 | 38.1 | 985.024018E-03 | |||
| NOV.12.2018 08:46 | 37.9 | 985.024036E-03 | |||
| NOV.12.2018 20:20 | 38.1 | 985.024159E-03 | |||
| NOV.12.2018 20:53 | 38.1 | 985.024177E-03 | |||
| NOV.13.2018 06:59 | 37.7 | 985.024186E-03 | |||
| NOV.13.2018 07:26 | 37.7 | 985.024355E-03 | |||
| NOV.13.2018 17:24 | 37.8 | 985.024314E-03 | |||
| NOV.13.2018 21:15 | 37.4 | 985.024399E-03 | |||
| NOV.14.2018 08:21 | 37.4 | 985.024508E-03 | |||
| NOV.14.2018 12:44 | 37.3 | 985.024480E-03 | |||
| NOV.15.2018 07:36 | 37.4 | 985.024509E-03 | |||
| NOV.15.2018 14:53 | 37.5 | 985.024469E-03 | |||
| NOV.15.2018 19:12 | 37.6 | 985.024450E-03 | |||
| NOV.16.2018 10:02 | 37.4 | 985.024447E-03 | |||
| NOV.17.2018 08:40 | 37.3 | 985.024525E-03 | |||
| NOV.17.2018 21:57 | 37.5 | 985.024442E-03 | |||
| NOV.18.2018 07:57 | 37.8 | 985.024409E-03 | |||
| NOV.18.2018 18:59 | 37.9 | 985.024326E-03 | |||
| NOV.19.2018 09:17, External CAL | 35.9 (Ambient +23 °C) | 985.024079E-03 C | 39.99998608E+03 (+2.5 ppm) | 7.09840903 (-0.8 ppm) | Reference C |
| NOV.20.2018 00:25 | 985.022906E-03 | ||||
| NOV.20.2018 00:33 | 985.022415E-03 | ||||
| NOV.20.2018 00:36 | 985.022368E-03 | ||||
| NOV.20.2018 01:12 | 985.022302E-03 | ||||
| NOV.20.2018 21:12 | 36.1 | 985.021419E-03 | |||
| NOV.21.2018 12:36 | 36.2 | 985.021287E-03 | |||
| NOV.22.2018 22:11 | 36.6 | 985.020223E-03 | |||
| NOV.22.2018 22:11 | 32.4 | 985.021089E-03 | |||
| NOV.23.2018 04:19 | 32.4 | 985.021117E-03 | |||
| NOV.25.2018 22:11 | 37.3 | 985.016636E-03 | |||
| NOV.30.2018 04:19 | 35.9 | 985.006321E-03 | |||
| DEC.02.2018 02:42 | 39.8 (slower fan) | 984.999454E-03 | |||
| DEC.03.2018 14:28 | 40.1 | 984.995187E-03 | |||
| JAN.21.2019, CAL | 35.0 | 986.247929E-03 D | 39.99998570E+03 (-0.01 ppm) | 7.09843516 (+3.68 ppm) | Reference D |
| JAN.22.2019 | 40.7 | 986.249791E-03 | |||
| JAN.23.2019 | 40.2 | 986.249026E-03 | |||
| JAN.24.2019 | 40.2 | 986.249851E-03 | |||
| JAN.25.2019 | 39.2 | 986.249432E-03 | |||
| JAN.26.2019 | 38.4 | 986.249500E-03 | |||
| JAN.28.2019 | 41.4 | 986.247580E-03 | |||
| JAN.31.2019 | 44.2 | 986.244314E-03 | |||
| FEB.02.2019 | 42.3 | 986.244514E-03 | |||
| FEB.24.2019 | 42.0 | 986.244196E-03 | |||
| FEB.25.2019 | 41.6 | 986.244331E-03 | |||
| FEB.26.2019 | 39.3 | 986.244438E-03 | |||
| FEB.28.2019 | 46.1 | 986.244037E-03 | |||
| MAR.01.2019 | 40.2 | 986.244429E-03 | |||
| MAR.05.2019 | 40.2 | 986.244097E-03 | |||
| MAR.09.2019 | 40.6 | 986.243971E-03 | |||
| MAR.16.2019 | 39.9 | 986.244208E-03 | |||
| MAR.17.2019 | 40.5 | 986.244396E-03 | |||
| MAR.18.2019 | 41.0 | 986.244386E-03 | |||
| MAR.20.2019 | 40.8 | 986.244206E-03 | |||
| MAR.21.2019 | 41.6 | 986.244336E-03 | |||
| MAR.22.2019 | 41.0 | 986.244141E-03 | |||
| MAR.24.2019 | 46.2 | 986.243825E-03 | |||
| MAR.25.2019 | 43.5 | 986.244268E-03 | |||
| MAR.26.2019 | 40.6 | 986.244255E-03 | |||
| MAR.31.2019 | 39.7 | 986.244514E-03 | |||
| APR.01.2019 | 40.1 | 986.244691E-03 |
Table 6: Post-calibration SN18-stability check
Overall A/D drift rate result per Service Note 18 is C = [(A – B) * 1000000] / [A * 7 days] formula = -0.0110 ppm, which is well within 0.43 ppm requirement. If this rate is greater than 0.43 ppm/day, then the A3 assembly needs to be replaced.
There is no much repair possible on drifty A3 boards. This is also confirmed by many 3458A owner reports, since usually root cause of excessive drift/integration errors is faulty U180 custom hybrid chip, which is not repairable. Last year I’ve spend more than 200 hours, trying different things to get A3 working in my first 3458A with no avail. Final solution was replacement of A3 PCBA altogether.
If you change the oven temperature, you will lose the calibration, as the LTZ1000A will change its reference voltage, invalidating previous calibration constants.
Additional resistor has to be high-stability and low tempco type, to ensure that temperature set-point does not drift over time. Vishay Precision Group VAR Z-foil 100 KΩ with specified maximum TCR ±2 ppm/°C resistor satisfy requirements well. Resistor temperature coefficient must be no more than 3ppm/°C. Still most of error comes from original 15 KΩ metal foil resistor, so there is no need for ultra-stable 0.2 ppm/°C resistors unless original one is replaced too. Retail price for VAR BMF resistor range in $USD 15-30 mark, depends on tolerance, value and order quantity required.
Here are few photos of modified LTZ1000 reference, A9 PCBA with 95 KΩ in our first 3458A:
And this second unit A9 module, modified same way but with VAR 100KΩ resistor instead:
Now after modification unit was assembled and warmed up few hours to perform stability test once again. No problems revealed at this stage.
Days 4-10: SN18 ADC stability test, 3458 “D” unit
So far initial test revealed no problem, let’s proceed with quick calibration to Fluke 732B 10V DC standard by executing CAL 10.000000 command and repeat same test, together with datalog of 10V. This will let us to see stability with DC signal applied on 10VDC range.
| Date/time | Meter temperature | CAL? 72 | CAL? 1,1 | CAL? 2,1 | Deviation, ppm |
|---|---|---|---|---|---|
| DEC.03.2018 22:24, External CAL | 30.9 (Ambient +25 °C) | 989.593369E-03 A | DNT | 7.11895458 | Reference A |
| DEC.04.2018 23:53 | 28.6 | 989.593950E-03 | |||
| DEC.05.2018 00:33 | 33.1 | 989.593576E-03 | |||
| DEC.05.2018 16:22 | 32.9 | 989.593544E-03 | |||
| DEC.06.2018 10:03 | 33.0 | 989.593671E-03 | |||
| DEC.10.2018 03:42 | 35.7 | 989.593393E-03 | |||
| DEC.11.2018 14:26 | 36.1 | 989.593298E-03 | |||
| DEC.17.2018 15:36 | 33.4 | 989.594197E-03 | |||
| DEC.18.2018 22:12 | 33.0 | 989.594147E-03 | |||
| DEC.19.2018 12:11 | 35.3 | 989.594161E-03 | |||
| DEC.21.2018 16:29 | 39.9 | 989.593905E-03 | |||
| DEC.22.2018 20:08 | 37.7 | 989.594236E-03 | |||
| DEC.23.2018 | 34.6 | 989.594633E-03 | |||
| DEC.27.2018 | 35.2 | 989.595136E-03 | |||
| DEC.28.2018 | 32.8 | 989.595281E-03 | |||
| DEC.29.2018 | 33.2 | 989.595169E-03 | |||
| DEC.30.2018 | 32.0 | 989.595570E-03 | |||
| DEC.31.2018 | 32.9 | 989.595608E-03 | |||
| JAN.02.2019 | 34.6 | 989.595746E-03 | |||
| JAN.08.2019 EXT.CAL | 35.7 | 989.596531E-03 B | 39.9984168E+03 | 7.11894911 (-0.77 ppm) | Reference B |
| JAN.12.2019 | 35.9 | 989.597048E-03 | |||
| JAN.14.2019 | 35.6 | 989.597178E-03 | |||
| JAN.15.2019 | 35.3 | 989.597509E-03 | |||
| JAN.16.2019 | 33.7 | 989.597870E-03 | |||
| JAN.18.2019 | 33.5 | 989.598251E-03 | |||
| JAN.21.2019 | 34.1 | 989.598469E-03 | |||
| JAN.22.2019 | 32.5 | 989.598855E-03 | |||
| JAN.22.2019 | 32.4 | 989.598861E-03 | |||
| JAN.23.2019 | 34.0 | 989.598815E-03 | |||
| JAN.23.2019 | 32.9 | 989.598983E-03 | |||
| JAN.24.2019 | 33.2 | 989.598984E-03 | |||
| JAN.25.2019 | 34.6 | 989.599019E-03 | |||
| JAN.26.2019 | 32.9 | 989.599323E-03 | |||
| JAN.28.2019 | 34.0 | 989.599428E-03 | |||
| JAN.31.2019 | 37.5 | 989.599654E-03 | |||
| FEB.02.2019 | 35.9 | 989.599901E-03 | |||
| FEB.19.2019 10V CAL | 33.1 | 989.599523E-03 | Same | 7.11892924 (-2.79 ppm) | Reference C |
| FEB.21.2019 | 31.8 | 989.599913E-03 | |||
| FEB.24.2019 | 34.4 | 989.600210E-03 | |||
| FEB.25.2019 | 34.4 | 989.600289E-03 | |||
| FEB.26.2019 | 32.2 | 989.600619E-03 | |||
| FEB.28.2019 | 39.4 | 989.600299E-03 | |||
| FEB.28.2019 | 33.7 | 989.600895E-03 | |||
| MAR.01.2019 | 33.3 | 989.600957E-03 | |||
| MAR.05.2019 | 34.8 | 989.601436E-03 | |||
| MAR.08.2019 | 32.8 | 989.602137E-03 | |||
| MAR.09.2019 | 33.3 | 989.602165E-03 | |||
| MAR.15.2019 | 32.9 | 989.602448E-03 | |||
| MAR.16.2019 | 33.4 | 989.603229E-03 | |||
| MAR.17.2019 | 34.6 | 989.603382E-03 | |||
| MAR.18.2019 | 34.8 | 989.603393E-03 | |||
| MAR.18.2019 | 34.6 | 989.603488E-03 | |||
| MAR.20.2019 | 34.5 | 989.603806E-03 | |||
| MAR.21.2019 | 35.2 | 989.603839E-03 | |||
| MAR.22.2019 | 34.4 | 989.603960E-03 | |||
| MAR.24.2019 | 39.5 | 989.603610E-03 | |||
| MAR.25.2019 | 36.2 | 989.604209E-03 | |||
| MAR.26.2019 | 34.3 | 989.604434E-03 | |||
| MAR.31.2019 | 32.7 | 989.605288E-03 | |||
| APR.01.2019 10V CAL | 33.2 | 989.607167E-03 | Same | 7.11894140 | Reference D |
https://xdevs.com/3458d_test1/
Days 4-10: SN18 ADC stability test
Now as we have unit functioning, it’s vital to determine if there is hidden drift over long-term period. And there is no workaround but to actually connect very stable source, such as +10 VDC ovenized DC reference, in this case mighty Fluke 732B and log data over extended period of time, such as week or two. By monitoring deviation and temperature, one can reveal drift component of measured voltage. It’s also important to keep stable environment conditions, such as air temperature/humidity to reduce error from these condition variations.
To draw a conclusion regarding new A3/meter stability next set of targets should be achieved:
- Voltage need to be stable within ±0.1 ppm window over 10 minutes of constant TEMP? PASS
- Stable within ±0.275 ppm window over 24 hour of constant TEMP? %{color:#008800}PASS, 0.2 ppm
- Stable within ±0.7 ppm window over 7 days of constant TEMP? %{color:#008800}PASS, 0.43 ppm
- Change less than ±0.5 ppm with TEMP? change 5°C PASS
- Stable within ±1.0 ppm window over 14 days of constant TEMP? PASS
Day 150+: ADC replacement
Both 3458 “C” and “D” units received A3 board swap. Here’s updated SN18 data on both boards.
Day 11: Calibration adjustment prior to final test
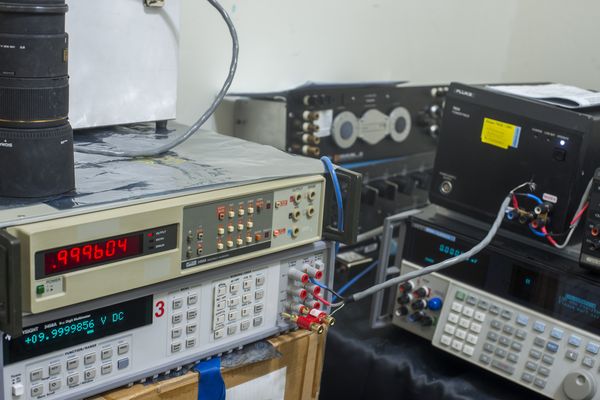
After stability check next step in repair is calibration adjustment and accuracy testing against know external references. Due to very tight specification for HP 3458A finding “good enough” is often a mighty challenge. However, this time opportunity to access stable and well aged Fluke 5700A and calibrated Fluke 732B & ESI SR104 standards was exploited. “Exploit” is correct word here, because meter was located in remote lab for few weeks, with wiring connected between 5700A and our DUT 3458A for days without interferences. Both instruments controlled by Raspberry Pi 3B via GPIB with “linux-gpib and NI GPIB-USB-HS pod”. Environment conditions were logged from “Bosch BME280 THP sensor”.
All equipment was left to warm up and stabilize few days before actual tests ran. Calibration was performed following guidelines in “HP 3458A Calibration manual”. Recently calibrated and well cared DC Standard Fluke 732B was used to execute DC gain calibration, ESI SR104 used for 10 KΩ adjustment, and setup with HP 3325A, Ballatine 1384 3V and 1V thermal converters with nanovoltmeter HP/Agilent/Keysight 34420A.
Day 13: Final calibration tests and report
Main DCV function performance test
Automated procedure on python linux-gpib application was used to perform verification of key multimeter functions.
Freshly calibrated and adjusted Fluke 5700A multifunction calibrator was used to perform a test. Both source and DUT 3458A multimeter were adjusted using manufacturer recommended procedures from service manuals.
Used standards in both adjustment and tests:
- Resistance standard IET SRL-1, Nominal 1 Ω, calibrated value 0.99997505 Ω, ± 0.17 ppm, Date 08/18/2016, due 08/18/2017
- Resistance standard ESI SR104, Nominal 10000 Ω, calibrated value 10000.0505 Ω, ± 0.17 ppm, Date 08/18/2016, due 08/18/2017
- Resistance standard xDevs.com, Nominal 1 GΩ, calibrated value 1.0015552 GΩ, ± 3800 ppm, Date 08/23/2016, due 08/23/2017
- Voltage standard Fluke 732B (#3), Nominal 10 VDC;, calibrated value 9.9999323 VDC, ± 0.56 ppm, age rate -0.000788 ppm/day, Date 08/23/2016, due 08/23/2017
- Signal Generator HP 3325B
This test however is NOT traceable calibration report and cannot be used as such for any legal purposes, it is mere indicator of equipment agreement, using these particular samples. Do not assume that measurement is correct just because meter and source are in agreement, account for uncertainty and all possible error sources. Refer to A Beginner’s Guide to Uncertainty of Measurement from NPL for better introduction on these aspects.
https://xdevs.com/hp3458c_comp1/
DMM settings used for DCV test are:
PRESET NORM
TARM HOLD
TRIG SGL
OFORMAT ASCII
AZERO ON
NRDGS 1,AUTO
MEM OFF
END ALWAYS
NDIG 9
NPLC 100
DELAY 0
DCV 1
Front terminals
For each test equipment was interconnected using Fluke recommended low-thermal cables, as per HP 3458A calibration manual. Calibrator was artifact-calibrated to SRL-1, SR104 and 732B, while 3458A was calibrated with SR104 and 732B.
| DCV -FS/FS | Reference | 3458B | Source unc. | Low Limit | Hi limit | Measured | 24hr | Result |
|---|---|---|---|---|---|---|---|---|
| 0.1 VDC | 0.100000 | 0.09999962 | 3.81 ppm | 0.099999069 | 0.100000931 | -3.75 ppm | 5.5 ppm | PASS 40.31 % |
| -0.1 VDC | -0.100000 | -0.09999991 | 3.81 ppm | -0.100000931 | -0.099999069 | -0.92 ppm | 5.5 ppm | PASS 9.94 % |
| 1.0 VDC | 1.000000 | 1.00000007 | 2.45 ppm | 0.99999575 | 1.00000425 | 0.06 ppm | 1.8 ppm | PASS 1.62 % |
| -1.0 VDC | -1.000000 | -1.00000003 | 2.45 ppm | -1.00000425 | -0.99999575 | 0.03 ppm | 1.8 ppm | PASS 0.71 % |
| 10 VDC | 10.000000 | 9.99999840 | 1.47 ppm | 9.9999798 | 10.0000202 | -0.16 ppm | 0.55 ppm | PASS 7.91 % |
| -10 VDC | -10.000000 | -9.99999754 | 1.47 ppm | -10.0000202 | -9.9999798 | -0.24 ppm | 0.55 ppm | PASS 12.19 % |
| 100 VDC | 100.000000 | 99.99996600 | 2.36 ppm | 99.999484 | 100.000516 | -0.34 ppm | 2.8 ppm | PASS 6.59 % |
| -100 VDC | -100.000000 | -99.99994760 | 2.36 ppm | -100.000516 | -99.999484 | -0.52 ppm | 2.8 ppm | PASS 10.16 % |
| 1000 VDC | 1000.000000 | 999.99982480 | 2.85 ppm | 999.98255 | 1000.01745 | -0.17 ppm | 2.6 ppm | PASS 1.00 % |
| -1000 VDC | -1000.000000 | -1000.00069300 | 2.85 ppm | -999.99345 | -1000.00655 | 0.69 ppm | 2.6 ppm | PASS 10.58 % |
Additional test of DCV linearity cross check between used source calibrator and 3458A, both on fixed 11V range.
| DCV Linearity | 10V Range | 3458B | Source unc. | Low Limit | Hi limit | Measured | 24hr | Result |
|---|---|---|---|---|---|---|---|---|
| 10.9999999 | 10.99999990 | 10.99999866 | 1.47 ppm | 10.999977680 | 11.000022120 | -0.113 ppm | 0.55 ppm | PASS 5.58 % |
| 9.999999 | 9.99999900 | 9.99999782 | 1.47 ppm | 9.999978800 | 10.000019200 | -0.118 ppm | 0.55 ppm | PASS 5.82 % |
| 8.888888 | 8.88888800 | 8.88888750 | 1.47 ppm | 8.888870044 | 8.888905956 | -0.057 ppm | 0.55 ppm | PASS 2.81 % |
| 7.777777 | 7.77777700 | 7.77777699 | 1.47 ppm | 7.777761289 | 7.777792711 | -0.001 ppm | 0.55 ppm | PASS 0.04 % |
| 6.666666 | 6.66666600 | 6.66666582 | 1.47 ppm | 6.666652533 | 6.666679467 | -0.026 ppm | 0.55 ppm | PASS 1.31 % |
| 5.555555 | 5.55555500 | 5.55555506 | 1.47 ppm | 5.555543778 | 5.555566222 | 0.010 ppm | 0.55 ppm | PASS 0.52 % |
| 4.444444 | 4.44444400 | 4.44444457 | 1.47 ppm | 4.444435022 | 4.444452978 | 0.129 ppm | 0.55 ppm | PASS 6.37 % |
| 3.333333 | 3.33333300 | 3.33333365 | 1.47 ppm | 3.333326267 | 3.333339733 | 0.195 ppm | 0.55 ppm | PASS 9.64 % |
| 2.222222 | 2.22222200 | 2.22222253 | 1.47 ppm | 2.222217511 | 2.222226489 | 0.240 ppm | 0.55 ppm | PASS 11.87 % |
| 1.111111 | 1.11111100 | 1.11111116 | 2.45 ppm | 1.111107667 | 1.111114333 | 0.141 ppm | 0.55 ppm | PASS 4.71 % |
| 0.123456789 | 0.12345679 | 0.12345642 | 9.91 ppm | 0.123455498 | 0.123458080 | -3.027 ppm | 0.55 ppm | PASS 28.94 % |
| -0.123456789 | -0.12345679 | -0.12345664 | 9.91 ppm | -0.123458080 | -0.123455498 | -1.243 ppm | 0.55 ppm | PASS 11.88 % |
| -1.111111 | -1.11111100 | -1.11111106 | 2.45 ppm | -1.111114333 | -1.111107667 | 0.058 ppm | 0.55 ppm | PASS 1.92 % |
| -2.222222 | -2.22222200 | -2.22222184 | 1.47 ppm | -2.222226489 | -2.222217511 | -0.070 ppm | 0.55 ppm | PASS 3.48 % |
| -3.333333 | -3.33333300 | -3.33333249 | 1.47 ppm | -3.333339733 | -3.333326267 | -0.154 ppm | 0.55 ppm | PASS 7.60 % |
| -4.444444 | -4.44444400 | -4.44444327 | 1.47 ppm | -4.444452978 | -4.444435022 | -0.164 ppm | 0.55 ppm | PASS 8.12 % |
| -5.555555 | -5.55555500 | -5.55555353 | 1.47 ppm | -5.555566222 | -5.555543778 | -0.265 ppm | 0.55 ppm | PASS 13.11 % |
| -6.666666 | -6.66666600 | -6.66666407 | 1.47 ppm | -6.666679467 | -6.666652533 | -0.290 ppm | 0.55 ppm | PASS 14.35 % |
| -7.777777 | -7.77777700 | -7.77777497 | 1.47 ppm | -7.777792711 | -7.777761289 | -0.261 ppm | 0.55 ppm | PASS 12.90 % |
| -8.888888 | -8.88888800 | -8.88888562 | 1.47 ppm | -8.888905956 | -8.888870044 | -0.268 ppm | 0.55 ppm | PASS 13.27 % |
| -9.999999 | -9.99999900 | -9.99999605 | 1.47 ppm | -10.000019200 | -9.999978800 | -0.295 ppm | 0.55 ppm | PASS 14.60 % |
| -10.9999999 | -10.99999990 | -10.99999784 | 1.47 ppm | -11.000022120 | -10.999977680 | -0.187 ppm | 0.55 ppm | PASS 9.27 % |
Resistance 4-wire function performance test
DMM settings used for OHMF test are:
PRESET NORM
TARM HOLD
TRIG SGL
OFORMAT ASCII
AZERO ON
NRDGS 1,AUTO
MEM OFF
END ALWAYS
NDIG 9
OCOMP 1
DELAY 5
NPLC 100
OHMF <resistance_value>
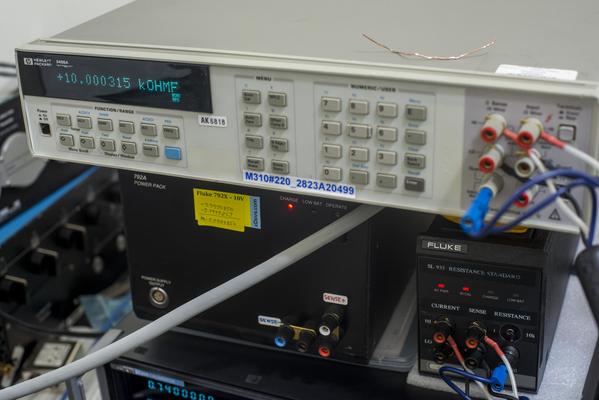
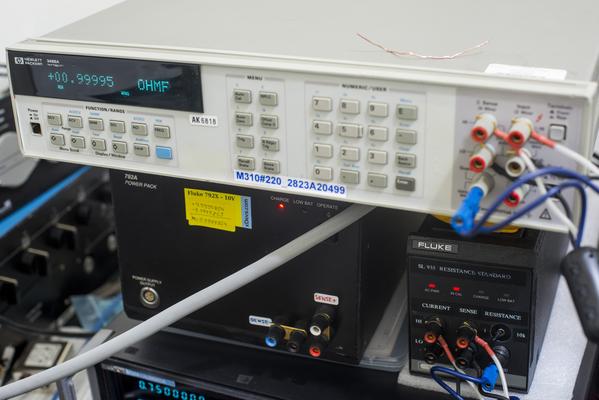
Front terminals, 4-wire connection to 5700A calibrator for ranges 10 Ω to 100 MΩ. 1 GΩ test was performed using separate standard in 2-wire OHM measurement mode, as calibrator cannot source this range.
| OHMF FS | Source value | 3458B | Source unc. | Low Limit | Hi limit | Measured | 24hr | Result |
|---|---|---|---|---|---|---|---|---|
| 1 Ω | 0.99979810 | 0.99979858 | 40.20 ppm | 0.99974990 | 0.99984629 | 0.48 ppm | 8 ppm | PASS 1.00 % |
| 10 Ω | 9.9999070 | 9.9998924 | 8.30 ppm | 9.99974400 | 10.0000699 | -1.46 ppm | 8 ppm | PASS 8.98 % |
| 100 Ω | 100.00163 | 100.00171 | 4.30 ppm | 100.000599 | 100.002660 | 0.84 ppm | 6 ppm | PASS 8.19 % |
| 1.0 kΩ | 0.99999100 k | 999.99132 | 3.30 ppm | 999.985500 | 999.996499 | 0.32 ppm | 2.2 ppm | PASS 5.87 % |
| 10 kΩ | 10.000081 k | 10000.075 | 3.30 ppm | 10000.0259 | 10000.1360 | -0.62 ppm | 2.2 ppm | PASS 11.25 % |
| 100 kΩ | 100.00138 k | 100001.08 | 3.30 ppm | 100000.829 | 100001.930 | -3.01 ppm | 2.2 ppm | PASS 54.80 % |
| 1.0 MΩ | 1.0000025 M | 999996.33 | 5.30 ppm | 999986.199 | 1000018.80 | -6.17 ppm | 11 ppm | PASS 37.86 % |
| 10 MΩ | 9.9994040 M | 9998988.1 | 14.30 ppm | 9998711.04 | 10000096.9 | -41.59 ppm | 55 ppm | PASS 60.02 % |
| 100 MΩ | 100.00913 M | 1.0001333E+08 | 60.30 ppm | 99952094.7 | 100066165 | 42.01 ppm | 510 ppm | PASS 7.37 % |
| 1 GΩ STD | 0.99551672 G | 9.9705412E+08 | 30000.0 ppm | 960663679 | 1030369760 | 1544.33 ppm | 5010 ppm | PASS 4.41 % |
DC Current function performance test
DMM settings used for DCI test are:
PRESET NORM
TARM HOLD
TRIG SGL
OFORMAT ASCII
AZERO ON
NRDGS 1,AUTO
MEM OFF
END ALWAYS
NDIG 9
NPLC 100
DELAY 0
DCI <value>
Front terminals used, AUX output on calibrator.
| DCI Test | 10 µA-1A | 3458B | Source unc. | Low Limit | Hi limit | Measured | 24h spec | Result |
|---|---|---|---|---|---|---|---|---|
| 10 µADC | 1E-05 | 1.0000317E-05 | 71.36 ppm | 9.9991164e-06 | 1.00008836e-05 | 31.6 ppm | 17 ppm | PASS 35.83 % |
| -10 µADC | -1E-05 | -9.9996183E-06 | 71.36 ppm | -1.00008836e-05 | -9.9991164e-06 | -38.1 ppm | 17 ppm | PASS 43.20 % |
| 100 µADC | 0.0001 | 9.9999772E-05 | 71.36 ppm | 9.9991264e-05 | 0.000100008736 | -2.2 ppm | 16 ppm | PASS 2.61 % |
| -100 µADC | -0.0001 | -9.9999499E-05 | 71.36 ppm | -0.000100008736 | -9.9991264e-05 | -5.0 ppm | 16 ppm | PASS 5.73 % |
| 1.0 mADC | 0.001 | 0.00099998491 | 38.63 ppm | 0.00099994737 | 0.00100005263 | -15.1 ppm | 14 ppm | PASS 28.68 % |
| -1.0 mADC | -0.001 | -0.0010000138 | 38.63 ppm | -0.00100005263 | -0.00099994737 | 13.8 ppm | 14 ppm | PASS 26.20 % |
| 10 mADC | 0.01 | 0.0099999641 | 38.63 ppm | 0.0099994737 | 0.0100005263 | -3.6 ppm | 14 ppm | PASS 6.82 % |
| -10 mADC | -0.01 | -0.010000012 | 38.63 ppm | -0.0100005263 | -0.0099994737 | 1.2 ppm | 14 ppm | PASS 2.32 % |
| 100 mADC | 0.1 | 0.099999436 | 48.63 ppm | 0.099992237 | 0.100007763 | -5.6 ppm | 29 ppm | PASS 7.26 % |
| -100 mADC | -0.1 | -0.10000019 | 48.63 ppm | -0.100007763 | -0.099992237 | 1.8 ppm | 29 ppm | PASS 2.39 % |
| 1.0 ADC | 1 | 1.0000164 | 71.36 ppm | 0.99981864 | 1.00018136 | 16.4 ppm | 110 ppm | PASS 9.03 % |
| -1.0 ADC | -1 | -1.0000227 | 71.36 ppm | -1.00018136 | -0.99981864 | 22.7 ppm | 110 ppm | PASS 12.50 % |
Because same artifact standards were used for both 3458A DUT and source calibrator, only relative accuracy specifications can be used for performance test. Properly operating equipment expected to be stable and meet all 24-hour specifications, as whole test suite takes less time. This enabled to perform more difficult performance verification against 24-hour relative specification of the 3458A. All major points passed well under 60% of the specified error, which help to build confidence of proper multimeter operation and accuracy of its artifact calibration.
Temperature stability test
DCV function test, by measuring fixed input voltage and changing ambient temperature around the DMM under test.
| Meter under test | Range/signal | Result |
|---|---|---|
| 3458A REF | 10V, 10V 732B | <0.075 ppm/K, over 4c span |
| 3458 GPIB10 ADC 92 | 10V, 10V 732B | <0.4 ppm/K, over 4c span, HST 0.5ppm |
| 3458 GPIB11 ADC 93 | 10V, 10V 732B | <0.15 ppm/K, over 4c span, HST 0.35 ppm |
| 3458 GPIB10 ADC | 10V, 10V 732B | |
| 3458 GPIB11 ADC | 10V, 10V 732B |
Summary
Goal of getting third 3458A in order was achieved once again. We expected expenses on this project to reach close to $2000 USD mark, so the outcome matched the expectations.
Performing traceable calibration transfers is key importance to any accredited service facility, and can sink lot of money and time. However, for hobby purposes and “best-effort” actually investing and using own high-performance calibrator, such as Fluke 5720A makes more sense, as one need to worry about maintaining only main voltage/resistance “gold” standards and calibrating 5720A to them to maintain accuracy of the all functions transfers between reference standards and fleet of 8½-digit mulitmeters. Just annual cost of shipping, calibrating with data, and shipping back of three Keysight 3458A and two Keithley 2002 meters will be over $10000 USD. For this reason alone xDevs.com selected path to own and maintain our own Fluke 5720A + 5725A setup with few ultra-stable standards as result.
This 3rd 3458A total project cost:
| Item | Cost | Shipping | Supplier |
|---|---|---|---|
| Dead HP 3458A with chewed FP, unit “C” | 500$ | 180$ | eBay |
| Dead HP 3458A with chewed FP, unit “D” | 2150$ | 275$ | eBay |
| Dallas/MAXIM NVRAMs 2 x DS1220, 4 x DS1230 | 160$ | N/A | Maxim |
| Keysight P/N | Cost | Qty | |
| 03458-40212 Front Panel Sub Assembly | $97.50 | 1 | |
| 03458-47911 Rear plastic bezel | $76.23 | 1 | |
| 03458-49331 Window, Front Panel | $26.00 | 1 | |
| 03458 A3 ADC PCBA | $1537.00 | ||
| 03458-44115 Front terminal block | $229.00 | 1 | |
| 03458-40214 Key cap, white, serial number 2823A21100 and above | $19.80 | 1 | |
Table 9: Replacement parts orders
Total restoration cost for this meter: $xxx.x USD. Not cheap by any measure, yet still in range of secondary-market value.
| Date | Activity | Time spent |
|---|---|---|
| 10/02/2018 | Received unit “C”, initial teardown, repairs and checks | 4 hour |
| 10/03/2018 | Post-calibration adjustment checks | 20 hour |
| 10/04/2018 | Documentation, photos, calibrations, article write-up | 4 hours |
| 12/03/2018 | Received another unit “D”, initial teardown, repairs and checks | 4 hour |
| 12/04/2018 | Started SN18 test on unit “D” | days |
Table 10: Timelog summary
I would like to express my gratitude and appreciation to supporters of this project: Todd, TheSteve, pipelie and of course all our readers. Stay tuned, many more interesting ideas will be in testing, using this HP/Agilent/Keysight 3458A.
Discussion about this article and related stuff is welcome in comment section or at our own IRC chat server: irc.xdevs.com (standard port 6667, channel: #xDevs.com). Web-interface for access mirrored on this page.
Projects like this are born from passion and a desire to share how things work. Education is the foundation of a healthy society - especially important in today's volatile world. xDevs began as a personal project notepad in Kherson, Ukraine back in 2008 and has grown with support of passionate readers just like you. There are no (and never will be) any ads, sponsors or shareholders behind xDevs.com, just a commitment to inspire and help learning. If you are in a position to help others like us, please consider supporting xDevs.com’s home-country Ukraine in its defense of freedom to speak, freedom to live in peace and freedom to choose their way. You can use official site to support Ukraine – United24 or Help99. Every cent counts.
Modified: April 27, 2020, 6:04 a.m.

